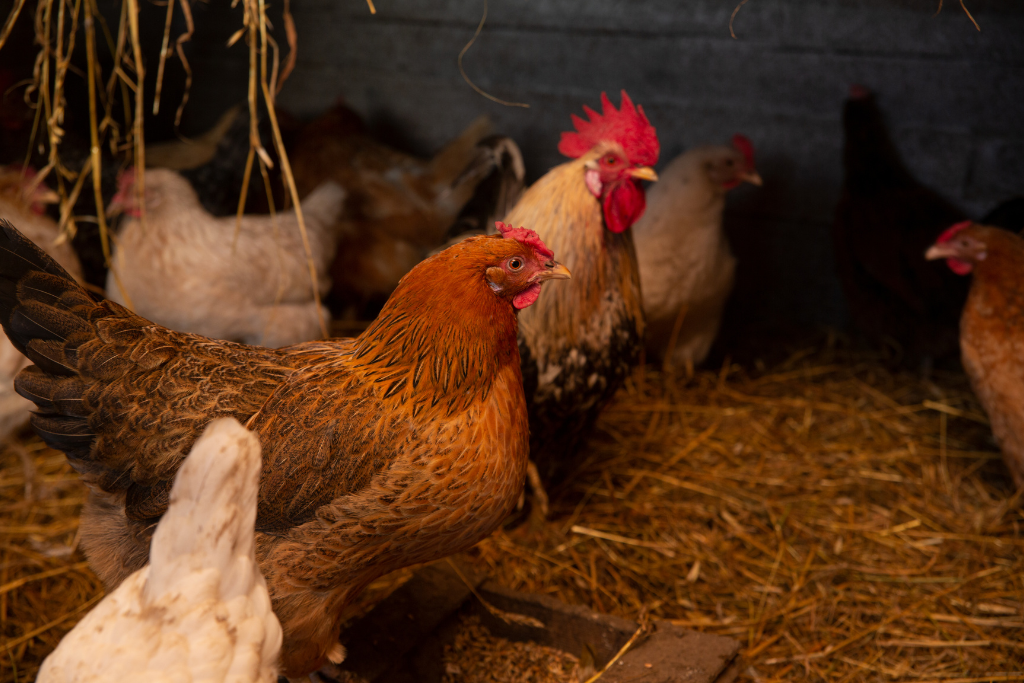
Springtime is just around the corner, which means it’s time for some spring cleaning. With the days getting longer and temperatures getting warmer, it’s the perfect time to deep clean your chicken coop and prepare your chickens for the season ahead.
Do a Health Check:
With the change of seasons, it is important to perform a quick health check on your birds. Check for overgrown beaks or toenails that need to be clipped, any abnormalities to their feet, cuts or wounds that require treatment, and ensure no mites or lice are hiding in their feathers.
Coop Cleaning: Step by Step
Wintertime typically leads to a messy chicken coop since birds aren’t out free-ranging, and cold temperatures make cleaning or repairs more challenging. This is why when spring arrives, thoroughly cleaning your coop and all supplies is essential to keeping your birds healthy and happy.
1. Remove and Clean Accessories
When you’re cleaning out your coop, you first want to remove any moveable accessories such as feeders, waterers, nesting boxes, broody cages, etc. Take any dirty bedding out of the nesting boxes and use a putty knife or scraper to remove any residue inside of them. Use a non-toxic cleaner or Dawn dish soap with a scrub brush to give those accessories a good scrub until clean. Rinse everything thoroughly and set in the sun to dry. If the winter weather was harsh on some of your feeders and waterers, be sure to stop by your local Feeds’ n Needs to find quality poultry essentials to last you for seasons to come!
2. Clear Out Dirty Bedding
Next, use a shovel to remove all the old bedding in your coop. You can use a broom to sweep the floors and the walls or ceilings to get rid of any remaining debris. Lice and mites are known to hide during the day, so it is important to pay extra attention to areas like corners and edges, under roosts and in between seams of the floor when cleaning out your coop. Mixing equal parts water and vinegar, you can make an at-home, non-toxic cleaning solution to spray down all the walls, floors and other surfaces in your coop and thoroughly scrub before putting everything back inside. This is also the perfect time to spray or dust any products to eliminate mites or lice if you have an issue with them. We carry a variety of easy-to-use products that will help you rid your coop and flock of pests in no time.
3. Inspect Your Coop
While your coop is empty and clean, thoroughly inspect it. The best defense against predators is having a safe coop to protect your birds. Check your coop for any loose boards, nails, or hardware, large or small holes that predators could fit through, leaks in the roof, and holes or weak points in your fencing. Be sure to make necessary repairs as soon as possible to prevent unwanted visitors from harming your flock.
4. Put Everything Back Together
Once your coop is clean and dry and repairs have been made if needed, refill your coop and nesting boxes with clean bedding of your choice. Our bales of pine shavings and dust-free chopped straw make excellent bedding options for your coop year-round. You can replace heated waterers with regular ones; keep an eye on the temperature forecast to ensure the water won’t freeze. Warm spring days often lead to cold nights, so be diligent. Fill feeders with fresh food and return your chickens to their clean coop!
Stop by your local Feeds ‘n Needs store to view our large selection of poultry essentials, which will help you get your spring coop cleaning under way!
For more tips, tricks, and information about raising and owning chickens, check out our related blogs:
Hen’s Health Throughout the Seasons
Prep Your Coop for Chicks
Livestock Bedding Options
Sources:
https://bestnestbox.com/blogs/news/how-to-clean-and-disinfect-your-chicken-coops-for-spring#:~:text=Mix%20equal%20parts%20vinegar%20and,for%20an%20all-natural%20cleaning.
https://www.muranochickenfarm.com/p/coop-and-housing-posts.html
https://www.muranochickenfarm.com/2018/02/preparing-chickens-for-spring.html
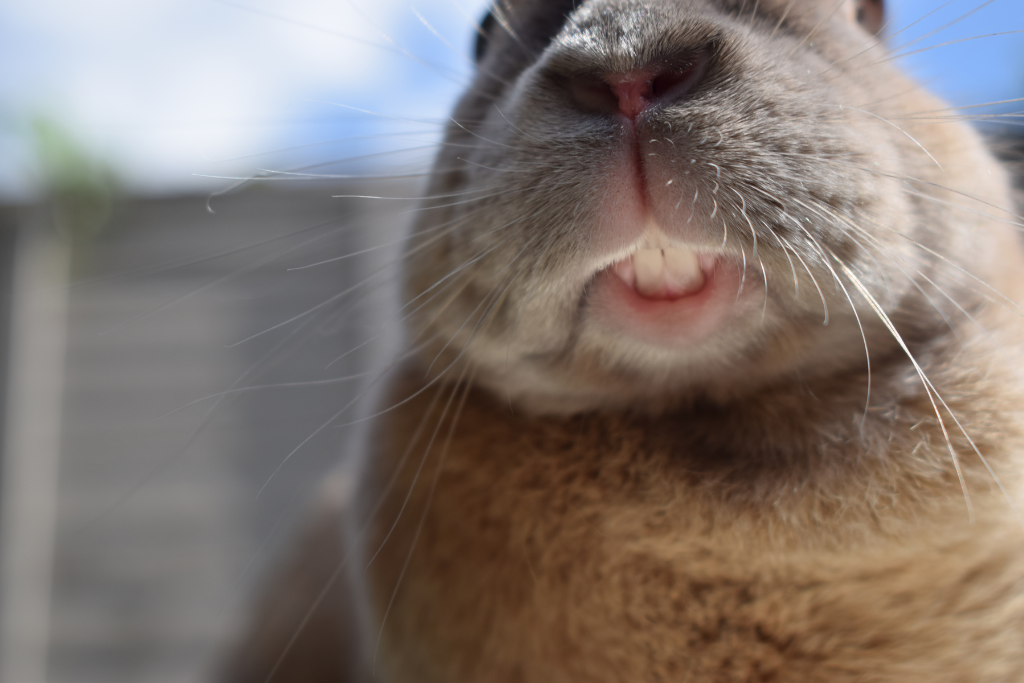
Small Animal Dental Health
As responsible small animal owners, it’s our job to educate ourselves on the proper care needed to ensure our pets’ health and well-being, including taking care of their dental health.
Did you know many small mammals, such as rabbits, guinea pigs and chinchillas, have open-rooted teeth? Meaning that throughout their entire lives, their teeth never stop growing! Because of this, these animals are more at risk of acquiring painful dental issues such as tooth overgrowth, abscesses in the mouth, and malocclusion (misalignment of the teeth).
Early Detection is Key
Because they are prey animals, it’s in the nature of our small pets to hide any signs of pain or illness they may be experiencing. This can make early detection difficult, so taking your small pets to be examined by a veterinarian at least once per year is recommended. A vet specializing in exotic pets will be able to thoroughly examine your pet and identify any issues that should be treated immediately to ensure your pet’s good health.
Between checkups, it is important to familiarize yourself with the normal appearance of your pet’s teeth and know what symptoms or behaviours could indicate possible dental issues.
Symptoms to Watch For:
- Noticeably overgrown teeth
- Difficulty chewing or dropping food from the mouth
- Watery eyes, nasal discharge or drooling from the mouth
- Weight loss
- Reluctance or refusal to eat
- Reduced grooming and/or bald patches of fur
- Visible signs of pain (i.e., hunching in a corner, grinding teeth, etc.)
Prevention
Thankfully, most forms of acquired dental disease in small animals are preventable with proper diet and care. For small herbivores like rabbits and guinea pigs, a diet that lacks free-choice hay is arguably the most common cause of these dental issues.
- Hay vs. Pellets – Because hay is high in fibre and stimulates natural chewing and dental wear patterns, various grass hay options should always be available to your herbivorous animals. While many pet parents still consider hay more of a treat for their small pets, at least 75% of their diet should be made up of it, with fortified pelleted food being fed daily in a measured amount (following the manufacturer’s direction.) We offer a variety of grass hay and pelleted foods to provide your small pets with the proper diet they require.
- Leafy Greens and Vegetables – Supplementary foods such as dark leafy greens and vegetables have a coarse consistency, which will help your small animals keep their teeth worn down and should be offered to them in a limited amount daily. Ensure that the vegetables or greens you give your pet are safe for their particular species.
- Chew Toys – Besides providing a proper diet, species-appropriate chew toys should also be available to your small pets. Toys and chews made from woven hay, untreated wood, dried sticks, or cardboard provide excellent opportunities for your pet to wear down their incisors while offering them enrichment and mental stimulation. We have a great selection of safe, natural chews to keep your pet busy while keeping their teeth healthy!
Visit one of our Experts at your local Feeds ‘n Needs store to see our great selection of small animal essentials and ask any questions you may have about proper dental care. We are always eager to help!

How to Brush Your Dogs Teeth
Brushing your dog’s teeth for the first time can be intimidating, and you may be wondering where to start. Having their teeth brushed is an unnatural feeling for dogs, so you must be diligent in taking all the proper steps to ensure that your dog is introduced stress-free.
Your local experts at Feeds’ n Needs will gladly help you select the proper tools to help you get started brushing your pup’s teeth!
What you’ll need
- Dog toothbrush or finger brush
- Pet safe toothpaste
- A soft cloth or piece of sterile gauze
- Your dog’s favourite treats
Introducing your dog to teeth brushing should be done gradually over several sessions, and depending on your dog, it can take a week to several months to accomplish successfully. Only do as much as your dog will tolerate during one session, and be sure to reward them through the entire process.
How to Brush Their Teeth
Step 1:
- Make sure your hands are clean before you begin, then find a quiet place where you and your dog will be comfortable without any distractions.
Step 2:
- Offer your dog a taste of the pet-safe toothpaste you will be using by putting a small amount on your finger and letting them lick it off.
Step 3:
- Using your finger, gently rub a bit of toothpaste onto the outer side of the dog’s upper teeth in a back-and-forth motion. Your dog may only tolerate a few seconds of this, so it’s best to focus on only a few teeth at first.
Step 4:
- Once your dog is comfortable with step 3, use a soft cloth or sterile gauze over your finger to brush the toothpaste onto your dog’s teeth. Go slow and focus on brushing only the outsides of the teeth. Most of the plaque and tartar buildup occurs on the outer sides of the teeth, so brushing the inner sides should only be done once your dog is very comfortable with brushing their teeth.
Step 5:
- Next, it’s time to introduce the toothbrush or finger brush to your dog. Apply a pea-sized amount of toothpaste to the brush, and holding it at a 45-degree angle, gently lift one side of your dog’s lips and begin brushing. Use circular motions and start with the teeth at the back, slowly working towards the front on each side. Once your dog feels comfortable with this, you may also begin brushing its bottom teeth during your sessions. To brush the bottom teeth, gently tilt the dog’s head back, allowing their mouth to open slightly. You can use your finger to hold the lip away from the teeth, then repeat the same brushing process that you did on the top. It is recommended to brush each side for 30 seconds if your dog allows it.
Step 6:
- Thoroughly rinse your dog’s toothbrush after every use, and wash your hands to avoid spreading any harmful bacteria. Pet toothbrushes should be replaced every three months, and NEVER use the same toothbrush on multiple pets.
Praising your dog and rewarding them with treats throughout every step will help to reinforce their positive association with having their teeth brushed. We carry a wide variety of healthy treats that your pup will find irresistible, even while having their teeth brushed!
For more information on the importance of dental health in pets and what you can do to prevent dental disease, check out some of our other helpful blogs!
How to Brush Your Cats Teeth
When introducing your cat to having its teeth brushed, patience is key. Ensuring that the experience is pleasant for you and your cat will require time, trust, and rewards for your feline friend. Before you begin, you’ll want to make sure you have all your supplies ready.
Your local experts at Feeds’ n Needs will help you find everything you need to start brushing your cat’s teeth!
What You’ll Need
- Cat toothbrush or finger brush
- Pet safe toothpaste
- Q-tip or cotton bud
- Your cat’s favourite treats
- Towel or blanket (optional)
Cats respond well to routine, and they may benefit from having their teeth brushed at the same time every day. Choosing a time of day when your cat is typically calm or hungry can make them easier to work with, as they will likely be more eager to accept treats and gentle pats as a reward for their cooperation.
How to Brush Their Teeth
Step 1:
- Choose a quiet time and place, such as a small room where the door can be closed to prevent your cat from escaping. You can place your cat on a countertop or table covered by a towel or sit with them in your lap. With the cats back toward you, ensure you can keep a gentle but firm hold on them. If your cat is particularly nervous, you may wrap them in a towel or blanket and have someone hold them to make sure they’re secure while you brush their teeth.
Step 2:
- Introduce your cat to the feeling of having their mouth touched by gently moving their lips and running your finger along their teeth and gumline. If your cat tolerates this well, reward them with treats and some gentle scratches if they enjoy it.
Step 3:
- Once your cat is familiar with your fingers touching their mouth, introduce the pet-safe toothpaste by placing a small amount on your finger and letting them lick it off. If the cat refuses to lick it from your finger, you can try putting a bit on the tip of their nose; they should instinctively lick it off.
Step 4:
- Using a Q-tip with a small amount of toothpaste on one end, gently rub the applicator tip along the outer surface of the cat’s teeth. Starting with the back teeth and working forward, rub the toothpaste into the teeth using circular motions. Your cat will likely only tolerate a few seconds of this at first, so focus on only a few teeth during your sessions until your cat grows more comfortable. Reward your cat’s cooperation with lots of treats.
Step 5:
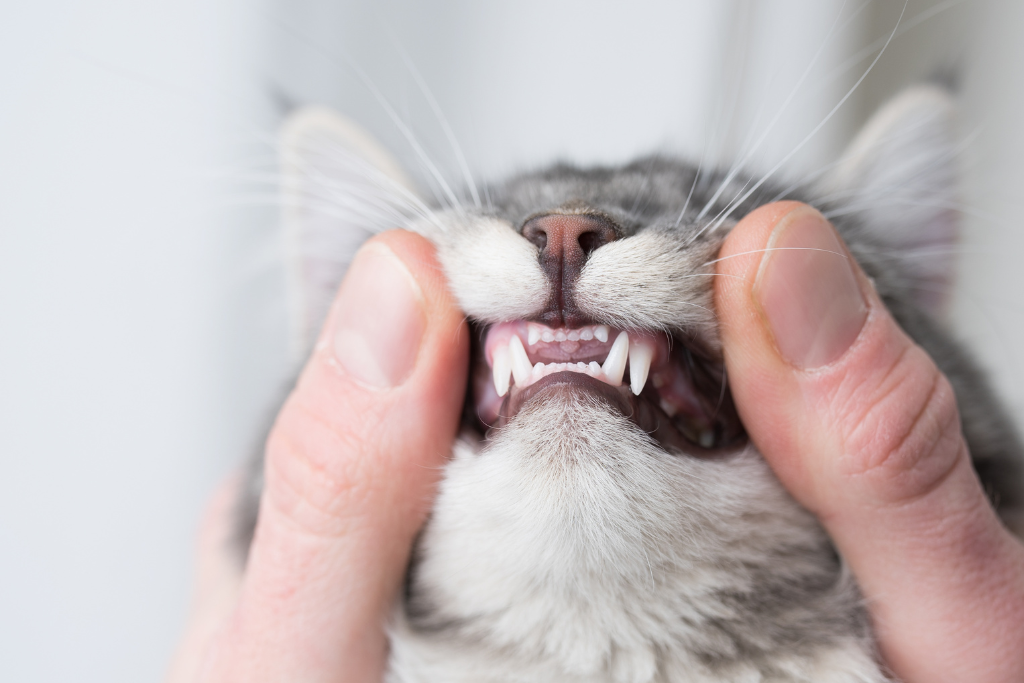
- Introduce the toothbrush to your cat by allowing them to lick a bit of toothpaste from the bristles. To ensure you have a secure grip on your cat while brushing their teeth, spread your hand wide and place your palm over the top of your cat’s head towards the back of their skull. Your thumb and second finger will grip around the cheekbones just under the eyes, allowing the cat’s mouth to fall open gently. Ensure your index finger is lifted to avoid covering the cat’s eyes. Now that you are holding your cat securely, use the same circular motions working from the back towards the front, and begin to gently brush the outer side of the cat’s teeth. As your cat gets more comfortable with each session, you can increase the time spent brushing each side until you can brush for 30-45 seconds per side.
Tooth brushing is unnatural for cats and can be stressful for them to adapt to, so be patient and do not rush the process. Taking as many days as necessary to get your cat comfortable at each step, reassuring them in a soothing voice and rewarding them with treats throughout is essential to helping them form a routine and making each experience a positive one.
Stop in at your local Feeds’ n Needs to pick up some well-deserved treats and toys for your cat, and be sure to ask our experts any questions you may have about your cat’s dental health!
For more information and resources about pet dental health, check out some of our other blogs:
Pet Obesity Awareness
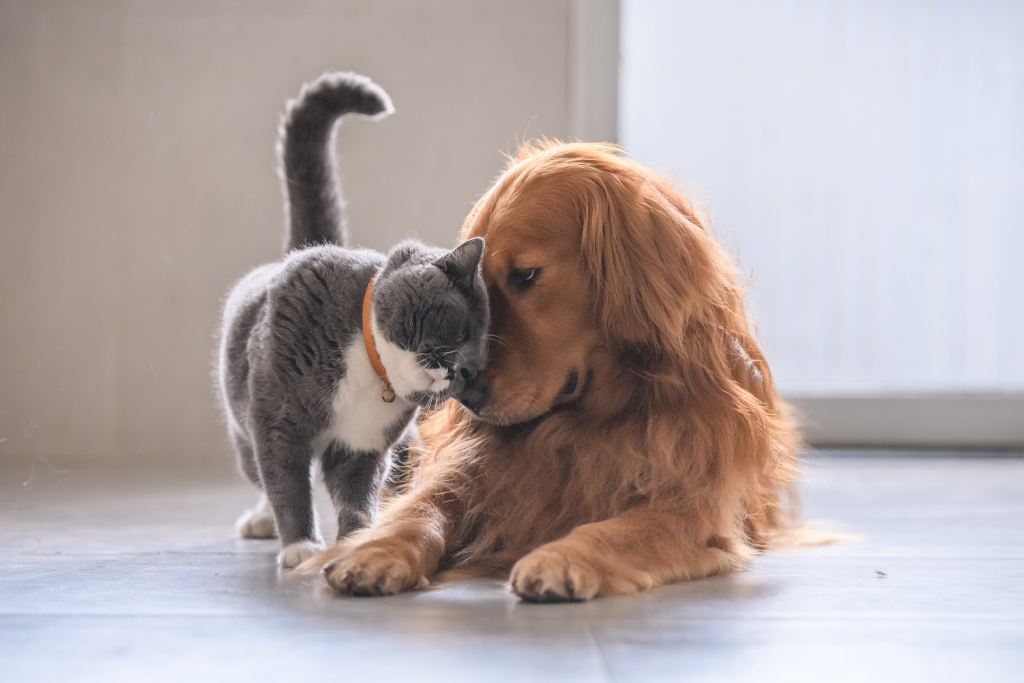
National Pet Obesity Awareness Day takes place every year in October. It is a day to remind people to keep their pets healthy. Obesity is the #1 health risk for pets. Now is the perfect time to start focusing on your pet’s weight. When your cat or dog starts to look a little plump, you know it is time for a few things – more walks, fewer table scraps, and perhaps even an additional visit to your vet. Here is why it is important to maintain your pet’s weight and why it should be your number one priority!
Pet obesity is well-known for causing the following:
– Chronic inflammation
– Reduced life expectancy
– Weakened immune system
– Cardiac diseases
– Joint problems
– Diabetes
– Respiratory disorders
– Cancer
– Metabolic disorders
– Kidney dysfunction
– Poor quality of life
You can use several strategies if your cat or dog has put on some weight.
- Portion Control: Measure your pet’s food.
- Calorie Deficit Diet: Prefer feeding a low-carb, low-fat diet.
- Fibres: Add more fibres to their diet to help keep them fuller for longer.
- No Unhealthy Treats: Give only healthy and natural treats such as Crumps Sweet Potato chews – available at your local Feeds’n Needs.
- Regular Exercise: More walks and exercise help burn extra fat.
- Dry Food/Wet Food: Wet pet food has a higher water content, which promotes feeling full.
If you’ve tried all these strategies and your pet is still not showing any signs of losing weight, visit or call your veterinarian for the best suggestions.


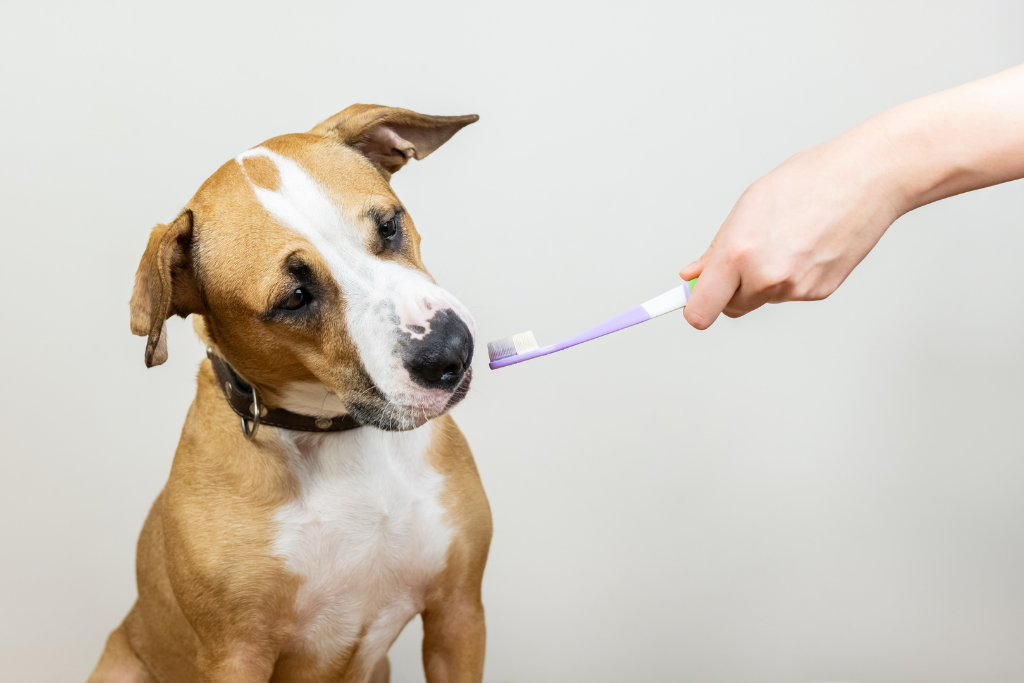
The Importance of Your Pet’s Dental Health
Dental care for pets is often overlooked. We teach our children about the importance of oral health care, so why do we neglect our pets? Our pets rely on us to keep their mouths clean and healthy. Good dental hygiene is directly tied to overall health and longevity for our pets. As pet parents, we want our pets to have healthy mouths. Here are some reasons why good dental care is so critical to our pet’s overall health:
- Preventing Tooth Loss: Good pet dental care will ensure the structures supporting a dog and cat’s teeth stay healthy and keep their teeth in place.
- Preventing Bad Breath: Bad breath will not be a problem when your pet has a healthy mouth and teeth.
- Preventing Oral Pain: Dental disease can become painful for dogs and cats. Keeping their teeth and gums healthy will prevent any pain.
- Preventing Organ Damage: Bacteria in plaque buildup can actually enter your pet’s bloodstream and spread to their heart, kidney and liver. This spread of bacteria, called bacteremia, can damage organs and make your pets quite sick.
- Preventing Worsening Dental Disease: So many pets have dental disease by the time they are three years old. Good dental care can prevent dental disease from becoming severe. It is essential to take preventative measures when your pets are young to avoid dental disease.
Preventative measures against dental disease should begin when your pets are young, but it is never too late to get them accustomed to teeth brushing! Here are some good reminders and tips to ensure the well-being of your furry friend’s oral hygiene:
- Regular exams are important. It is recommended to visit the vet once a year.
- Check your pet’s breath monthly. Bad breath can indicate gum disease.
- Dogs can often disguise how much pain they are truly in. Regularly monitor eating and chewing habits to look for signs of oral distress.
- Check for red, puffy gums and yellow or browning tartar on teeth as signs of concern.
- Supplements and diet play an important role.
- Dental-specific kibble and dental treats can help reduce plaque and tartar.
- Daily oral chews can help improve dental health.
- Look for Veterinary Oral Health Council-approved products.
- Daily brushing is essential in preventing bacteria build-up.
- Use a pet-specific toothbrush or a soft child toothbrush.
- Use pet-friendly toothpaste only.
- Start slow and work up to longer brushing.
Oral care is health care for our furry friends. Feeds’n Needs has a variety of specialty treats, chews and more to help keep your pet’s teeth healthy. Ask our Experts in-store about our favourite oral health care products and what will best suit your pet’s needs!
For more dental health tips for your pets, check out our other blogs:
Dental Health Tips for Your Dog
Dental Health Tips for Your Cat
Source:
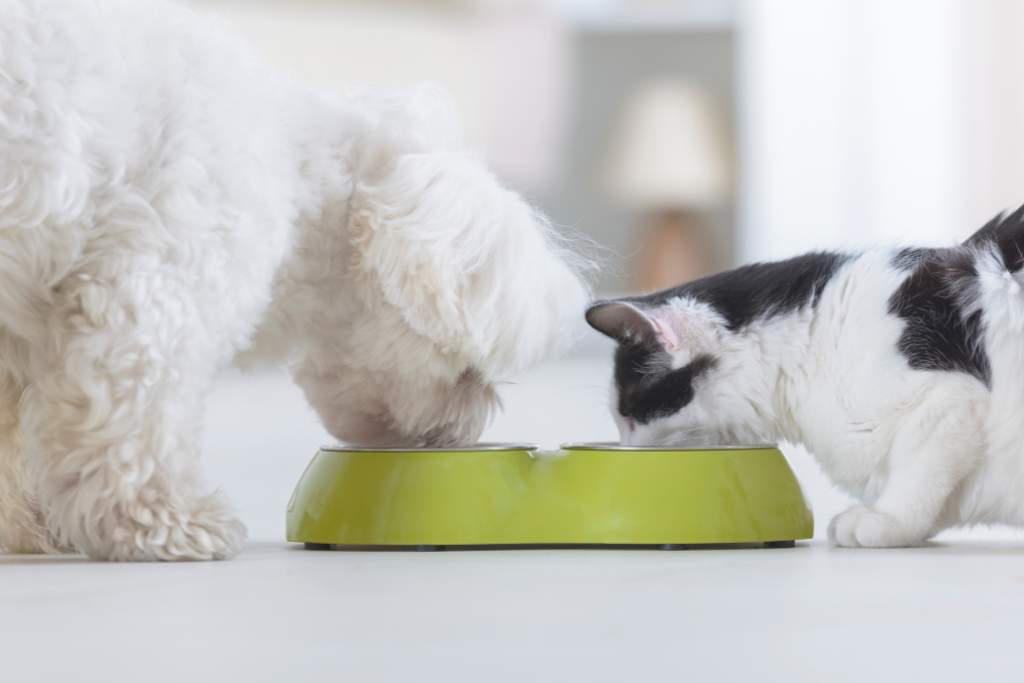
Benefits of a Raw Food Diet
Raw food diets for cats and dogs are becoming more popular! Many people are choosing to feed their pets a raw diet because it is more natural and less processed than kibble. Others feed raw due to the many health benefits of a raw food diet. Here are some of the top reasons you should make the switch to raw:
-
- Joint and Bone Health
The best way to support bones is with bones! Real crushed bone is a natural source of calcium, phosphorus, glucosamine, chondroitin, collagen and marrow. These components result in healthy growth in puppies and maintain superior joint and bone health for your dog throughout its lifetime. - Immune System Support
Raw meat is highly bioavailable and contains live bacteria/enzymes that support digestion and help to absorb almost all the immune-boosting nutrients. Raw food is also naturally rich in moisture, which supports organ health. - Less Stool
Having a diet of highly digestible ingredients for your pet is that more of what goes in is absorbed and utilized within the body – meaning less comes out the other end. Carbohydrates and filler ingredients such as soy, potato, corn and rice take longer to digest and do not fully absorb within your pet’s body. These ingredients can lead to larger stool volume with a heavy odour. Most raw diets contain no fillers and are low in carbohydrates, resulting in less waste passing through and decomposing faster. - Healthy Skin & Coat
Raw diets contain many ingredients that support skin and coat health, one of the most notable being omega-3 fatty acids. Healthy omega fats play a significant role in supporting healthy skin and a soft coat. Some common ingredients that provide essential omega-3 fatty acids include salmon, chia, and flax seeds. After switching your pet to a raw diet, you’ll notice a difference in their skin, coat and even how much less they shed! - Reduced Body Odour
When pets consume food high in fillers, additives, and preservatives, it can lead to unpleasant odours. A raw food diet better supports your pet’s digestive system, which often decreases or eliminates gas. - Weight Management
A raw diet is a natural way to help manage your pet’s weight and improve its overall well-being. Kibble contains carbohydrates and sugars that are harder for your pet to burn off, most times causing weight issues. - Cleans Teeth Naturally
Poor dental hygiene in your pets can sometimes be caused by a poor diet, especially if their diet is heavily processed or high in carbohydrates. Kibble and canned food can often get stuck in your pet’s teeth, leading to plaque, tartar and bad breath. Raw, meaty bones are well-known for helping them get into those tricky places between their teeth and removing plaque. - Reduction in Allergies
A pet’s diet is the most common cause of allergies. Many fillers used in kibble are not biologically meant for pets to digest and can cause stress on their digestive system and compromise their immune system. Common allergic reactions include rashes, itchy paws, ear infections, and digestive and joint issues. Healthy omega fats provide anti-inflammatory benefits, perfect for dogs with allergies or inflammatory skin diseases. A raw food diet can help reduce and sometimes even eliminate your furry friend’s allergy symptoms.
- Joint and Bone Health
These are just some of the many benefits of a raw food diet for your pet. Our Experts here at Feeds’n Needs recommend Big Country Raw for your pets! There is something on their menu for dogs and cats of all breeds, sizes, and ages! Chat with one of our Experts in-store for more information on getting your furry friend started on a raw diet. We are here to help!
Sources:
Health benefits of raw feeding – Guides | Big Dog Pet Foods
The Top 10 Benefits Of A Raw Diet For Your Pet – Top Dog Food & Supply (topdogfoodandsupply.com)
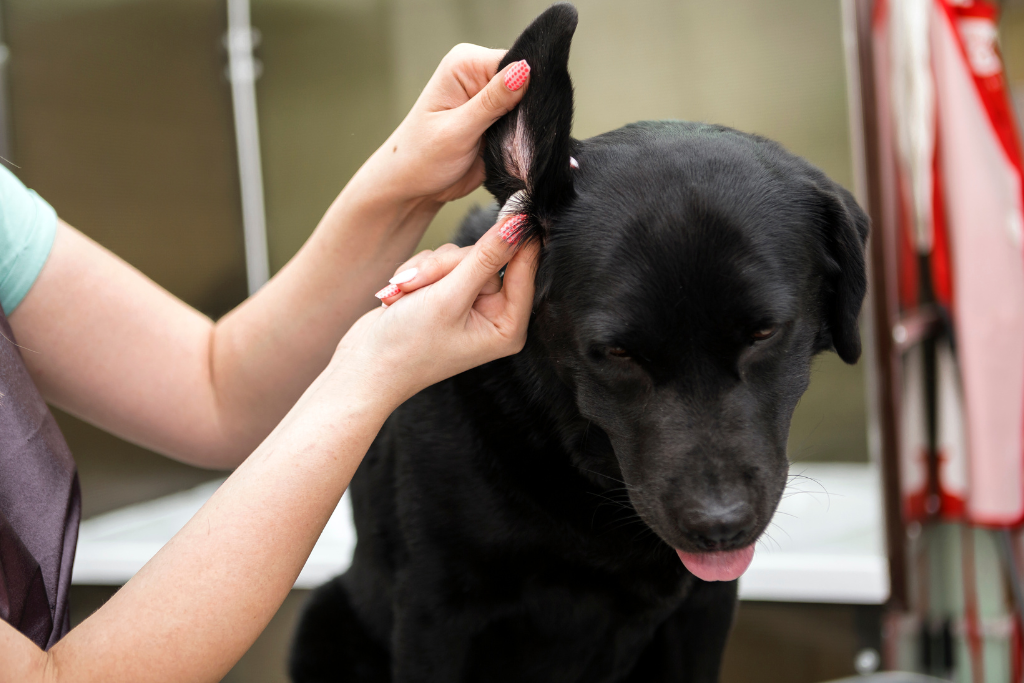
How To Properly Clean Your Dogs Ears
Ears of all shapes and sizes must be cleaned regularly as part of your dog’s grooming.. Every dog is different when determining how often they need their ears cleaned. Long, floppy ears need to be cleaned more often as they can be prone to ear infections, while others rarely require cleaning. If your dog visits a professional groomer regularly, you should check with them to verify that your dog’s ears are getting cleaned. All dog owners should know how to clean their dog’s ears properly. Dogs with short ears and not a lot of hair may only need to have their ears wiped out occasionally when they begin to look dirty. Dogs with long, floppy ears and those with a lot of hair around their ears should have a more thorough inspection and have them cleaned at least every other week to prevent any infections or irritations. Here is everything you need to know, from supplies to steps:
Supplies Needed to Clean Your Dog’s Ears:
- Ear Cleaner: Look for a veterinarian-recommended cleaning solution. If you’re unsure whether something is okay to use on your dog, ask your vet or the Experts at your local Feeds’n Needs. Visit your local Feeds’n Needs for an ear-dry solution with aloe vera by Professional Pet Products. It is a routine ear cleaning, drying and odour control product. Be sure to follow the recommended directions on the ear cleaner you are using.
- Cotton Balls or Pads: Swab your dog’s ears with a cotton ball or pads. Be careful not to go too deep. A rule of thumb to remember is to not go past skull depth to avoid causing hearing damage. Wipe the inside of the ear flap and ridges of the outer ear as well.
- Tweezers: It’s a good idea to have a pair of tweezers dedicated to your dog’s ear.
- A Towel: This is recommended for containing potential messes, especially if your dog is prone to shaking its head when something gets in its ears.
- Treats: You’ll want to reward your dog when you’re all done.
Steps on How to Clean Your Dog’s Ears
Before you begin, take a moment to inspect your dog’s ears. If they appear red or inflamed, they smell bad, or your dog shows signs that their ears itch, contact your vet as they may have an infection that needs to be treated. For dogs who have a lot of hair, use tweezers to clear the hair out of the ear canal. If everything appears normal, follow this step-by-step process on how to clean their ears:
- Get your pup to sit, reward them with a treat and then let them inspect the bottle of ear cleaner.
- If your pup has long, floppy ears, hold their ear flap upright and carefully fill the ear canal with a cleaning solution.
- Keep the ear flap out of the way and gently massage the base of the ear with your fingers for about 20 seconds.
- Allow your dog to shake their head if they desire. Hold a towel over their head to prevent the solution from flying everywhere.
- Use a cotton ball or pad wrapped around your index finger to gently wipe the visible part of your dog’s ear canal and outer ear.
- Reward your pup with another treat and repeat these steps for their other ear.
Tips and Tricks to Make it Easier
Here are a few tips that will help it go easier for both you and your pup:
- Wear old clothing that won’t get ruined if the cleaning solution gets on them.
- Follow directions on the cleaning solution bottle.
- If the ears still appear dirty when you’re done, go ahead and repeat the process, and stop immediately if you notice redness or bleeding or if your dog show signs of discomfort.
Knowing how to clean dog ears is fundamental to their health. Make sure cleaning is done regularly to help protect their hearing and ensure that your pup’s ears stay healthy throughout their life.
Sources: How to Clean Dog Ears | Hill’s Pet (hillspet.com)
24Petwatch: How to Properly Clean Your Pet’s Ears

Road Trip Safety For Your Dog
While road tripping with your dog, their safety should be a top priority. Whether you’re driving a couple of kilometres or taking a long road trip, it’s important to have safety precautions in place at all times for your pet’s safety. Check out our tips to road trip safety for your dog. These tips will help keep your furry friends safe, secure and comfortable during your road trips so you both can enjoy the drive!
Keep them Buckled!
In order to keep your pup safe while on the road, the best thing to do is keep them properly restrained. Accidents can’t be foreseen, so it’s crucial to keep them protected at all times. Vehicles, unfortunately, don’t come with doggy seat belts, so during your next visit to your local Feeds’n Needs, ask our Experts what equipment is available and would be best for you and your furry friend. These are necessary to secure your dog and restrict them from harmful movement in the event of an accident. Prepare your pup for a safe road trip by taking them on short trips to town to get used to the safety equipment.
Pack the Essentials!
You never know what may happen on the road, so it’s good to have a first aid kit for you and your dog. Packing your pet’s food, water, treats, medicine, toys, and feeding bowls is also a good idea when going on a long drive. It’s a good idea to have something to keep your dog entertained and engaged, such as their favourite chew toy helping to keep them calm during the ride.
Wear your Dog Out!
A tired pup is often a more well-behaved one, so right before you plan to head out on your trip, take your pet for a long run or a visit to the dog park. This should help your dog feel more rested and calm. They may even sleep a portion of the drive. During long trips, it’s important to stop anywhere from 2 to 3 hours so your dog has some time to play and get some more energy out.
Don’t Let Them Overheat!
You should never leave your dog unattended in your car for any reason. Especially during the warmer weather, this can lead to heat stroke and even death. Be sure to pack water to keep your dog hydrated during your trip. Grab a portable dog water bottle from one of our stores before your next trip, making it simple to keep your pup hydrated during the drive!
These are just simple tips, but following them will help you have a safe road trip with your dog and one that you can both enjoy. If you ever have any questions, reach out to the Experts are your local Feeds’n Needs.
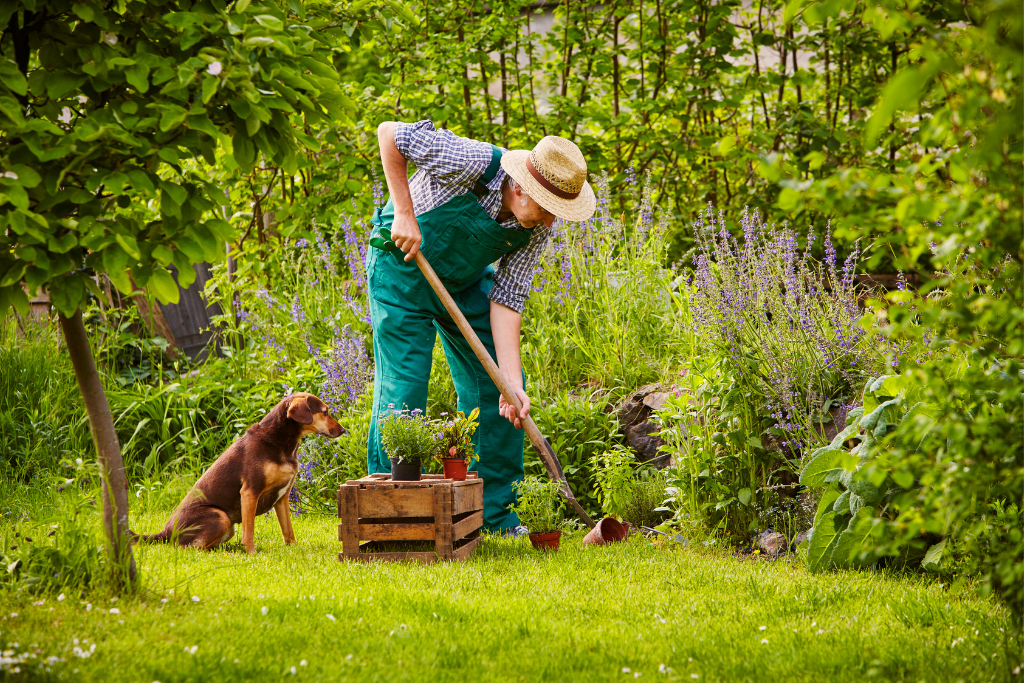
Springtime Garden Pet Safety
Gardening season is upon us, and for us pet owners, that means we need to be aware of how to keep our pets safe from hazardous spring plants! There are few effective treatments for toxic plant ingestion, so it’s important to know the potential dangers spring plants can have on our furry friends.
Most common toxic spring plants:
- Tulips, Daffodils, Narcissus, and Hyacinths – The skin at the bottom of bulb flowers is dangerous to both dogs and cats, but they are especially toxic to dogs. Make sure your dog isn’t digging up the bulbs in the garden! If ingested, it can cause vomiting, diarrhea, and drooling.
- Lilies – These are highly toxic to cats. The pollen, leaves, stems, and even the water in a vase can cause kidney failure, even small ingestions such as 2-3 petals or leaves.
- Irises – These are considered toxic to both dogs and cats. All parts of the iris contain harmful components, but the bulbs are the most dangerous part. If your pet ingests an iris, it can cause vomiting, diarrhea, and drooling.
- Begonias – The underground stem can cause severe mouth irritation for both dogs and cats.
- Buttercups – These flowers can cause your pets to have an upset stomach if ingested.
- Crocus – The spring Crocus may cause gastrointestinal upset like vomiting, diarrhea, and drooling if any part of the plant is ingested by dogs or cats.
- Lily of the Valley – This plant can cause symptoms such as vomiting, diarrhea, a drop in heart rate, severe cardiac arrhythmias, and possibly seizures.
It’s also important to be mindful of fertilizers as these often contain bone, blood or feather meal which ingesting in large quantities can cause vomiting and diarrhea. Next time you visit your local Feeds’n Needs store, be sure to ask our Experts for advice on safe fertilizers to use as a pet owner! You can also keep your curious furry friend away from the garden by fencing it off.
Educating yourself about these springtime hazards will help you, and your pet enjoy your backyard with no worry!
Sources:
Springtime Hazards: Protect your Pets From Toxic Plants | 24Petwatch
Spring Dangers To Pets | Pet Poison Helpline


