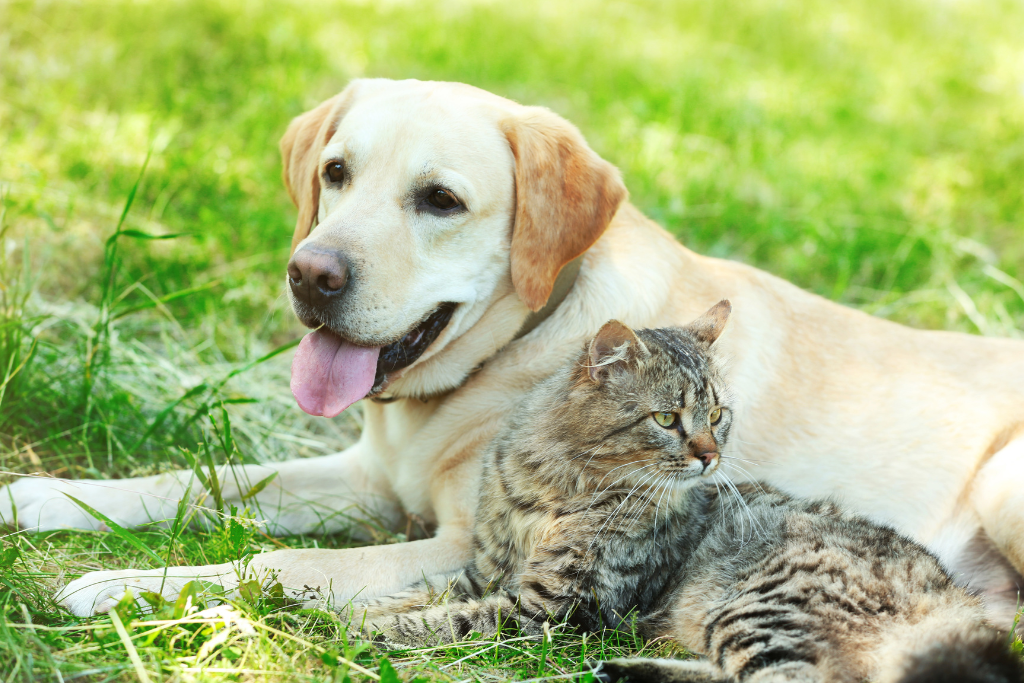
If you’ve ever dealt with seasonal allergies, you know springtime is one of the worst times of year for producing allergens like pollen and dust. But did you know that seasonal allergies can also affect our pets? In this blog, you’ll learn what symptoms to look for and how to help your furry friend if they show signs of allergies.
What Are Seasonal Allergies?
Like us, dogs and cats can experience allergy symptoms during certain times of the year. Seasonal allergies are caused by various things in the environment that the immune system is hypersensitive to. These various things are called allergens, which can cause pets to have an allergic reaction when exposed. The spring (March-May) and fall (September-November) seasons are typically when most pets will be affected by seasonal allergies, but this can vary based on the weather and your location.
Symptoms of Seasonal Allergies in Pets:
Seasonal allergies typically affect pets around their paws, limbs, mouth, ears, abdomen, groin, armpits, tail, and around the eyes. During the spring and fall seasons, keep a close eye on your pet and watch out for these symptoms that may indicate a seasonal allergy:
- Itchiness – Scratching, gnawing, licking, chewing, or digging at the skin
- Skin Lesions – Redness, crusts, black pigmentation or thickening of the skin
- Odor to the Skin or Ears
- Head Shaking
- Pawing at the Eyes, Ears, or Face
- Watery Eyes
- Reverse Sneezing
- Recurring Scooting or Licking of the Anus
- Moist Skin
Seasonal allergies can be diagnosed by your veterinarian through a series of tests that will rule out any other conditions that could be causing similar symptoms. Since many common allergy symptoms can progress into more serious conditions, it is important to consult your veterinarian to help you decide the best course of treatment for your pet.
What Could my Pet be Allergic to?
Some of the most common allergens that affect pets seasonally are:
- Plant and tree pollens
- Mold spores
- Yeast and other bacteria
- Dust and storage mites
- Fleas
Treating Seasonal Allergies in Pets:
Seasonal allergies are a chronic condition that has no cure. However, many treatment options are available to manage symptoms and keep your furry friend feeling their best. We recommend consulting a veterinarian to help you determine what course of treatment is best for your pet.
Baths – Bathing your pet with a soothing shampoo will not only remove any allergens from your pet’s skin but also relieve symptoms like itching. Choose a shampoo with gentle ingredients such as coconut to hydrate the skin while minimizing inflammation or one that is formulated specifically for allergies and itch relief. Our experts recommend the OxyMed medicated or hypoallergenic oatmeal shampoos and soothing sprays for bathing pets with seasonal allergies.
Wipe Off Their Coat & Paws – When pets return from being outside, they can carry allergens inside with them. A quick way to combat this without giving them a bath is to use a moist cloth or hypoallergenic pet wipe to wipe down their coat, skin and paws each time they come inside. Tropiclean gentle coconut hypoallergenic wipes work perfectly for this!
Flea & Tick Prevention – Protect your pet from flea or tick irritation by regularly treating them with preventative treatments. Our experts recommend the Advantage II treatment for your canine or feline friends and the K9 Advantix treatment for canines only.
Inside Your Home – Cut down on airborne allergens inside your home by regularly changing air filters, running a dehumidifier to remove moisture and prevent mold and bacterial growth, vacuuming at least once per week, and remember to regularly wash areas that typically pick up allergens like rugs, curtains, blankets, and pet beds.
Dietary Supplements – Coconut oil, fish oils, and fatty acids like omegas 3 and 6 are a natural way to improve your pet’s skin and coat health. They can also help with anal gland irritation during allergy season. Supplementing your pet’s diet with these natural remedies can reduce itching and skin irritation, as well as improve overall coat health. Smart Earth camelina oil is a great source of omega 3 and 6 to help with pet’s allergies, skin and coat, joints and mobility, hearth health and more. Find this and other supplements, including Thrive herring oil, at your local Feeds’n Needs!
*Note – It can take 4-6 weeks for an omega-3 fatty acid supplement to take effect. If your pet is prone to seasonal allergies and skin irritation, we recommend supplementing year-round.
Topical Treatments – There are many topical treatment options that may help treat skin infections or irritation caused by seasonal allergies. These may include anti-bacterial or anti-fungal sprays, ointments, or wipes.
Ear Cleaning – Keeping your pet’s ears clean, especially after a bath or water activities, can help prevent bacterial growth and infections in the ears. Tropiclean dual action ear cleaner will both clean and dry your pets’ ears, working effectively to prevent bacteria.
Veterinary Treatments – Depending on the severity of your pet’s allergic reactions, your veterinarian may prescribe a more aggressive form of treatment such as steroids, antihistamines, or immunotherapy.
Our experts understand that each pet has its own unique needs, and this applies to seasonal allergies too. Stop by your local Feeds’n Needs to check out our selection of supplements, shampoos, and remedies to help your pet this allergy season!
For more tips and information about your pet’s health and wellbeing, check out some of our other blogs!
Dog Grooming Tips for Spring
What You Need to Know About Your Dog’s Paws
How to Properly Clean Your Dog’s Ears
Sources:
https://www.animalhumanesociety.org/resource/signs-your-pet-has-seasonal-allergies-and-what-you-can-do-help
https://www.dogtopia.com/blog/dog-seasonal-allergies/
https://www.petmd.com/dog/conditions/skin/seasonal-allergies-dogs
https://www.hillspet.com/dog-care/healthcare/managing-dog-seasonal-allergies?lightboxfired=true#\

Benefits of Crate Training Your Dog
Crate training is a frequently overlooked yet highly beneficial training method when bringing a new dog home. Puppies, adults, and senior dogs can all benefit from being crate trained, and it’s a skill they can learn at any age. So, what are the benefits of crate training your dog? Keep reading to find out!
Nurturing Their Instincts:
Did you know that dogs have a natural “denning” instinct? This means that dogs will instinctively seek out small, safe places to take shelter and rest. Crates are a great way to nurture these instincts, providing the dog with a space to retreat where it feels safe and comfortable. Crate training is an important life skill for dogs, as it helps them learn to rest and relax when confined.
Crates can be a safe haven for dogs in many situations, for example:
Rescue Dogs – Crates can comfort fearful or insecure rescue dogs in a new environment. Since dogs feel responsible for their territory, having a smaller space to protect and call their own may help them relax while adjusting to their surroundings.
Senior Dogs – Crates provide senior dogs with a place to rest their achy joints and take naps undisturbed. Senior pets sometimes get overwhelmed if surrounded by other pets or children, and crates offer them a safe place where they can be left alone.
Anxious Dogs – Crates help teach dogs to self-soothe and cope with anxiety. When stressed or frightened, they seek the safety and comfort they know their crate provides.
Housebreaking:
Did you know that crate training is one of the most effective ways to housebreak your dog? Dogs instinctively try to keep their sleeping areas clean, which is where crate training comes in handy. Keeping your puppy in their crate between training sessions and socialization gives them a designated place to rest and teaches them to hold and strengthen their bladder and bowel muscles as they won’t want to soil their sleeping area. When kennel time is over, take your puppy directly outside to their designated potty area to reinforce proper bathroom habits. When choosing a kennel, it’s essential to select one that will give your dog enough room to relax comfortably but not be able to use the bathroom without soiling their sleeping space. For puppies, you could buy several appropriately sized crates as they grow or find a crate that includes a divider so you can adjust the crate size as they grow. Stop by your local Feeds ‘n Needs to see our crate and kennel options selection.
Prevent Hazardous Behavior:
As a dog owner, the last thing we want is to come home to chewed-up furniture or garbage strewn across the room after leaving our dog alone with free rein in the house. Not only is this inconvenient to us, but it’s incredibly dangerous for your dog. Dogs who display destructive behaviour when left alone are at risk of swallowing foreign material or injuring themselves, which could potentially be life-threatening. An easy way to resolve this is to crate-train your dog. While in a crate, there is very little harm your dog can do to your home or themselves, giving you peace of mind knowing that your dog will be safe while you’re out of the house or unable to supervise. Keeping your dog in a crate while you’re out will also prevent them from escaping or getting out of the house if this is something they have tried to do in the past.
Additionally, crate-trained dogs are less likely to develop anxiety disorders, which can lead to destructive behaviour. This is because if they are accustomed to being in a crate, whether you are home or not, they learn to self-soothe themselves and relax while confined.
Transportation:
Keeping your dog in a crate while travelling with them makes road trips safer for them and you. Having a dog loose in a moving vehicle is dangerous, as they can distract the driver, potentially causing an accident or getting them injured if they stumble around or fall while you’re driving. Crating your dog in the car will keep them safe, secure, and out of the driver’s way. Additionally, if you ever take your dog on a flight, so having a dog who is comfortable being kenneled will make the journey less stressful.
Emergencies / Evacuation:
In an emergency where you may need to make a quick escape or evacuate your home, having a dog trained to go into their crate could save you precious time and reduce the risk of your pet getting lost or injured. Additionally, if there was ever an emergency when you weren’t home, having your dog in a crate will make it easier for first responders or rescuers to locate them than if they were free roaming the house. Crated dogs will also keep first responders safe from your dog if they were to become reactive out of fear.
Vet Visits / Recovery:
If your dog has to spend the night at the vet or a boarding facility, being comfortable in a crate will help them adjust to being crated in a new environment and reduce stress. In extreme cases, your veterinarian may require you to keep your dog on crate rest while recovering from surgery. A crate-trained dog is less likely to suffer complications following surgery since they are used to resting in their crate. Dogs who have never spent time in a crate may feel stressed and fearful, potentially causing more harm to themselves and delaying their recovery.
Stop by your local Feeds‘n Needs to check out our selection of crates and kennels, one of our experts would love to help you choose the right one for your dog!
Disclaimer – Dogs require lots of exercise, socialization, and mental stimulation daily to remain healthy, which is why they should never be left in their crate for prolonged periods. The crate is a tool for you to use when you cannot supervise your dog or when housebreaking a puppy, and it should never be used as a form of punishment for your dog. Consult a knowledgeable dog trainer or veterinarian if you have any questions or concerns about crate training your dog.
Check out our other blogs for more training tips and advice!
Helping Your Dog When You Are Out
Tips to Prevent Leash Pulling
Road Trip Safety for Your Dog
Tips to Minimize Your Dog’s Separation Anxiety

Dog Grooming Tips for Spring
With spring in full swing, most dogs are saying goodbye to their winter coats, allergens are filling the air, and pests are coming out; now is the perfect time to start a grooming routine for your pet. Here are some important spring (and year-round) grooming tips for your furry friend to feel like their best selves:
Brush:
Dogs with thick winter coats will begin shedding as the weather gets warmer with spring. If your dog has a double coat, they’ll shed their thick undercoat for a light one, which is better for the warmer seasons. Brush them often; this helps remove all that extra fur and keeps their coat smooth. Regular brushing is essential during spring to remove dead hair and prevent mats. Brushing also helps remove dirt and improves circulation to promote healthier skin. Using a slicker brush will help to remove loose hair, followed by a comb to keep your pup’s coat knot-free. Visit your local Feeds’n Needs to see our selection of brushes. Not sure what you are looking for? Our Experts can help!
Bath Time:
Ensure all dead hair and mats are removed from brushing before bathing your dog. If a dog is bathed with mats in their fur, it only makes their hair tighter and harder to brush out. It’s important to regularly wash your dog, particularly during the spring, because pollen and other allergens are most active during this time and can take a toll on your dog’s skin. You should bathe your dog every 21 days to align with their skin rejuvenation cycle. Always use dog-safe shampoo and conditioner to keep their coat healthy and clean and avoid any irritation to your dog’s skin.
Paws and Noses:
Keep your pup’s paws and noses moisturized with paw ointment to prevent dry or cracked skin. Don’t forget about their nails! When you don’t clip your dog’s nails, they get uncomfortable, and walking can hurt. If you don’t feel comfortable cutting your dog’s nails, try using a nail grinder or filer to maintain them between visits to a professional groomer. After your walks, always check your dog for foreign objects. Remove debris and carefully clean paws, examining each pad for any unwanted objects or injuries.
Smelling Sweet:
Keep your furry friends smelling sweet with a nice smelling dog-safe spritz. This will help them get by until their next bath.
Fleas and Ticks:
Pests like fleas and ticks start showing up more in spring. Be sure to check your pet often. A good time to always watch for them is while brushing and bathing your dog. The more frequently you check your pets, the more likely you are to locate these pests.
* Spring brings… muddy paws! If your dog is covered from head to paw in mud, act fast and wipe them down to prevent mud from drying and setting in. When your dog is dry, brush them with a slicker brush to remove any excess dirt and tangles before bath time.
Get your pup squeaky clean at one of our Splash’n Dash locations!
The Feeds’n Needs in Berwick, NS, and Woodstock, NB, offer a self-service dog wash (with more locations opening soon)! You can bring your dog in for a $12 self-service wash, where we provide professional tubs, shampoo, towels, and dryers. The cost is only $10 if you bring your own towel.
We can’t wait to see your furry friends soon!
Sources:
5 Essential Spring Grooming Tips for Your Dog. (shop-pawness.com)
Spring Grooming Tips to Get Your Dog Ready for Warmer Weather – American Kennel Club (akc.org)
April Showers Bring…Muddy Paws: Tips for Spring Grooming (hsgn.ca)
Spring and Summer Grooming Tips for Dogs (cruisincanines.com)

Overseeding Your Lawn in Spring
Is your lawn looking a little dull after a long winter? Don’t worry; the Feeds’n Needs Experts are here to share our top tips and products for bringing your lawn back to life this spring! From preparing your soil and overseeding to fertilizing and maintenance, this blog covers all the basics of springtime lawn care! Great lawns start with Feeds’n Needs!
Prepare Your Soil
Before you can seed your lawn, you need to prepare the soil.
- Mow the grass: Set your lawn mower to the lowest setting and cut your grass short. Bag the clippings or add them to your compost bin.
- Rake the lawn: Use a rake to scratch up the top layer of soil on your lawn and remove any dead grass or root buildup called thatch. Thatch buildup can prevent essential water and nutrients from reaching the soil beneath it and cause your grass to look dull and unhealthy.
- Aerate the soil: Aerate your soil during the spring and fall growing seasons. Aeration helps prevent thatch buildup while allowing water and nutrients to penetrate deeper into the soil and reach the roots of your grass.
Overseeding
Overseeding your lawn in the spring helps cover up any thin or bare spots in your grass and encourages new growth of thick, healthy grass. At Feeds’n Needs, we carry a variety of quality grass seed blends. Ask our Experts which one is best suited for your lawn!
- Choose a grass seed: When choosing grass seed for your lawn, consider the amount of sunlight or shade it receives and whether you’ll need cool-season or warm-season grass seed. Cool-season grasses are best for planting in spring and early fall when the soil temperature reaches 10 degrees Celsius.
- Spreading grass seed: To ensure the grass seed is spread evenly across your lawn, fill your spreader and adjust the density setting according to the recommendation on your seed bag.
- Let it grow: Once you’ve spread your grass seed, you’ll need to water your lawn frequently to keep the soil moist and allow the seeds to germinate.
Fertilizing
Once you’ve spread your grass seed and the new grass has begun growing, adding fertilizer will give your lawn the nutrients it needs to grow and remain healthy.
- Choose a fertilizer: When new grass begins growing in the spring, a high-nitrogen fertilizer will encourage new leaf growth. We recommend the Cavendish slow-release 21-7-7 fertilizer for springtime lawn maintenance.
- Spreading fertilizer: Fill your spreader and adjust the settings according to the recommendation on your fertilizer bag. Spread the fertilizer evenly across your lawn, ensuring each area gets covered.
- Water: Once you’ve spread your fertilizer, continue to water your lawn regularly to allow the fertilizer to sink into the soil and bring nutrients to your growing grass seedlings.
Maintenance
- Routine watering: Newly seeded and fertilized lawns need about an inch of water each week to promote root growth and vitality. Lightly water once or twice a day to keep the soil moist. Watering may not be necessary if it rains enough in your area.
- Mowing habits: When your lawn is freshly seeded, avoid mowing until the new grass reaches about 3 inches in height to prevent damage.
- Regularly Fertilize: Fertilize your lawn every eight weeks to support lush, healthy grass. Visit your local Feeds’n Needs to find fertilizer for every season!
When it comes to keeping a healthy lawn, Feeds’ n Needs is your one-stop shop for all the essentials! Check out our great selection of fertilizers, grass seeds, and more, and don’t forget to ask our Experts which products will work best for you!
For more expert advice on how to maintain a healthy lawn, check out our blog on How to Maintain a Healthy Lawn.

How to Attract Birds to Your Yard
Attract different wild bird species to bring your backyard to life! Many birds in Canada depend on humans to provide them with safe habitats where they can find food and make nests. In return, they help reduce insects in your yard, sing beautiful birdsongs, and are delightful to watch!
There are four key elements to attracting birds to your yard; our blog will teach you about each one!
Habitat:
The ideal habitat for wild birds should be diverse in its plant life. Planting different kinds of flowers, trees, shrubs, and bushes that are native to your area will not only effectively attract native bird species, but it will also help to strengthen and preserve your local ecosystem. Ensuring there is plenty of greenery and cover in your backyard will provide birds with a safe place to explore.
Feed:
One of the best ways to attract birds to your yard is to provide them with a food source. Different species prefer different types of feeders, so try placing a few different kinds around your yard to attract a variety of birds. Feeders should be placed about 10 feet from trees and greenery to allow them to quickly escape from predators if needed. Additionally, different species prefer feeding from different heights, so try hanging your feeders at different levels. Make sure to keep all feeders clean by scrubbing them with one part bleach to nine parts hot water at least once per month. The type of seed you use to fill your feeders will also determine which birds may stop by. Different species have their own unique nutritional requirements and, therefore, will be attracted to different types of seed to meet their dietary needs. Black oil sunflower seeds and suet blocks are great options for feeding your yard’s most incredible variety of birds. Ask the Experts at your local Feeds ‘n Needs about what type of feeder and bird seed you should use to attract a desired bird species!
Water:
Birds require access to water for bathing and hydration year-round, so adding a water source like a bird bath, pond, or fountain can make your backyard even more popular with bird visitors. Try placing a shallow bird bath in your backyard near an area with good, dense greenery in which birds can take cover. Change the water in your bird bath every few days in the summer, and consider investing in a heater or de-icer to keep the water from freezing in the winter.
Nesting:
Encourage birds to stick around all year by providing safe places to nest in your backyard. Many birds will build nests in dense greenery that provides adequate shelter. However, some bird species, such as bluebirds and chickadees, prefer a more secure, warm shelter to nest. Install birdhouses or nesting boxes on posts or tree trunks in safe areas around your yard for these birds to make nests in. Ensure the entrance hole in your birdhouse is only big enough for the intended species to get through to prevent larger predatorial birds from entering.
You can also provide birds with materials to nest with by filling a suet cage with organic materials like grass clippings, twigs, dried leaves and even pet hair and hanging it where birds will find it. These organic materials will eventually decompose, so you don’t have to worry about harming the environment!
If you want to start attracting wild birds to your yard, make Feeds ‘n Needs your one-stop destination to find all the essentials you’ll need! Check out our wide selection of quality bird feeders, accessories, and premium bird seeds in our wild bird center! You’ll find that feeding the birds is even more rewarding when you join our Wild Bird Seed Club and start earning 10$ off after every $200 you spend on bird seed. Stop into your local Feeds ‘n Needs and ask one of our Experts for details on the loyalty program and how you can get started feeding the birds!
Are you interested in learning more about wild birds? You may enjoy our other blogs!
Keeping Feeding Areas Clean and Maintained
How to Properly Store Bird Seed
Feeding Wild Birds in Winter
Calving Supplies Checklist
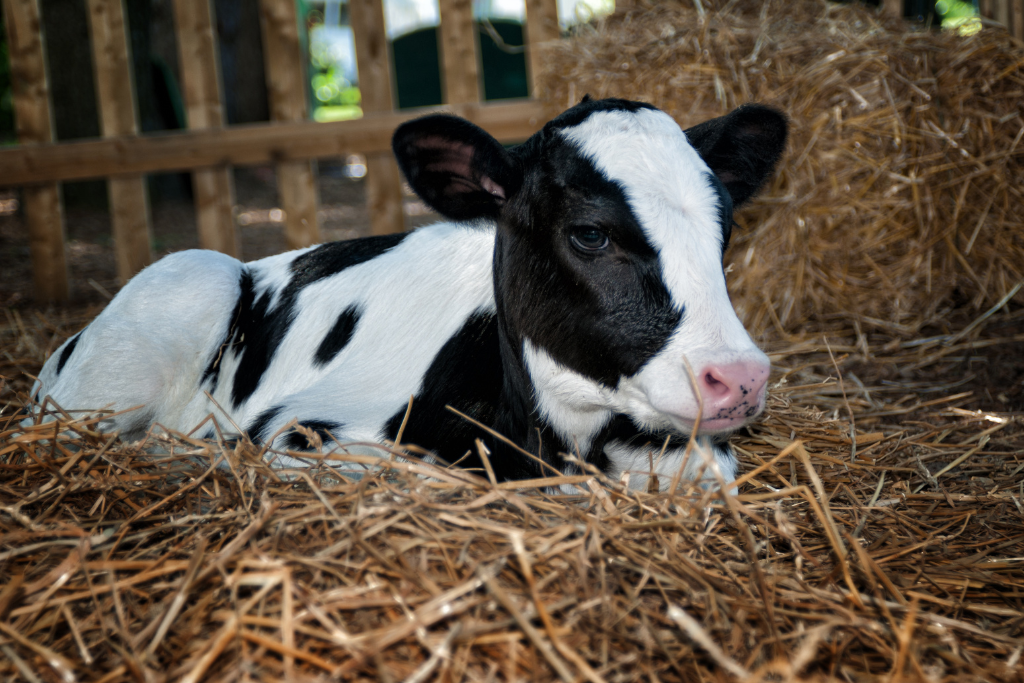
When it comes to the birth of new calves, things sometimes go differently than planned. From difficult labor and delivery to dealing with sick, cold newborns, when you’re expecting a pregnant cow to give birth, you need to be prepared for any scenario. Make sure your calving kit is fully stocked and ready to go prior to the due date of the first calf so that even if it’s born early, you’ll be prepared. Our calving supply checklist is a great guide to help you make sure you have everything you need this calving season!
Veterinarian Contact Information
If you plan to own and breed cattle, you’ll want to make sure you know who your local farm veterinarian is and keep their contact information on file in case of an emergency. It’s not uncommon for a cow to require assistance to deliver her calf; however, sometimes, if the farmer cannot get the calf out, a veterinarian must be called to the farm to perform emergency measures.
Notebook & Pencil
Keep a detailed record of important information, including breeding and due dates, so you have a rough idea of when to expect calves. Record newborn calves’ birth date, sex, birth weight, and any additional information such as the ID numbers of each cow and calf pair, whether or not a bull calf has been castrated, and any health issues noticed.
Calving Pen
Calving areas should be sheltered from cold weather, have clean straw or shavings for bedding, and ideally have a functional chute in case of emergencies requiring medical intervention. Make sure your calving pen has adequate lighting and keep a flashlight close by in case you need to inspect a cow or calf. Stock up on dust-free chopped straw or wood shavings at your local Feeds ‘n Needs.
Heating & Drying Sources
Since they are born covered in amniotic fluid, calves must be quickly dried and warmed up after birth to prevent them from developing hypothermia. A cow should be allowed to lick her calf clean after delivery; however, in cases of cold weather or if the mother does not clean her baby, have towels and blankets ready to dry the calf off and stimulate blood circulation. If a newborn gets chilled, have a warming box or other heat source like hair dryers and heat lamps ready to use to get the calf warm. Use a thermometer to keep track of calves’ temperatures, especially if they are sick or hypothermic. Always sterilize thermometers after use.
Gloves & OB Lubricant
Keep boxes of long and short disposable gloves to protect you and your animals from bacteria entering the body, and always change gloves between working with different animals. If a cow requires assistance delivering her calf, have lots of regular obstetrical lubricant on hand to lubricate the birth canal and your gloved arms to reduce friction and swelling. If your cow may require a C-section, avoid using J-lube to try and get the calf out, as it is toxic to the peritoneal cavity and will be fatal to the cow.
Halter, Rope & OB Chains
Ensure you have clean OB chains and handles ready in case you have to intervene and assist a cow during delivery. Additionally, have a halter and long rope prepared for laying down a cow to make delivery easier.
Disinfectant
A 7% iodine solution or chlorhexidine should be used to dip the calf’s navel after birth to keep it clean and disinfected. Additionally, you can add these disinfectants to a bucket or squeeze bottle of water to create wash water for cleaning the cow after delivery. Roll cotton soaked in this disinfectant water also works well to wash the cow.
Colostrum & Milk Replacer
The colostrum, or “first milk” a pregnant cow produces, is rich with antibodies and nutrients, which are vital for her calf to receive in the first 4 to 6 hours after birth. Calves should be standing and nursing on their own within 1 hour. Otherwise, you may need to intervene. If you are worried that a calf is not getting colostrum, or if you have a calf too weak to nurse on their own, frozen colostrum or dried colostrum mixed with warm water should be readily available to administer to the calf. Colostrum replacer products should contain a minimum of 100g of lgG per dose. Keep powdered milk replacer on hand for calves that will be bottle fed. Trust Feeds ‘n Needs to provide you with the best quality powdered colostrum and milk replacers to help your calves grow and thrive.
Feeding Supplies
A flexible stomach feeding tube and large syringe may need to be used to administer colostrum to weak or sick calves that are unable to suckle. Be sure to sterilize supplies between calves or keep a second stomach tube on hand to feed sick calves only. Additionally, keep bottle feeding supplies like calf bottles and extra nipples on hand to bottle feed calves that are stronger and able to suckle.
Needles & Syringes
Keep an assortment of sterile needles and syringes in your calving kit for administering supplements, vaccines, antibiotics, or other medications as per your veterinarian’s recommendation.
Use a bulb syringe to suction amniotic fluid out of newborn’s noses so they can breathe.
Injectables & Supplements
Administering supplements of the vitamins A, D, E, and selenium, as well as a mix of electrolytes for calves, is recommended for newborns. Our experts recommend the AVL Vitaferst-Care oral neonatal supplement for ruminants to give your calves the best start at life. Medications and vaccinations can be administered as per your veterinarian’s recommendation. Additionally, it’s always beneficial to keep scour pills or a prevention solution on hand in the event a calf develops scours and requires immediate treatment. If you do not have access to scour pills from your vet, we recommend administering Calf Renova at the first signs of diarrhea or Calf Perk to get a cold, weak calf to its feet after birth. Ask your local Feeds’ n Needs experts about product availability.
ID Equipment
Each head of cattle in Canada is required to have a registered CCIA tag before being transported from their farm of origin. These can be bought from an authorized dealer like your local Feeds ‘n Needs store. In addition to CCIA tags, you may want to tag your cattle with an on-farm ID tag, which should be done within the first few days of a calf’s life as cows sometimes swap calves, making future genetic selections inaccurate if calves were not tagged at birth. If you plan to give your calves tattooed ID numbers, ensure all your equipment is clean and in good working order.
Elastrator Rings & Tool
If you plan on castrating bull calves, you will need to make sure you have elastrator rings and the proper elastrator tool. Castration of bull calves is typically done between 1 week and 5 months of age. Be sure to record which calves are being castrated and which are not.
When it comes to calving, expect the unexpected and always be prepared. Stop by your local Feeds ‘n Needs to pick up some essential calving kit items so that you’ll be ready when the first calf arrives!
Disclaimer: Feeds ‘n Needs is not qualified to give medical advice or recommendations; please consult your veterinarian for any concerns, vaccine recommendations, etc.

Lambing Supplies Checklist
The arrival of new lambs can be exciting and busy, so the best way to guarantee a smooth lambing season is to ensure you are well-prepared in advance. In this blog, we will review the essential supplies that every shepherd should have on hand before the arrival of any lambs.
Notebook & Pencil
Have a notebook to record all contact between ewes and rams, and use a gestation table to calculate approximate due dates. Knowing roughly when to expect lambs to be born allows you to ensure you have all supplies on hand at least a week before due dates.
Use this notebook to keep track of other things, such as ewe and lamb ID numbers or colors, any health issues you have noticed, etc.
Lambing Pen
Ewes and their newborns should have an isolated pen away from the rest of the flock for the first several days after birth to allow a safe place for them to bond. The pen should be at least 5’ x 5’, and bedding should be kept clean and dry to prevent infection, especially after lambs are born.
Lighting
Keep bright flashlights or headlamps nearby if your barn does not have great lighting. If a lamb arrives at night, you’ll need a good light source to assist the ewe and her newborn.
Heat Sources
Newborn lambs are susceptible to hypothermia, so several methods to warm a chilled lamb can be vital to survival. Hair dryers, warming boxes, and heat lamps are all great ways to get a lamb warm after birth when used with caution. You can also place a lamb’s body in a plastic bag with its head sticking out and sit it in a warm water bath to quickly raise its body temperature without affecting its smell.
Digital Thermometer
Monitor lamb’s temperature to ensure it isn’t too cold or sick. A normal temperature for a lamb is 38.8°C to 39.4°C, if the temperature drops below 37.7°C, the lamb is hypothermic.
Towels and Paper Towel
Lambs are born covered in amniotic fluid which the mother ewe should clean off. While this is important for their bonding, you may need to assist the ewe and help get the baby dry using towels or paper towels to prevent the lamb from getting cold.
Bulb Syringe
The use of a bulb syringe may be required to suck any amniotic fluid out of a newborn lamb’s nostrils after birth to allow it to breathe.
Iodine Spray or Dip
Whether or not you decide to cut a newborn lamb’s umbilical cord using sterile scissors, the navel can serve as a pathogen pathway to a lamb, and it is vital that the area be kept clean. Use a 10% iodine spray or dip solution to keep the area disinfected, and make sure that the lambing pen has clean bedding.
Lubricant
Keep some OB lubricant on hand in case it’s needed. This can be helpful to lube up a thermometer, getting a lamb’s head unstuck during birth, or lubricating your arm and any needed birthing tools if the ewe requires help while giving birth.
Gloves
Keep boxes of long and short gloves to use when handling lambs and ewes to prevent bacteria from entering your body. Be sure to use different gloves when handling different sheep to avoid the potential spread of infection.
Colostrum & Milk Replacer
Lambs need to nurse during the first 24 hours of their life to receive the nutrients and antibodies from the ewe’s first milk, called colostrum. Before a lamb can nurse, you must strip the wax plug from the ewe’s teats and ensure her milk flows. If a lamb is rejected by its mother, or if you have a lamb that is too weak to nurse, have powdered or frozen colostrum that you can warm and feed to them as they must receive this vital colostrum within their first 8 hours of life. It is also a good idea to keep a lamb milk replacer on hand in case of a rejected lamb that may need to be bottle-reared.
Feeding Supplies
A flexible stomach feeding tube and large syringe can feed weak or cold lambs that can’t suckle on their own. Additionally, keep bottle-feeding supplies on hand, including lamb bottles and nipples, to feed stronger and able-to-suckle lambs, such as a triplet or rejected lamb.
Needles & Syringes
Have a variety of sterile needles and syringes to be used to administer any injectables or vaccines as recommended by your veterinarian.
Injectables & Supplements
Injectable vitamins A, D, and E with Selenium may be given after birth, as well as injectable antibiotics or vaccines per your veterinarian’s recommendation. Additionally, it can be beneficial to keep a propylene glycol solution on hand to help an exhausted ewe regain her energy after birth. This is especially helpful for ewes who have given birth to twins or triplets.
Elastrator Rings and Tool
If you plan on castrating ram lambs not intended for breeding, you will want to make sure you have elastrator rings and the appropriate elastrator tool to castrate within the first week of the ram’s life. The same rings and tool can be used to dock a lamb’s tail. Unless you plan on leaving your lambs with their natural long tails, they will need to be docked within the first few days of their lives.
ID Tags & Applicator
Animals intended to be sold and shipped must have registered CCIA tags which can be purchased from an authorized dealer. You may also want to tag your lambs using a different tag to use as an on-farm ID. Use your notebook to keep track of animal ID’s!
Marker Crayons or Spray
Identify your animals more easily by marking your ewes and lambs with colored ID-marking crayons or sprays. Use this method to keep track of twin lambs, mother and lamb pairs, banded ram lambs, etc. Keep notes of your ewes and their lambs in your notebook.
Get prepared for lambing season with a trip to your local Feeds ‘n Needs! Our stores carry a variety of essential supplies to ensure that you can be well-prepared for the arrival of new lambs! Our Experts will be happy to help you find what you need!
Disclaimer: Feeds ‘n Needs is not qualified to give medical advice or recommendations; please consult your veterinarian for any concerns, vaccine recommendations, etc.

Easy Easter DIYs Using Eggs
Springtime is all about bright colors, new beginnings, and creativity. What better way to welcome the season and have some Easter-themed fun than decorating eggs? This blog provides a step-by-step guide to making three easy Easter crafts that the whole family will love!
Blowing Eggs
Before starting any of our Easter egg DIYs, you’ll need to remove the yolks from all the eggs you’ll be working with.
What You’ll Need:
- Eggs
- Pin (you can also use a needle or sharp metal skewer)
- Cocktail stick or wooden skewer
- Paper clip (optional)
- Bowl
Step 1: Using your pin or needle, carefully poke a hole in the top and bottom of your egg. Gently insert your cocktail stick or skewer into the hole to gradually increase its size. The hole in the bottom of the egg needs to be big enough for the yolk to pass through, but be careful not to crack the egg in the process.
Step 2 (Optional): Use a straightened paper clip to “stir” the yolk inside the egg, making it easier to blow through the hole you made.
Step 3: Hold your egg over a bowl and blow as hard as you can into one of the holes in your egg. The yolk should start coming out the other end. You won’t need the yolk for these projects, but you can set them aside to use for cooking later!
Step 4: Now that the yolks are out of the eggs, rinse them under hot tap water to remove any residue. Once rinsed, leave the shells out to dry.
DIY #1 – Painting Eggs
Test your painting skills by getting creative with eggs! Paint stripes, patterns, splatters, and more! The design options for this DIY are endless!
What You’ll Need:
- Eggs with yolks blown out
- Acrylic paint
- Cocktail stick or skewer
- Paint brushes
- Sponge (optional)
Step 1: Insert a cocktail stick or skewer into the bottom hole of your egg to keep it away from your fingers while you paint.
Step 2: Use paintbrushes or a sponge to apply paint to your egg. Get creative with this part!
Step 3: Let the paint dry while your egg is still on the skewer by holding the skewer in a glass.
Step 4: Once your paint is dry, add a second coat to brighten the colors or add more designs! Leave your egg on the skewer until you are done painting and the egg is dry.
DIY #2 – Dyeing Eggs
Use food coloring or natural dyes with ingredients from around your home to create beautiful, dyed eggs that are the perfect Easter decorations! We will teach you how to dye eggs using food coloring for this DIY.
What You’ll Need:
- Eggs with yolks blown out
- Vinegar
- Food coloring (your choice of colors)
- Measuring spoons
- Kitchen tongs
- Paper towels
- Heat-proof bowls (one bowl for each color of food coloring)
- Crayons (optional)
Step 1: Prep your work area by laying down paper towels to prevent food coloring stains.
Step 2: To make your dyes, bring some water to a boil, then add 1 teaspoon of vinegar and about 20 drops of food coloring. The more food coloring you add, the more vibrant your dye color will be. Pour your mixture into a heat-proof bowl deep enough to dip your eggs in.
Step 3 (Optional): You can use crayons to create fun patterns and designs by drawing directly on the egg before you dye it. The dye pigment will not stick to the wax, so whatever you draw will stand out after you dip your egg!
Step 4: When you’re ready to dye your egg, use a pair of kitchen tongs to submerge the egg into your bowl of coloring. Make multicolor eggs, striped eggs, patterned eggs – You can be as creative as you want with this part!
Step 5: Remove your eggs from the dye using your kitchen tongs and set them out to air dry when finished.
DIY #3 – Jello Filled Eggs
This DIY project is a fun way to make a tasty treat that can also be a great April fool’s prank! You can paint or dye your eggs before you add the Jello to add to the fun and make this a 2-part project or leave them plain and give someone a surprise when their egg turns out to be Jello!
What You’ll Need:
- Eggs with yolks blown out
- Packets of Jello (Your choice of flavor)
- A fine pastry tip
- Egg carton
- Duct tape
Step 1: Use a small piece of duct tape over the hole in the bottom of your eggs to seal it closed, then place your eggs tape-side down back into the carton.
Step 2: Follow the instructions on the package to prepare your Jello mixture. Try making different flavors to add variety to your eggs!
Step 3: Once your Jello mix is ready, insert a fine pastry tip into the top hole of your egg and carefully pour the liquid Jello into the egg. Be careful not to overfill the egg, as the liquid will be hot.
Step 4: Once you’ve filled all your eggs, place the carton in the fridge to allow the Jello to set. This should take 2-3 hours.
Step 5: Once the Jello has set completely inside your eggs, open the shells and enjoy this tasty Easter treat!
Have fun and get creative this spring using everyday kitchen items and eggs from your own backyard! From all of us at Feeds ‘n Needs, we hope you try these Easter DIYs and have a great time making them!
Sources:
https://www.marthastewart.com/275626/egg-dyeing-101
https://www.marthastewart.com/266591/blowing-out-an-egg
Garden Projects for Spring
The weather is getting warmer, and it’s finally time to start making your garden plans! It’s not quite time to plant yet, but you can begin many other projects in the spring to ensure your garden is ready to roll once the frost is gone!
Create a Garden Journal:
Keep track of what you’ve planted in the past, what grew well and what didn’t, where you planted things last year so you can rotate crops, tape seed package tags to pages, sketch out garden bed ideas—the list goes on! Keeping a detailed journal of your garden is a great way to help you remember what worked well for you in previous years or even new ideas you might like to try!
Start Seeds Indoors:
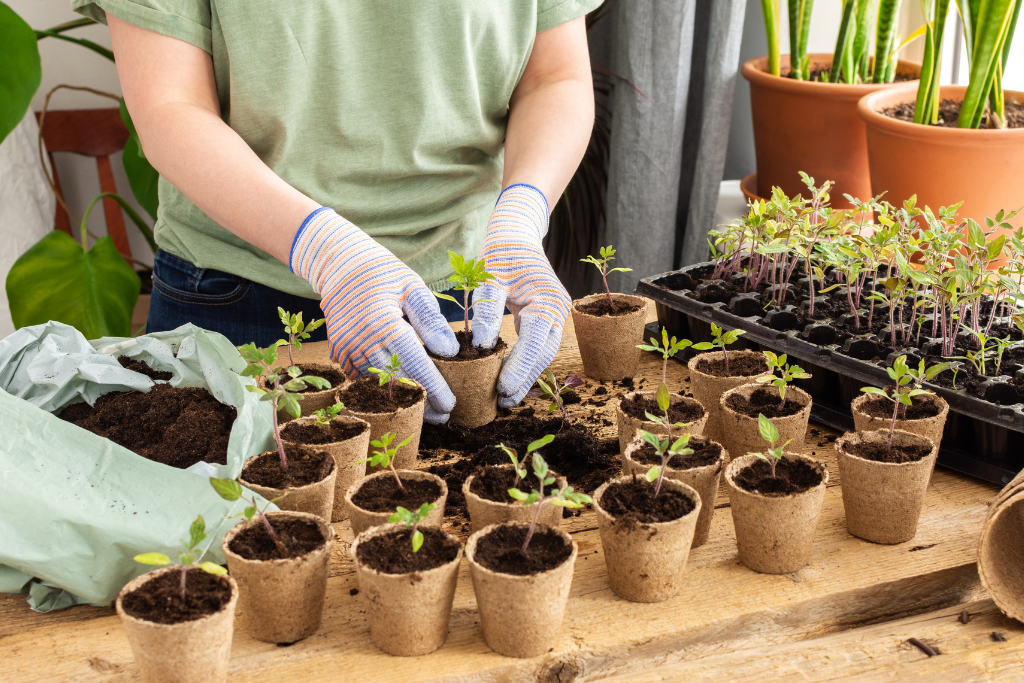
Many seed varieties, especially those that take longer to grow, such as tomatoes and peppers, can be started indoors. Plant your seeds in a shallow container about 2 to 3 ½ inches deep with drainage holes. Peat pots, pellets, paper cups, or shallow compartmented trays all work well.
Use a soilless seed starting mix, ideally made up of peat, perlite, vermiculite, and added nutrients. These mixes are light, improve drainage, and aid water retention, making them best for seedling germination.
Follow the planting directions on your seed packages to determine the depth in which to plant your seeds. Then, place your seed containers in a warm location (ideally 18 – 22 degrees Celsius) where they will have access to light for about 12 to 14 hours per day. Keep the soil moist and cover the seed pots or trays with plastic or damp paper towel to allow seeds to germinate.
Start a Compost Bin:
Commonly called “black gold,” compost does wonders for the soil and plants growing within it. Made up of recycled matter such as kitchen scraps and lawn clippings, compost adds vital nutrients to the soil, helping to maintain its structure, porosity, and density, maintain proper pH balance and moisture, and even prevent weeds! Composting is a great way to prevent unnecessary waste from ending up in landfills, helping your soil and plants thrive!
Test Your Soil:
Test your soil for deficiencies before you plant! Pick up a soil test kit at your local Feeds ‘n Needs to test your soil’s pH, nitrogen, phosphorus, and potash levels. The plants you grow need to be able to get their nutrients from the soil they grow in, so if your soil’s nutrient levels are too high or too low, it could cause problems down the road that are much easier to identify and fix before you plant!
Prepare Your Pots and Containers:
Make sure you have all the pots and containers you will need for all the planting you plan on doing. If you have containers that you used last year, get rid of any old soil and scrub them down with powdered laundry detergent and water. Once clean, disinfect the containers with a mixture of bleach and water. If you are new to planting or just need some new planting essentials, we carry a variety of plant pots, containers, and seed-starting kits!
Clean Your Tools:
Before you can start tending to your garden, make sure that all your tools are cleaned up and ready to go. Wash off any dirty tools and check their condition. If some of your tools have become rusty, try soaking them in a solid black tea bath or use sandpaper or a wire bristle brush to shine them up again. Take this time to tighten up any screws or bolts that may have come loose on any of your tools as well.
Our Experts know how exciting it is once the snow melts and gardening season is just within reach. But don’t forget to take advantage of springtime to make sure you have everything ready and planned out. We want to help you ensure that when it comes time to plant, you are more than prepared! Stop into your local Feeds ‘n Needs and check out our gardening section. We’ve got everything you need to prep, plant, and maintain your garden!
For more helpful gardening tips and tricks, check out our related posts!
Link 1 – Gardening Tips for Beginners
Link 2 – How to Sprout Your Own Seeds
Link 3 – Garden Planning for Spring and Summer
Sources:
https://www.almanac.com/content/3-simple-diy-soil-tests
https://www.farmandfleet.com/blog/early-spring-lawn-garden-projects/
https://www.housebeautiful.com/lifestyle/gardening/a31747273/easy-gardening-projects-spring/
https://www.countryliving.com/gardening/garden-ideas/a30753842/how-to-start-seeds/?psafe_param=1&utm_source=google&utm_medium=cpc&utm_campaign=arb_ga_clv_md_pmx_hybd_mix_ca_18700871953&gad_source=1&gclid=EAIaIQobChMI5svmw6P0hAMVdpJoCR1xhwOBEAAYAyAAEgKKOfD_BwE
https://www.veseys.com/ca/growing-from-seeds?gad_source=1&gclid=EAIaIQobChMI_bmPoqz0hAMV55KDBx11XwRdEAAYAiAAEgIhLvD_BwE
Predator Proofing Your Chicken Coop
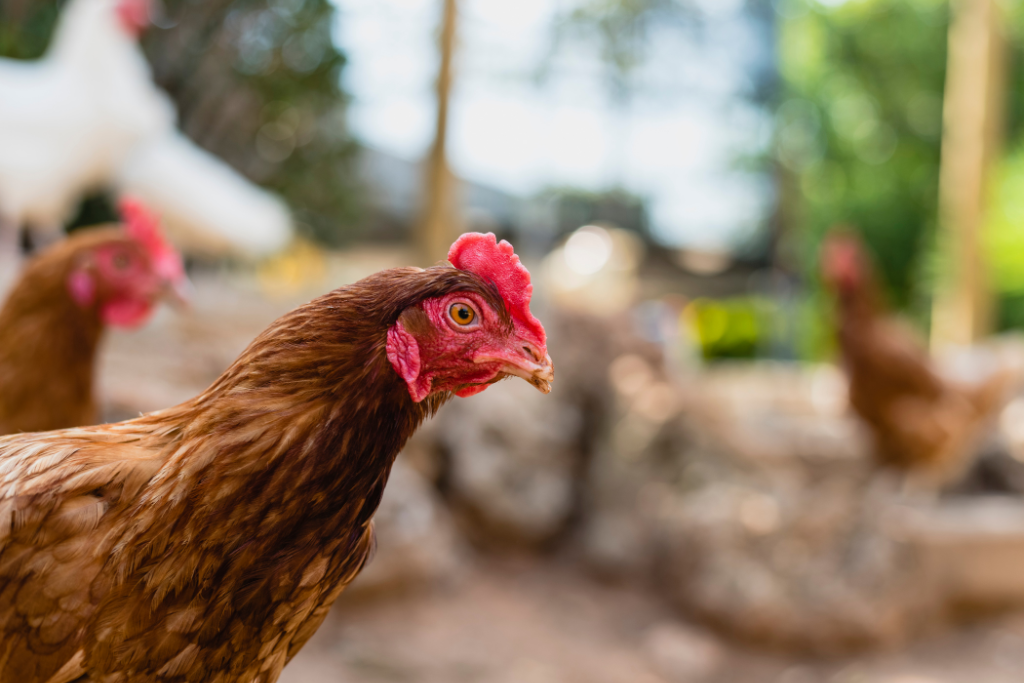
When owning chickens, keeping your birds safe should always be a priority. Unfortunately, these birds have a rather lengthy list of predators who won’t hesitate to harm your flock if the opportunity arises. It is important to ensure your coop is a safe place for your birds. This blog covers all the basics of predator-proofing your chicken coop, from proper fencing to locking up feed bins.
Know The Predators:
Familiarizing yourself with the wildlife in your area that may pose a threat to your chickens is ultimately the first step in knowing how to protect them. By doing this, you will have a better idea of any potential weak areas in your coop that need to be reinforced to prevent these predators from breaking in. Some common chicken predators include foxes, coyotes, raccoons, weasels, rats, and birds of prey, but depending on your location, these predators may differ.
Inspect Your Coop:
Check your coop regularly for any areas that a predator may easily breach. Inspect all coop structures, including doors, windows, walls, roof, and floor. Predators are often capable of fitting through tiny holes, so use hardware cloth secured by washers and screws to cover up any cracks or holes in your coop structure, as well as any windows. Keeping all windows locked and adding a complex lock to the coop door will help prevent raccoons from opening them, as they are known for their cleverness.
Fencing:
Whether you have a fenced-in run attached to your coop or a large area where your chickens can free-range, ensuring your fence is secure and won’t allow predators through is essential. Our experts recommend using hardware cloth with ¼” holes or smaller when building a fence to protect your chickens. Chicken wire is typically flimsy and has larger holes that predators can easily get through, so investing in a sturdier wire will better protect your flock. When putting up fencing in a run or a larger fenced-in area, bury the wire 6 to 12 inches underground to deter digging or burrowing predators. An alternative to burying your wire is to create an “apron” of hardware cloth which extends 12 feet outward from the base of your fence. Check out our selection of different fencing options at your local Feeds ‘n Needs!
Prevent Aerial Attacks:
Digging and burrowing predators aren’t the only ones threatening your chickens. Birds of prey such as hawks, vultures and owls are also a danger to your flock while they are outside in their run or when free-ranging. Cover the top of your run or fenced area with hardware cloth or a solid roof to prevent aerial attacks from these predators who fly overhead. Ensure that your covering does not leave gaps between it and your fence, as climbing predators could squeeze through.
Secure Food Sources:
Easy access to your chicken’s feed is an almost guaranteed way to attract predators to your area. Keeping all chicken feed and other food sources locked up in metal bins with secure lids will help to keep rodents and other predators out of it. Keep chicken feeders inside the coop to avoid spilled feed on the ground outside, which would surely draw in predators.
Lock up at Night:
Most predators of chickens are nocturnal, meaning they are active at night. This is when your chickens are the most vulnerable since they are defenseless as they sleep. If your flock free ranges during the day, ensure everyone is back inside before nightfall and that the coop door is latched securely each night with a lock that predators cannot open.
Motion Sensor Lights:
Since most predators are nocturnal, mounting a motion sensor light on or around your coop may startle them, deterring them from coming closer and making attempts to break in.
At Feeds ‘n Needs, we know the best defense against predators is a secure coop and fence. Check out the fencing options available at your local Feeds ‘n Needs, and be sure to ask our experts any questions about how you can keep your birds safe year-round. We’re happy to help!
For more tips, tricks, and information about raising and owning chickens, check out our related blogs:
Hen’s Health Throughout the Seasons
Prep Your Coop for Chicks
Livestock Bedding Options


