
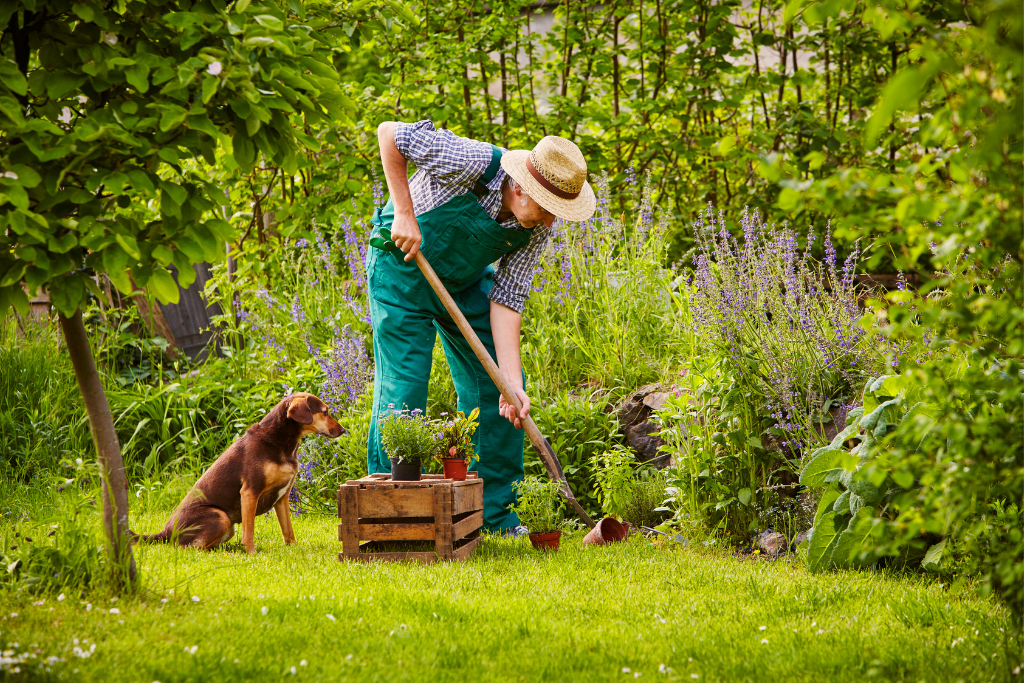
Planting and maintaining your own vegetable garden takes time and care but is a fun, satisfying way to bring nutritious foods to your family’s table. If you are not sure where to start, below we share a step-by-step guide to growing a successful vegetable garden!
")
Step 1: Plan
Plan out your garden. Choose a spot that gets full sun, at least 6 hours a day (8 to 10 hours is even better). Start small if this is your first garden; anything over 1 m x 1 m may require more time than you are prepared to commit. After your first successful year of gardening, you can always add to your garden to make it larger.
")
Step 2: Remove Rocks and Debris from Soil
Remove any rocks, roots or debris from your soil and use a garden fork or spade to break up the soil to a depth of at least 15-20 cm. Using the fork, add a layer at least 5 cm deep of Grampie’s Super Soil and work it in to help stimulate root growth and ensure that you get the very best produce and herbs in your garden.
")
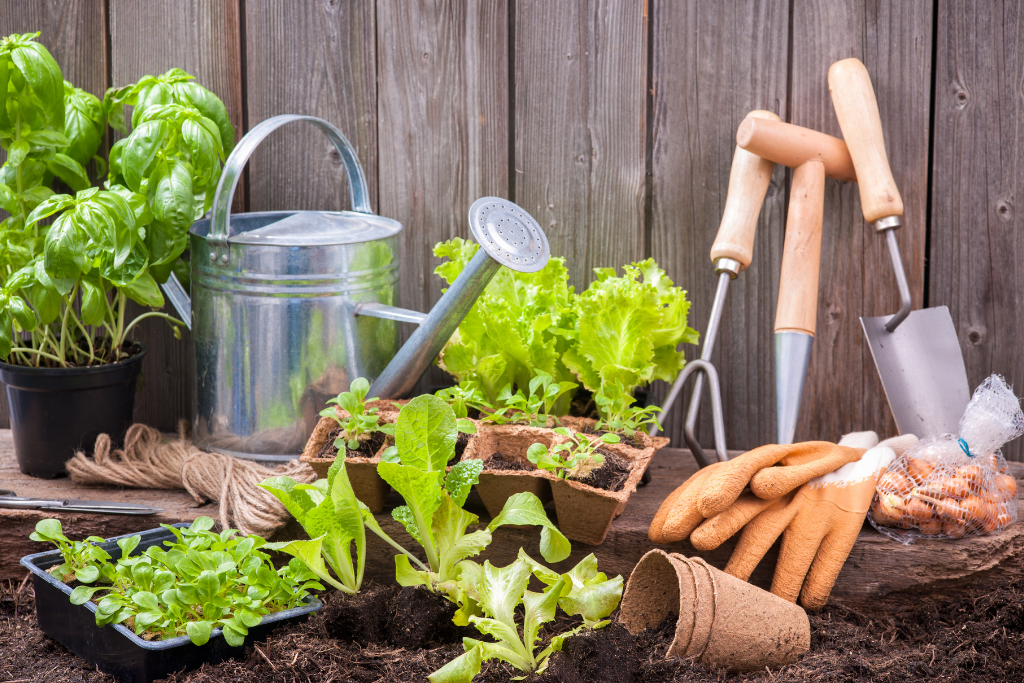
Step 3: Plant Your Seedlings
Plant your vegetable or herb seedlings. Keep in mind how big your plants will grow, and plant taller plants on the north side of the patch. Ask your Feeds’n Needs Experts for helpful tips on spacing your seedlings depending on what vegetable you are planting. Inspect your garden for weeds, pests and diseases at least twice each week. Pull weeds by hand, identify any pests and use an appropriate pest remedy before the problem becomes serious. Be sure to remove any diseased plant parts promptly to avoid affecting others.
")
Step 4: Feed Vegetables with Fertilizer Every 2 Months
Feed your garden every 2 months with 6-12-12 fertilizer or 10-10-10 fertilizer. Alternatively, apply water-soluble fertilizer approximately once every second week. During your next visit to your local Feeds’n Needs, ask our Experts what water-soluble fertilizer they recommend for your vegetable garden!
")
Step 5: Water as Needed
Water slowly with very little pressure so that the water has a chance to sink into the soil rather than running off. Water the soil rather than spraying the leaves of the plants, ideally in the very early morning before the sun becomes intense. Depending on the temperature, wind, soil type, spacing and type of plants, watering is usually required every second day unless it rains. If in doubt, stick your finger into the soil past the first joint and water if it feels dry.
Materials you will need:
- Plants, vegetable seeds or bulbs of your choice
- Grampie’s Super Soil
- 6-12-12 Fertilizer or 10-10-10 Fertilizer
Tools you will need:
- Shovel
- Garden hoses
- Fork or Spade
Sources: How to Grow an Organic Vegetable Garden | The Home Depot Canada
Springtime Garden Pet Safety
Gardening season is upon us, and for us pet owners, that means we need to be aware of how to keep our pets safe from hazardous spring plants! There are few effective treatments for toxic plant ingestion, so it’s important to know the potential dangers spring plants can have on our furry friends.
Most common toxic spring plants:
- Tulips, Daffodils, Narcissus, and Hyacinths – The skin at the bottom of bulb flowers is dangerous to both dogs and cats, but they are especially toxic to dogs. Make sure your dog isn’t digging up the bulbs in the garden! If ingested, it can cause vomiting, diarrhea, and drooling.
- Lilies – These are highly toxic to cats. The pollen, leaves, stems, and even the water in a vase can cause kidney failure, even small ingestions such as 2-3 petals or leaves.
- Irises – These are considered toxic to both dogs and cats. All parts of the iris contain harmful components, but the bulbs are the most dangerous part. If your pet ingests an iris, it can cause vomiting, diarrhea, and drooling.
- Begonias – The underground stem can cause severe mouth irritation for both dogs and cats.
- Buttercups – These flowers can cause your pets to have an upset stomach if ingested.
- Crocus – The spring Crocus may cause gastrointestinal upset like vomiting, diarrhea, and drooling if any part of the plant is ingested by dogs or cats.
- Lily of the Valley – This plant can cause symptoms such as vomiting, diarrhea, a drop in heart rate, severe cardiac arrhythmias, and possibly seizures.
It’s also important to be mindful of fertilizers as these often contain bone, blood or feather meal which ingesting in large quantities can cause vomiting and diarrhea. Next time you visit your local Feeds’n Needs store, be sure to ask our Experts for advice on safe fertilizers to use as a pet owner! You can also keep your curious furry friend away from the garden by fencing it off.
Educating yourself about these springtime hazards will help you, and your pet enjoy your backyard with no worry!
Sources:
Springtime Hazards: Protect your Pets From Toxic Plants | 24Petwatch
Spring Dangers To Pets | Pet Poison Helpline

How To Sprout Your Own Seeds
Sprouting seeds is an easy way to start growing plants indoors in the springtime, then you can plant them in soil once the roots appear. If it is warm enough to plant outside, you can plant seeds directly into the garden soil.
What you’ll need:
- Ruler, small shovel or garden trowel
- Garden gloves
- Vegetable seeds
- Compost or garden soil
- Paper towels
- Plastic baggie
- Water marker
Planting Indoors:
- Lay 1 to 3 seeds on a square paper towel.
- Fold one side of the towel over the seeds and dampen the paper towel. Use a spray bottle if you have one—you don’t want it to soak it!
- Put the paper towel in a clear plastic baggie and seal it.
- Write the name of the plant and the date on the front of the bag. Put it in a warm, sunny spot.
- Keep an eye on it! Once roots appear, you can plant it in the garden or a pot in a sunny window.
Planting Outdoors:
- Find a space in the garden to plant your seeds. If it’s still too cold to plant outdoors, you can plant them directly into the soil in a pot kept in a sunny spot in your house.
- Look at the back of the seed packet to see how much room each plant will need. Use your ruler to see how many seeds you can plant in your area.
- Put on your gloves and mix some compost or bagged garden soil in with the soil in the ground.
- Dig a shallow line in the soil, then drop in the seeds. Gently cover with dirt and water the row.
- It may take a few weeks before you see any growth, but don’t forget to water and weed the planting area!
Be sure to write down when you first see roots, when the first leaves appear, which plants seem to be growing faster, and more as this will help you with future garden planting!
Sources: Sprout Your Own Seeds | Miracle-Gro Canada (miraclegro.com)
Garden Planning for Spring and Summer
Is garden planning on your to-do list this spring and summer?
Deciding what to grow in your garden is one of the most essential steps in gardening; sometimes, it can be the most challenging too. If you focus on the three main keys to success, you can’t go wrong: available sunlight, soil type, and climate.
1. Available Sunlight:
When trying to figure out what area you want to plant your garden, ask yourself, does it get at least 6 hours of direct sunlight per day? If it does, consider it a sunny spot; if it doesn’t, consider it a shady spot.
2. Soil Type:
Every plant prefers a specific type of soil. A great way to improve overall soil is to mix 3 inches of All Purpose soil into the top 6 to 8 inches of your existing garden soil.
3. Climate:
Climate is another crucial aspect to consider when deciding what to plant in your garden.
When discovering which plants fit your specific growing conditions, visit your local Feeds’n Needs store; they can provide helpful tips and tricks to help get your garden prepped for the growing season.
Here are a few plant types that suit some common growing conditions:
- Shade – ferns, hydrangeas, sweet woodruff, hostas, azaleas
- Sun – fruit trees, vegetables, daylilies, roses, ornamental grasses
- Heat – angelonia, coneflowers, sage, oregano, prairie natives, cactus
- Pots – annual flowers, bush-type edibles, herbs, perennials
Growing in containers is a great way to create custom growing conditions. Not only can you move them around to get more (or less) sunlight and choose to keep them indoors or outdoors, but you can also customize your soil.
The bottom line on choosing what to grow depends on how much elbow grease you’re willing to invest in keeping plants happy.
Sources: Making the Decision on What to Grow in Your Garden | Miracle=Gro (miraclegro.com).
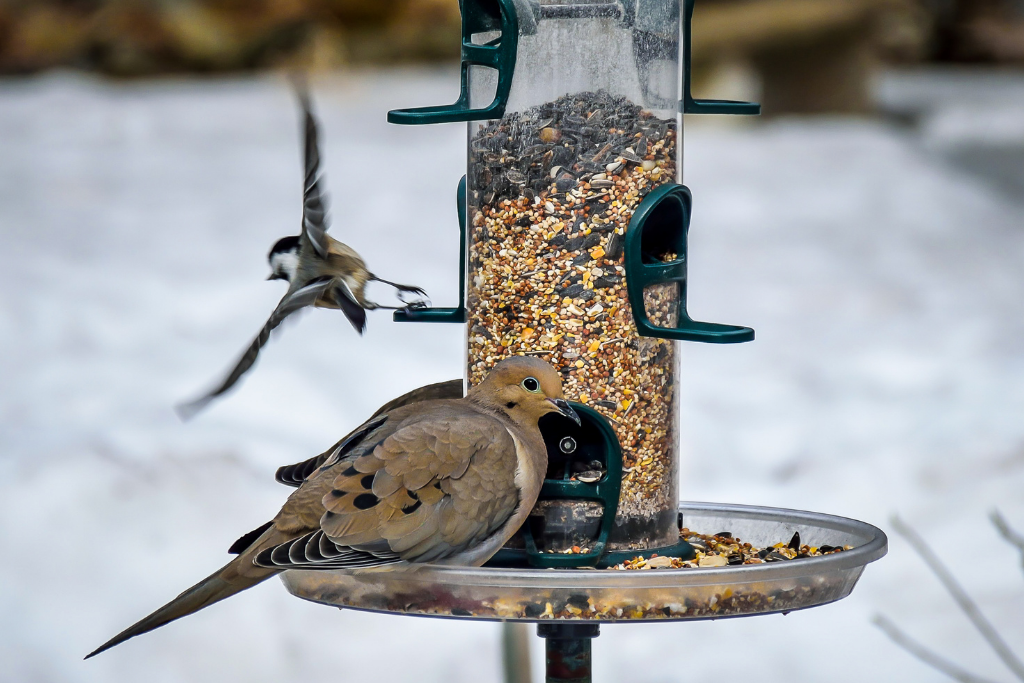
Feeding Wild Birds in Winter
Winter is a rewarding time for birders and one of the busiest for bird feeders due to the lack of natural food sources and colder temperatures. Here are some reasons to feed wild birds during the colder months:
Reliable food source: Besides helping northern migrants coming to the Maritimes replenish their energy resources, it also provides all wild birds with a reliable food source once natural sources deplete in colder weather.
Attracts the first winter birds: A stocked bird feeder can attract the first winter bird species and encourage them to remain nearby all winter. This helps wild birds remember reliable food source locations, so they return year after year. Overtime, consistent feeding will increase the size and diversity of your backyard visitors and become a trusted winter source. This also means birds don’t have far to go to replenish their energy.
Birds become reliant on feeders as food source: If deciding to feed birds in winter, it is important to stay consistent by keeping feeders clean and well stocked all season. Wild birds become reliant on these feeders, up to and including spring. This is an especially crucial time to keep feeding as many Maritime provinces experience ice storms creating a barrier for birds to acquire food and shelter.
Related Articles
Winter Backyard Bird Enthusiasts
Best Winter Bird Feeders
Best Winter Bird Seed
How To Properly Store Bird Seed
Keep Feeding Areas Clean and Maintained
Keep Backyard Birds Healthy in Winter

Best Winter Bird Feeders
Winter is a great time of year to feed the birds. Besides the large variety of bird species that live in the Maritimes year-round, northern migrants are arriving to spend the season in our milder climates. There are also some bird species that are more easily seen in cooler temperatures than in any other season. Adding a variety of feeders with different seed will attract an abundance of bird species. Separate larger specie feeders from smaller ones to allow smaller birds a chance to feed without being scared off by larger varieties.
Considerations for Winter Bird Feeders
Feeder Style: Consider designs that have a larger capacity and protected reservoirs to keep bird seed dry. Feeders with covers and with feeding stations underneath are ideal for a variety of birds. This also provides shelter for birds to feed. Select metal mesh or tube feeders for Nyjer seed.
Feeder Location: Hang feeders in areas that are more sheltered from winter elements such as closer to tree trunks, under covered patios or roof eaves. This will make them easier to refill and keep birds protected while they feed.
Protect Feeders From Pests: Birds are not the only hungry wildlife this time of year. To ward off unwanted visitors, take steps to squirrel-proof feeders and surround the area with cages or fences. Take feeders in at night if all else fails. Avoid excessive ground-feeding that can attract smaller pests.
Top Winter Bird Feeders
Tube Feeder: If you are going to put out just one bird feeder, a tube feeder is the way to go. Tubes keep seed clean, dry, prevent bird droppings from getting in the seed and reduce squirrel foraging. Perches on tube feeders are usually smaller attracting smaller birds and discouraging larger ones.
Hopper Feeder: A hopper or house feeder dispense seed into a tray at the bottom of the hopper aided by gravity. These feeders keep seed clean, dry, and readily available even in snowstorms. If you’re looking for a hopper feeder made of wood, weather-resistant cedar is a good choice.
Platform Feeder with Cover: Platform feeders attract a variety of birds due to their easy access to seed. For winter, place platform feeders where there is some shelter from the elements or opt for one that has a roof structure.
Bird droppings and wet weather can cause seed to spoil more so than other feeders. It is important to keep feeders clean on a regular basis, daily if possible. Replace seed every few days or immediately after wet weather to avoid an unhealthy environment for your feathered friends. Only fill enough for a few days’ worth to ensure seed doesn’t spoil due to unpredictable winter conditions.
Ground Feeding Table: This screen-bottomed tray sits a few inches off the ground and is easy to clean and disinfect. Select designs that have covers to prevent snow from accumulating over the seed and ones that are surrounded by wire mesh to keep out squirrels and large birds.
Place the feeder in an open location, at least 10 feet from the nearest shrub, to give birds a chance to flee in the event of predators. Ground feeders are especially favored by doves, juncos, sparrows, towhees, goldfinches, and cardinals. Only fill enough for a few days’ worth to ensure seed doesn’t spoil due to unpredictable winter conditions.
Suet Feeder: Winter is the perfect time for hanging suet because the cooler temperatures keep suet from spoiling. Place suet blocks in cage feeders during winter to help prevent moisture build up. Place in trees that provide some shelter from poor weather.
Nyjer Feeder: These feeders, also known as “Thistle Feeders”, are specifically designed to dispense ‘thistle’ seed. They feature tiny holes making seed available only to small-beaked birds. Select metal mesh designs or tube feeders as these styles are better for winter use.
Bird Houses & Roost Boxes: Though not exactly bird feeders, bird houses and roost boxes provide a place for birds to escape poor weather conditions and keeps them close to their reliable food source.
Related Articles
Winter Backyard Bird Enthusiasts
Feeding Wild Birds in Winter
Best Winter Bird Seed
How To Properly Store Bird Seed
Keep Feeding Areas Clean and Maintained
Keep Backyard Birds Healthy in Winter

Winter Backyard Bird Enthusiasts
From the beginning of December to the end of February it is an exciting time for backyard bird enthusiasts and bird watchers alike. It’s a time when most migratory birds and passing migrants have flown south, and more northern migrants arrive to spend the season in milder temperatures. There are also some bird species that live in the Maritimes year-round that are more easily seen in colder temperatures than in any other season.
This seasonal transition makes for an especially rewarding time for backyard bird enthusiasts, because these winter birds are only seen during colder months and welcome the opportunity to find an easy snack at feeders.
As the colder weather approaches, prepare your backyard for winter birds by:
- Inspecting and cleaning feeders.
- Cleaning the surrounding area where birds perch and feed.
- Switching to winter friendly bird feeders.
- Switching to winter bird seed that is higher in oil and calories.
- Providing a fresh water source.
- Adding windbreaks and other shelters for birds to escape poor weather.
For a more detailed look at each of these tips, see our related articles below.
Related Articles
Feeding Wild Birds in Winter
Best Winter Bird Feeders
Best Winter Bird Seed
How To Properly Store Bird Seed
Keep Feeding Areas Clean and Maintained
Keep Backyard Birds Healthy in Winter

Watch our Tick Webinar Recording with Dr. Nicolette Faraone
We were fortunate to have Dr. Nicoletta Faraone, PHD. join us for a tick webinar to teach us all about tick safety and prevention! Dr. Nicoletta Faraone is an assistant professor at the Chemistry Department, Acadia University, Wolfville (NS). She teaches Biochemistry and Natural Product Chemistry. Her research focuses on studying tick chemosensory system, how ticks detect odours from hosts and how they respond to repellents. She designs and develops novel essential oil-based tick repellent products. In this one hour long webinar, customers had the chance to learn from Dr. Faraone and ask their questions. If you missed the live webinar, you can watch the recording below!
For more Expert Advice on products we carry to protect your pets, click here.


Keep Tick Safety Top of Mind This Spring and Summer
Its spring, which mean it is tick season here in the Maritimes. As the weather warms up, it’s important to remember that ticks will be more present within our communities and the places we love to adventure with our pets. Whether you are letting your dogs out in your yard, or heading to a local trail to get some exercise, you will need to be diligent about checking for ticks on both you, and your pet. Here are a few Tick Tips to ensure you and your pet’s safety this season!
Where ticks are present:
Ticks are small so it can be difficult to spot them not just on your pets, but where you are outside that they could be hiding. The most popular ticks in our area are called Blacklegged ticks, or commonly known as deer ticks. Ticks can be as small as the size of a poppy seed, so be vigilant! Typically, ticks can be found in tall grass, woods, shrubs, walkways and trails.
Ticks can also be found in your own backyard. In fact, most people contact Lyme disease from ticks within 100 yards of their own homes in areas with woods or tall grass. If you are doing some spring cleaning around your yard, be careful of the shrubs, sticks and trees when you are doing your chores in preparation for the summer.
Pet owner tip: if you are doing yard work, wear long pants and boots and wear clothing that is light in colour so you can easily identify a tick. Spray yourself with repellent and remember to take a hot shower once your yardwork is complete.
Where to check your pet for ticks:
The more frequently you check your pet, the more likely you are to locate ticks before they fully latch onto your cat or dog. Here are a few places they like to hide on your animals.
Ears: In and around the ears are popular places for ticks to hide. They could even be inside your pet’s ears! If your dog has floppy ears, be extra vigilant of this area.
Between the toes: Check in between each toe of your pet, on each paw. Ticks like to burrow in between these areas as they are drawn to dark, warm places.
The tail: Naturally your pet is going to be happy when they are out adventuring, but this makes for some extra wagging in areas where ticks hide. Check at the base of the tail and your pets groin for ticks.
Under the collar: Your pet’s neck is another likely place for ticks to latch onto. It can be extra difficult to spot ticks in this area, especially with pets who have lots of fur or scuff on their neck area. When it’s safe, remove your pet’s collar and check for ticks underneath it where they might be burrowed.
Under back and front legs: while this may seems standard, it’s important that this area is checked as carefully as other furry areas on your pet!
How to prepare for tick season and protect your pet:
Preparing your tick season means beginning with preventatives for your pet. It’s important to talk to your vet before choosing a treatment to best suit your pet’s needs. At Feeds’n Needs, we carry many preventatives, topical treatments (Infestop, Advantix, and Advantage products), oral preventatives, sprays (Zodiac and Atlantick) and many tick accessories (tick removing tools, shampoos, etc.) in-store! Ask our Experts for help regarding tick safety on your next visit, and remember to always check your pet for ticks!

What Type of Garden Best Suits Your Needs?
Are you interested in starting your own garden, but aren’t sure where to start, and what type of garden would work for you? Here we’ll share information about different types of gardens, and hopefully help you choose the type that best suits your needs!
Edible Gardens
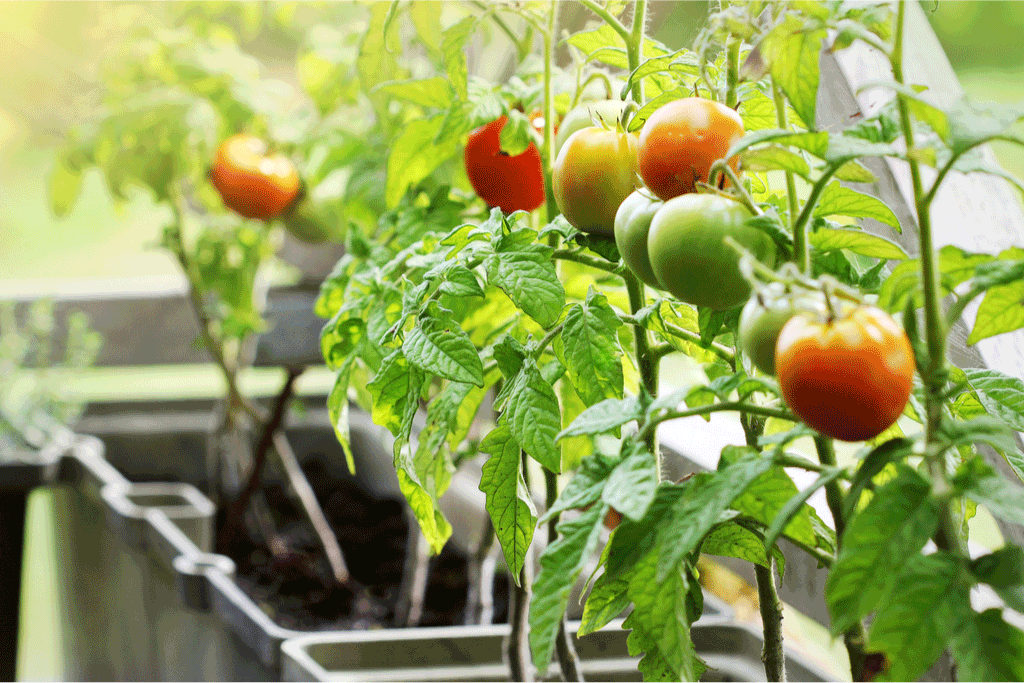
Edible gardens are perfect for those who want to grow their own fruits and vegetables! The great thing about this kind of garden is that it doesn’t have to be complicated and you can do it in containers that you already own! If you are in an apartment and have a balcony, you can still grow edible plants like tomatoes, herbs, and even edible flowers.
Urban Gardens
Urban gardens are great for those who have access to a small years, balcony, or roof. They are gardens that don’t take up much space, but still allow you to perk up and beautify a small space to grow certain fruits or veggies. Be cautious of rooftop gardens, as you must take into account the weather conditions that could vary depending on the height of your building. Choose plants that can thrive in light, strong winds, and heat.
Environmental Gardens
There are many types of environmental gardens, you just need to find the type that interests you the most and matches your gardening goals!
Pollinating Gardens
Pollinating gardens contain a multitude of plants, flowers and shrubs which attract the insects and animals responsible for pollination. Some familiar friends you may find in these types of gardens are garden butterflies, bees and birds, to name a few.
Wildlife Garden
The wildlife garden attracts small animals and insects and allows them to survive on the plants and flowers found there.
Japanese Gardens
Japanese gardens, unlike other types of gardens, remains simplistic in its design. Water is an important part of this type of garden, such as streams or ponds. If you have a large lot, you could even add bamboo features like a bridge or create stone trails for some extra design added to your space! These gardens are relaxing, and will allow you to have a zen space only a few steps from the house.
Water Gardens
If your property allows, a water garden can add a peaceful and original touch to your backyard. Whether it’s a small pond, or a waterfall, you will be sure to find many kinds of moisture-loving aquatic plants, like water lilies and cattails. Not all fields however can accommodate this type of garden of course. It’s important to check with your municipality to make sure the project is doable !
Tropical Garden
Tropical gardens are surprisingly easy to create and feature many famous plants, such as Geraniums and Cannas or even palm trees (although you likely aren’t seeing these anywhere in the Maritimes). If you want a colourful and original garden, this might be the perfect type for you! However, make sure you have the space to plant several species of plants for added diversity to your garden.
Woodland Gardens
A woodland type of garden consists of a wooden garden which groups together trees and wildflowers. It is the perfect kind of garden if you have a rather shady space because the plants they have thrive well without direct sunlight.
In conclusion, there are a ton of different types of gardens, you just need to choose the one that you find yourself most passionate about and that best meets your needs and gardening goals! Of course, when you are developing a garden, it’s important to take into account the space you have available and the type of soil on your land. Budget correctly to ensure you have the materials required for whichever design you choose. Big or small, we have everything you need to get equipped with starting and maintaining your garden! Ask one of our Experts in-store to know how we can get you started!
