
National Pet Fire Safety Day takes place every year on July 15. It’s a day to learn how to keep your pet safe during a fire. Pets are part of the family, so it makes sense that we would dedicate a day to keeping them safe during one of the scariest situations we can imagine.
It is important to have a plan for your pets and your entire family, along with making your home “fire safe” for everyone! Make sure you have working smoke detectors and fire extinguishers to protect your whole family. Take these eight additional steps to help keep your pets safe:
1. Prevention:
Never leave your pets unattended around an open flame such as a candle or fireplace. Consider replacing your candles with flameless ones. If your dog knocks it over or your cat’s tail brushes it, they’ll be safe. They offer the same ambiance as a real candle, with fewer hazards. It may be best to eliminate the unnecessary open flames in your home entirely.
If you have a fireplace, be sure to watch your pets around them. Most will stay away, but some are curious and may get too close. Toys or other flammable items can accidentally be pushed too close to a fire which could quickly ignite.
2. Keep Your Pets Away From Hazards:
Cooking equipment is a major cause of pet-originated fires. Pets who jump on counters can hit a stove knob, turning the gas on or turning up a flame. If you have a curious pet or one who climbs on top of your counters, consider using knob covers or remove the knobs when you are not around to monitor your pet safely. Keep young or untrained pets away from potential hazards by crating them or securing them in a safe area with a baby gate.
If you know your pet tends to chew on things, make sure to hide loose wires that could potentially cause a fire, and turn them off and unplug them entirely when they are not in use.
3. Make Sure Emergency Responders Know You Have Pets:
A pet alert sign near each entrance to your home is an important pet fire safety step. It tells emergency responders that one or more pets are in your home and might need help. If you crate pets when you are away or sleeping, keep them near a door, so it’s easy for firefighters to find them after entering your home. You can also keep your leashes by the front entrance so they’re visible to first responders who may enter.
4. Make A Pet Fire Safety Evacuation Plan:
Every family should have a fire evacuation plan and do a practice fire drill at least twice a year. Include your pets in your fire evacuation plan and have leashes or carriers at easy access.
5. Consider Monitored Smoke Detectors:
For pet fire safety you may want to think about upgrading your smoke detectors. Consider using monitored smoke detectors. They are connected to a monitoring center so emergency responders can be contacted when you’re not home or at least send your phone a notification.
6. Know Where Your Pet Is Likely To Hide:
In case of a fire, your pet will probably be scared, especially if a loud fire alarm goes off. Know where your pet is likely to hide inside your home.
Unfortunately, if you can’t find them quickly, get outside and leave the door open for your pets to follow. Call for them to help them find their way and let firefighters know that pets are still inside.
7. Make Sure Pets Aren’t Lost During Evacuation:
A fire is a scary situation, and pets may run off. Another important pet fire safety step is ensuring your pets have a microchip before an emergency and that the information on the chip is up to date.
8. After A Fire, Watch Your Pet Closely:
If your pet acts lethargic or has trouble breathing, it could be a sign of smoke inhalation. See your veterinarian as soon as possible for any needed follow-up care.
Following these tips could help you prevent a fire or even save your pet’s life if an emergency occurs. Preparing ahead of time for pet fire safety can go a long way toward reducing risk. Spend some time this week developing your pet fire safety plan!
Sources: Pet Fire Safety: 8 Ways to Keep Your Pets Safe (bettercitiesforpets.com)

Water Safety For Dogs
Summer is here, and what better way to stay cool on hot sunny days than swimming. It’s a great source of exercise and fun for both you and your pup! Before you take your dog swimming, make sure you know how to keep things safe, especially since not all dogs know how to swim.
Here are some things to consider when swimming with your furry friend:
- Never leave your dog unattended while swimming. If you have a pool, keep your pet away from it when you are not swimming and fence it in if possible.
- Check the water temperature before you let your dog go swimming. Not all dogs can handle super cold water.
- Keep fresh drinking water nearby. Drinking pool, lake or ocean water can make your pet very sick.
- Check that the water is shallow and your pup can easily make it back to dry land. If you have a pool, show your dog how to get out using the steps.
- Thoroughly rinse your dog after swimming. Saltwater, chlorine, and lake algae can irritate or damage their skin and fur. Also, make sure to dry their ears completely to prevent any infections.
- Some dogs do well with life jackets. It’s a good idea to put a life jacket on your dog if you are on a boat or a dock. Make sure it fits them comfortably and that they still have full mobility. Visit your local Feeds’n Needs store with your pup, and our Experts can help with life jacket sizing.
- Never throw your dog into a body of water, especially if it is deep or has a current.
- Know your dog’s limits! Swimming is tiring, and a tired dog is more susceptible to drowning. Let your dog get out of the water to rest if you sense they may be getting tired.
- Remember, if they don’t want to go in, don’t force them. Try to keep it positive and stress-free on your pup. Make sure to know your dog. Some breeds are better suited for water than others. Breeds with short snouts such as pugs, English bulldogs and Boston terriers are not built to swim.
Dogs can have a lot of fun in the water, whether they love to swim or just love wading in the shallow water. Always remember that water safety for dogs is key while you and your pup have fun this summer!
Sources: Swim Safety for dogs | 24Petwatch

Road Trip Safety For Your Dog
While road tripping with your dog, their safety should be a top priority. Whether you’re driving a couple of kilometres or taking a long road trip, it’s important to have safety precautions in place at all times for your pet’s safety. Check out our tips to road trip safety for your dog. These tips will help keep your furry friends safe, secure and comfortable during your road trips so you both can enjoy the drive!
Keep them Buckled!
In order to keep your pup safe while on the road, the best thing to do is keep them properly restrained. Accidents can’t be foreseen, so it’s crucial to keep them protected at all times. Vehicles, unfortunately, don’t come with doggy seat belts, so during your next visit to your local Feeds’n Needs, ask our Experts what equipment is available and would be best for you and your furry friend. These are necessary to secure your dog and restrict them from harmful movement in the event of an accident. Prepare your pup for a safe road trip by taking them on short trips to town to get used to the safety equipment.
Pack the Essentials!
You never know what may happen on the road, so it’s good to have a first aid kit for you and your dog. Packing your pet’s food, water, treats, medicine, toys, and feeding bowls is also a good idea when going on a long drive. It’s a good idea to have something to keep your dog entertained and engaged, such as their favourite chew toy helping to keep them calm during the ride.
Wear your Dog Out!
A tired pup is often a more well-behaved one, so right before you plan to head out on your trip, take your pet for a long run or a visit to the dog park. This should help your dog feel more rested and calm. They may even sleep a portion of the drive. During long trips, it’s important to stop anywhere from 2 to 3 hours so your dog has some time to play and get some more energy out.
Don’t Let Them Overheat!
You should never leave your dog unattended in your car for any reason. Especially during the warmer weather, this can lead to heat stroke and even death. Be sure to pack water to keep your dog hydrated during your trip. Grab a portable dog water bottle from one of our stores before your next trip, making it simple to keep your pup hydrated during the drive!
These are just simple tips, but following them will help you have a safe road trip with your dog and one that you can both enjoy. If you ever have any questions, reach out to the Experts are your local Feeds’n Needs.

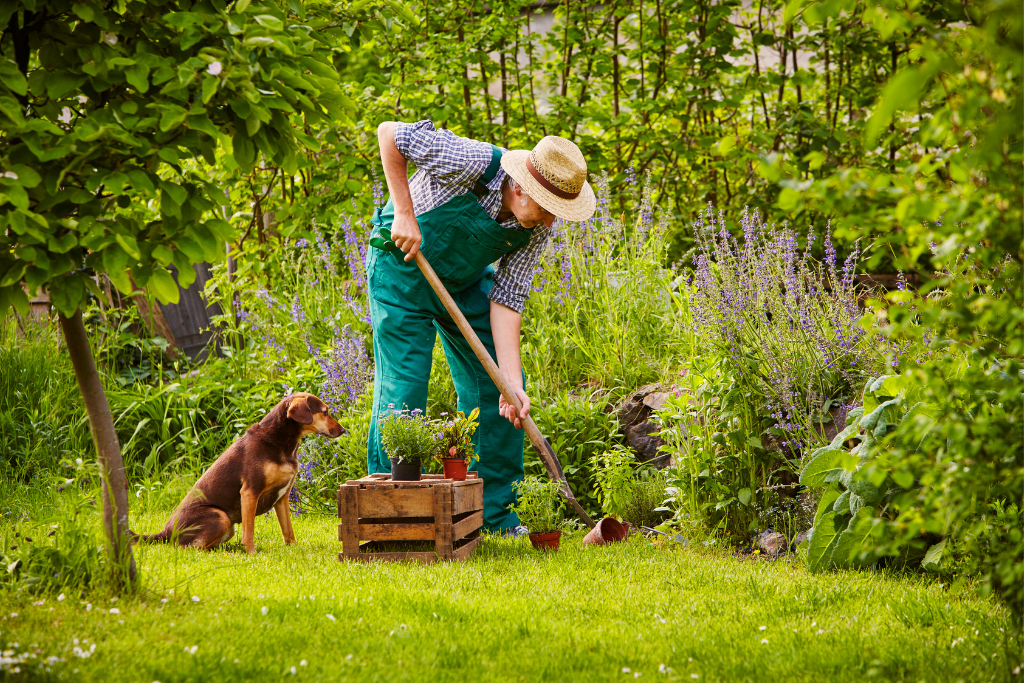
How to Successfully Grow a Vegetable Garden
Planting and maintaining your own vegetable garden takes time and care but is a fun, satisfying way to bring nutritious foods to your family’s table. If you are not sure where to start, below we share a step-by-step guide to growing a successful vegetable garden!
")
Step 1: Plan
Plan out your garden. Choose a spot that gets full sun, at least 6 hours a day (8 to 10 hours is even better). Start small if this is your first garden; anything over 1 m x 1 m may require more time than you are prepared to commit. After your first successful year of gardening, you can always add to your garden to make it larger.
")
Step 2: Remove Rocks and Debris from Soil
Remove any rocks, roots or debris from your soil and use a garden fork or spade to break up the soil to a depth of at least 15-20 cm. Using the fork, add a layer at least 5 cm deep of Grampie’s Super Soil and work it in to help stimulate root growth and ensure that you get the very best produce and herbs in your garden.
")
Step 3: Plant Your Seedlings
Plant your vegetable or herb seedlings. Keep in mind how big your plants will grow, and plant taller plants on the north side of the patch. Ask your Feeds’n Needs Experts for helpful tips on spacing your seedlings depending on what vegetable you are planting. Inspect your garden for weeds, pests and diseases at least twice each week. Pull weeds by hand, identify any pests and use an appropriate pest remedy before the problem becomes serious. Be sure to remove any diseased plant parts promptly to avoid affecting others.
")
Step 4: Feed Vegetables with Fertilizer Every 2 Months
Feed your garden every 2 months with 6-12-12 fertilizer or 10-10-10 fertilizer. Alternatively, apply water-soluble fertilizer approximately once every second week. During your next visit to your local Feeds’n Needs, ask our Experts what water-soluble fertilizer they recommend for your vegetable garden!
")
Step 5: Water as Needed
Water slowly with very little pressure so that the water has a chance to sink into the soil rather than running off. Water the soil rather than spraying the leaves of the plants, ideally in the very early morning before the sun becomes intense. Depending on the temperature, wind, soil type, spacing and type of plants, watering is usually required every second day unless it rains. If in doubt, stick your finger into the soil past the first joint and water if it feels dry.
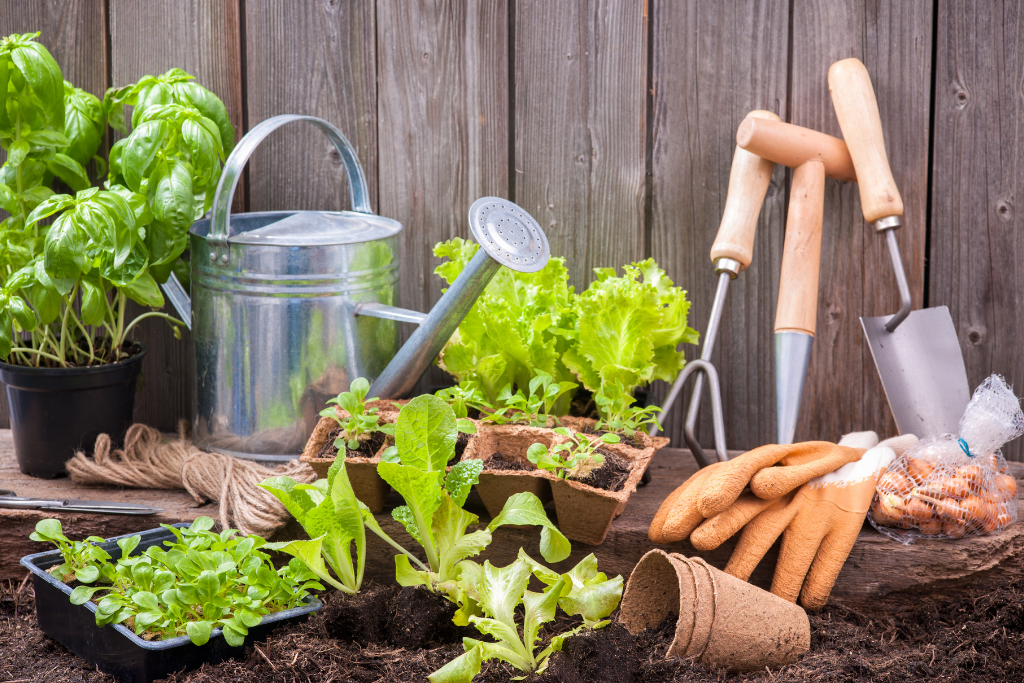
Materials you will need:
- Plants, vegetable seeds or bulbs of your choice
- Grampie’s Super Soil
- 6-12-12 Fertilizer or 10-10-10 Fertilizer
Tools you will need:
- Shovel
- Garden hoses
- Fork or Spade
Sources: How to Grow an Organic Vegetable Garden | The Home Depot Canada
Springtime Garden Pet Safety
Gardening season is upon us, and for us pet owners, that means we need to be aware of how to keep our pets safe from hazardous spring plants! There are few effective treatments for toxic plant ingestion, so it’s important to know the potential dangers spring plants can have on our furry friends.
Most common toxic spring plants:
- Tulips, Daffodils, Narcissus, and Hyacinths – The skin at the bottom of bulb flowers is dangerous to both dogs and cats, but they are especially toxic to dogs. Make sure your dog isn’t digging up the bulbs in the garden! If ingested, it can cause vomiting, diarrhea, and drooling.
- Lilies – These are highly toxic to cats. The pollen, leaves, stems, and even the water in a vase can cause kidney failure, even small ingestions such as 2-3 petals or leaves.
- Irises – These are considered toxic to both dogs and cats. All parts of the iris contain harmful components, but the bulbs are the most dangerous part. If your pet ingests an iris, it can cause vomiting, diarrhea, and drooling.
- Begonias – The underground stem can cause severe mouth irritation for both dogs and cats.
- Buttercups – These flowers can cause your pets to have an upset stomach if ingested.
- Crocus – The spring Crocus may cause gastrointestinal upset like vomiting, diarrhea, and drooling if any part of the plant is ingested by dogs or cats.
- Lily of the Valley – This plant can cause symptoms such as vomiting, diarrhea, a drop in heart rate, severe cardiac arrhythmias, and possibly seizures.
It’s also important to be mindful of fertilizers as these often contain bone, blood or feather meal which ingesting in large quantities can cause vomiting and diarrhea. Next time you visit your local Feeds’n Needs store, be sure to ask our Experts for advice on safe fertilizers to use as a pet owner! You can also keep your curious furry friend away from the garden by fencing it off.
Educating yourself about these springtime hazards will help you, and your pet enjoy your backyard with no worry!
Sources:
Springtime Hazards: Protect your Pets From Toxic Plants | 24Petwatch
Spring Dangers To Pets | Pet Poison Helpline

How To Sprout Your Own Seeds
Sprouting seeds is an easy way to start growing plants indoors in the springtime, then you can plant them in soil once the roots appear. If it is warm enough to plant outside, you can plant seeds directly into the garden soil.
What you’ll need:
- Ruler, small shovel or garden trowel
- Garden gloves
- Vegetable seeds
- Compost or garden soil
- Paper towels
- Plastic baggie
- Water marker
Planting Indoors:
- Lay 1 to 3 seeds on a square paper towel.
- Fold one side of the towel over the seeds and dampen the paper towel. Use a spray bottle if you have one—you don’t want it to soak it!
- Put the paper towel in a clear plastic baggie and seal it.
- Write the name of the plant and the date on the front of the bag. Put it in a warm, sunny spot.
- Keep an eye on it! Once roots appear, you can plant it in the garden or a pot in a sunny window.
Planting Outdoors:
- Find a space in the garden to plant your seeds. If it’s still too cold to plant outdoors, you can plant them directly into the soil in a pot kept in a sunny spot in your house.
- Look at the back of the seed packet to see how much room each plant will need. Use your ruler to see how many seeds you can plant in your area.
- Put on your gloves and mix some compost or bagged garden soil in with the soil in the ground.
- Dig a shallow line in the soil, then drop in the seeds. Gently cover with dirt and water the row.
- It may take a few weeks before you see any growth, but don’t forget to water and weed the planting area!
Be sure to write down when you first see roots, when the first leaves appear, which plants seem to be growing faster, and more as this will help you with future garden planting!
Sources: Sprout Your Own Seeds | Miracle-Gro Canada (miraclegro.com)
Garden Planning for Spring and Summer
Is garden planning on your to-do list this spring and summer?
Deciding what to grow in your garden is one of the most essential steps in gardening; sometimes, it can be the most challenging too. If you focus on the three main keys to success, you can’t go wrong: available sunlight, soil type, and climate.
1. Available Sunlight:
When trying to figure out what area you want to plant your garden, ask yourself, does it get at least 6 hours of direct sunlight per day? If it does, consider it a sunny spot; if it doesn’t, consider it a shady spot.
2. Soil Type:
Every plant prefers a specific type of soil. A great way to improve overall soil is to mix 3 inches of All Purpose soil into the top 6 to 8 inches of your existing garden soil.
3. Climate:
Climate is another crucial aspect to consider when deciding what to plant in your garden.
When discovering which plants fit your specific growing conditions, visit your local Feeds’n Needs store; they can provide helpful tips and tricks to help get your garden prepped for the growing season.
Here are a few plant types that suit some common growing conditions:
- Shade – ferns, hydrangeas, sweet woodruff, hostas, azaleas
- Sun – fruit trees, vegetables, daylilies, roses, ornamental grasses
- Heat – angelonia, coneflowers, sage, oregano, prairie natives, cactus
- Pots – annual flowers, bush-type edibles, herbs, perennials
Growing in containers is a great way to create custom growing conditions. Not only can you move them around to get more (or less) sunlight and choose to keep them indoors or outdoors, but you can also customize your soil.
The bottom line on choosing what to grow depends on how much elbow grease you’re willing to invest in keeping plants happy.
Sources: Making the Decision on What to Grow in Your Garden | Miracle=Gro (miraclegro.com).

Dental Health Tips For Your Cat
How often do you brush your cat’s teeth? It is suggested that owners should brush their companion’s teeth after every meal, or at least once a day to keep their dental health in check. Did you know that once a cat reaches the age of three, they’re more likely to experience issues related to their dental health? Check for signs of bad breath, drooling, lack of appetite or repetitive shaking and pawing at their mouth for signs of a potential issue. If left untreated, poor dental hygiene can lead to more serious conditions, including kidney and heart disease. Many owners find that putting anything in a cat’s mouth to be a tricky, squirmy process, so here are a few tips to keep in mind when thinking about your furry friend’s dental health.
It is important to get into a habit of checking your cat’s teeth and gums for problems – the sooner you start, or earlier in your cat’s life you establish these habits, the better and more cooperative and patient they’ll be during teeth brushing and check-ups. Start by gently lifting their upper lip to check for red, swollen gums, or tartar build up on their teeth for indications that it’s time for a check in at the vet.
Use a pet-safe, cat-friendly toothpaste. Let one of our experts help you find a toothpaste in-store that will keep your cat interested and distracting during the brushing and cleaning process.
When it comes to selecting a toothbrush for your cat, opt for a human baby-sized or pet toothbrush, or a rubber finger slip that goes over your finger that allows you to graze over their teeth.
Reward with some catnip throughout the process to make it a pleasant experience for your kitty. We carry many great brands that are specifically formulated and coated to clean your pet’s teeth while chewing. Greenies Dental Treats are a great option for this, as they freshen breath while the treats’ textured surface helps remove tartar buildup. Ask our Experts in-store which treats they recommend!
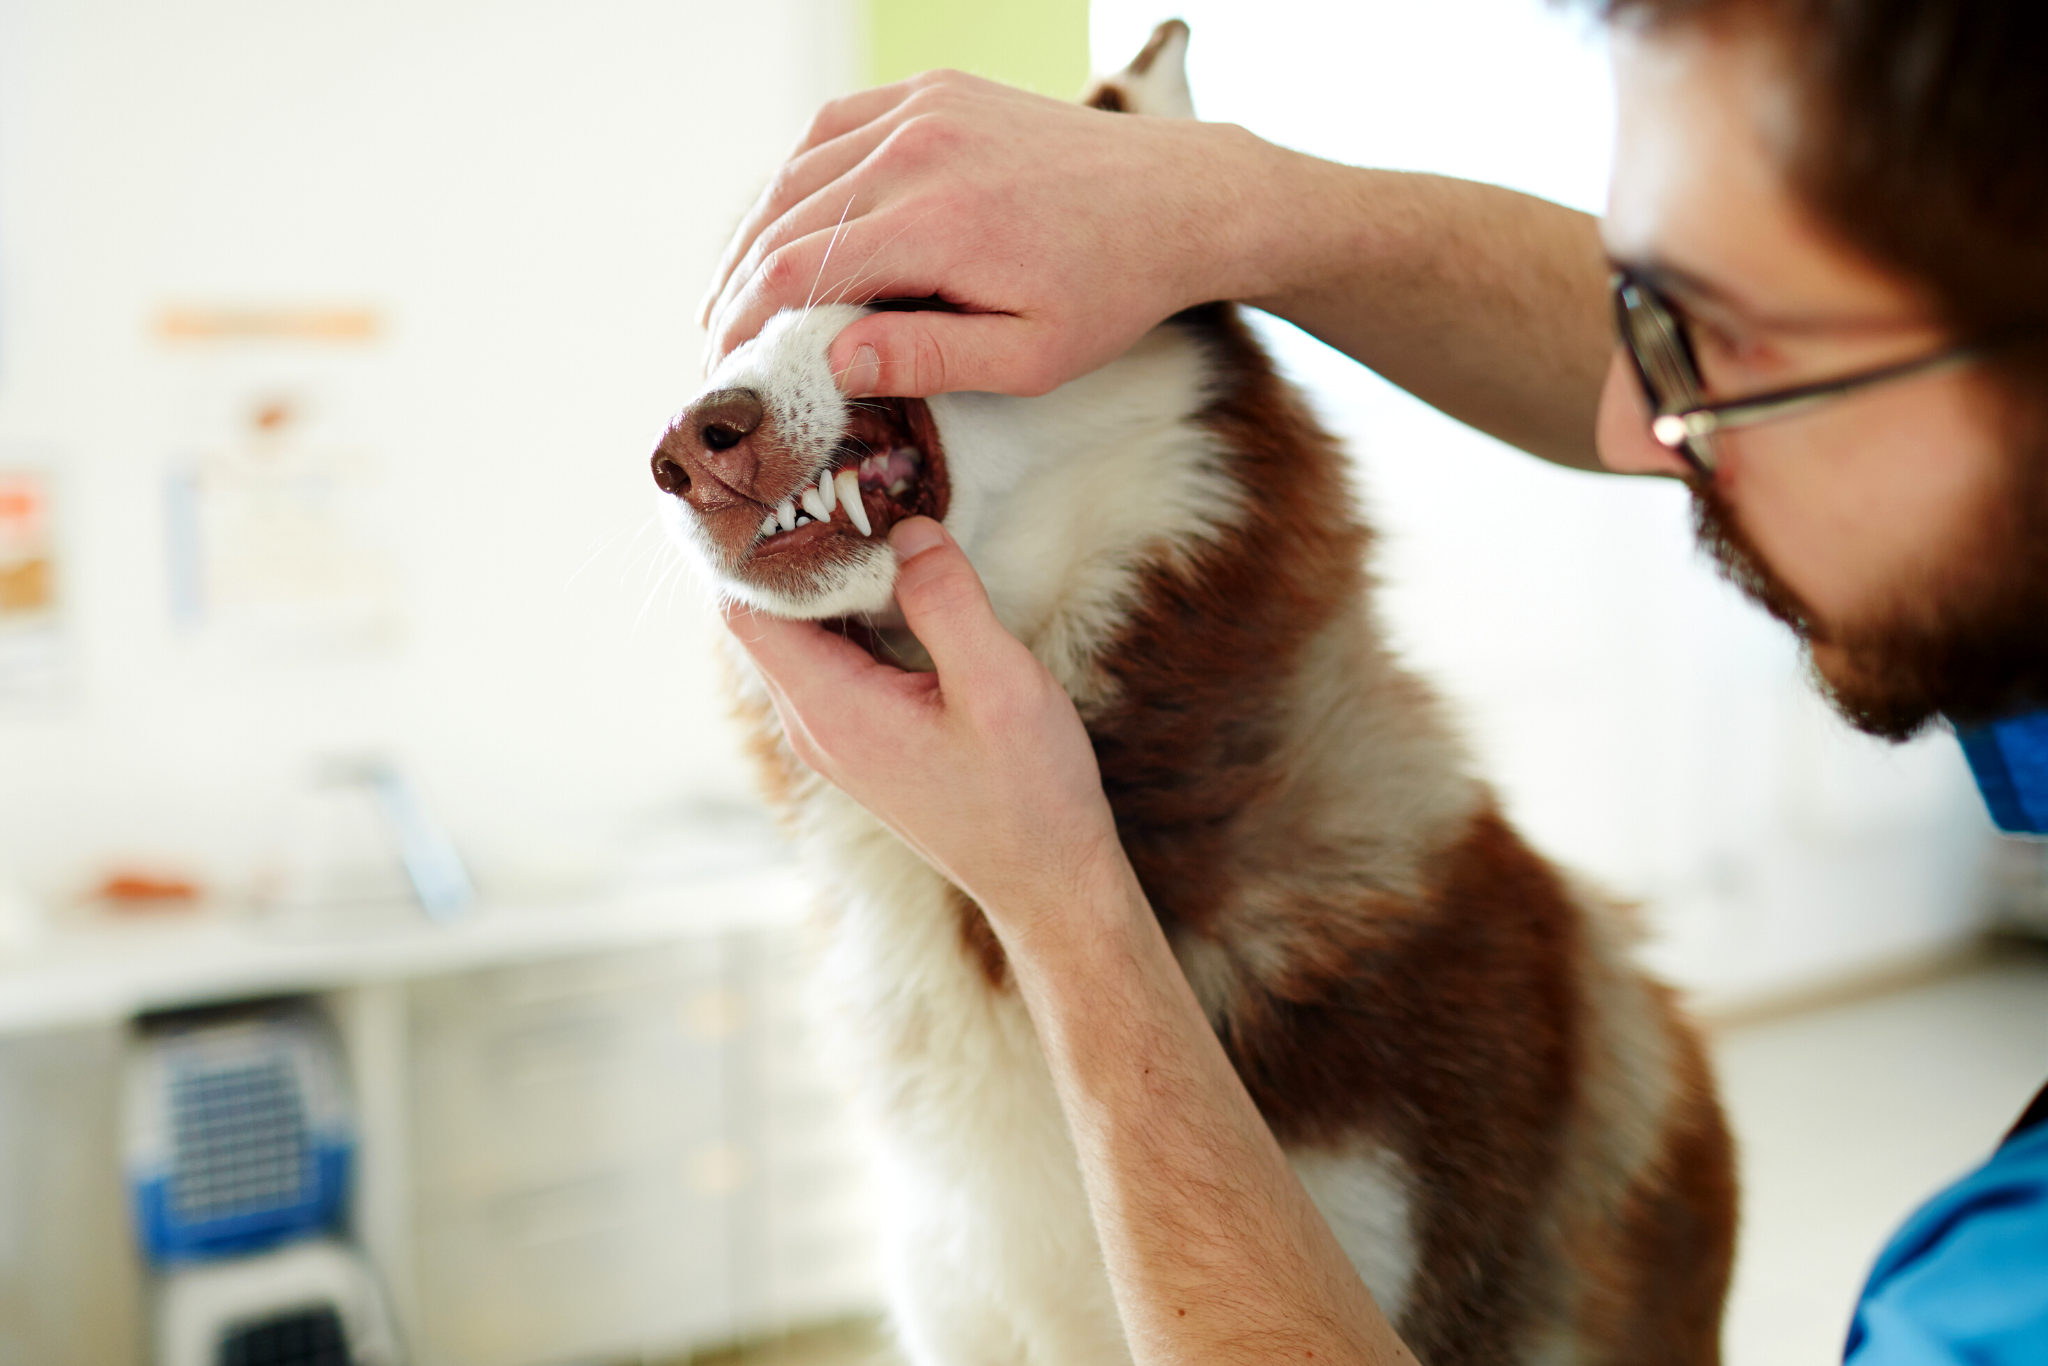
Dental Health Tips For Your Dog
We know the importance of brushing our teeth, but what about our pets? Did you know that dogs can get cavities, gum disease and plaque build up? Yep, just like humans! Your dog’s teeth should ideally be brushed after every meal to prevent tartar build up and protect against periodontal disease. If you haven’t gotten your dog accustomed to teeth brushing as a puppy, it’s not too late to start. Here are a few helpful dental health tips for your dog.
- Get your dog used to having their mouth open when you need to check their teeth or mouth. The more you do this, the more patient and calm your dog will be when brushing. It might be helpful to offer them a treat for good behaviour when they let you do this.
- Head to your local Feeds’n Needs and ask our Experts to help you pick out a dog-friendly toothpaste. This is an important step to take, as human brands contain fluoride which isn’t healthy for your pet to swallow and can be toxic. Many toothpaste for pets come in a variety of flavours, some similar to their favourite treats, such as beef, chicken, bacon and more.
- Pick a soft toothbrush for your dog, to ensure their gums don’t damage during brushing. There is a large selection of options, but opt for one with an angled tip, making it easier for you to reach the back of your dog’s mouth. Many pet owners use toothbrushes made for babies, as they are smaller and less intrusive in your dog’s mouth. If your dog is used to having your fingers in their mouth, you could consider purchasing a finger brush slip that can go over your index finger and get the job done!
Pro tip: If your dog is fussy when brushing, don’t worry too much about brushing the insides of their teeth as their tongue does a great job of keeping the inner sides of their teeth clean throughout the day. - Pick up some dental treats and kibble for your pet to help protect against disease. Greenie’s Dental Treats are a perfect choice for both dogs and cats, as they freshen breath while the treats’ textured surface helps remove tartar buildup. Ask our Experts in-store which treats they recommend!

Best Winter Bird Seed
Backyard birders should provide bird seed that is high in protein, oil, fat, and calories because higher quality food gives winter birds the most energy for keeping warm during colder weather. Offer a variety of food in different feeders to increase the size and diversity of your backyard visitors.
Keep an eye on your backyard winter flocks and adjust food supplies as needed. Limit mixes with fillers like red or golden millet, flax seed, and rape seed because winter birds consume the most nutrient rich food first, these fillers will most likely end up on the ground attracting unwelcomed critters.
Sunflower Seeds
Black Oil Sunflower Seed: Black oil sunflower seeds top the list for winter feeding. These sunflower seeds attract a variety of bird species including black-headed grosbeaks, chickadees, house sparrows, northern flickers, and song sparrows. Unlike striped sunflower seeds, black oil sunflower seeds have a thinner shell making them easier for smaller birds to break through them. These seeds are rich in oil and a high source of calories, making them a popular feeder option year-round.
Offer black oil sunflower seeds in hopper feeders, wide-mouthed tube feeders, broad mesh feeders, open trays, dishes, and platform feeders.
Striped Sunflower Seed: Striped sunflower seed are a great source of fat and oil. The hulls on striped sunflowers are thicker and harder than black oil sunflower seed. This seed is popular with larger bird species such as cardinals, blue jays, and grackles.
Offer striped sunflower seeds in hopper feeders, wide-mouthed tube feeders, broad mesh feeders, open trays, dishes, and platform feeders.
Hulled Sunflower Seed: Hulled sunflower seed is popular with songbirds including finches, titmice, chickadees, sparrows, and cardinals. These seeds are rich in oil and a high source of calories, making them a popular feeder option year-round.
Offer hulled sunflower seeds in hopper feeders, wide-mouthed tube feeders, broad mesh feeders, open trays, dishes, and platform feeders.
Other Bird Seeds
Safflower Seed: Safflower seeds are white seeds and a favorite among doves and cardinals, though other birds will also feed on safflower seeds if sunflower seeds are not available. This seed is somewhat bitter tasting making it a good choice to detract unwanted critters and feeders with a pest problem.
Offer safflower seeds in hopper feeders, wide-mouthed tube feeders, broad mesh feeders, open trays, dishes, and platform feeders.
Nyjer Seed: Nyjer seed is rich in oil, fat, and protein. It is a favorite among small birds including siskins, goldfinches, redpolls, and juncos. Quail and larger finches often feed on the ground beneath Nyjer feeders, cleaning up spilled seed. Nyjer is more expensive compared to larger seed but has good economic value due to its lack of waste.
Nyjer (or Thistle) seed is very light and best offered in feeders with small openings. Narrow-mouthed tubes and metal or nylon mesh feeders are ideal.
Suet Blocks: Suet blocks are a great energy source for backyard birds particularly in colder temperatures. These densely packed fat and seed blocks give backyard birds extra energy reserves to keep them warm and refueled during cooler weather. There are a variety of birds from chickadees to woodpeckers that enjoy this satisfying snack.
Winter is a perfect time for hanging suet feeders as the colder temperatures keep suet from turning rancid. Suet blocks can be hung from trees (sometimes in onion bags or half inch hardware cloth basket) or in cage feeders.
Winter Treats
Cracked Corn: Cracked corn is popular for large ground-feeding birds such as starlings and grackles, as well as pheasants, wild turkeys, and ducks. It has a good source of oil and starch, is inexpensive and can be used to tempt larger birds away from more expensive seeds.
Offer cracked corn in a variety of ways including large platform or dish feeders, sprinkled directly on the ground, or mixed in with other seed.
White Proso Millet: White proso millet is a grass seed that is particularly popular with small birds. Millet is high in starch, protein, fiber, and fat, making it a great energy source for small birds in winter. It is particularly favored by towhees, sparrows, finches, juncos, and buntings among others.
Offer millet in small tube and hopper feeders, open platforms, or dish feeders.
Nuts: Nuts in their natural state are packed full of fat and protein, providing birds with plenty of energy to generate more body heat. Woodpeckers, blue jays, chickadees, titmice, nuthatches, cardinals, and finches are among some of the frequent flyers that will enjoy this tasty treat. Ensure nuts are deshelled and unsalted, as salt is highly toxic to wild birds. It is advisable to purchase nuts from a pet store as bird feed promoted for wild bird to guarantee nuts do not contain any harmful ingredients.
Offer nuts in open platforms or dish feeders, wire mesh feeder for peanuts, or sprinkled on the ground.
Related Articles
Winter Backyard Bird Enthusiasts
Feeding Wild Birds in Winter
Best Winter Bird Feeders
How To Properly Store Bird Seed
Keep Feeding Areas Clean and Maintained
Keep Backyard Birds Healthy in Winter
