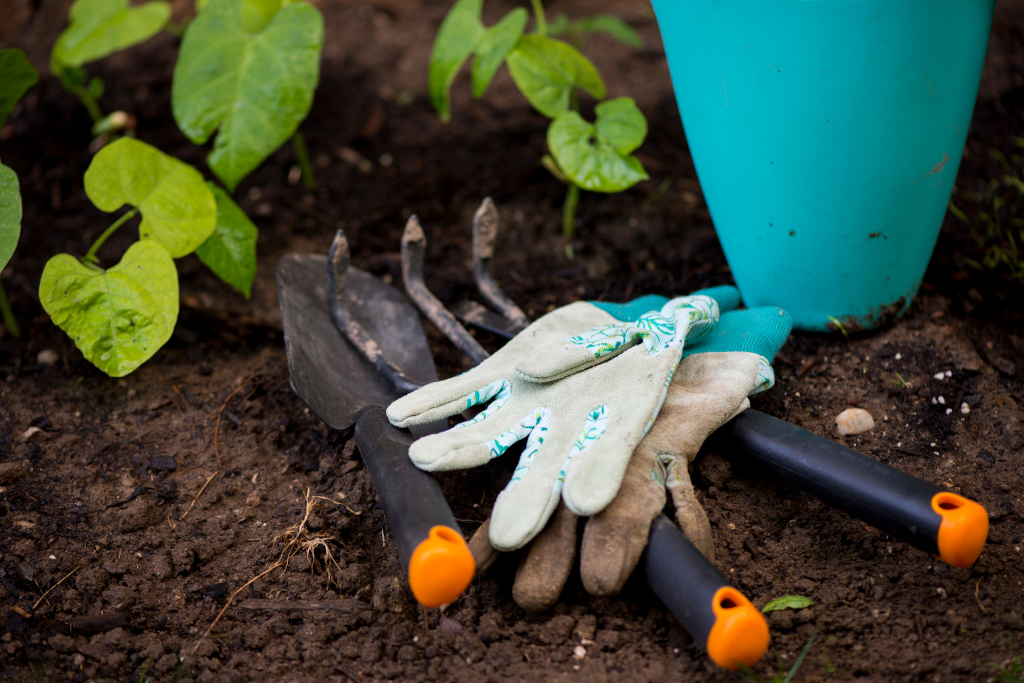
If you’re new to gardening, you may be wondering where to start. Before you can plant your garden, it’s helpful to have all the essentials you’ll need to ensure that your garden’s preparation, maintenance and harvesting are easy and hassle-free. Our list of the top 12 essential gardening tools is an excellent guide for first-time gardeners looking for a place to get started:
Gardening Gloves:
Keeping your hands clean, dry, and safe while you work. A good pair of breathable and waterproof gardening gloves is a must-have for every new gardener.
Garden Hoe:
A garden hoe is a useful tool for cultivating the garden, stirring up and mounding soil, and dislodging weeds. You can buy multiple types of garden hoes, each better suited to a specific task.
Garden Fork:
This tool comes in handy when getting your vegetable plots ready for planting. Garden forks come in different shapes and sizes but are generally used for breaking up stony soil, aerating sod and digging up root crops.
Shovel:
Shovels serve many purposes when gardening or working around the yard. A sturdy, long-handled shovel is perfect for digging large holes, moving and turning soil, digging out perennials to divide or transplant, and so much more. This is one tool you’ll definitely want to have on hand!
Garden Rake:
A long-handled tool with a wide head and teeth on the end, a garden rake works well to break down soil into a fine tilth that’s best for planting seeds. These rakes are also useful for getting rid of debris in your soil.
Spade:
Garden spades are essential tools for landscapers and come in handy in the garden, too. Used to break through ground and chop through tree roots and tough soil. Spades are helpful when excavating gardens, removing clumps of grass or roots, and cutting garden margins. These tools can also be used for soil aeration and turning soil.
Hand Trowel:
An invaluable tool in the garden, hand trowels are perfect for digging small holes for seeding and transplanting, turning small amounts of soil, and digging up weeds. Try finding a trowel with depth measurements to help you out when planting!
Hand Cultivator:
While these tools are available in various sizes, keeping a small handheld cultivator in your gardening tool kit will be helpful when you first start out. Great for reaching smaller areas where large tools won’t fit, hand cultivators have teeth that are perfect for pulling up pesky weeds between plants and digging or breaking up soil.
Pruners:
A good pair of hand pruners is perfect for trimming small branches, cutting through roots, and dividing root balls. There are various hand pruner options, with certain types better suited for specific tasks, and some even designed to minimize muscle strain and discomfort while using them.
Scissors:
A good, sharp pair of scissors serves many purposes while working in the garden. You can use them to deadhead flowers, harvest vegetables, snip herbs, cut twine or ties holding up plants and even cut open packages of seeds or fertilizers! The uses for this tool are endless!
Zip Ties or Twine:
Useful for securing plants to a support system like trellises, stakes, cages, fences, etc.
Hose & Watering Can:
Once you plant your garden, watering your crops as they grow is a daily task. A garden hose and nozzle with multiple watering settings are essential to ensure that your plants get the water they require to grow. A watering can is also beneficial to supply water to areas where your hose may not reach.
Having the proper tools on hand will make your time in the garden more efficient, precise, and safe while ensuring your plants’ health and maintenance. Stop by your local Feeds’ n Needs to view our selection of various garden tools, Vesey’s seeds, soils, and fertilizers. Let our Experts answer any questions about getting started in the garden!
For more expert advice on getting your garden started, check out our related blogs:
Garden Planning for Spring and Summer
Small Animal Dental Health
As responsible small animal owners, it’s our job to educate ourselves on the proper care needed to ensure our pets’ health and well-being, including taking care of their dental health.
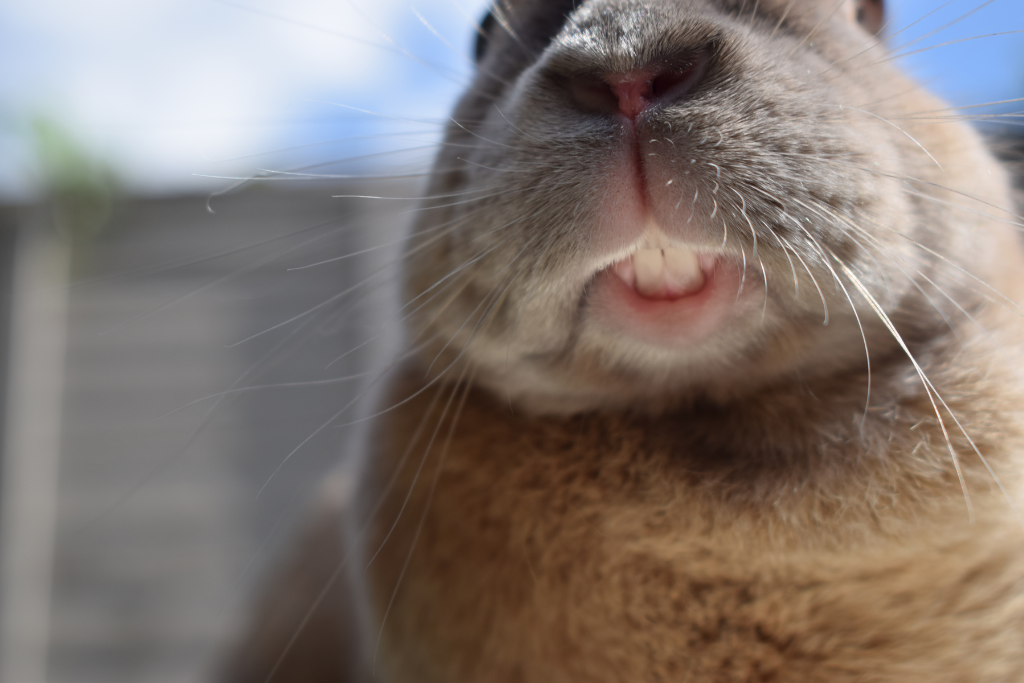
Did you know many small mammals, such as rabbits, guinea pigs and chinchillas, have open-rooted teeth? Meaning that throughout their entire lives, their teeth never stop growing! Because of this, these animals are more at risk of acquiring painful dental issues such as tooth overgrowth, abscesses in the mouth, and malocclusion (misalignment of the teeth).
Early Detection is Key
Because they are prey animals, it’s in the nature of our small pets to hide any signs of pain or illness they may be experiencing. This can make early detection difficult, so taking your small pets to be examined by a veterinarian at least once per year is recommended. A vet specializing in exotic pets will be able to thoroughly examine your pet and identify any issues that should be treated immediately to ensure your pet’s good health.
Between checkups, it is important to familiarize yourself with the normal appearance of your pet’s teeth and know what symptoms or behaviours could indicate possible dental issues.
Symptoms to Watch For:
- Noticeably overgrown teeth
- Difficulty chewing or dropping food from the mouth
- Watery eyes, nasal discharge or drooling from the mouth
- Weight loss
- Reluctance or refusal to eat
- Reduced grooming and/or bald patches of fur
- Visible signs of pain (i.e., hunching in a corner, grinding teeth, etc.)
Prevention
Thankfully, most forms of acquired dental disease in small animals are preventable with proper diet and care. For small herbivores like rabbits and guinea pigs, a diet that lacks free-choice hay is arguably the most common cause of these dental issues.
- Hay vs. Pellets – Because hay is high in fibre and stimulates natural chewing and dental wear patterns, various grass hay options should always be available to your herbivorous animals. While many pet parents still consider hay more of a treat for their small pets, at least 75% of their diet should be made up of it, with fortified pelleted food being fed daily in a measured amount (following the manufacturer’s direction.) We offer a variety of grass hay and pelleted foods to provide your small pets with the proper diet they require.
- Leafy Greens and Vegetables – Supplementary foods such as dark leafy greens and vegetables have a coarse consistency, which will help your small animals keep their teeth worn down and should be offered to them in a limited amount daily. Ensure that the vegetables or greens you give your pet are safe for their particular species.
- Chew Toys – Besides providing a proper diet, species-appropriate chew toys should also be available to your small pets. Toys and chews made from woven hay, untreated wood, dried sticks, or cardboard provide excellent opportunities for your pet to wear down their incisors while offering them enrichment and mental stimulation. We have a great selection of safe, natural chews to keep your pet busy while keeping their teeth healthy!
Visit one of our Experts at your local Feeds ‘n Needs store to see our great selection of small animal essentials and ask any questions you may have about proper dental care. We are always eager to help!
Tips to Prevent Leash Pulling
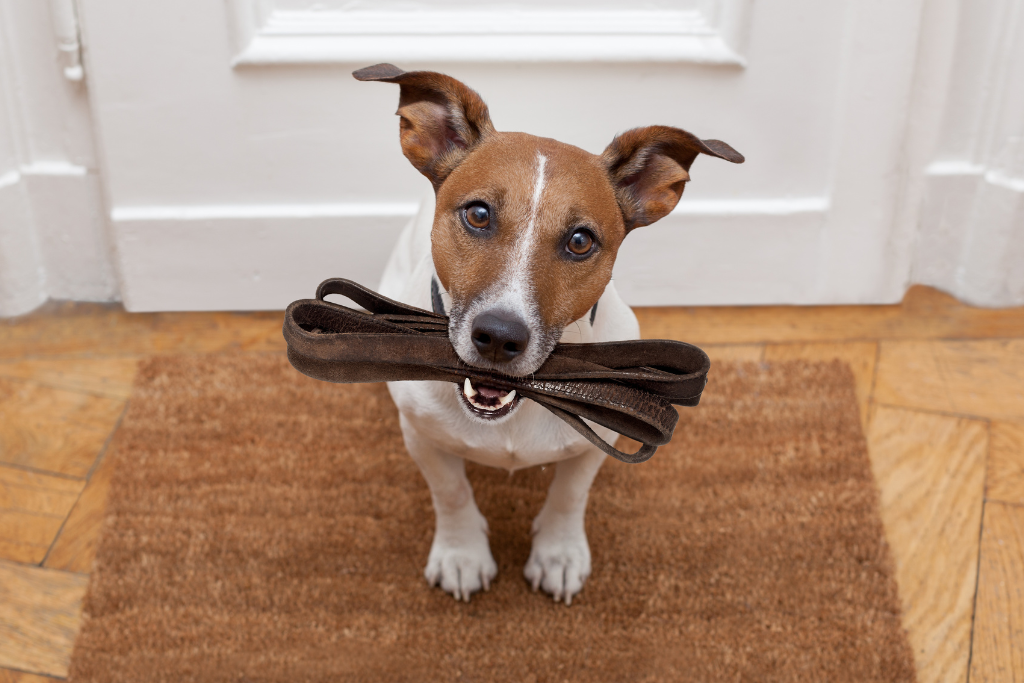
Does your dog constantly pull on their leash during walks? Has it made walking with them become a dreaded task? We’ve been there too, and we’re here to help! Training your dog to have good leash manners can be difficult and time-consuming, but it is never too late to start. With the right tools, tricks, and patience, even the worst pullers can be trained to walk with a loose leash!
Invest in Equipment
Having the right equipment to walk your dog can make a huge difference when it comes to pulling. If you train your dog to stop pulling on the leash during walks, investing in quality, no-pull collars, harnesses, and leashes will be key to your success.
No-Pull Harnesses: Fitting your dog with a harness with 2 points of connection helps prevent the dog from pulling all their weight forward and putting you both out of balance. Connecting a leash to the dog’s chest and back enables the handler to “steer” the dog in their desired direction and encourages the dog to walk in balance with you. Products such as Halti’s no-pull or front control harnesses paired with their versatile Halti training lead have proven to be successful for many of our customers looking to teach their dogs to stop pulling.
Headcollars: These collars are built with one loop that goes around your dog’s nose and a strap that secures around the back of their head. A leash with two clasps to connect to the collar and the noseband is designed to discourage pulling by giving you control of the direction in which your dog walks. With the leash attached to the dog’s noseband, handlers can create tension when the dog tries to pull forward and redirect their attention back to where you want them to go. Gentle Leaders and Halti Headcollars are created to do this while ensuring your dog’s comfort.
Training Tips
Location & Frequency:
- Begin your training sessions in a quiet area with minimal distractions. Going for short walks daily rather than a couple of long ones throughout the week will be beneficial, as repetition is important in successful training.
- Try to pick a time for your walks when your dog may have less energy, such as later in the evening.
- The less excitable your dog is during your training sessions, the more responsive they will likely be to your instruction.
Treats:
- Having treats on hand to reward your dog when they follow your commands and behave how you want them to is a useful tool to enforce a positive association between them and good leash manners.
- Oven Baked Tradition dog treats are soft and chewy treats that make the perfect reward during training sessions. They are low in calories and have several irresistible flavours to choose from. Find these treats and more at your local Feeds ‘n Needs!
Attention & Focus:
One of the most important things to incorporate into dog training is demanding your dog’s attention. When going for a walk:
- Remain still and quiet until your dog gives you their attention. Once they are paying attention to you, you may begin walking.
- If your dog moves too far ahead of you, stop walking before they put tension on the leash and wait for them to return their focus to you.
- Offer them a treat when they give you their attention or to help encourage them to walk beside you.
- Consistency and patience are key to this method.
Verbal Commands:
Before you begin teaching your dog proper leash manners, make sure they understand basic obedience commands such as “sit,” “stay,” “come,” etc.
These commands are helpful while leash training as they can be used alongside the attention and focus strategy. If your dog starts to pull, stop and wait for their attention, then give them a command such as “sit” or “heel.” If they perform this command for you, reward them with a treat before releasing them to start walking with another command, like telling them, “okay.”
Try out some of these training tips next time you take your dog for a walk, and remember that consistency is critical with this training!
Visit your local experts at your nearest Feeds ‘n Needs location to check out our great selection of quality leashes, no pull harnesses, headcollars and more! We are always happy to answer any questions you may have!
Prep for New Chicks Arrival
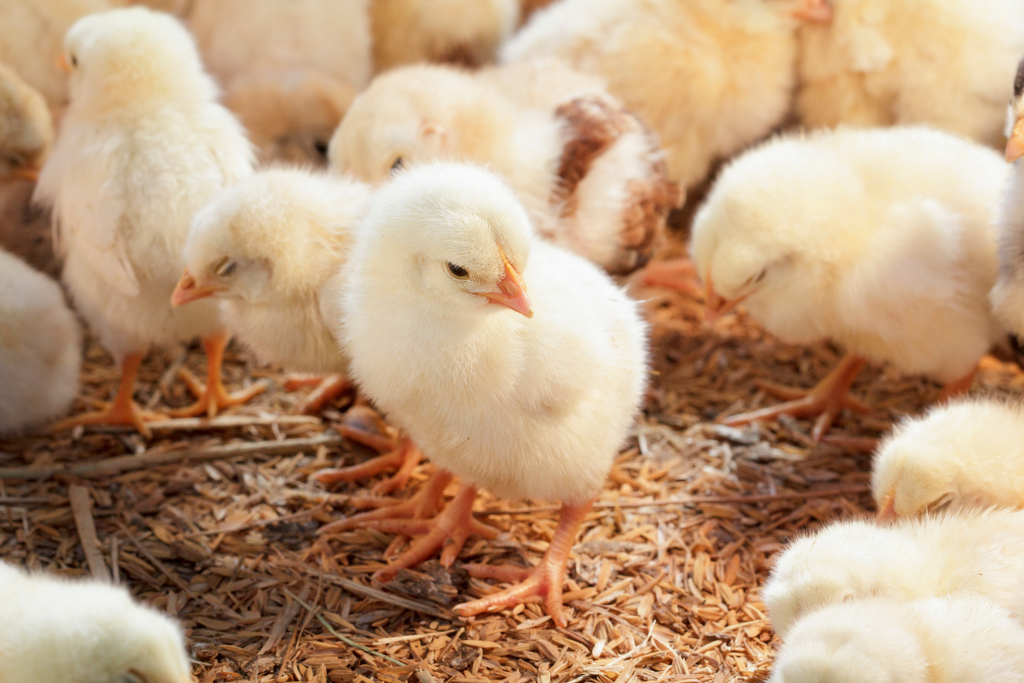
Getting ready for the arrival of baby chicks can be an exciting but also an overwhelming time. Making sure you have everything prepared before welcoming your new flock is beneficial in ensuring your chicks get the best start in life. From setting up your brooder to transporting your birds, this article will break down all the basics to help you feel confident in preparing to bring your chick’s home.
Preparing Housing for Chicks
Brooder Options:
The setup required for housing your chicks can be simple. When deciding what to use as a brooder (the space in which your chicks will live), you’ll want to choose something sturdy, large enough to comfortably house your chicks, and, ideally, inexpensive. Because of how rapidly baby chicks grow, they need to be moved into larger housing units as they get bigger. A strong cardboard box, Rubbermaid tote, or kiddie pool are all suitable options if they provide enough space. If you have pets or small children in your household, consider covering your brooder with hardware cloth or chicken wire to prevent accidents and keep chicks from escaping as they grow larger.
Bedding Material:
The bedding you use for your baby chicks should be absorbent, easy for them to walk on, and not slippery. Paper towels or puppy training pads are great options to use for the first 5-7 days after getting your chicks as they meet all these requirements. These options also make it easy to monitor if your chicks are eating since the smooth, white surface makes droppings visible. Bedding should be changed frequently to ensure your chick’s environment stays clean and dry.
Heat Source:
Since baby chicks do not yet have their feathers, they cannot regulate their own temperature. A constant heat source must be provided for them. The most used heat source for baby chicks is a heat lamp with a 250-watt infrared heat bulb. This should be secured over top of their brooder box; however, some alternate heating options include radiant heat plates or simply keeping the brooder in a small room with the heat turned up enough to keep them warm.
Food and Water
Once you have prepared a housing unit for your chicks to be placed in upon their arrival, it is time to prepare their food and water. Baby chicks require access to food and fresh water at all times and will likely be very thirsty following their journey to their new home. The feeder and waterer that you choose for your chicks should be small enough to fit in your brooder without overcrowding and easy for your chicks to access. It is important that you change your chick’s water several times per day to ensure that it stays clean. Spot clean or add fresh feed as needed if contamination occurs. Use caution if using an open water source for your chicks, as they are at risk of accidental drowning and contracting diseases related to fecal contamination.
*Pro Tip – Adding clean marbles or rocks into the bottom of the chick’s water dish and elevating it slightly from the ground while they are young can help prevent accidents and contamination.
Food Options:
We pride ourselves on providing feed to help your chicks thrive from day one. Chickens require different feed formulations throughout their life stages, and when it comes to baby chicks, we carry two options:
- Medicated Chick Starter – A crumbled formulation containing the medication amprolium. This medication helps fight off coccidiosis, a disease that is spread through fecal contamination and is deadly to baby chicks. See bag for feeding instructions.
*Note – If raising meat birds, switch to unmedicated feed at four weeks old to ensure no medication is present when they are processed.
- Plain Chick Starter – A crumbled feed formulated to meet the nutritional needs of young chickens without added medication. See bag for feeding instructions.
Now that everything is ready for your chick’s arrival home, it’s time to pick them up. When bringing chicks home, you must have a secure way to transport them. Ensuring they have a smooth, non-stressful ride home will help your chicks transition quickly into their brooder environment.
An ideal container to bring your chicks home in should meet the following criteria:
- Has a solid bottom and four walls
- Small enough that chicks won’t stumble around and fall
- Large enough to fit chicks without them being on top of each other
- Lined with a paper towel or similar bedding to absorb any messes.
You should now be well on your way to becoming an expert in caring for baby chicks, and before long, you will be reaping the rewards of all your hard work! Visit one of our experts in-store to learn more about preparing for chicks, and be sure to check out our wide range of products and feed to find everything you need to get started!
Sources:
https://www.thehappychickencoop.com/how-to-feed-meat-chickens/
https://oakwayfarmandgarden.com/page/page-2/?permalink=how-to-keep-baby-chicks-warm
https://backyardpoultry.iamcountryside.com/feed-health/how-long-do-chicks-need-a-heat-lamp/
https://the-chicken-chick.com/baby-chick-basics-what-you-need-to-know/

How to Brush Your Dogs Teeth
Brushing your dog’s teeth for the first time can be intimidating, and you may be wondering where to start. Having their teeth brushed is an unnatural feeling for dogs, so you must be diligent in taking all the proper steps to ensure that your dog is introduced stress-free.
Your local experts at Feeds’ n Needs will gladly help you select the proper tools to help you get started brushing your pup’s teeth!
What you’ll need
- Dog toothbrush or finger brush
- Pet safe toothpaste
- A soft cloth or piece of sterile gauze
- Your dog’s favourite treats
Introducing your dog to teeth brushing should be done gradually over several sessions, and depending on your dog, it can take a week to several months to accomplish successfully. Only do as much as your dog will tolerate during one session, and be sure to reward them through the entire process.
How to Brush Their Teeth
Step 1:
- Make sure your hands are clean before you begin, then find a quiet place where you and your dog will be comfortable without any distractions.
Step 2:
- Offer your dog a taste of the pet-safe toothpaste you will be using by putting a small amount on your finger and letting them lick it off.
Step 3:
- Using your finger, gently rub a bit of toothpaste onto the outer side of the dog’s upper teeth in a back-and-forth motion. Your dog may only tolerate a few seconds of this, so it’s best to focus on only a few teeth at first.
Step 4:
- Once your dog is comfortable with step 3, use a soft cloth or sterile gauze over your finger to brush the toothpaste onto your dog’s teeth. Go slow and focus on brushing only the outsides of the teeth. Most of the plaque and tartar buildup occurs on the outer sides of the teeth, so brushing the inner sides should only be done once your dog is very comfortable with brushing their teeth.
Step 5:
- Next, it’s time to introduce the toothbrush or finger brush to your dog. Apply a pea-sized amount of toothpaste to the brush, and holding it at a 45-degree angle, gently lift one side of your dog’s lips and begin brushing. Use circular motions and start with the teeth at the back, slowly working towards the front on each side. Once your dog feels comfortable with this, you may also begin brushing its bottom teeth during your sessions. To brush the bottom teeth, gently tilt the dog’s head back, allowing their mouth to open slightly. You can use your finger to hold the lip away from the teeth, then repeat the same brushing process that you did on the top. It is recommended to brush each side for 30 seconds if your dog allows it.
Step 6:
- Thoroughly rinse your dog’s toothbrush after every use, and wash your hands to avoid spreading any harmful bacteria. Pet toothbrushes should be replaced every three months, and NEVER use the same toothbrush on multiple pets.
Praising your dog and rewarding them with treats throughout every step will help to reinforce their positive association with having their teeth brushed. We carry a wide variety of healthy treats that your pup will find irresistible, even while having their teeth brushed!
For more information on the importance of dental health in pets and what you can do to prevent dental disease, check out some of our other helpful blogs!
How to Brush Your Cats Teeth
When introducing your cat to having its teeth brushed, patience is key. Ensuring that the experience is pleasant for you and your cat will require time, trust, and rewards for your feline friend. Before you begin, you’ll want to make sure you have all your supplies ready.
Your local experts at Feeds’ n Needs will help you find everything you need to start brushing your cat’s teeth!
What You’ll Need
- Cat toothbrush or finger brush
- Pet safe toothpaste
- Q-tip or cotton bud
- Your cat’s favourite treats
- Towel or blanket (optional)
Cats respond well to routine, and they may benefit from having their teeth brushed at the same time every day. Choosing a time of day when your cat is typically calm or hungry can make them easier to work with, as they will likely be more eager to accept treats and gentle pats as a reward for their cooperation.
How to Brush Their Teeth
Step 1:
- Choose a quiet time and place, such as a small room where the door can be closed to prevent your cat from escaping. You can place your cat on a countertop or table covered by a towel or sit with them in your lap. With the cats back toward you, ensure you can keep a gentle but firm hold on them. If your cat is particularly nervous, you may wrap them in a towel or blanket and have someone hold them to make sure they’re secure while you brush their teeth.
Step 2:
- Introduce your cat to the feeling of having their mouth touched by gently moving their lips and running your finger along their teeth and gumline. If your cat tolerates this well, reward them with treats and some gentle scratches if they enjoy it.
Step 3:
- Once your cat is familiar with your fingers touching their mouth, introduce the pet-safe toothpaste by placing a small amount on your finger and letting them lick it off. If the cat refuses to lick it from your finger, you can try putting a bit on the tip of their nose; they should instinctively lick it off.
Step 4:
- Using a Q-tip with a small amount of toothpaste on one end, gently rub the applicator tip along the outer surface of the cat’s teeth. Starting with the back teeth and working forward, rub the toothpaste into the teeth using circular motions. Your cat will likely only tolerate a few seconds of this at first, so focus on only a few teeth during your sessions until your cat grows more comfortable. Reward your cat’s cooperation with lots of treats.
Step 5:
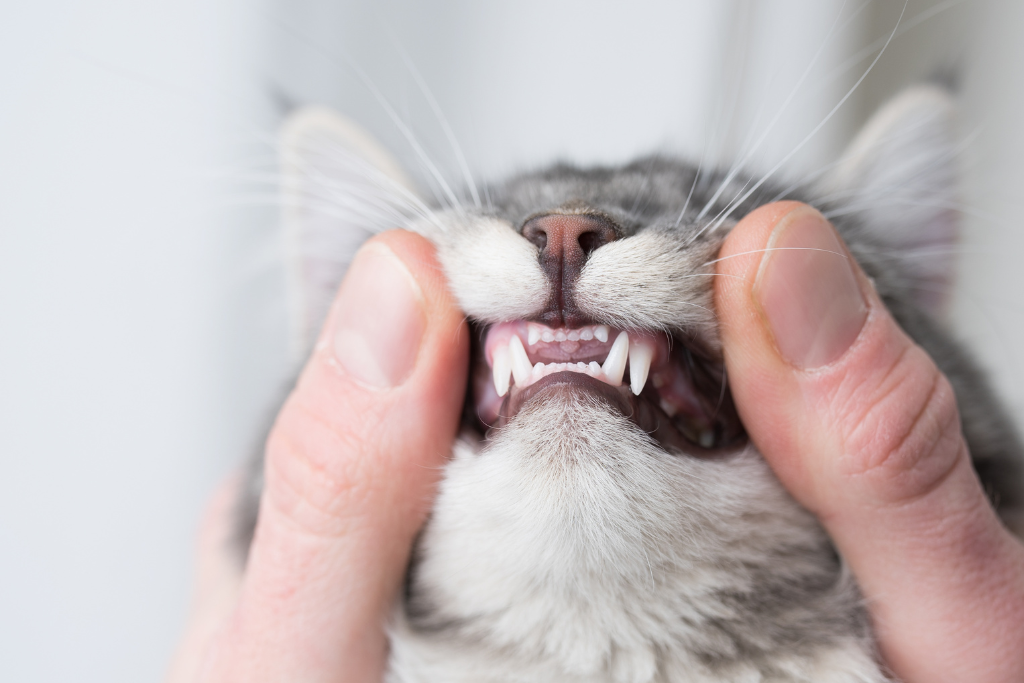
- Introduce the toothbrush to your cat by allowing them to lick a bit of toothpaste from the bristles. To ensure you have a secure grip on your cat while brushing their teeth, spread your hand wide and place your palm over the top of your cat’s head towards the back of their skull. Your thumb and second finger will grip around the cheekbones just under the eyes, allowing the cat’s mouth to fall open gently. Ensure your index finger is lifted to avoid covering the cat’s eyes. Now that you are holding your cat securely, use the same circular motions working from the back towards the front, and begin to gently brush the outer side of the cat’s teeth. As your cat gets more comfortable with each session, you can increase the time spent brushing each side until you can brush for 30-45 seconds per side.
Tooth brushing is unnatural for cats and can be stressful for them to adapt to, so be patient and do not rush the process. Taking as many days as necessary to get your cat comfortable at each step, reassuring them in a soothing voice and rewarding them with treats throughout is essential to helping them form a routine and making each experience a positive one.
Stop in at your local Feeds’ n Needs to pick up some well-deserved treats and toys for your cat, and be sure to ask our experts any questions you may have about your cat’s dental health!
For more information and resources about pet dental health, check out some of our other blogs:

Valentine’s Pet Safety Tips
Valentine’s Day is almost here, a day you can also celebrate with your pets. Give them a special toy or treat, take them for a long walk, or cuddle them on the couch. However you choose to celebrate, be aware of the possible Valentine’s Day hazards. Check out our tips to help keep your pets safe this love day!
Xylitol: This sugarless sweetener is in many candies and gums and is toxic to pets. It can cause hypoglycemia.
Chocolate: Do NOT feed your pets anything with chocolate. It can be very toxic to them!
Flowers: Certain flowers are deadly to pets. All Lilies are fatal to cats. Roses can cause punctures to the mouth and paws and possible bawl obstruction if swallowed. Keep them away from your furry friends!
Decorations: Tape, ribbons, bows, balloons, and wrapping paper can become a choking hazard. Dispose of them before your pet finds them!
Candles: Candles can become a fire hazard around pets. They can also burn themselves accidentally. Never leave candles or a fire unattended with pets.
Cocktails: A small amount of alcohol can cause illness, coma or death. Keep cocktails away from pets and wipe up any spills ASAP!
A safe home is a happy home during festivities! Keeping these tips in mind can help avoid emergency trips to the vet.
Have a safe and happy Valentine’s Day from Feeds’n Needs!

Keep Your Pets Safe this Holiday Season
We love including our pets in holiday celebrations, but there are some holiday hazards to look out for to make this season safe and fun for everyone!
Here are some holiday pet safety tips to keep in mind:
- Secure your Christmas Tree – Always observe dogs and cats around the tree. If possible, set it up in a room your can easily close off when you’re not home to avoid them trying to jump onto or into the tree.
- Don’t let your pets drink the tree water – Pet parents with a real tree at home should ensure the water inside the tree stand is NOT easily accessible to dogs and cats as it can sometimes release toxic sap into the water.
- Keep Christmas light away from your pet s- Christmas lights and cords can cause electrocution, internal injuries, or intestinal blockage if your curious pet decides to chew on them. Fasten your lights to your tree and place cords out of reach.
- Make sure ornaments are out of reach – Chewing on ornaments can cause cuts in you rpet’s mouth, throat and digestive tract. When eaten, decorations such as garland and tinsel can also result in gastrointestinal blockages.
- Pick pet safe Christmas plants – popular decorative plants like holly, mistletoe, and poinsettias can be poisonous for pets if ingested.
- Keep gifts and candy/chocolate out of reach – Gift wrapping, candy and chocolate can threaten your pet’s health if ingested.
A safe home is a happy and festive home this holiday season. Keeping these tips in mind can help avoid emergency trips to the vet, which means the whole family can celebrate a joyful holiday season.
Have a safe and happy holiday from Feeds’n Needs!
How to Grow Your Own Indoor Herb Garden
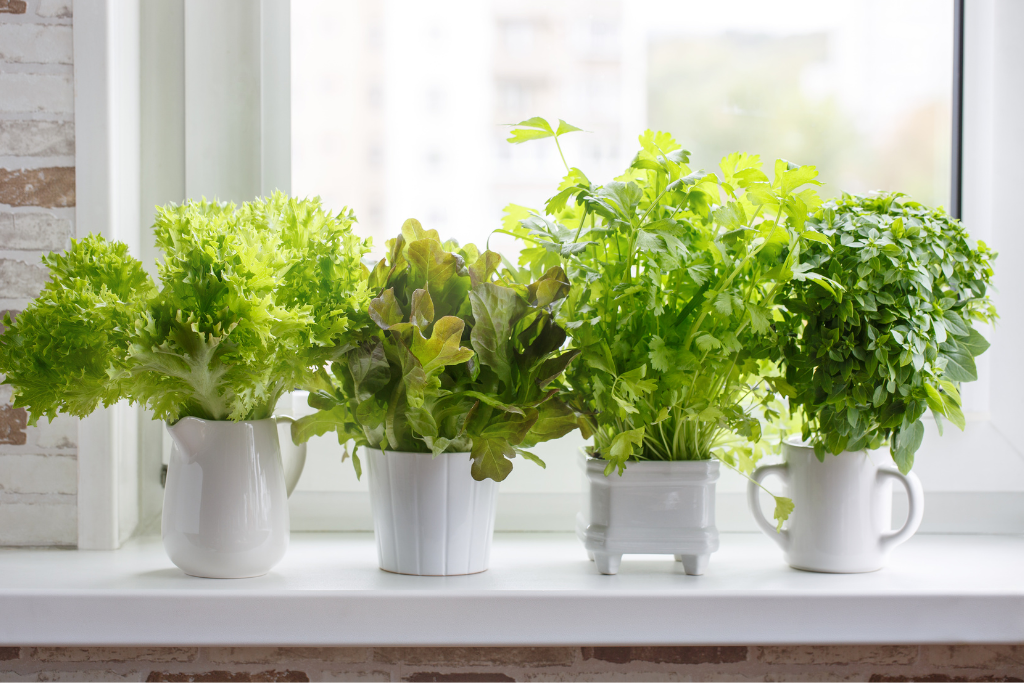
Not ready to give up gardening for the season? Start your own indoor herb garden! A herb garden will ensure you always have fresh herbs on hand. It’s as simple as understanding the plant’s requirements and making sure to give them what they need. Check out our step-by-step guide to learn how to grow your own indoor herb garden successfully!
Pick the Right Plants
Most herbs can be grown indoors, but ones that tend to thrive the most inside include basil, chives, mint, oregano, parsley, rosemary and thyme. First-time herb growers should select three to five herbs to keep the garden manageable. You can start herbs from seeds or cutting, but you may find it much easier and faster to start with seedlings. The best herbs for you will depend on the ones you plan to use while cooking.
Select a Container with Drainage
You can plant herbs in just about any container as long as it has some drainage. You should also have something underneath your pot, like a saucer or round plastic protector.
Choose a Sunny Spot
Most herbs prefer a lot of sunlight. You’ll want to give your indoor herb garden at least six hours of sun daily to thrive. It is best to place your herbs as close to your brightest windows as possible. Growth in the winter season can be slower as there isn’t as much natural light. You can invest in a grow light or LED light to help ensure your plants get enough light.
Herbs grown in strong, bright light will have the best flavour! A bright, sunny window or sunroom is the ideal location for growing herbs indoors.
Water – But Not Too Much
Keep the soil moist but not waterlogged to ensure your plants grow successfully. A small watering can, or a drizzle under the sink will do the job. If you notice the leaves of your plants turning yellow or wilting, scale back the water amount. Pour out any excess water that collects in the tray or saucer they’re sitting in.
Harvest a Little at a Time
Pinch off a few leaves with your fingers. Regular cutbacks encourage new growth. Be careful not to remove more than a quarter of the plant at a time, as this can cause distress to your herbs.
Transplant When Ready
If you see roots coming out of the drainage holes, growth seems to have stalled, or the plant starts to flop over, it’s time to transplant to give your plants more space to grow.
Visit your local Feeds’n Needs to stock up on your herb seeds and gardening necessities and get to planting! You’ll have fresh and delicious herbs at your fingertips in no time!
Sources:
10 Important Tips to Create your own Indoor Herb Garden (howtoculinaryherbgarden.com)
How to Plant an Indoor Herb Garden (eatingwell.com)
Fall Garden Checklist
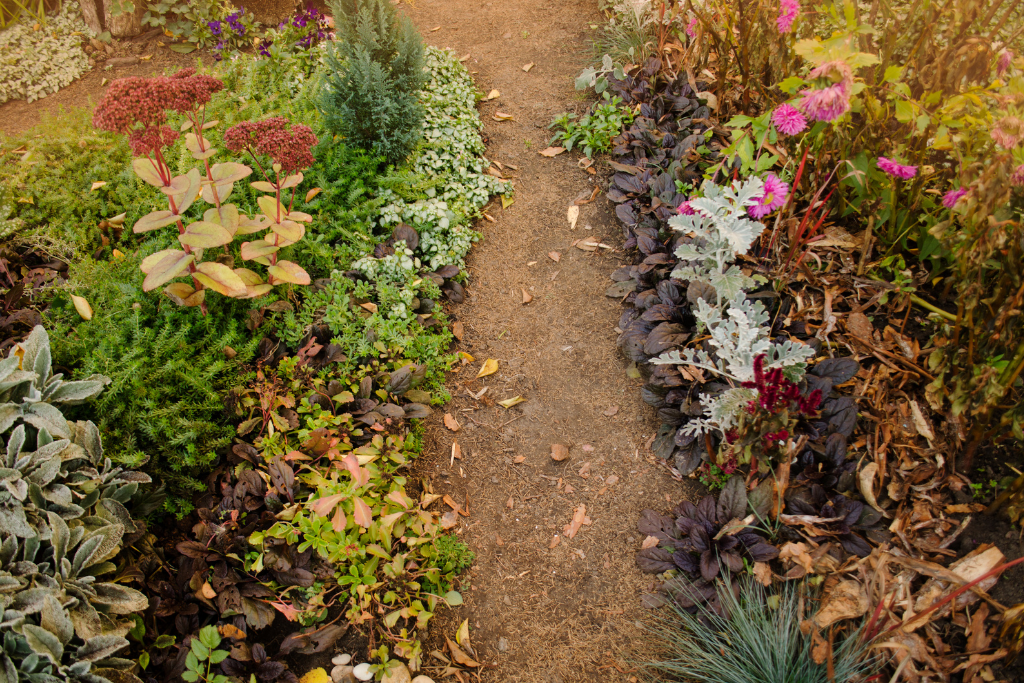
It is never too early to think about your spring garden – that is why it needs some attention in the fall. When the weather cools down, it’s time to finish the gardening season by preparing your gardens for winter. Use this fall garden checklist that can make all the difference next spring!
Leave the Leaves
Leave plenty of healthy plant material in your garden to help feed garden wildlife over the winter months. Some insects will hibernate in the leaves or leave behind eggs to hatch in spring, giving birds something to munch on upon their return.
Plants naturally drop their leaves to feed the roots as they decompose. Leave some of the leaves on the soil until spring so the plants can get their nutrient boost!
Mulch
Mulching in the fall creates a warm blanket on the top of the soil that slowly breaks down into humus that will feed the soil.
If you have deciduous trees on your property, mulching is easy! Let the leaves fall on the garden and leave them there as mulch. In the spring, the mulched leaves can be left in place when you add a layer of compost or topsoil. They will continue to feed the soil as they break down.
Remove Diseased Material
Removing any diseased plant material or fallen fruit is good practice to stop the spread of pests and diseases the following year. It is important to remove anything that will cause you problems in the spring.
Plant Spring Bulbs
Many of your favourite spring flowers, such as tulips, daffodils, hyacinth, allium, and crocus, must be planted in the fall to get that cold bust.
Grow Fall & Winter Vegetables
Vegetable gardening doesn’t have to end in the fall. There are some super seedy and frost-hardy vegetables out there that can grow before the winter chill sets in.
Harvest
The most exciting garden task in the fall is harvesting. Celebrate your success, and then get to harvesting and preserving herbs, vegetables, and flowers.
Save the Seeds
As your plants go to seed, it’s time to collect them! Look at your favourite seasonal flowers and vegetables and see what you want to include in next year’s garden. Collect only seeds from the strongest plants, so next year’s garden is even better than this one.
Plant Your Shrubs
Fall means it is time to plant shrubs and evergreens. The best time of year for planting, the warm soil and cold air help to develop a strong enough root system to get through the winter.
Amend Soil
Give your garden some nutrition back by amending garden soil in the fall.
Make compost at home using a compost bin to turn leaves, food scraps, and more into a soil amendment. Spread the compost around the garden. From there, it will do the hard work for you.
Divide Perennials
Dividing perennials increases your plant stock and helps them fill in, improve blooming, and avoid overcrowding. For the healthiest perennials, dividing them in the fall is essential. Many perennials thrive by being divided, especially if they are crowded.
Clean Your Garden Tools
Fall is a great time to give your garden tools a good scrubbing. Wash hand tools like trowels and rakes with soapy water and a scouring sponge. Use a power washer to get large tools clean. You will also want to wrap up your garden hose and fully drain it of any water before curling it up.


