Garlic is one of the easiest and most rewarding crops to grow in your garden. Whether you’re a seasoned gardener or just starting out, planting garlic in the fall sets you up for a flavourful harvest next summer. Here’s everything you need to know to get started.
Choosing Your Garlic Type
Before planting, decide which type of garlic suits your climate and needs:
- Softneck Garlic: Ideal for warmer regions, this variety has a flexible stem perfect for braiding and tends to store longer.
- Hardneck Garlic: Best for colder climates, it produces edible flower stalks called scapes in spring. Removing the scapes helps the plant focus on growing larger bulbs.
When to Plant Garlic
Garlic is typically planted in the fall, from mid-October until the ground freezes. This gives the cloves time to establish roots before winter sets in.
How to Plant Garlic
- Pick the Right Spot
Choose a sunny location with well-drained soil. Garlic needs at least 6 hours of direct sunlight daily and doesn’t like soggy conditions. - Prepare the Soil
Loosen the soil and dig holes about 2–6 inches deep. Go deeper in colder climates and shallower in warmer ones. - Separate the Cloves
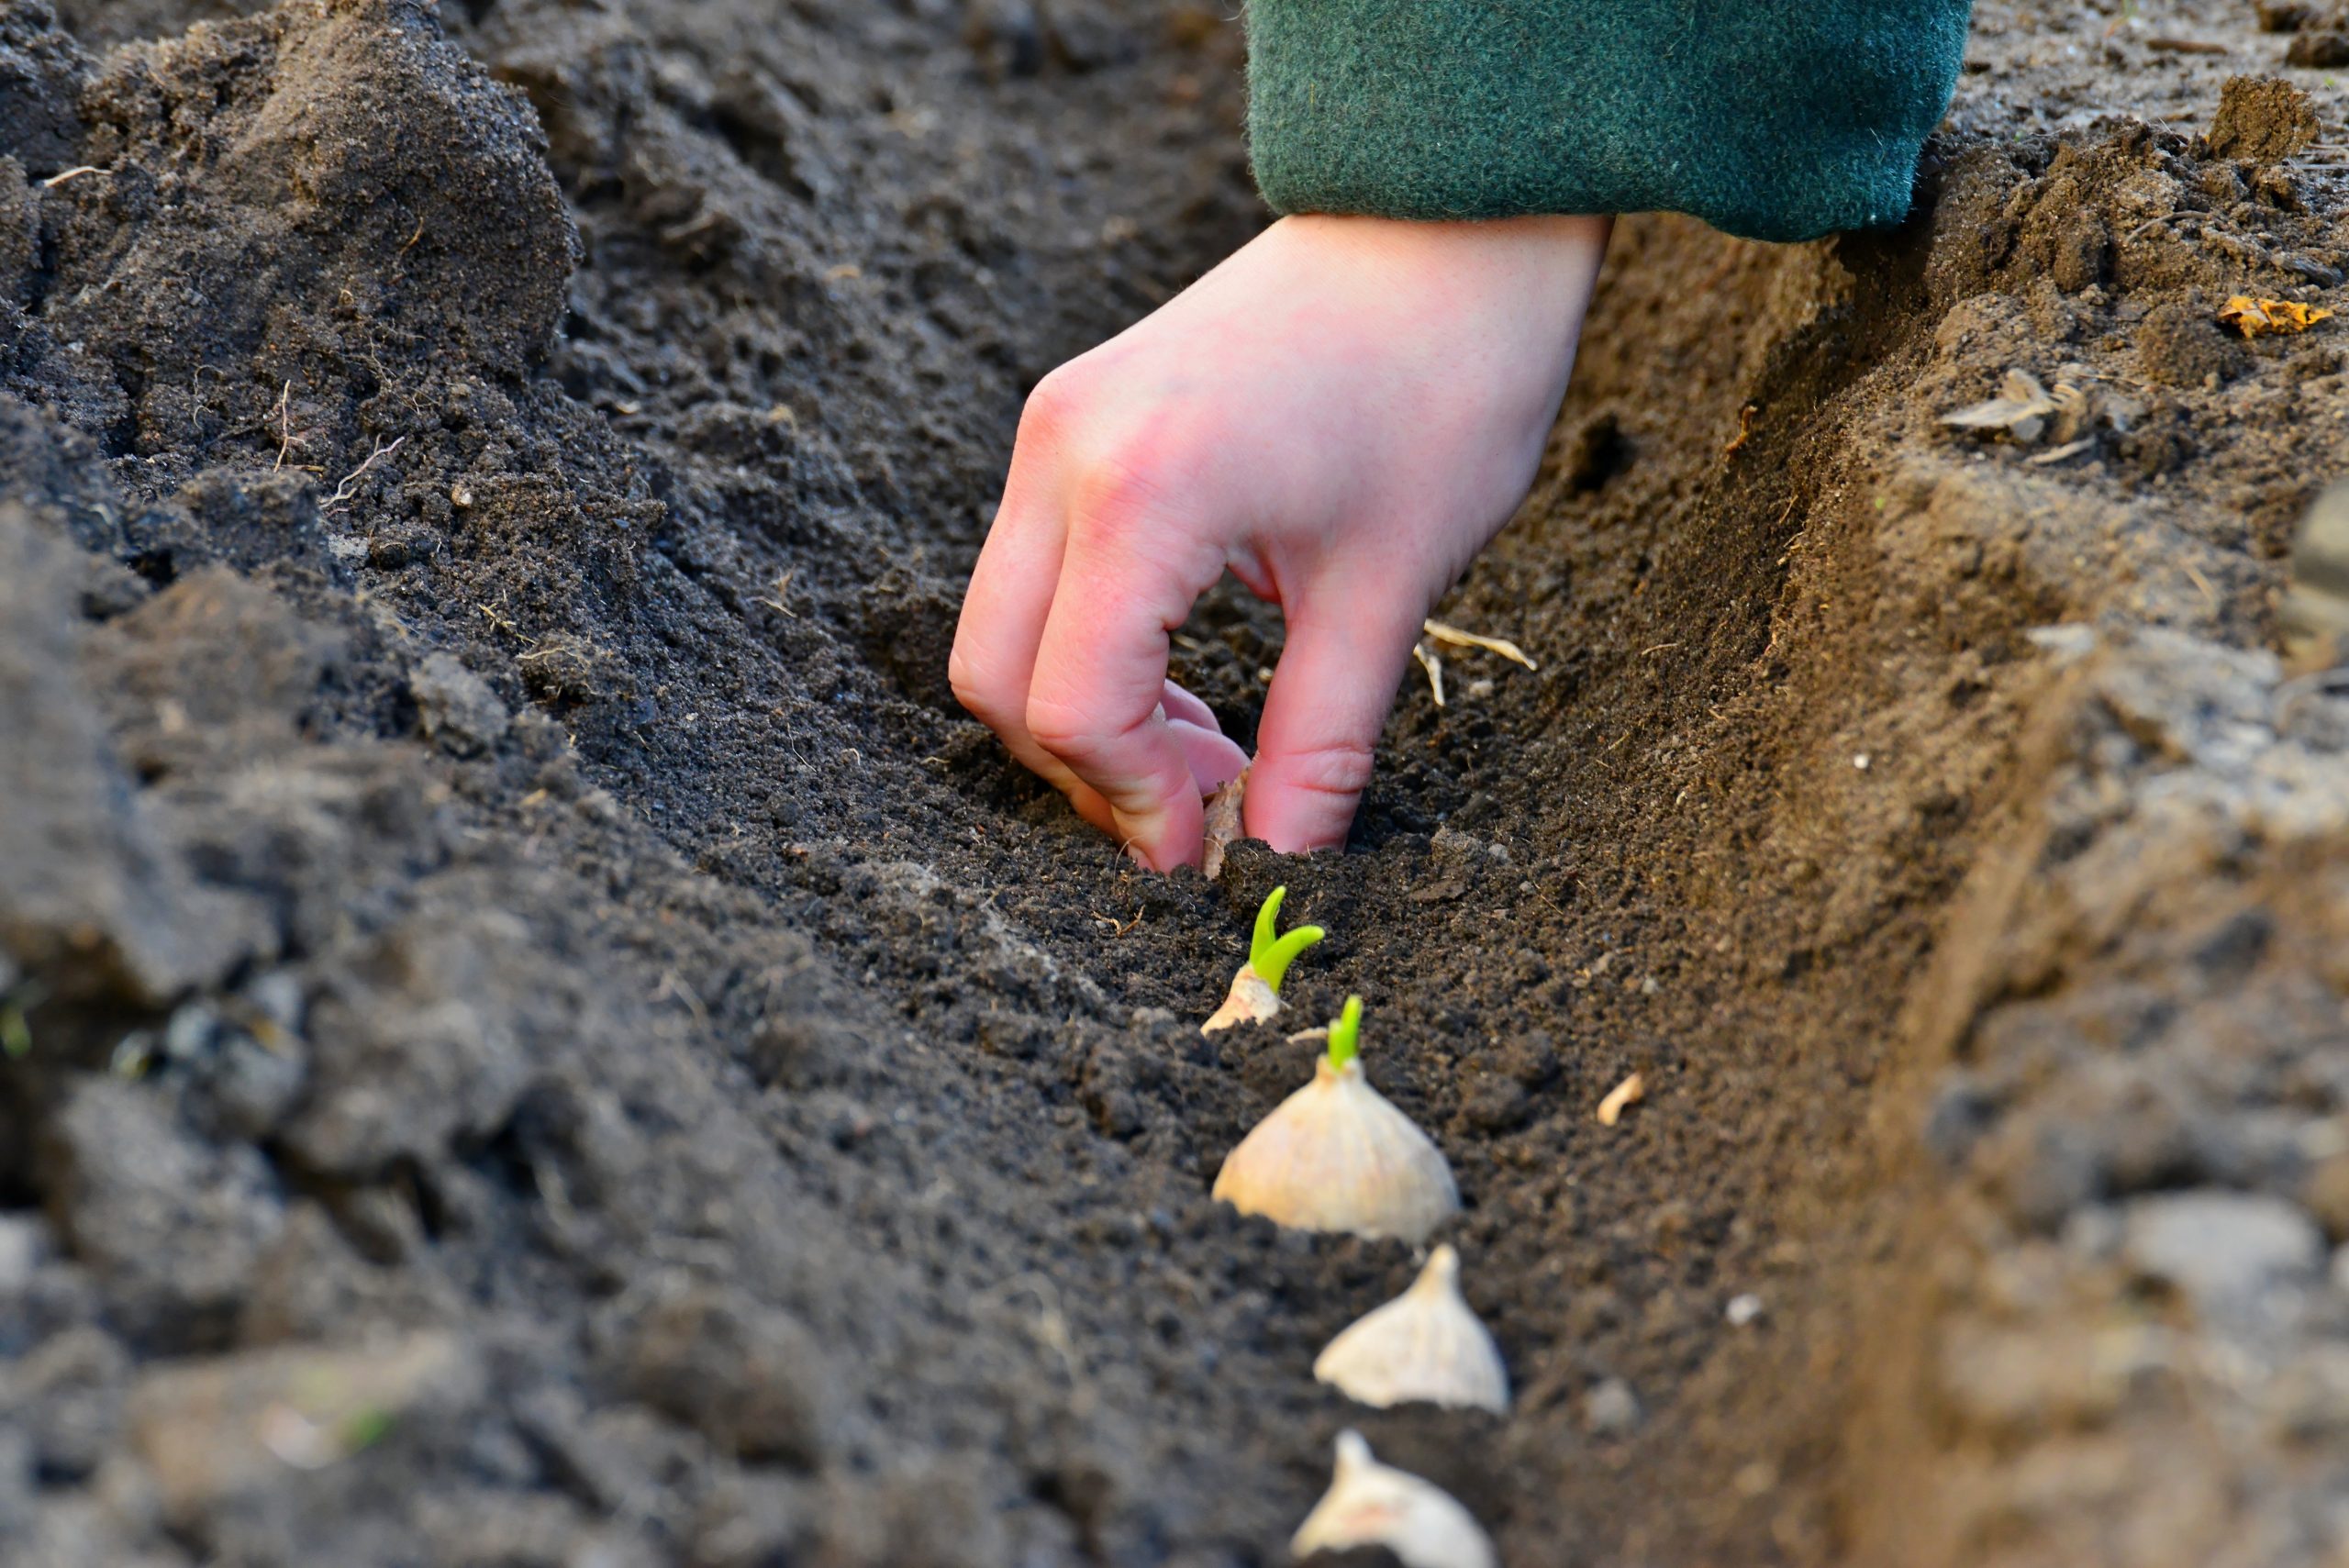
Break apart the garlic bulb just before planting. Keep the papery skin on each clove intact, even if some flakes off. - Plant the Cloves
Place each clove in the hole with the pointy end facing up and the flat root end down. Space them 4–8 inches apart. - Cover and Water
Fill the holes with soil, gently tamp it down, and add a light layer of mulch. Water thoroughly to help the roots settle in.
Spring Garlic Care
- Fertilize: When green shoots appear in spring, apply a balanced fertilizer.
- Water: Keep the soil moist during dry spells.
- Weed: Remove weeds regularly to prevent competition for nutrients.
Harvesting Garlic
Garlic is ready to harvest in late spring to early summer. Here’s how to know when it’s time:
- Hardneck Garlic: Watch for curly scapes in late spring. Snip them off to encourage bulb growth. Bonus: scapes are delicious sautéed!
- All Varieties: When about half the leaves turn yellow and flop over, it’s harvest time. Use a garden fork to gently lift the bulbs from the soil.
Let the bulbs cure in a dry, shaded spot for a couple of weeks. Once dry, trim the stems or braid softneck varieties for storage.
Storing Garlic
Store garlic in a cool, dark place with good air circulation. Mesh bags, baskets, or hanging braids work well. Properly cured garlic can last 4–6 months. Use any damaged bulbs first, as they won’t store as long.
Ready to grow your own garlic? With just a little effort this fall, you’ll be rewarded with a flavorful harvest next year. Happy planting!

Best Vegetables to Can for Beginners
Canning is a fantastic way to preserve your garden harvest and enjoy fresh-tasting vegetables all year long. If you’re new to the process, starting with easy, reliable options can make your first season a success. Here are ten of the best vegetables to can for beginners that taste just as good months later as the day you packed them.
- Asparagus – Tender asparagus is a spring favorite that cans surprisingly well. Start with fresh, firm stalks, trim them to fit your jars, and blanch before packing. Whether you add them to salads, stir-fries, or snack straight from the jar, you’ll be glad you preserved them when winter rolls around.
- Beets – With their rich color and earthy flavor, beets are as beautiful as they are delicious. Leave a bit of stem and root when boiling to keep juices in, then slip off the skins before canning. They can be preserved whole, halved, or quartered, making them perfect for salads, side dishes, or snacking.
- Carrots – Crisp, sweet carrots hold their texture wonderfully after canning. Simply wash, peel, and cut them into slices or chunks. They’re great for soups, stews, or quick side dishes—and pulling a jar off the shelf is much easier than peeling fresh ones on a busy night.
- Corn – Fresh corn is hard to beat, and canning lets you keep that summer flavour on hand. Cut the kernels from the cob without scraping too close (to avoid tough bits) and pack them for year-round use in chowders, casseroles, and side dishes.
- Cucumbers – Cucumbers are a classic canning choice—especially for pickles. Small ones stay crisp, while larger cucumbers can be sliced into spears or rounds. With the right brine, you’ll have tangy, crunchy pickles that brighten any meal.
- Green Beans – Whether you prefer them whole or cut into bite-sized pieces, green beans are a canning staple. Just snap off the ends, rinse, and pack them in jars. They stay tender yet firm, making them a reliable side dish straight from the pantry.
- Peas – Peas might not be the first vegetable you think of for canning, but they’re a hidden gem. Shell and blanch them to lock in their bright green color, then preserve them on their own or as part of a mixed vegetable blend. Their sweet pop adds flavour to soups, stews, and salads.
- Peppers – From sweet bells to spicy varieties, peppers are versatile and full of flavor. Blister or boil them to remove skins before canning. Small peppers can be left whole, while larger ones work well halved or sliced for quick fajitas, pasta, or stir-fries.
- Tomatoes – Tomatoes are practically made for canning. Use them for sauces, soups, stews, or salsa. Blanch to slip off the skins, then choose your style—whole, diced, or puréed. Season with herbs like basil or garlic for ready-to-use flavor boosters.
- Radishes – Not just for salads, radishes shine when pickled. Their peppery bite mellows into a tangy, slightly sweet crunch that’s perfect for tacos, sandwiches, or charcuterie boards. They’re quick to grow, easy to prepare, and add something unique to your pantry lineup.
Start small and build your skills each season. With just a few jars of each of these vegetables, you’ll be stocking your pantry with homemade goodness—and you might find yourself looking forward to canning season as much as the harvest itself.

Dog-Friendly Pupsicle
Summer is here, and the temperatures are high — which means your pup might be looking for a tasty way to beat the heat! Why not treat them to a refreshing, homemade dog-friendly pupsicle? It’s super simple to make and guaranteed to have your furry friend jumping for joy!
What You’ll Need:
1–2 cups of goat’s milk (we recommend Big Country Raw, available at Feeds’n Needs)
4 standard 6″ bully sticks (also available at Feeds’n Needs)
Your pup’s favourite treat
Popsicle mold of your choice
How to Make It:
Step 1: Place your dog’s favourite treat inside the popsicle mold.
Step 2: Pour in the goat’s milk to fill the mold, then insert a bully stick as the “popsicle stick.” Secure the top and pop it into the freezer.
Step 3: Once frozen solid, remove the mold and run it under warm water for a few seconds to help release the pupsicle.
Step 4: Serve it to your dog and watch them go wild! (Pro tip: enjoy this treat outdoors to avoid any sticky mess inside.)
Extra Protein Boost
Want to make this treat even more nutritious? Add some of your pet’s raw food to the mix! Simply thaw or rehydrate the meat, puree it, and pack it into the popsicle mold along with the goat’s milk.
These dog-friendly pupsicles are a fun, healthy way to help your pup stay cool and hydrated all summer long!

How to Get Started Growing Strawberries
There’s something truly satisfying about harvesting fresh, juicy strawberries from your own garden. Whether you’re a seasoned green thumb or just starting out, strawberries are a rewarding and relatively easy crop to grow—especially with our Maritime climate. Here’s everything you need to know to get started on the path to a bountiful strawberry harvest.
Step 1: Choose the Right Location and Prepare the Soil
Strawberries love the sun and thrive in fertile, well-drained soil. Here’s how to set the stage for success:
- Sunlight: Choose a spot that receives at least 6 hours of direct sunlight per day.
- Drainage: Avoid areas with heavy clay or soggy soil. Strawberries hate “wet feet,” so good drainage is key.
- Soil Amendment: Enrich the soil with compost or well-rotted manure to boost nutrients and improve texture.
- Soil pH: Aim for a pH between 6.0 and 6.5. You can test your soil using a simple home testing ki available at your local Feeds’n Needs.
Step 2: Plant the Strawberry Crowns
Once your soil is prepped, it’s time to plant:
- When to Plant: Spring is ideal, though fall planting can work in milder regions.
- Planting Depth: Dig holes large enough for the roots. Position the crown (where the roots meet the stems) level with the soil surface.
- Spacing: Space each plant about 20 inches apart. This helps with airflow and reduces disease risk.
Step 3: First-Year Plant Care
Your plants need a little TLC in their first season to set the stage for future harvests:
- Watering: Water thoroughly after planting and regularly throughout the season, especially during dry spells.
- Weeding: Keep the area weed-free so your strawberries don’t have to compete for water and nutrients.
- Blossom Removal: If you’re growing June-bearing varieties, pinch off the flowers during the first year. This encourages stronger root development and better yields next season.
- Fertilizing: Apply a nitrogen-rich fertilizer about 4–6 weeks after planting to promote healthy growth.
Step 4: Prepare for Winter
Strawberries are hardy, but they still need protection when the temperatures drop:
- Mulch: Apply a thick layer of straw or similar mulch around the plants in late fall. This insulates the crowns and helps prevent winter damage.
- Snow Cover: In areas like the Maritimes, snow can offer additional insulation—but mulch is still essential to guard against freeze-thaw cycles.
Step 5: Ongoing Strawberry Plant Care
Keep your plants healthy and productive with consistent care:
- Watering: Continue regular watering, especially while fruit is developing.
- Fertilizing: Feed your strawberries in early spring and again after harvesting. Follow the product’s instructions for best results.
- Weed and Pest Control: Stay vigilant for weeds, pests, and diseases. Remove weeds promptly and use organic or chemical treatments as needed.
- Plant Renewal: Strawberry plants tend to decline after 3–4 years. Plan to replace older plants to maintain high yields.
Best Strawberry Varieties for Atlantic Canada
Not all strawberries are created equal, especially when it comes to colder climates. These varieties are known to do well in Nova Scotia:
- ‘Northeaster’ – Cold-hardy and early ripening.
- ‘Sable’ – Excellent flavor and disease resistance.
- ‘Primetime’ – A reliable producer for home gardens.
Growing your own strawberries takes a little planning, but the payoff is sweet—literally. With the right care and a bit of patience, you’ll be enjoying homegrown berries straight from the garden in no time.
Conclusion
Integrating a new pet into your household isn’t always easy, but it’s definitely rewarding. With time, patience, and plenty of positive reinforcement, your furry family members can learn to live together peacefully—and maybe even become best pals.
For more information on introducing a new cat to your home, check out our blog Preparing for Your New Kitten!

Hand Feeding Birds Safely
If you spend enough time feeding backyard birds, chances are you’ll have close encounters with your backyard feathered friends. Maybe a hummingbird buzzes by as you hang up the feeder, or a curious chickadee flutters nearby while you fill the seed tray. With the right approach, it’s possible to hand feed birds. Before you try, it’s important to think about safety—for both you and the birds.
Safety First: When Hand Feeding Is (and Isn’t) a Good Idea
Before offering a snack from your palm, consider whether encouraging birds to get that close to people is truly safe in your environment. On private property with little foot traffic, building trust with wild birds may not pose much risk. But in busier areas, teaching birds to approach humans could put them in danger.
Some people are afraid of birds, and an unexpected visit from a feathered friend might lead to panic—potentially harming the bird. In public spaces like parks and beaches, feeding birds is often discouraged or even prohibited. Not only can larger birds like geese become overly aggressive once they lose their fear of people, but close encounters can sometimes result in injuries.
Before trying to feed birds by hand, check local regulations and think through the possible outcomes. ALWAYS wash your hands before and after contact with birds, feeders, or nests. Even trace amounts of sunscreen, lotion, or bug spray can harm their delicate feathers, and while rare, diseases can be passed between birds and humans.
Earning the Trust of Seed-Eating Birds
In areas where hand feeding is safe and allowed, it can be a truly rewarding experience. Songbirds like chickadees and nuthatches are often the most willing to approach humans.
Start by sitting quietly near a feeder while holding a small tray of seeds. Patience is key—spend several sessions just being a calm, non-threatening presence. As the birds grow more comfortable, you can gradually move closer to the feeder. Eventually, try standing with seeds in your open hand. If you’ve built enough trust, a brave little bird may land for a snack.
Feeding Hummingbirds from the Hand
Hummingbirds, with their lightning-fast movements and fearless curiosity, are often comfortable coming close. You can hold a small, handheld nectar feeder available at your local Feeds’n Needs and simply wait—many hummingbirds will zip over once they realize it’s safe. Don’t force interaction. These tiny birds are fragile, and even a gentle mistake could cause harm.
The experience of having a wild bird take food from your hand is both humbling and unforgettable. But it should always be approached with care. If there’s any doubt about the safety of hand feeding—for either the birds or the people around you—it’s best to enjoy their beauty from a respectful distance. A well-placed feeder and a quiet window view can offer just as much joy.

Attracting Downy Woodpeckers
March’s Bird of the Month is the Downy Woodpecker! With their colourful feathers and lively personalities, woodpeckers make a captivating addition to any backyard. Their distinctive habit of foraging vertically on tree trunks provides endless entertainment, while their diet of insects like beetles, grubs, and ants makes them valuable natural pest controllers for garden enthusiasts. You’ll know you have Downy Woodpeckers nearby when you hear their signature “drumming” as they tap on trees or other structures. Since Downy Woodpeckers are year-round residents, they are a welcome presence in all seasons. But how can we create a backyard that’s inviting to these fascinating birds?
Offer a Variety of Food:
Downy Woodpeckers enjoy a diverse diet, foraging for insects, nuts, and berries in the wild. In your yard, they’ll appreciate offerings like suet, peanut butter, peanuts, and black oil sunflower seeds. These birds are often quite cautious, so placing feeders and water sources in quieter corners of your yard, especially near mature trees, will help them feel at ease.
Make sure any suet you provide stays fresh. You can break it into smaller pieces or use suet cakes packed with sunflower seeds, which they will devour quickly.
Provide Clean, Fresh Water:
While Downy Woodpeckers do enjoy visiting birdbaths, they are somewhat shy about using them. Placing them in more secluded spots is ideal. A ground bird bath with a dripper or moving water feature will catch their attention, make sure the water depth is shallow—around 1-2 inches is perfect. Adding perches nearby will make them accustomed to the bath over time. Always keep the bath clean to avoid the spread of disease. In winter, it’s essential to offer heated bird baths so the birds have access to fresh water even in freezing temperatures.
Create Safe, Secure Sheltering and Nesting Areas:
Downy Woodpeckers thrive in small, wooded spaces surrounded by mature trees, with the added benefit of shrubs, especially those with berries. They nest in tree cavities but will also appreciate a well-positioned birdhouse with an entrance hole suited to their size, mounted 10-20 feet above the ground.
Attracting Too Many Woodpeckers
While it’s a joy to host woodpeckers in your yard, sometimes, these birds can cause problems. If they begin pecking at wooden siding, eaves, fences, or even chimneys and downspouts, the damage can be significant. To prevent this, repair any damage and cover the area with wire mesh or netting to deter further pecking. Hanging reflective items near the problem area can also help prevent woodpeckers from targeting inappropriate surfaces.
By providing these woodpecker-friendly resources, you can enjoy the company of these energetic and charming birds while keeping them safe and content in your backyard.

Dental Care Treats
Pets adore treats, and dental treats are a fantastic way to promote oral health. They help fight bad breath, combat plaque and tartar buildup, and can even prevent periodontal disease, keeping your pet’s mouth clean and healthy.
How Do Dental Treats Work?
Dental treats work in two key ways: mechanical action and enzymatic action.
Mechanical Action: This is the physical scraping that occurs when your pet chews on the treat. The texture of the treat rubs against your pet’s teeth and gums, helping to remove plaque and tartar—similar to how brushing works for humans.
Enzymatic Action: This refers to the special ingredients in the treats that help fight plaque and tartar buildup. These ingredients work much like toothpaste or mouthwash for humans. They break down the harmful buildup in your pet’s mouth, providing an added layer of protection.
It’s important to note that while dental treats are an excellent preventive measure, they are most effective when combined with regular brushing and professional cleanings by your vet. However, for pets who aren’t keen on having their teeth brushed, dental treats are a great alternative for maintaining cleaner, healthier teeth.
Top 5 Dental Treats for Your Pet
- Greenies Dental Treats: With a chewy texture that cleans teeth and supports healthy gums, Greenies are made with natural ingredients, plus added vitamins and minerals. They’re safe and easy to digest for both dogs and cats.
- Chew A Bulls Dental Ring: This unique dental chew is designed to gently remove plaque while massaging your dog’s gums. It also includes cumin, which aids digestion and gives the chew a pleasant scent.
- Tartar Buster Dog Bones: These bones help remove tartar buildup and plaque, leaving your dog’s teeth cleaner and whiter. They also freshen your dog’s breath, making for a healthier mouth overall.
- Oven-Baked Dental Treats: These crunchy treats are made with natural, functional ingredients like spearmint, parsley, pumpkin, and green tea extract. Slowly oven-baked to preserve nutrients, they help break down plaque and tartar with every bite, keeping teeth clean and breath fresh.
- Vetgies Healthy Dog Treats: These treats not only help maintain healthy teeth and gums, but also prevent boredom and destructive behavior. They’re perfect for keeping your pet engaged while supporting their oral health.
With these top dental treats, you can help your pet enjoy a cleaner, healthier smile!

How to Attract Cardinals to Your Yard
February’s Bird of the Month is the Northern Cardinal! With their striking red feathers and beautiful songs, cardinals are a favourite among bird watchers. These non-migratory birds can become year-round visitors if you create a welcoming space with the right mix of food, water, and shelter. Here’s our tips on how to attract them to your yard:
1. Offer the Right Food
– Black Oil Sunflower Seeds: Easy to crack open and nutrient-rich.
– Safflower Seeds: A favourite of cardinals but not as appealing to squirrels.
– Suet, Cracked Corn, and Berries: Good supplementary options.
Consider purchasing seed mixes designed for cardinals. These blends typically include their favourite seeds.
2. Use the Right Feeders
Cardinals prefer ground feeders, so provide options like:
– Tray, Platform, or Hopper Feeders: These allow for easy perching.
– Covered Feeders: Protects food from rain and snow.
– Placement: Set feeders 4-6 feet above the ground near shrubs for safe escapes.
Keep feeders clean and stocked to encourage frequent visits.
3. Provide Fresh Water
A bird bath is essential for attracting cardinals, offering both drinking and bathing opportunities. Cardinals prefer deeper baths, ideally placed on the ground to match their feeding habits. In winter, a heated bath or de-icer will prevent freezing.
4. Create Shelter
Cardinals like dense shrubs and evergreen trees for shelter, so adding plants like dogwoods or honeysuckles can help. They also nest in low bushes, so leave out materials like twigs or pine needles for them to use.
Things to Avoid
– Reflective Surfaces: Prevent window collisions by using screens or bird netting.
– Harmful Chemicals: Avoid pesticides and herbicides near bird feeders.
– Predators: Keep feeding areas away from places where pets or predators can hide.
You can enjoy these beautiful birds all year long by offering the right food, water, and shelter!

How to Properly Feed Your Rabbits
A rabbit’s digestive system is delicate, and their nutritional needs require careful attention. By understanding the basics of rabbit nutrition, you can avoid common health problems and help your bunny thrive. Here’s our guide on how to properly feed your rabbits so you can enjoy many years of companionship.
Key Components of a Rabbit’s Diet
A healthy rabbit diet primarily consists of three main components: hay, fresh greens, and limited pellets. Anything beyond that—such as fruits and other treats—should be offered sparingly. A balanced diet helps keep your rabbit’s digestive system running smoothly.
Hay (80% of Diet)
Hay is the most essential part of a rabbit’s diet and should make up about 80%. It provides the necessary fibre to promote healthy digestion and prevent common issues like hairballs. Hay is also a source of essential proteins and nutrients. It should be offered daily in unlimited amounts and available to your rabbit at all times.
Types of Hay:
Timothy Hay: Ideal for adult rabbits, it’s rich in fibre but low in calories and calcium.
Alfalfa Hay: Suitable for baby rabbits, pregnant or nursing mothers, and elderly or injured rabbits. However, it’s too high in calcium for adult rabbits and should not be used for long-term feeding.
Other Grass Hays: Adult bunnies do best on a mix of timothy hay and other grass hays because they are lower in calories and calcium than alfalfa hay.
Store hay in a cool, dry place with good ventilation to prevent mold. Ensure the hay smells fresh, and discard any wet or stale hay. Offer it in a hay rack or basket to prevent waste; remember, rabbits love to nibble all day long.
Fresh Greens (10% of Diet)
Fresh greens provide important vitamins and minerals, and they help keep your rabbit’s digestive system healthy. Aim to give your rabbit a variety of fresh, fibrous vegetables daily, especially leafy greens. Fresh greens should make up about 10% of your rabbit’s diet. Avoid feeding your rabbit iceberg lettuce, as it lacks nutritional value.
Recommended Vegetables:
– Carrot tops
– Beet tops
– Dandelion greens and flowers
– Kale
– Collard Greens
– Dark Leafy Green Lettuce
– Romain Lettuce
– Parsley
– Clover
– Broccoli and its leaves
– Green Peppers
– Snow Pea Pods
– Basil
– Peppermint Leaves
– Raspberry Leaves
– Bok Choy
– Spinach
For a full list of recommended vegetables for rabbits, visit: Best Vegetables for Rabbits: A Healthy Diet Guide – Rabbit.org
Start with small amounts of one type of green to avoid your rabbit having an upset stomach, and gradually add more variety over time. Aim for at least 1 cup of fresh veggies for every 5 pounds of body weight, given twice a day.
Pellets (5% of Diet)
Rabbit pellets are a convenient way to supplement your bunny’s nutrition, but they should only make up a small part of their overall diet at 5%. Overfeeding pellets can lead to obesity, heart disease, liver disease, and other health issues due to their high carbohydrate and low fibre content.
How to Feed Pellets:
Young Rabbits (under 8 months): Pellets can be offered free choice as they are growing quickly.
Adult Rabbits (over 8 months): Follow the recommended daily amounts based on their weight:
– 2-4 pounds: 1/8 cup
– 5-7 pounds: 1/4 cup
– 8-10 pounds: 1/2 cup
– 11-15 pounds: 3/4 cup
Pregnant or Nursing Rabbits: Can be offered unlimited pellets until the babies are weaned.
Fruits & Treats(<5% of Diet)
While rabbits love their fruits, they should only be given as treats due to their high sugar content. Treats should make up to no more than 5% of your rabbit’s diet and only occasionally. Feeds’n Needs carries delicious Sunburst treats made specifically for rabbits. Here are some other good options for rabbit treats:
– Strawberries, raspberries, and blackberries
– Apples, pears, peaches, and melon
– Papaya and pineapple (but only in small amounts)
Carrots also fall into the “treat” category dur o their sugar content, and should only be given sparingly.
Fresh Water
Fresh water should always be available to your rabbit in a water bottle or heavy, spill-proof bowl. Change the water daily to ensure it stays clean and free from bacteria. A dirty water dish can lead to health problems, so be diligent about cleanliness.
Special Dietary Needs
Some rabbits have special dietary requirements due to age, health conditions, or specific life stages. For example:
Long-Haired Rabbits like Angoras, Lion Heads, or Jersey Woolies may require more protein to support the growth of their long fur.
Overweight Rabbits may need fewer pellets and more hay to help them shed excess pounds.
Older or Sick Rabbits may require a higher calorie intake to regain strength or support healing.
Mother Rabbits nursing babies will need extra pellets and hay to keep up with the demands of milk production.
For any specific concerns, it’s always a good idea to consult a veterinarian who can recommend the best diet for your rabbit’s unique needs.
By providing your rabbit with a balanced, fiber-rich diet primarily consisting of hay, supplemented with fresh vegetables and limited pellets, you’ll set the foundation for a long healthy life. Always monitor your rabbit’s weight, adjust portions as necessary, and consult your vet if any dietary issues arise.
Taking the time to feed your rabbit properly helps ensure their health and strengthens the bond you share as a pet and caregiver. Happy feeding!

How to Attract Chickadees to Your Backyard
With their playful antics and charming personalities, Chickadees are a favourite among backyard birders. These small, curious birds are year-round residents in the Maritimes, making them a delightful sight no matter the season. With just a few simple steps and basic bird supplies, you can attract Black-Capped Chickadees to your yard all year round!
Offer the Right Food
Chickadees are active birds with big appetites, so having a reliable food source is essential. These feathered friends are particularly fond of black oil sunflower seeds, which offer high energy content. In addition to sunflower seeds, chickadees will gladly munch on peanuts, striped sunflower seeds, and suet.
Use a hopper feeder, tray, or tube feeder to offer these tasty treats. For a natural touch, consider growing sunflowers in your garden to create a feeding station where chickadees can perch and feast. Chickadees are also known to enjoy insects, berries, and nuts. To support this, minimize insecticide use in your garden and plant native berry bushes for natural food sources. You can also offer whole peanuts or peanut halves at your feeders.
For an easy-to-access snack, smear suet or peanut butter directly on tree trunks and watch these tiny birds enjoy the tasty treat!
Provide Clean, Fresh Water
Water is essential to attracting chickadees, especially in winter when they stay in their range and don’t migrate. A shallow bird bath is an excellent way to give chickadees a place to drink and bathe. Consider investing in a heated bird bath or a bird bath de-icer to keep the water from freezing; this will give chickadees a consistent water source, helping them stay hydrated throughout the colder months. If you’re using small dishes, make sure they are shallow enough for chickadees to safely access.
Create Shelter and Nesting Areas
Chickadees are cavity-nesting birds, which means they need safe, sheltered spots to rest and raise their young. One of the best ways to attract chickadees to your yard is by providing nesting boxes. A suitable birdhouse should be 8-10 inches tall with a 4-inch square base and a 1-1/8 inch entrance hole. Adding some wood shavings inside your birdhouses will make them even more attractive, and chickadees are known to use pet fur for their nests (just be sure the fur hasn’t been treated with flea products, as these can be toxic to birds).
Hang the nesting box on a tree trunk for easy access, and consider smearing some peanut butter or soft suet on the tree nearby to lure the birds closer.
For natural shelter, chickadees prefer dense, mature trees—especially evergreens. Chickadees will also use roost boxes or nesting pockets during the winter months to keep warm, often cuddling together in small groups.
Attracting chickadees to your yard is an enjoyable and rewarding experience. With the right food, clean water, shelter, and nesting areas, these delightful birds will become regular visitors. By following these tips and being patient, you’ll create a welcoming environment that encourages chickadees to thrive in your backyard, year-round.
