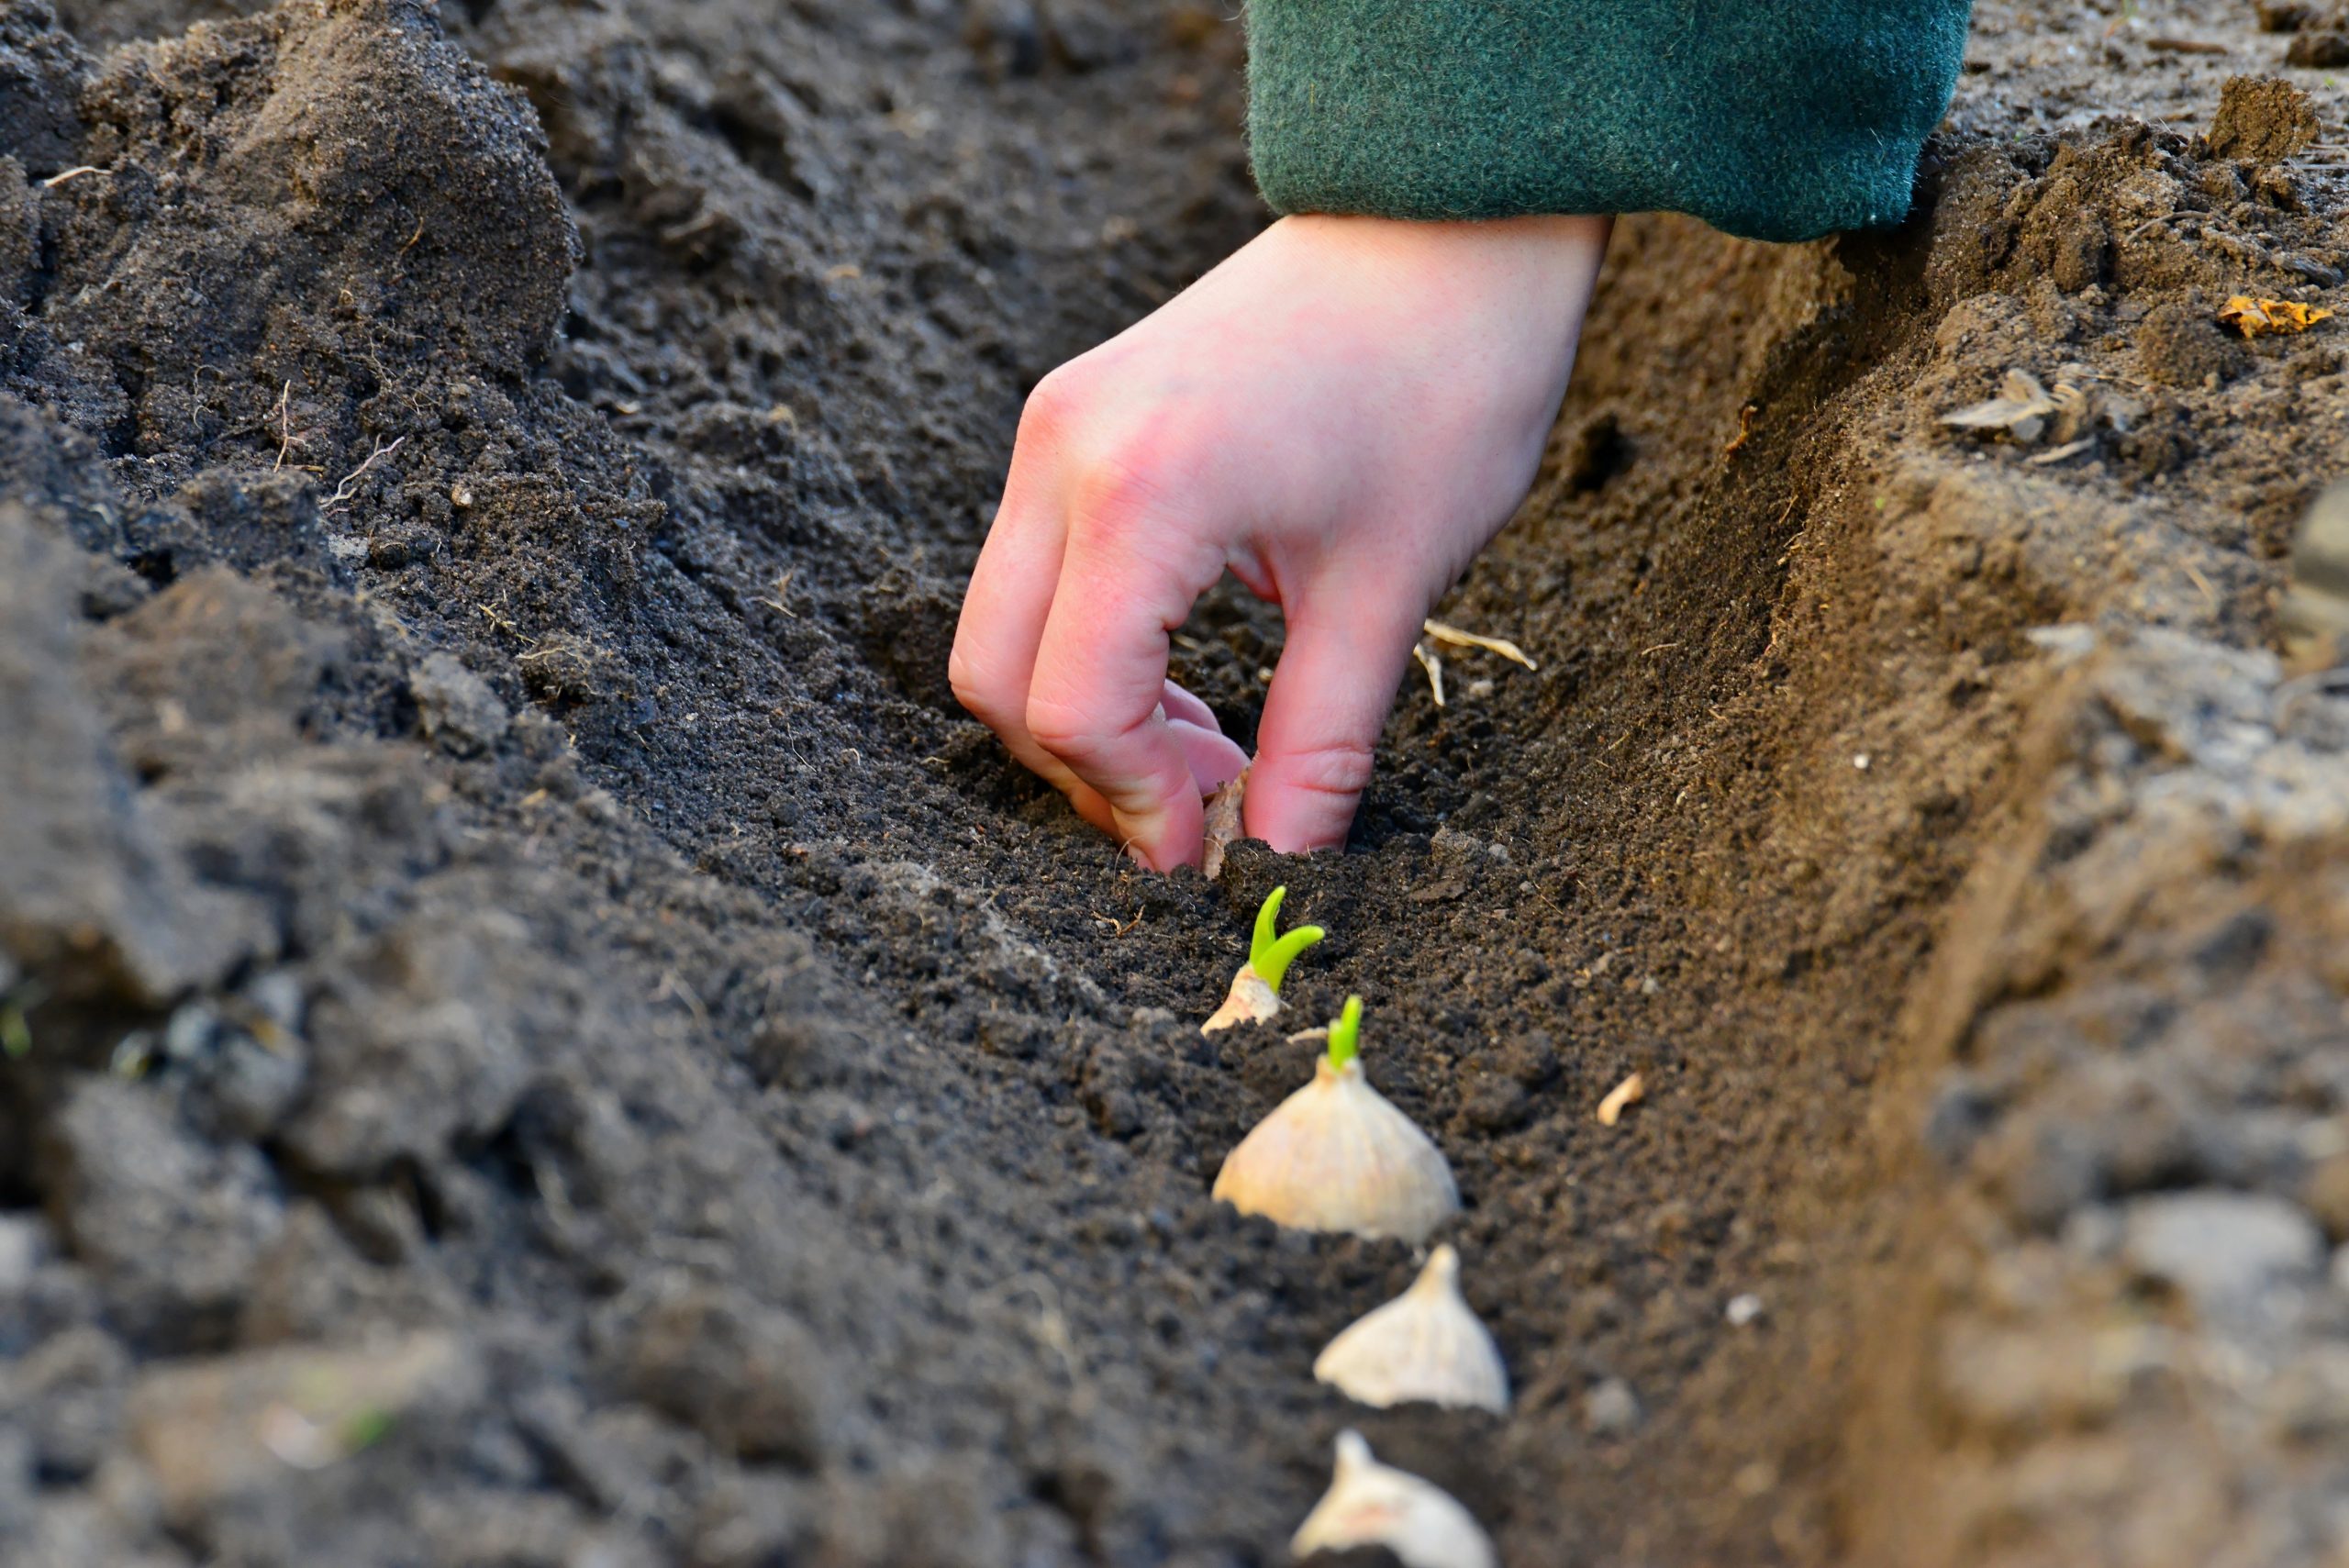
Garlic is one of the easiest and most rewarding crops to grow in your garden. Whether you’re a seasoned gardener or just starting out, planting garlic in the fall sets you up for a flavourful harvest next summer. Here’s everything you need to know to get started.
Choosing Your Garlic Type
Before planting, decide which type of garlic suits your climate and needs:
- Softneck Garlic: Ideal for warmer regions, this variety has a flexible stem perfect for braiding and tends to store longer.
- Hardneck Garlic: Best for colder climates, it produces edible flower stalks called scapes in spring. Removing the scapes helps the plant focus on growing larger bulbs.
When to Plant Garlic
Garlic is typically planted in the fall, from mid-October until the ground freezes. This gives the cloves time to establish roots before winter sets in.
How to Plant Garlic
- Pick the Right Spot
Choose a sunny location with well-drained soil. Garlic needs at least 6 hours of direct sunlight daily and doesn’t like soggy conditions. - Prepare the Soil
Loosen the soil and dig holes about 2–6 inches deep. Go deeper in colder climates and shallower in warmer ones. - Separate the Cloves
Break apart the garlic bulb just before planting. Keep the papery skin on each clove intact, even if some flakes off. - Plant the Cloves
Place each clove in the hole with the pointy end facing up and the flat root end down. Space them 4–8 inches apart. - Cover and Water
Fill the holes with soil, gently tamp it down, and add a light layer of mulch. Water thoroughly to help the roots settle in.
Spring Garlic Care
- Fertilize: When green shoots appear in spring, apply a balanced fertilizer.
- Water: Keep the soil moist during dry spells.
- Weed: Remove weeds regularly to prevent competition for nutrients.
Harvesting Garlic
Garlic is ready to harvest in late spring to early summer. Here’s how to know when it’s time:
- Hardneck Garlic: Watch for curly scapes in late spring. Snip them off to encourage bulb growth. Bonus: scapes are delicious sautéed!
- All Varieties: When about half the leaves turn yellow and flop over, it’s harvest time. Use a garden fork to gently lift the bulbs from the soil.
Let the bulbs cure in a dry, shaded spot for a couple of weeks. Once dry, trim the stems or braid softneck varieties for storage.
Storing Garlic
Store garlic in a cool, dark place with good air circulation. Mesh bags, baskets, or hanging braids work well. Properly cured garlic can last 4–6 months. Use any damaged bulbs first, as they won’t store as long.
Ready to grow your own garlic? With just a little effort this fall, you’ll be rewarded with a flavorful harvest next year. Happy planting!

Keep Your Pet Safe with Custom Pet ID Tags
Pets are family and keeping them safe is a top priority. One of the easiest ways to protect them is with a custom ID tag.
At Feeds’n Needs, we offer personalized pet ID tags at all our Maritime locations.
Why ID Tags Matter
Even the best-trained pets can wander. Microchips help, but they need a scanner. An ID tag gives instant access to your contact info, making it easier for someone to help your pet get home fast.
What to Include on Your Pet’s Tag
When customizing your tag, make sure to include:
- Your pet’s name
- Your phone number (primary contact)
- Address
- Any special care instructions (e.g., “Needs medication”)
Key Considerations When Choosing a Tag
- Lightweight for comfort
- Bright colors for visibility
- A great backup to microchips
Visit Feeds’n Needs Today
As your local Animal Experts, we’re here to help every lost pet find their way home. Stop by Feeds’n Needs to get your custom tag; it’s a small step that makes a big difference.

Winterizing Your Lawn
As the days grow shorter and temperatures begin to drop, it’s time to give your lawn a little extra care before winter sets in. Winterizing your lawn helps protect it from harsh conditions and sets the stage for lush, green growth when spring arrives. Here’s a step-by-step guide to help you get started:
- Aerate the Lawn
Aeration is one of the most beneficial things you can do for your lawn before winter. By creating small holes in the soil, aeration allows water, oxygen, and nutrients to reach the roots more effectively. This strengthens the root system and improves overall lawn health.
- Mow the Grass Shorter
Before the snow flies, give your lawn a final trim. Mow to a height of about 2–3 inches—short enough to prevent matting under snow, but not so short that the grass becomes stressed. This helps reduce the risk of disease and keeps your lawn tidy through the colder months.
- Fertilize with a Winterizer
Applying a winter fertilizer gives your lawn the nutrients it needs to survive the cold and thrive in the spring. Look for a blend high in nitrogen and potassium, which promotes strong root growth and helps store energy for next season. Available at your local Feeds’n Needs. A well-fed lawn now means a greener lawn later!
- Mulch the Leaves
Instead of raking and bagging fallen leaves, mulch them directly into the lawn using your mower. This adds valuable organic matter, helps retain soil moisture, and provides insulation for the roots. It’s a simple way to recycle nutrients and improve soil health.
- Seed Bare Spots
Fall is a great time to overseed any thin or bare patches in your lawn. The cooler temperatures and increased moisture create ideal conditions for seed germination. By spring, you’ll enjoy a thicker, more resilient lawn.
Conclusion
Winterizing your lawn doesn’t take long, but the benefits last well into the next growing season. With a little effort now, you’ll be rewarded with a vibrant, healthy lawn when the snow melts and the sun returns.

Digging Up and Storing Bulbs for Winter
As the growing season winds down and frost begins to settle in, it’s time to think about lifting and storing your tender bulbs to protect them through the winter. Proper care can ensure vibrant blooms next year!
- Know When to Dig
Timing is everything when it comes to digging up bulbs.
- Wait for dieback: Let the foliage die back naturally after the first frost. This signals the bulb has stored enough energy for next season.
- Avoid frost damage: Digging too soon can harm the bulb, while waiting too long may expose it to freezing temperatures underground.
- Dig Up and Clean the Bulbs
- Use the right tool: A garden fork is ideal to gently lift bulbs without damaging them.
- Lift carefully: Dig around and under the bulb to avoid cutting roots or bruising the bulb.
- Clean gently: Shake or brush off excess soil—no need to wash them.
- Dry the Bulbs
- Air-dry: Place bulbs in a well-ventilated, dry area for about a week.
- Trim foliage: Once dry, remove any remaining leaves or stems.
- Prepare for Storage
- Choose ventilated containers: Cardboard boxes, mesh bags, or crates work well.
- Add insulation: Layer bulbs with peat moss, sawdust, or vermiculite to prevent them from touching and to retain just enough moisture.
- Label everything: Include bulb type and color for easy spring planting.
- Store the Bulbs
- Find the right spot: Store bulbs in a cool 7–13°C, dark, and dry location that won’t freeze.
- Ideal places: Unheated garages, basements, or root cellars are perfect.
- Monitor regularly: Check for signs of rot or mold and remove affected bulbs.
Spring & Summer Bulb Tips
Spring Bulbs (e.g., Daffodils, Crocus)
- Dormancy begins: Once foliage turns brown and papery in late spring or early summer, bulbs are dormant and ready to be lifted if needed.
- Divide every 5 years: Overcrowding leads to smaller blooms and uneven growth. Dig, divide, and replant to refresh your beds.
Summer Bulbs (e.g., Dahlias, Begonias)
- Lift after frost: Wait until frost blackens the foliage, then gently dig up the bulbs.
- Dry before storing: Allow leaves to dry naturally before trimming. Dust bulbs with fungicide to prevent rot.
- Store smart: Use paper bags or nylon stockings with dry peat moss. Keep in a frost-free, well-ventilated area between 16–18°C.
Conclusion
While many bulbs can stay in the ground for years, lifting and storing tender varieties ensures they survive harsh winters and thrive come spring. With a little care and attention, your garden will reward you with a stunning display year after year.

Fall Garden Prep
As the days grow shorter and the air turns crisp, it’s the perfect time to give your garden a little TLC before winter sets in. Prepping your garden in the fall not only keeps things tidy but also sets the stage for a healthy, vibrant growing season next year. Here’s how to wrap up the season with care:
Clean Up and Sanitize Your Garden
A tidy garden is a healthy garden. Start by removing any spent annuals and vegetable plants that have finished producing. This helps prevent pests and diseases from lingering through the winter.
- Toss diseased plants in the trash—not the compost pile—to avoid spreading pathogens.
- Leave healthy roots from nitrogen-fixing plants like beans and peas in the soil. They’ll break down naturally and enrich your garden.
- Weed thoroughly, especially those that have gone to seed, to reduce next spring’s weed load.
Enrich Your Soil
Fall is a great time to give your soil a boost so it’s ready to support new growth come spring.
- Test your soil every few years to check pH and nutrient levels. Fall is ideal for applying amendments like lime, which need time to take effect.
- Add compost—a 2–3 inch layer will feed your soil over the winter as it breaks down.
- Mulch generously with shredded leaves, straw, or wood chips to protect the soil and retain moisture.
Care for Perennials and Bulbs
Your perennials and bulbs need a little attention before the frost hits.
- Divide and transplant overcrowded perennials to give them room to thrive.
- Water deeply before the ground freezes to help roots stay hydrated through winter.
- Plant spring-blooming bulbs like tulips and daffodils now for a colorful show next year.
- Dig up tender bulbs such as dahlias and gladiolus and store them indoors.
Prep Your Tools and Equipment
Don’t forget to take care of your gardening gear!
- Clean and sharpen tools to keep them in good shape and ready for spring.
- Drain hoses and irrigation systems to prevent freezing and cracking.
- Store pots and containers in a dry place to avoid damage from freeze-thaw cycles.
Fall Planting and Final Harvest
There’s still time to enjoy a few more crops before winter.
- Plant garlic between September and the end of November.
- Harvest remaining produce before the first hard frost. Green tomatoes? Let them ripen on a sunny windowsill indoors.
With a little effort now, your garden will be healthier, your tools will last longer, and you’ll be one step ahead when spring rolls around. Happy fall gardening!
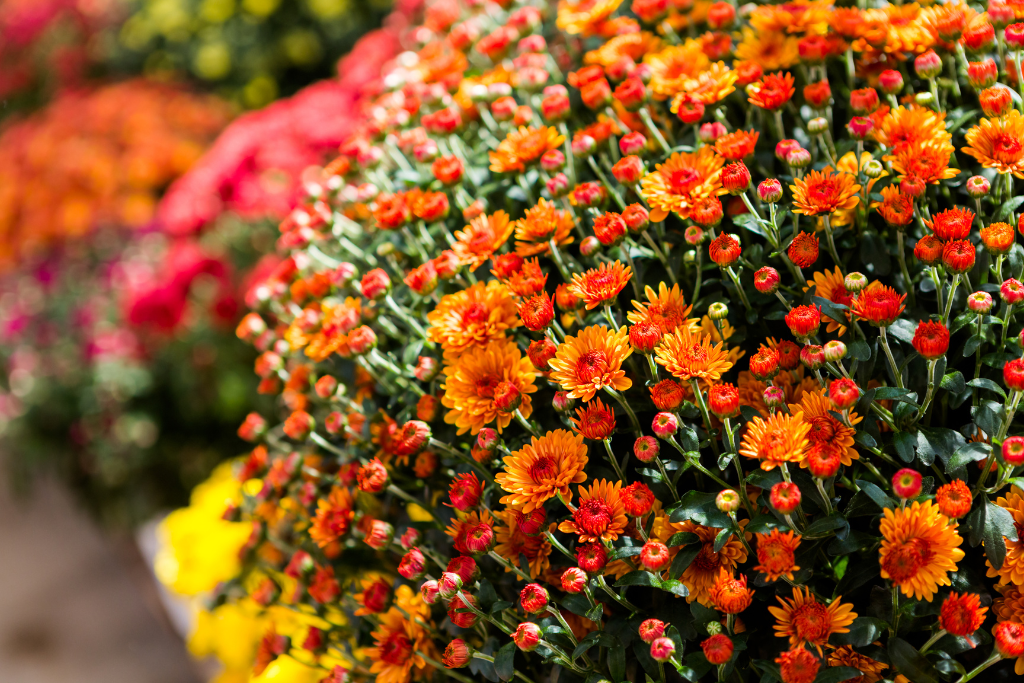
How to Care for Potted Mums
As summer fades and autumn rolls in, it’s time to welcome one of the season’s most iconic flowers — the chrysanthemum, or as most of us call them, mums. These vibrant blooms are a staple in fall décor, adding bursts of color to porches, patios, and gardens. Whether you’re a seasoned green thumb or just starting out, caring for potted mums is simple with a few key tips.
Here’s how to keep your mums healthy, happy, and blooming beautifully all season long.
Choosing the Right Pot & Placement
Start with a container that drains well — think terra cotta, ceramic, or even the plastic nursery pot your mum came in. Good drainage is essential to prevent root rot.
If you’re repotting, use a high-quality potting mix from Feeds’n Needs that holds moisture but still drains well. Mums love sunlight, so place them where they’ll get at least 6 hours of direct sun daily. Want to extend their bloom time? Try a spot with partial shade to slow down bud opening.
Watering Wisely
Mums like consistent moisture, but soggy soil is a no-go. Water when the top inch of soil feels dry, and always aim for the base of the plant — not the leaves — to avoid fungal issues. A regular watering schedule will help your mums stay vibrant longer.
Deadheading for More Blooms
To keep your mums looking fresh and encourage new flowers, remove faded blooms as they appear. This redirects the plant’s energy into producing more blossoms instead of seed.
Fertilizing for Fall Success
If you’re growing mums from spring, start feeding them with a balanced fertilizer like 10-10-10. As buds begin to form, switch to one with higher phosphorus and potassium (like 5-10-5) to boost blooms and root strength.
- Start feeding after the last frost in spring
- Continue until late July
- Feed every 7–14 days
- Water deeply after fertilizing to avoid root burn
If you’re treating your mums as seasonal décor and plan to compost them after fall, you can skip the fertilizer.
Winterizing Your Mums
Want your mums to come back next year? Here’s how to give them a fighting chance:
- Wait until after the first hard frost
- Add 4 inches of mulch (straw or shredded hardwood) around the base
- Leave stems intact — prune in spring, not fall
- In early spring, remove mulch and trim away dead growth
Keep in mind: mums are hardy, but poor drainage or extreme cold can reduce their chances of surviving winter.
Conclusion
Caring for potted mums is a great way to celebrate the season and add a splash of color to your outdoor space. With the right pot, proper watering, and a little TLC, your mums will thrive well into autumn — and maybe even return next year.
Looking for supplies? Visit your local Feeds’n Needs for potting mix, fertilizers, and everything you need to keep your fall garden blooming.
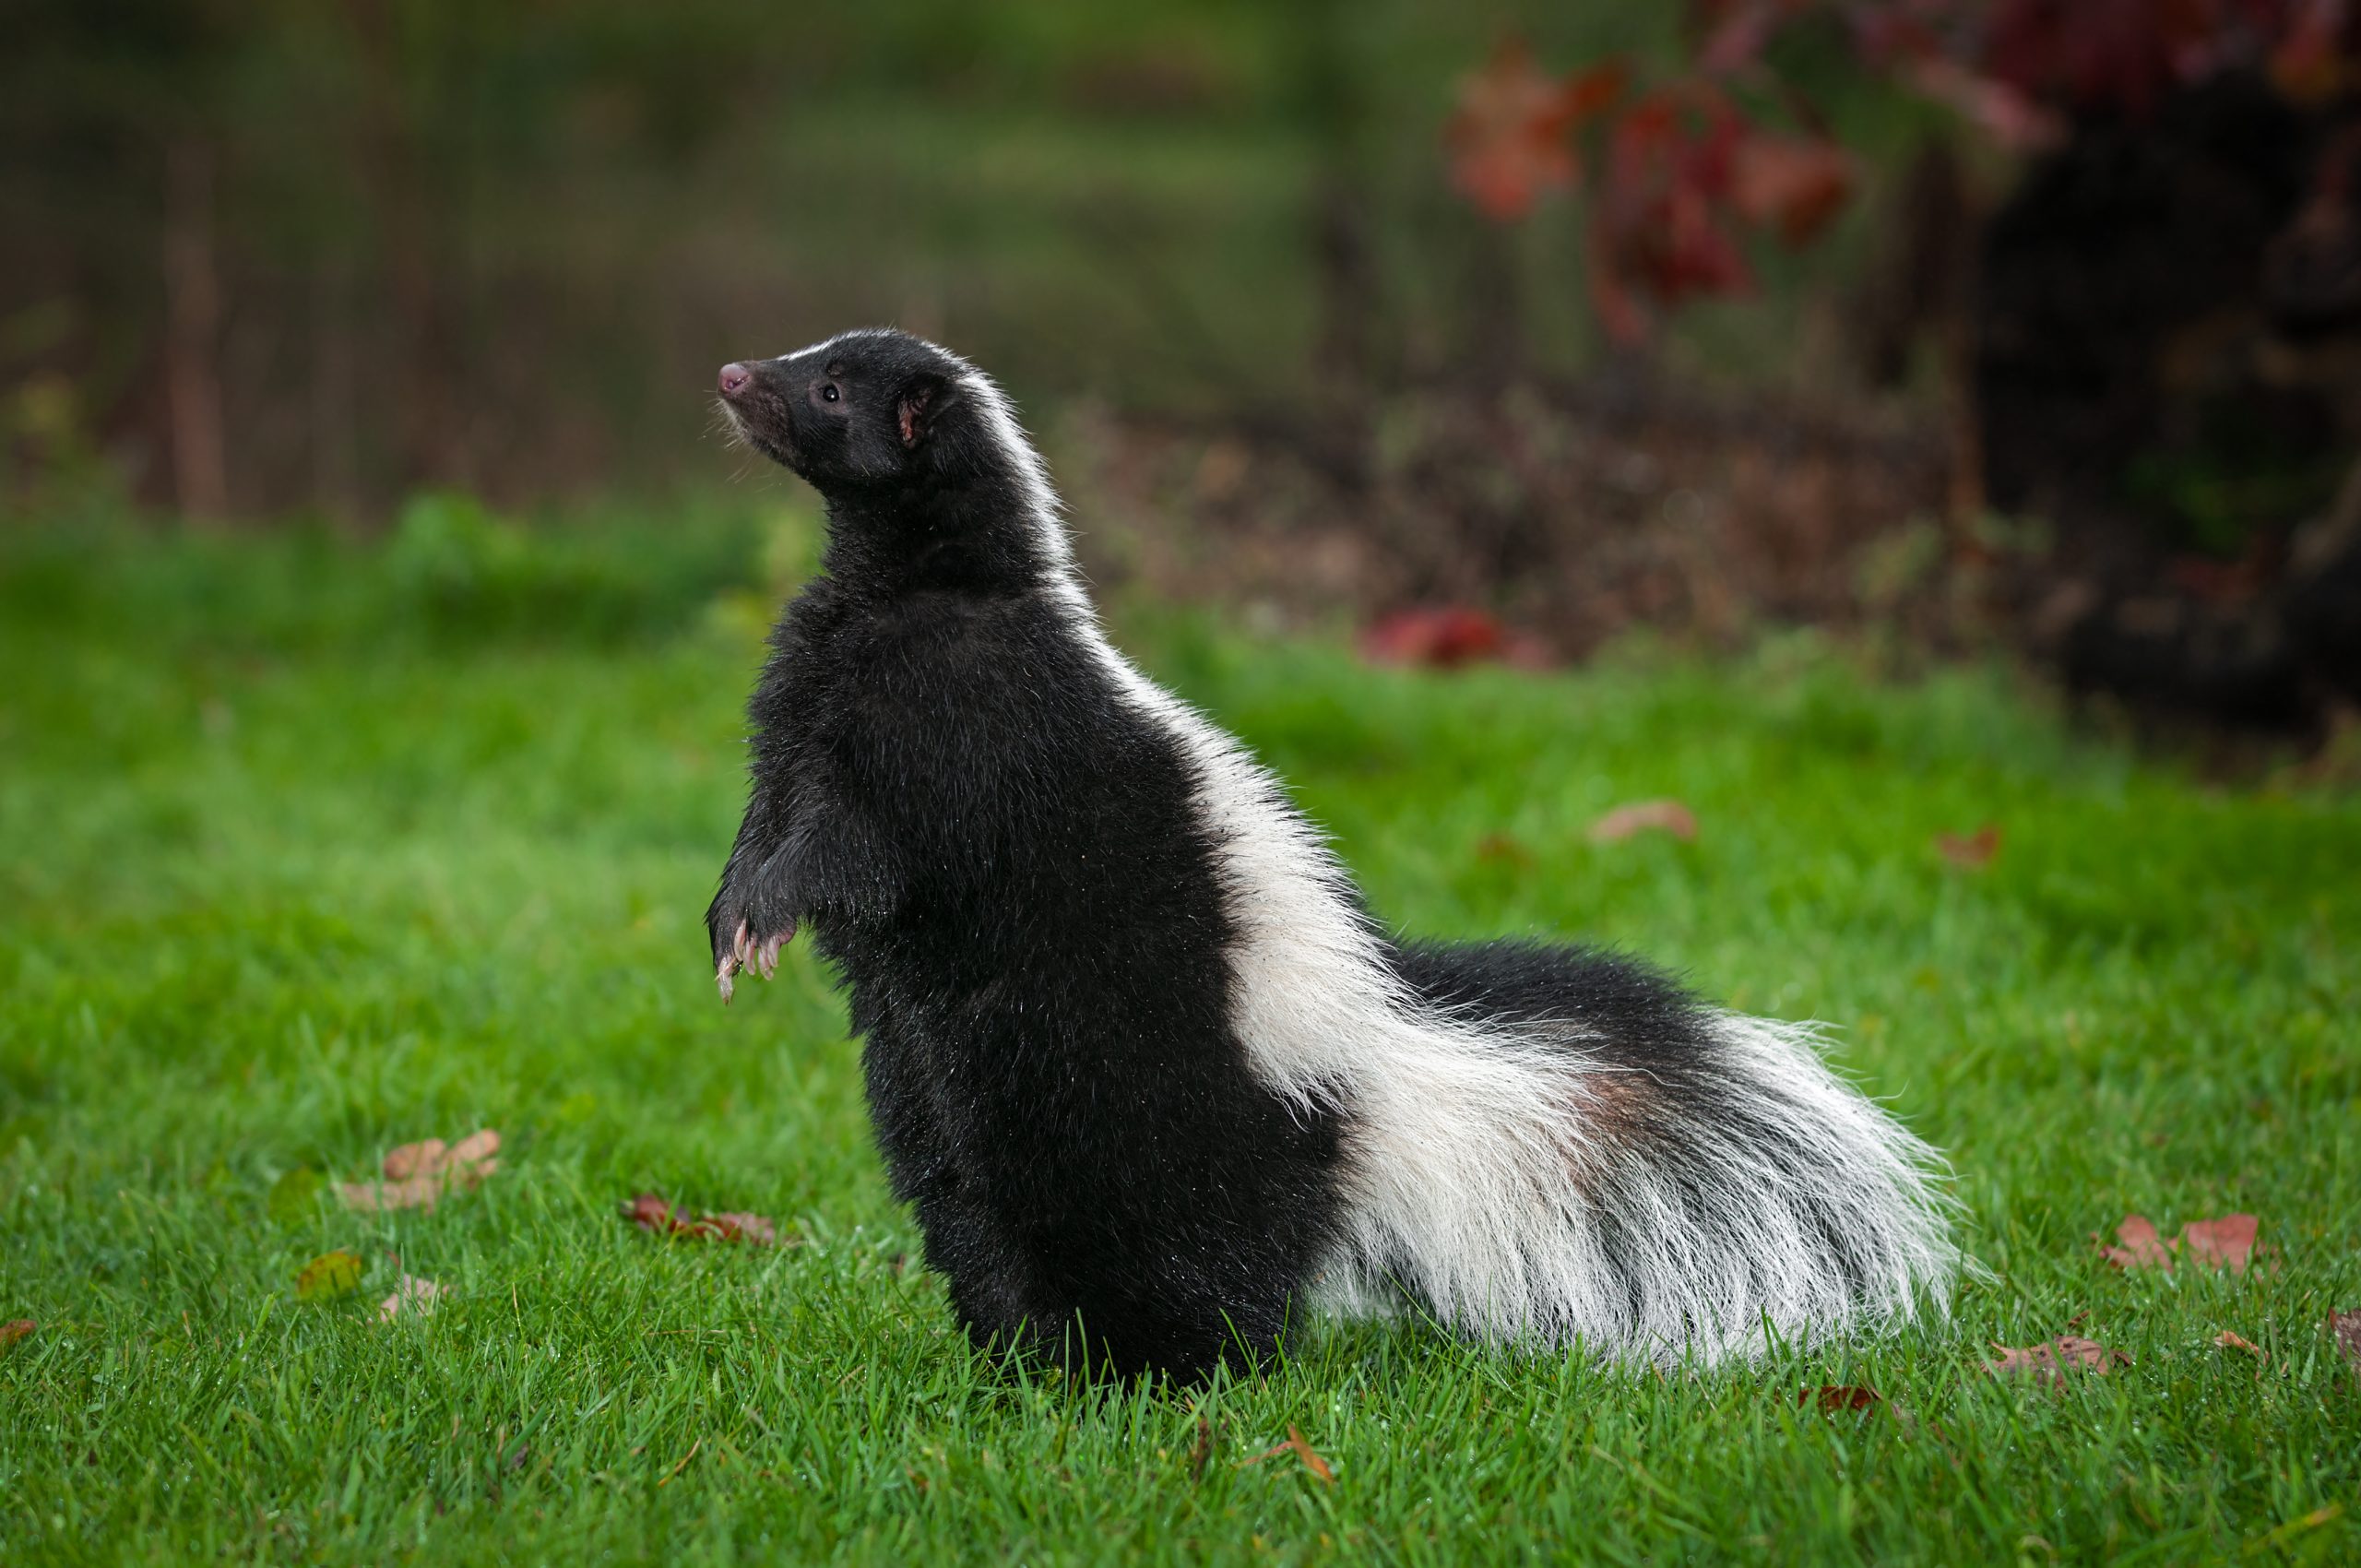
What to do When Your Dog Gets Skunked
It’s a scenario no pet owner wants to face: your dog comes bounding back from the yard, tail wagging… and smelling absolutely awful. Yep, they’ve been skunked.
Skunks are usually peaceful creatures, but when they feel threatened, they don’t hesitate to unleash their powerful defense mechanism — a foul-smelling spray that can linger for days. If your dog has had a run-in with one, here’s what you need to know to handle the situation calmly and effectively.
Ensure Your Dog is Okay
Skunk spray isn’t just smelly — it can cause physical discomfort and, in rare cases, health issues. Here are a few things to check right away:
- Eyes: If your dog was sprayed in the face, their eyes might be red or irritated. Flush them gently with clean water or pet-safe eye drops.
- Mouth: If the spray got into their mouth, rinse thoroughly with water to help remove the taste and odor.
- Wounds or Bites: Look for any signs of injury. If your dog was bitten, especially by a potential skunk with rabis, contact your vet immediately.
- Unusual Symptoms: Watch for signs like lethargy, pale gums, or dark-colored urine. These could indicate a rare reaction affecting red blood cells and should be checked by a vet.
Keep the Stink Outside
As tempting as it is to rush your dog indoors, resist the urge. Skunk odor can quickly spread through your home and cling to furniture, carpets, and clothing. Keep your dog outside while you assess the situation and prepare to clean them up.
How to Remove Skunk Smell from Your Dog
Feeds’n Needs carries products to help remove skunk smell, but you can also whip up a DIY solution that’s surprisingly effective. Here’s a tried-and-true homemade remedy:
Ingredients:
- 1 quart of 3% hydrogen peroxide
- ¼ cup baking soda
- 1 teaspoon liquid dish soap
Instructions:
- Mix the ingredients in a bowl (do not store — it can build pressure).
- Apply the mixture to your dog’s fur, avoiding the eyes and ears.
- Let it sit for a few minutes, then rinse thoroughly.
- Follow up with a full bath using pet shampoo and conditioner.
Note: This mixture may lighten dark fur temporarily and can damage fabrics, so use with care.
Alternative Option: Vinegar Rinse
If you don’t have hydrogen peroxide on hand, mix equal parts white vinegar and water. Apply and rinse as above.
If DIY isn’t your thing, Feeds’n Needs carries a range of skunk odor removal products, including:
- Skouts Honor® Skunk Odor Eliminator
- Nature’s Miracle Skunk Odor Remover Spray & Shampoo
- Loona Pet Atomizer
- De-Skunk Odor Destroying Shampoo
Availability may vary by location, so check with your local store.
Special Care for the Face
When treating your dog’s face, be extra cautious. Avoid getting any cleaning solution near their eyes, ears, or nose. Use a damp cloth to gently wipe the affected areas, and rinse with water if needed. If irritation persists, contact your vet.
Prevention Tips: Keep Skunks Away
The best way to deal with skunk spray? Avoid it altogether. Here are some tips to make your yard less inviting to skunks:
- Secure food sources: Store pet food and bird seed in sealed containers.
- Block hiding spots: Close off access to decks, sheds, and wood piles.
- Use deterrents: Motion-activated lights or sprinklers can scare skunks away.
- Discourage denning: Stuff suspected holes with leaves or paper, or sprinkle kitty litter nearby.
Conclusion
Getting skunked is never fun — for you or your dog. But with a little patience, the right cleaning method, and a watchful eye for any health concerns, your pup will be back to their usual self in no time. And next time they go sniffing around the yard, hopefully they’ll think twice before getting too close to a skunk.

UV Safety for Pets
Warm weather means more time outdoors, but while we enjoy the sunshine, it’s important to remember our pets need protection from harmful UV rays too. Sun exposure can be beneficial in small doses—but without proper precautions, pets can suffer sunburns and even face long-term skin issues, including cancer. Luckily, a few simple steps can keep your furry companions safe while they soak up the sun.
Can Pets Get a Sunburn?
Yes, they can—and not just hairless breeds. Any animal can get sunburned, especially in spots where fur is sparse, such as the nose, ears, belly, and around surgical sites. Light-colored or thin-coated pets are more vulnerable.
Even indoor cats who love to nap in sunny windows aren’t fully safe—standard glass doesn’t block all UV rays, so they can still get burned.
What Does a Sunburn Look Like on a Pet?
A sunburn on pets appears much like it does on humans: red, dry, sensitive skin that may crack or peel. Your pet might flinch when touched, lick or scratch at the area, or show signs of discomfort. Severe burns can lead to blisters or even fever, so it’s important not to ignore the warning signs.
Treating a Sunburn
Minor sunburns typically heal on their own, but it’s best to consult your vet if the area is red, painful, or if your pet seems distressed. Treatment often includes cleaning the area, applying a soothing ointment, and possibly trimming fur around the burn to help it heal.
Sun Safety Tips for Pets
To keep your pet safe under the sun:
- Use vet-approved sunscreen on vulnerable areas (never use human sunscreen—it can be toxic to pets).
- Opt for sun-protective pet clothing if your pet tolerates it.
- Plan walks and playtime for early morning or evening when the sun is less intense.
- Seek shade on outings and keep pets cool and hydrated.
- Install UV-blocking window film or shades if your indoor pet loves to bask in sunbeams.
Always check with your veterinarian for recommended sunscreen products and how to apply them safely.
Skin Cancer Risks
Repeated sunburn can increase the risk of skin cancer in pets, particularly squamous cell carcinoma. Regularly check your pet’s skin for any unusual lumps, bumps, red spots, or flaky patches. Early detection makes a significant difference.
If you notice anything concerning, schedule a veterinary exam promptly. Not every change is dangerous, but it’s always better to be safe.
Hot Spots: Another Summer Skin Concern
In warmer months, pets are also more prone to hot spots—raw, inflamed patches caused by constant licking, scratching, or biting. These can be triggered by allergies, insect bites, or matted fur and often become infected quickly.
Treatment involves trimming the hair around the area, cleaning the skin, and applying medications.
Just like us, pets need sun protection. With a little planning and attention, you can help your four-legged friends enjoy the sunny days safely—whether they’re lounging by the window or running around in the yard.

Preventing Heat Stress in Horses
Summer is a beautiful time to enjoy the outdoors with your horse. But as temperatures climb, so does the risk of heat-related illness. Just like humans, horses can suffer from heat stress and, in severe cases, heat stroke. That’s why it’s critical to understand how to recognize the signs and take proactive steps to keep your horse safe and comfortable.
What Is Heat Stress?
Heat stress occurs when a horse’s internal cooling system is no longer able to regulate body temperature effectively. This often happens during high temperatures, high humidity, or intense exercise. If left unmanaged, heat stress can lead to serious complications like dehydration, shock, or even collapse.
The horse’s normal body temperature typically ranges from 37.5–38.5°C (99–101.5°F). Anything above 40.5°C (105°F) is cause for concern and may indicate the onset of heat stroke—a potentially life-threatening emergency.
Warning Signs to Watch For
Knowing the signs of heat stress and heat stroke can make all the difference. Monitor your horse closely during warm weather or periods of exertion.
Common signs of heat stress include:
- Elevated rectal temperature (above 103°F / 39.5°C)
- Rapid breathing and flared nostrils
- Increased heart rate
- Lethargy or reluctance to move
- Excessive sweating or, conversely, no sweating
- Dehydration: tacky gums, sunken eyes, or reduced urination
- Diminished appetite
In severe cases (heat stroke), symptoms may escalate to:
- Rectal temperature exceeding 105°F (40.5°C)
- Staggering, incoordination, or collapse
- Very rapid heart and respiratory rates
- Extended skin tent when testing hydration
- Signs of agitation or distress
If you observe any of these signs, stop all activity, move your horse to a shaded area, and begin cooling them down immediately. If symptoms persist or worsen within 20 minutes, call your veterinarian.
Why Horses Struggle in the Heat
Despite being incredible athletes, horses are not as heat-tolerant as we might think. They generate a lot of heat during exercise due to their large muscle mass and relatively small surface area for heat loss. Sweating is their main cooling mechanism—losing up to 4 gallons per hour in extreme heat.
Unfortunately, high humidity prevents sweat from evaporating effectively, trapping heat and raising the risk of dehydration and electrolyte loss.
Contributing Risk Factors
Some horses are more vulnerable to heat stress than others. Keep an eye on:
- Foals and senior horses – less efficient thermoregulation
- Overweight or unfit horses – fat insulates, making it harder to cool down
- Long travel – confined spaces with poor airflow and limited water access
- Thick coats or heavy blanketing
Prevention Strategies
When it comes to heat stress, prevention is always the best medicine. Try these management strategies to help your horse beat the heat:
Modify Exercise Routines
- Avoid riding during peak heat (typically 12–5 PM)
- Use early mornings or cooler evenings for training
- Watch for early fatigue—even low-intensity work in heat can be harmful
Prioritize Hydration & Electrolytes
- Always provide access to clean, cool water
- In hot weather, horses may drink up to 19 gallons per day
- Use electrolyte supplements to replenish minerals lost through sweat (especially sodium, potassium, and chloride)
- Avoid giving large quantities of plain water alone after heavy sweating, as this can dilute existing electrolytes
Utilize Cooling Tools
- Install fans or mist systems in barns and shelters
- Walk your horse in shaded areas after workouts
- Hose down with cool water
- Use ice packs or cold towels on the neck and chest if temperatures remain high
- Skip cooling sheets during active heat stress—they can trap heat if the horse is still sweating
Consider Clipping
- Thick coats can trap heat—body clipping in the summer can help some horses cool more efficiently
Emergency Response: Cooling Down a Hot Horse
If your horse becomes overheated:
- Move to shade or a well-ventilated area
- Hose down with cool water continuously (focus on large muscle groups and neck)
- Walk gently to promote circulation
- Use ice on large blood vessels along the neck and shoulders if the temperature is dangerously high
- Offer small sips of water with electrolytes
- Monitor rectal temperature—if it doesn’t drop below 103°F (39.5°C) within 15–20 minutes, call your vet
Conclusion
Heat stress is a real concern during the summer months, but it’s also highly preventable. Understanding the warning signs and taking simple, proactive steps can protect your horse’s health and ensure you both enjoy the season safely.

How to Squirrel-Proof Your Bird Feeders
If you’ve ever looked out your window hoping to catch a glimpse of your feathered friends—only to see a squirrel hanging upside down on your bird feeder instead—you’re not alone.
Squirrels may be cute, but they can also be relentless when it comes to raiding bird feeders. The good news? There are plenty of safe, effective, and humane ways to keep them from turning your backyard into their personal buffet.
Here are some strategies to squirrel-proof your bird feeders—and keep your birdseed for the birds!
1. Follow the 5-7-9 Rule
Squirrels can seem like acrobats, but they do have limits. They generally can’t:
- Jump more than 5 feet vertically,
- Leap more than 7 feet horizontally, or
- Drop from more than 9 feet above.
Use this knowledge to your advantage. Place feeders outside of those ranges, ideally in open spaces where squirrels can’t jump from nearby trees or fences.
2. Suspend Feeders with Wire
Don’t have a spot that fits the 5-7-9 rule? Try using a long, sturdy wire to hang your feeder between two distant points. Squirrels struggle to navigate thin, flexible wire—especially if you make sure the feeder hangs at least 5 feet above the ground and 10 feet from the nearest launch point.
3. Invest in a Squirrel Baffle
These dome- or cone-shaped barriers block squirrels from climbing poles or jumping onto feeders. Most are easy to install and won’t harm the squirrels—just frustrate them enough to give up.
4. Pick the Right Seeds
Birds love sunflower seeds, and so do squirrels. If you’re looking for something less squirrel-tempting, try:
- Safflower seeds
- Nyjer (thistle) seeds
- White millet
Mixing these in with your regular seed may make your feeders less appealing to squirrels without deterring birds.
5. Add a Dash of Spice
Capsaicin—the compound that gives chili peppers their heat—is a squirrel deterrent. Birds can’t taste it, but squirrels can. Consider sprinkling a bit of cayenne pepper into your birdseed mix.
6. Try a Spinning Feeder
Squirrels don’t do well with unstable footing. Some feeders are designed to spin or wobble when too much weight is applied, making it nearly impossible for squirrels to stay on board. You can also use a spinning hook to achieve a similar effect.
Always ensure these devices are safe and won’t injure the squirrel—just discourage it.
7. Give Squirrels Their Own Feeders
Giving squirrels their own feeder stocked with peanuts or dried corn may satisfy their appetites enough to keep them away from your bird feeders.
Some backyard birders find that keeping squirrels fed and happy (away from the birds) creates a peaceful balance.
8. Use a Slinky
Yes, a Slinky—as in the toy. Wrap one around your bird feeder pole and let it hang down. When squirrels try to climb up, the Slinky moves and drops them back to the ground in a harmless way.
9. Upgrade to a Caged Feeder
Caged bird feeders are designed with openings small enough to let birds through while keeping squirrels (and larger birds) out. It’s one of the most effective ways to protect your birdseed. Feeds’n Needs has a variety of caged feeders available to choose from.
10. Keep Things Clean
Fallen seed and shells can attract rodents—including squirrels. Use a seed tray under your feeder or clean the ground regularly to reduce mess and discourage furry visitors.
What Not to Do
Please avoid harmful methods such as:
- Glue or adhesives
- Poison
- Petroleum jelly or grease
Squirrel-proofing is about creating a safe, respectful boundary—not harming the wildlife that shares your space.
Conclusion
There’s no one-size-fits-all solution, but with a little patience and creativity, you can create a squirrel-resistant setup that keeps your feeders full—for the birds.


