Most people think lawn care stops when the snow falls. In the Maritimes, that instinct is mostly right — but not entirely.
Winter is the one season where your lawn is largely taking care of itself underground, storing energy and waiting for spring. Your job as a homeowner shifts from active care to protection and preparation. The decisions you make in late fall, and a few key habits through the winter months, can be the difference between a lawn that bounces back quickly in spring and one that struggles for weeks to recover from avoidable winter damage.
This guide covers what’s actually happening to your Maritime lawn in winter, what you can and can’t control, the most common sources of winter lawn damage, and how to set yourself up for the strongest possible spring.
Key Takeaways
- Dormant grass is alive — the crowns and roots remain viable under snow and frozen soil
- Most winter lawn damage in the Maritimes is caused by salt, traffic on frozen grass, snow mold, ice sheets, and vole activity
- Avoid walking on frost-covered or frozen grass — it breaks dormant grass crowns
- Never apply fertilizer, seed, or lime to frozen or snow-covered ground
- Salt and ice melt products cause significant lawn damage — choose carefully and use sparingly near lawn edges
- Snow mold risk is highest under prolonged, heavy snow cover — good fall preparation is the best prevention
- Winter is the ideal time to plan spring repairs, test your equipment, and order products early
- The number one winter lawn care job is keeping heavy traffic, salt, and debris off the grass
1. What’s Actually Happening to Your Lawn in Winter
Understanding the biology of your lawn in winter helps you make better decisions about how to treat it.
Cool-season grasses — Kentucky Bluegrass, Fine Fescue, and Perennial Ryegrass, which make up most Maritime lawns — go dormant in winter, but dormant does not mean dead. Dormancy is a survival strategy. When soil temperatures drop consistently below 5°C, grass plants stop top growth and redirect their energy into the crown (the growth point just at or below the soil surface) and the root system.
What’s happening underground:
- The crown of the plant remains alive and viable — this is what regenerates the lawn in spring
- Root systems continue very slow activity as long as soil isn’t completely frozen
- Carbohydrate reserves stored during fall feeding sustain the plant through winter
- Soil microbiology slows significantly but doesn’t stop — earthworms, beneficial bacteria, and fungal networks remain partially active in unfrozen soil layers
What this means practically:
- A healthy lawn going into winter — well-fed, properly cut, and free of heavy debris — has the reserves to survive a typical Maritime winter without any intervention
- A stressed, underfed, or debris-covered lawn entering winter is vulnerable to ice sheet suffocation, snow mold, and a weak, patchy spring emergence
- The crown is the most vulnerable part of the plant in winter — anything that physically damages it (foot traffic on frozen grass, ice sheets, heavy equipment) causes the kind of damage that shows up as dead patches in spring
2. The Most Common Winter Lawn Damage in the Maritimes — and How to Prevent It
Salt and Ice Melt Damage
This is the single most common and most preventable source of winter lawn damage in Atlantic Canada. Road salt, municipal sidewalk salting, and homeowner-applied ice melt products are responsible for the brown and dead strips that appear along driveways, walkways, and road-facing lawn edges every spring.
How salt damages grass:
Salt draws moisture out of plant tissue through osmosis, even in dormant grass. High sodium concentrations in the soil also disrupt the balance of nutrients and make it difficult for grass to recover in spring, even after the salt itself has dissipated.
What you can do:
- Choose lawn-safe ice melt products where possible — calcium magnesium acetate (CMA) and sand-based products are significantly less damaging to turf than sodium chloride (rock salt) or calcium chloride
- Use less — most homeowners over-apply ice melt. A light, even application is more effective and less damaging than heavy use
- Create a physical buffer where persistent salt damage occurs year after year — edging, a narrow gravel strip, or alternative ground cover along driveway edges can protect vulnerable lawn areas
- Keep municipal salt spray in mind — if your lawn borders a road that receives heavy municipal salting, the runoff and spray drift during plowing events can be significant. Low edging or a slight berm can reduce direct contact
Foot Traffic on Frozen or Frost-Covered Grass
Walking across a lawn covered in frost or frozen solid doesn’t look like it causes damage — but it does. Grass crowns are brittle when frozen, and the physical pressure of footsteps breaks and crushes them. This damage shows up in spring as irregular dead patches in areas that received regular winter foot traffic.
What you can do:
- Establish clear pathways with stepping stones, gravel, or cleared walkways so foot traffic naturally stays off the lawn in winter
- Communicate this to family members, visitors, and anyone providing snow removal services
- Avoid taking shortcuts across the lawn during frost or freeze periods — even occasional traffic in the same area accumulates damage over a winter
Ice Sheets and Prolonged Ice Cover
Extended periods of ice cover — from freezing rain events, melt-freeze cycles, or thick, impermeable snow layers — can suffocate grass by blocking gas exchange at the soil surface. Carbon dioxide builds up beneath the ice while oxygen is depleted. This is less common as a widespread problem but can cause significant damage in low-lying areas, spots with poor drainage, or regions that experience frequent freeze-thaw cycling.
What you can do:
- Improve drainage in low-lying areas before winter — a task best done in fall
- If a thick ice sheet forms over a significant portion of your lawn and persists for more than three to four weeks, gently breaking it up to create openings for gas exchange can help in severe cases
- Most ice cover situations in the Maritimes are not prolonged enough to cause widespread damage — localized low spots are the main concern
Snow Mold
Snow mold develops under prolonged snow cover, particularly when snow falls on unfrozen ground or when deep, heavy snowpack sits for extended periods. The two main types — gray snow mold and pink snow mold — both leave circular, matted patches of discoloured grass visible after snowmelt.
Prevention is far more effective than treatment:
- Make your final fall mow at 2 to 2.5 inches — long grass matting under snow is the primary driver of snow mold
- Remove heavy leaf accumulation before winter — a thick mat of wet leaves under snow creates a perfect incubator for fungal growth
- Avoid piling or pushing snow into large, deep accumulations on your lawn if possible — the deeper and longer the snowpack, the higher the snow mold risk underneath
If snow mold appears in spring: Lightly rake affected areas to restore airflow and allow drying. Most lawns recover naturally. Persistently bare patches may need overseeding.
Vole Damage
Voles — small meadow mice — create networks of surface runways under the snow, feeding on grass crowns and plant material over winter. Their damage appears in spring as winding, matted trails or patches of dead grass in irregular patterns across the lawn, often more visible in lawns bordering fields, wooded areas, or gardens.
What to look for in spring: Narrow, winding trails of dead or matted grass — typically an inch or two wide — running in irregular patterns. Unlike snow mold, which appears as circular patches, vole damage follows the trail patterns the animals created under the snow.
What you can do:
- Keep grass mowed short going into winter — tall grass provides the cover voles prefer for their runway systems
- Remove brush piles, dense garden debris, and heavy mulch near lawn edges in fall — these are preferred overwintering habitats
- In areas with persistent vole pressure, consult your local Feeds’n Needs team about deterrent options
3. What NOT to Do to Your Lawn in Winter
Knowing what to avoid is as important as knowing what to do.
Don’t apply fertilizer to frozen or snow-covered ground. Fertilizer applied to frozen soil cannot be absorbed by grass roots. It sits on the surface until thaw, at which point a significant portion runs off into storm drains, ditches, and waterways rather than feeding your lawn. This is both ineffective and environmentally harmful.
Don’t seed in winter. Grass seed requires soil contact, consistent moisture, and minimum soil temperatures to germinate. None of these conditions exist in frozen Maritime winters. Seed applied to frozen or snow-covered ground will either wash away at thaw, be eaten by birds, or simply fail to germinate. Wait for spring.
Don’t apply lime to frozen ground. Lime needs moisture and soil contact to begin working. While a light frost won’t prevent lime from being effective, applying to frozen, snow-covered ground means most of the product will run off at snowmelt rather than being absorbed. Fall application before freeze-up is the right approach.
Don’t pile snow excessively on lawn areas. If you’re managing snow removal from a driveway or walkway, try to distribute piles across a larger area rather than creating one massive, deep accumulation in one spot. Deep, long-lasting snow piles increase snow mold risk and can cause prolonged ice cover damage in the area below.
Don’t use metal shovels or snow blower chutes aggressively near lawn edges. Scraping and gouging lawn edges during snow removal causes physical damage to turf that shows up as tearing and bare spots in spring.
4. Winter Is Planning Season — Use It Well
The best thing most Maritime homeowners can do for their lawn in January and February is plan.
Assess your lawn while snow is on the ground:
- Think back to how your lawn looked at the end of last season
- Note areas that struggled through summer or fall — bare spots, thin patches, grub damage, drainage problems, high-traffic zones
- Consider whether you need to adjust your approach — different seed mix, earlier lime application, aeration this coming fall
Order products early:
- Spring lawn care products — seed, fertilizer, lime — can sell out at busy times
- Knowing what you need before the rush means you’re ready to act as soon as the ground firms up in spring
- Talk to your local Feeds’n Needs team over winter about what you observed last season and what your plan is for spring
Maintain and tune up your equipment:
- Winter is the ideal time to sharpen mower blades, change the oil, replace the air filter, and check the spark plug on your lawn mower
- A well-maintained mower ready to go in April makes a real difference — dull blades on the first spring cut stress a lawn that’s already working to recover from winter
- Check your spreader for fertilizer and seed application — clean and calibrate it so it’s ready for spring
Research and learn:
- Read through Feeds’n Needs seasonal guides for spring, summer, and fall so you have a clear plan for the coming year
- Consider whether a soil test might be worthwhile this spring — knowing your pH and nutrient levels takes the guesswork out of fertilizing and liming decisions
5. Watching for Early Signs of Winter Damage
As winter progresses — particularly after major ice events, prolonged snow cover, or significant thaw-refreeze cycles — it’s worth keeping an eye on your lawn when conditions allow a visual check.
After a significant thaw event, take a look at:
- Low-lying areas that may have accumulated standing water under the snow — prolonged saturation under ice can cause root damage
- Lawn edges along driveways and roads — check whether salt spray or melt runoff has reached the turf
- Areas where you know voles have been a problem in past years
You won’t be able to do much about what you observe until spring, but noting problem areas while they’re visible helps you act quickly once the ground firms up.
6. What to Expect When Spring Arrives
Even a well-protected Maritime lawn will look rough after winter. Managing your expectations — and knowing the difference between normal winter dormancy and actual damage — helps you respond appropriately rather than overreacting.
Normal after winter:
- Tan or straw-coloured grass across much of the lawn — this is dormancy, not death
- Matted, flat-looking areas where snow compression has occurred
- Slow green-up in shaded or north-facing areas that stay cold and damp longer
- A dull, tired overall appearance before the first warm weeks of spring
Signs of actual damage requiring attention:
- Circular, matted patches with discolouration — likely snow mold
- Winding trails of dead grass — likely vole damage
- Dead strips along driveway and road edges — likely salt damage
- Irregular bare patches in areas that received winter foot traffic — likely crown damage from traffic on frozen grass
- Patches that don’t green up at all after several weeks of warm weather — may indicate root death from ice suffocation or severe grub damage
The most important thing in early spring is patience. Wait for the ground to firm up, assess what’s actually there, and then act — rather than rushing in on wet soil and causing more damage than winter did.
Frequently Asked Questions
Is my lawn dead or dormant in winter?
Almost certainly dormant. Cool-season grasses survive winter by going dormant — the crowns and roots remain alive while top growth stops. A lawn that was healthy going into winter and has not experienced severe ice suffocation or salt damage will recover in spring. You can check by gently pulling at a small section of turf — if the crowns (just at soil level) have some firmness and slight colour, the grass is alive.
Should I put anything on my lawn in winter?
No. Fertilizer, seed, and lime should not be applied to frozen or snow-covered ground. They either run off at snowmelt or simply don’t work until conditions are right. Wait for spring.
What ice melt is safest for my lawn?
Calcium magnesium acetate (CMA) is the least damaging to turf. Sand-based products provide traction without chemical damage. Sodium chloride (rock salt) and calcium chloride are the most commonly available but also the most damaging to grass. If you use them, apply sparingly and flush the area with water in spring.
How do I know if my lawn has snow mold?
After snowmelt, snow mold appears as circular or irregular matted patches, typically grayish-white or pinkish in colour. The grass in affected areas looks flattened and may have a webby appearance. Lightly raking these areas in spring restores airflow and allows recovery.
What is vole damage and how do I fix it?
Voles are small meadow mice that tunnel under snow, creating surface runways and feeding on grass crowns. Their damage looks like narrow, winding trails of dead or matted grass visible after snowmelt. Rake out affected areas in spring and overseed once conditions allow.
Can I walk on my lawn in winter?
Avoid walking on frost-covered or frozen grass. Frozen grass crowns are brittle and break under foot pressure, leaving dead patches in spring. If you need to cross the lawn regularly, create a dedicated pathway with stepping stones or cleared ground.
When should I start spring lawn care after winter?
Wait until the ground has firmed up enough that footprints don’t remain visible. In most Maritime areas this is late April to mid-May. Starting too early on wet, soft soil causes compaction and damages emerging grass.
My lawn looks terrible after winter — is it too late?
Almost certainly not. Cool-season grasses are remarkably resilient. Most winter damage — snow mold, matting, salt edges, and even moderate vole damage — can be repaired with proper spring care. Give the lawn a few weeks of warm weather before drawing conclusions, then assess and address what remains.
A Note on Winter as a Season of Preparation
Winter isn’t a passive season for Maritime homeowners who care about their lawn — it’s a season of observation, planning, and preparation. The lawns that look the best every summer belong to homeowners who use fall to prepare properly and winter to plan ahead.
Visit your local Feeds’n Needs team over the winter months. Tell us what you observed about your lawn last season — where it struggled, where it thrived, and what you want to improve. We can help you build a product and timing plan so you’re ready to act the moment the ground firms up in spring.
Recommended Products to Have Ready for Spring
- 17-17-17 Balanced Fertilizer — For spring overseeding and bare spot repair
- 21-7-7 Slow Release Fertilizer — For established lawn green-up in spring
- Triple Mix Lawn Seed — For general spring repair and overseeding
- Premium Lawn Mix — For front yards and high-visibility finished lawn areas
- Highway Mix — For slopes, ditches, and low-maintenance areas
- Lime — For correcting the acidic soil conditions common across the Maritimes
Have questions about your lawn? Visit your local Feeds’n Needs store for expert advice — even in winter. Our team is here year-round to help you plan, prepare, and get ahead for a greener lawn next season.
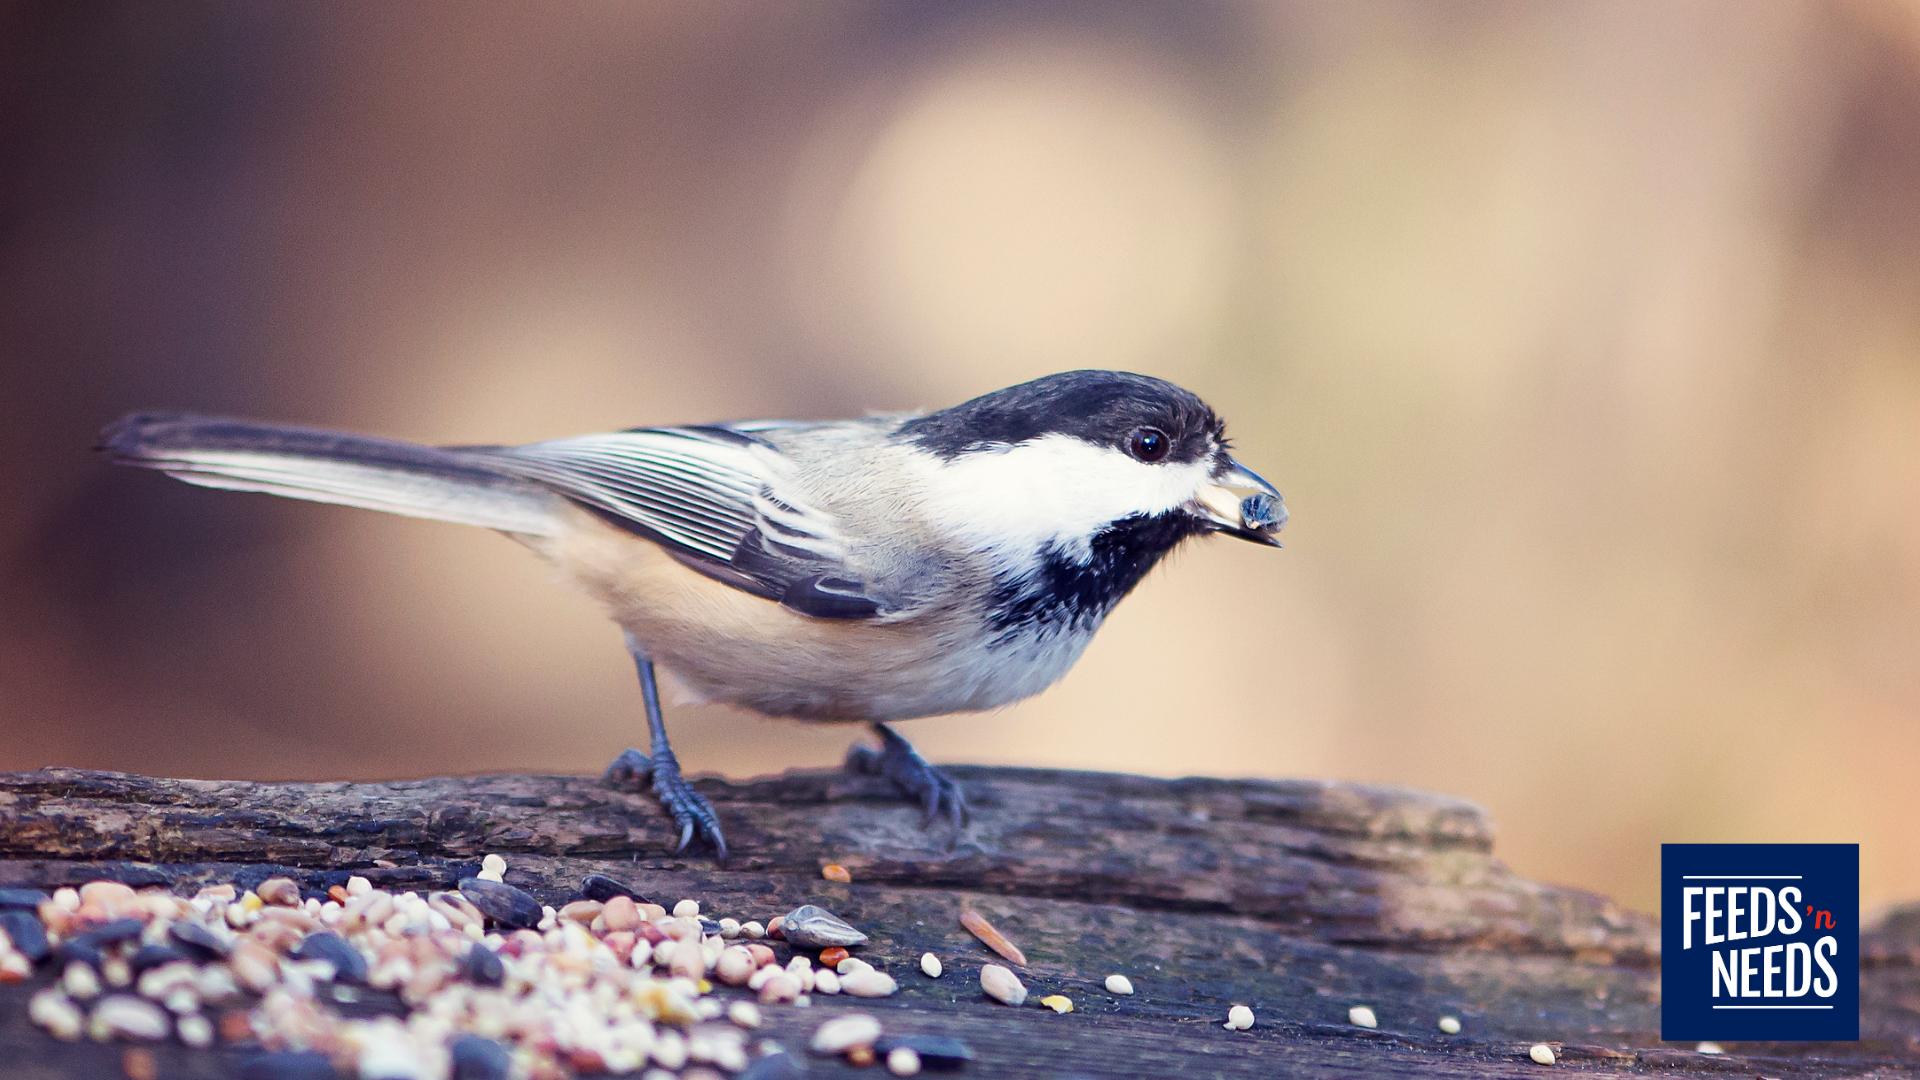
Winter in Atlantic Canada can be demanding for backyard birds. Short daylight hours, frozen ground, deep snow, coastal winds and sudden changes in temperature can make natural food more difficult to find.
While native plants, shrubs and trees remain important sources of natural food and shelter, a well-maintained feeder can provide visiting birds with an additional source of energy during the colder months.
Choosing the best birdseed for winter is not simply about filling a feeder with any available mix. Black oil sunflower seed, peanuts, suet and mixed birdseed each appeal to different species and provide different nutritional benefits.
By matching the food with the right feeder and the birds in your backyard, you can reduce waste, improve feeder activity and support a wider variety of Atlantic Canadian winter birds.
What Do Winter Birds Need?
Birds use significant energy to maintain body temperature during cold weather. They must also continue flying, searching for food and avoiding predators while working with fewer daylight hours.
High-energy foods rich in fat can be especially valuable during winter. However, feeder birds also need reliable access to clean, dry food that suits the size and shape of their bills.
A varied winter feeding station may include:
- Black oil sunflower seed for broad appeal
- Peanuts for larger, energetic visitors
- Suet for insect-eating birds
- A quality mixed seed for greater variety
- Fresh water when safely available
- Multiple feeder styles for different feeding behaviours
No single food attracts every bird. Offering two or more options can help create a more active and diverse backyard feeding area.
Black Oil Sunflower Seed: The Best All-Around Choice
If you plan to offer only one type of winter birdseed, black oil sunflower seed is an excellent place to start.
Black oil sunflower seeds have relatively thin shells that many birds can open. The kernels provide fat and energy, making them well suited to cold-weather feeding.
Common Atlantic Canadian birds attracted to black oil sunflower seed include:
- Black-capped chickadees
- Boreal chickadees
- Blue jays
- Northern cardinals
- American goldfinches
- Pine siskins
- House finches
- Purple finches
- Red-breasted nuthatches
- White-breasted nuthatches
- Downy woodpeckers
- Hairy woodpeckers
- Evening grosbeaks
Not every species will appear in every yard, and some winter visitors vary from year to year. Feeder activity is influenced by habitat, weather, natural food supplies and regional movement.
Best Feeders for Black Oil Sunflower Seed
Black oil sunflower seed works well in:
- Tube feeders
- Hopper feeders
- Platform feeders
- Covered tray feeders
- Squirrel-resistant feeders
Choose a feeder with drainage and enough protection to keep seed as dry as possible. Atlantic Canadian winters often bring a combination of rain, freezing rain, snow and thawing conditions, which can cause exposed seed to become wet or frozen.
Whole Seed or Sunflower Hearts?
Whole black oil sunflower seed is economical and stores well, but the discarded shells can accumulate beneath feeders.
Sunflower hearts or chips eliminate most shell waste and are easier for birds to eat. They can attract many of the same species, but the exposed kernels may spoil more quickly when wet. Offer smaller quantities and check the feeder frequently.
Peanuts: High-Energy Food for Bold Backyard Visitors
Peanuts are rich in fat and protein, making them a popular winter food for several larger birds as well as chickadees and nuthatches.
Birds commonly attracted to peanuts include:
- Blue jays
- Canada jays in suitable habitat
- Black-capped chickadees
- Red-breasted nuthatches
- White-breasted nuthatches
- Downy woodpeckers
- Hairy woodpeckers
Blue jays may carry whole peanuts away and store them for later. Chickadees and nuthatches often visit feeders for peanut pieces that can be eaten quickly or cached nearby.
Whole Peanuts
Whole peanuts in the shell are particularly appealing to blue jays and other larger birds. They can be offered in a sturdy platform feeder or a feeder designed specifically for peanuts.
Whole peanuts may also attract squirrels, crows and other wildlife. A weight-sensitive or squirrel-resistant feeder can help if smaller birds are your priority.
Shelled Peanuts and Peanut Pieces
Shelled peanuts or peanut pieces are easier for smaller birds to manage. Use a wire-mesh peanut feeder or another design that limits the amount removed at one time.
Only offer peanuts that are:
- Plain
- Unsalted
- Unseasoned
- Fresh
- Free from mould
Peanuts can absorb moisture and spoil, so avoid overfilling feeders during wet weather. Discard any peanuts that appear damp, mouldy or rancid.
Suet: Cold-Weather Fuel for Woodpeckers and Insect-Eating Birds
Suet is a concentrated source of fat that is especially useful during cold weather. It can supplement the insects and larvae that many birds search for in tree bark throughout the year.
Winter birds commonly attracted to suet include:
- Downy woodpeckers
- Hairy woodpeckers
- Pileated woodpeckers
- Red-breasted nuthatches
- White-breasted nuthatches
- Black-capped chickadees
- Boreal chickadees
- Brown creepers
- Blue jays
Choosing a Suet Blend
Suet cakes are available in several blends, including varieties containing:
- Peanuts
- Sunflower seed
- Insects or mealworms
- Fruit
- Mixed seed
Peanut and insect blends often appeal to woodpeckers and nuthatches, while fruit blends may attract additional seasonal visitors.
Choose a quality product intended specifically for wild birds. Avoid feeding kitchen grease or heavily processed fats, which may contain salt, seasonings or other unsuitable ingredients.
Best Suet Feeders
A basic wire suet cage works well for many yards. Other options include:
- Tail-prop feeders for larger woodpeckers
- Upside-down suet feeders
- Caged suet feeders that limit access by larger birds
- Combination seed and suet feeders
Mount the feeder near trees or shrubs where birds can approach from cover, but place it carefully so predators cannot hide immediately beside it.
Suet performs best in cool weather. Inspect it during warm spells and replace any product that becomes spoiled, dirty or rancid.
Mixed Birdseed: Variety in One Bag
A quality mixed birdseed can attract several species with different feeding preferences. It may include black oil sunflower seed, white millet, cracked corn, sunflower chips and other grains or seeds.
Depending on the ingredients, mixed seed may attract:
- Black-capped chickadees
- Northern cardinals
- Blue jays
- Dark-eyed juncos
- Mourning doves
- American tree sparrows
- Song sparrows
- Finches
- Other ground-feeding birds
Read the Ingredient List
Not all mixed birdseed provides the same value. Some blends contain a high proportion of inexpensive grains that local birds may leave behind.
When birds scatter unwanted ingredients while searching for preferred seeds, more food ends up on the ground. This creates waste and may attract rodents.
Look for a blend with recognizable, appealing ingredients such as:
- Black oil sunflower seed
- Sunflower chips
- White millet
- Peanut pieces
- Cracked corn in moderate amounts
The best blend depends on the birds using your yard. Pay attention to which ingredients disappear and which remain in the feeder or collect underneath it.
Best Feeders for Mixed Seed
Mixed birdseed can be offered in:
- Hopper feeders
- Platform feeders
- Covered tray feeders
- Ground-feeding stations
- Some tube feeders, depending on seed size
A hopper feeder protects seed better than an open tray during snow or rain. Ground-feeding birds may appreciate seed offered close to ground level, but feeding areas must be kept especially clean to reduce contamination and rodent activity.
Quick Winter Birdseed Comparison
Black Oil Sunflower Seed
Best for: A wide variety of backyard birds
Likely visitors: Chickadees, cardinals, nuthatches, finches, grosbeaks and woodpeckers
Best feeder: Tube, hopper or squirrel-resistant feeder
Main benefit: High-energy seed with broad appeal
Peanuts
Best for: Larger birds and energetic winter visitors
Likely visitors: Blue jays, chickadees, nuthatches and woodpeckers
Best feeder: Mesh peanut feeder, platform or specialty peanut feeder
Main benefit: Concentrated fat and protein
Suet
Best for: Clinging and insect-eating birds
Likely visitors: Woodpeckers, nuthatches, chickadees and brown creepers
Best feeder: Suet cage or tail-prop feeder
Main benefit: Concentrated cold-weather energy
Mixed Birdseed
Best for: Attracting birds with varied preferences
Likely visitors: Juncos, sparrows, doves, cardinals, chickadees and finches
Best feeder: Hopper, platform or covered tray feeder
Main benefit: Multiple food types in one blend
Match the Feeder to the Bird
The food you offer is only half of the equation. Feeder design determines which birds can comfortably access it.
Tube Feeders
Tube feeders are well suited to chickadees, nuthatches and finches. Models with short perches can limit access by some larger birds.
Hopper Feeders
Hopper feeders hold a larger quantity of seed and provide some protection from precipitation. They can attract both small and medium-sized birds.
Platform Feeders
Open platform feeders accommodate cardinals, jays, doves and other birds that prefer a broad landing area. Because the food is more exposed, these feeders require frequent cleaning and careful weather monitoring.
Suet Feeders
Wire cages and tail-prop feeders allow woodpeckers and other clinging birds to feed in a natural position.
Ground-Feeding Areas
Juncos, sparrows and mourning doves often search for fallen seed. Keep the ground beneath feeders clean and avoid allowing damp seed and hulls to accumulate.
Create a Winter Feeding Station
Instead of combining every food in one feeder, consider creating a small feeding station with several options.
A balanced setup might include:
- Black oil sunflower seed in a tube or hopper feeder.
- Suet in a cage mounted nearby.
- Peanuts in a mesh feeder.
- Mixed seed in a covered feeder for cardinals, juncos and sparrows.
Spacing feeders apart can reduce crowding and give timid species more opportunities to eat.
Trees, shrubs and evergreen cover provide places for birds to perch and shelter from weather. A yard with varied natural habitat is often more attractive than an exposed feeder by itself.
Keep Winter Birdseed Fresh and Dry
Atlantic Canadian weather can quickly turn good birdseed into wet, frozen or mouldy feed.
To protect your seed:
- Store it in a cool, dry location.
- Use a container with a secure lid.
- Keep storage containers away from rodents.
- Avoid buying more than you can use while it is fresh.
- Check feeders after rain, freezing rain and wet snow.
- Break up or discard frozen clumps.
- Never add fresh seed on top of damp or spoiled seed.
- Refill with smaller amounts during stormy weather.
Birdseed should smell fresh. If it appears mouldy, wet or rancid, discard it.
Clean Feeders Regularly
Many birds gathering in one location can increase the risk of disease transmission. Clean feeders regularly and more frequently when conditions are wet or when bird activity is heavy.
Remove old seed and hulls, wash the feeder appropriately and allow it to dry completely before refilling. Clean the ground beneath feeding stations and rotate feeder locations when practical.
If you notice birds that appear unusually lethargic, have swollen or crusted eyes, struggle to eat or remain fluffed up for long periods, temporarily remove the feeders and seek current guidance from a wildlife-health or bird-conservation authority.
Reduce Waste and Rodent Activity
Food left on the ground can attract mice, rats and other unwanted visitors.
Reduce waste by:
- Choosing seed your local birds actually eat
- Using a seed-catching tray
- Avoiding overfilled feeders
- Cleaning beneath feeders
- Storing birdseed in secure containers
- Discarding damp or spoiled food
- Bringing accessible feeders in at night if rodents become a problem
- Using separate feeders for different food types
Hulled seed creates less shell debris, but any uneaten food still needs to be cleaned up.
Don’t Forget Water
Birds need water in winter for drinking and feather maintenance. Natural water can be difficult to access when ponds, puddles and birdbaths freeze.
A heated birdbath designed for outdoor winter use can provide a valuable water source. Follow all product instructions and use safe electrical connections intended for outdoor conditions.
Keep water shallow and clean it regularly. Do not add salt, antifreeze or other chemicals to prevent freezing.
Choose Birdseed Based on the Birds You Want to See
For the widest variety of Atlantic Canadian winter birds, start with black oil sunflower seed. Add suet to attract woodpeckers, chickadees and nuthatches. Offer peanuts for blue jays and other bold visitors, then include a quality mixed seed for ground-feeding birds and species that enjoy smaller grains.
The strongest winter feeding setup combines:
- Quality food
- Appropriate feeders
- Dry storage
- Regular cleaning
- Shelter nearby
- Consistent observation
Feeds’n Needs carries black oil sunflower seed, peanuts, suet, mixed birdseed, feeders and birdseed-storage solutions to help you build a dependable winter feeding station. Product selection may vary by location, so visit your local store and speak with our knowledgeable team about the birds visiting your backyard.
Choose the right seed, keep your feeders clean and enjoy the colour and activity that winter birds bring to Maritime backyards.
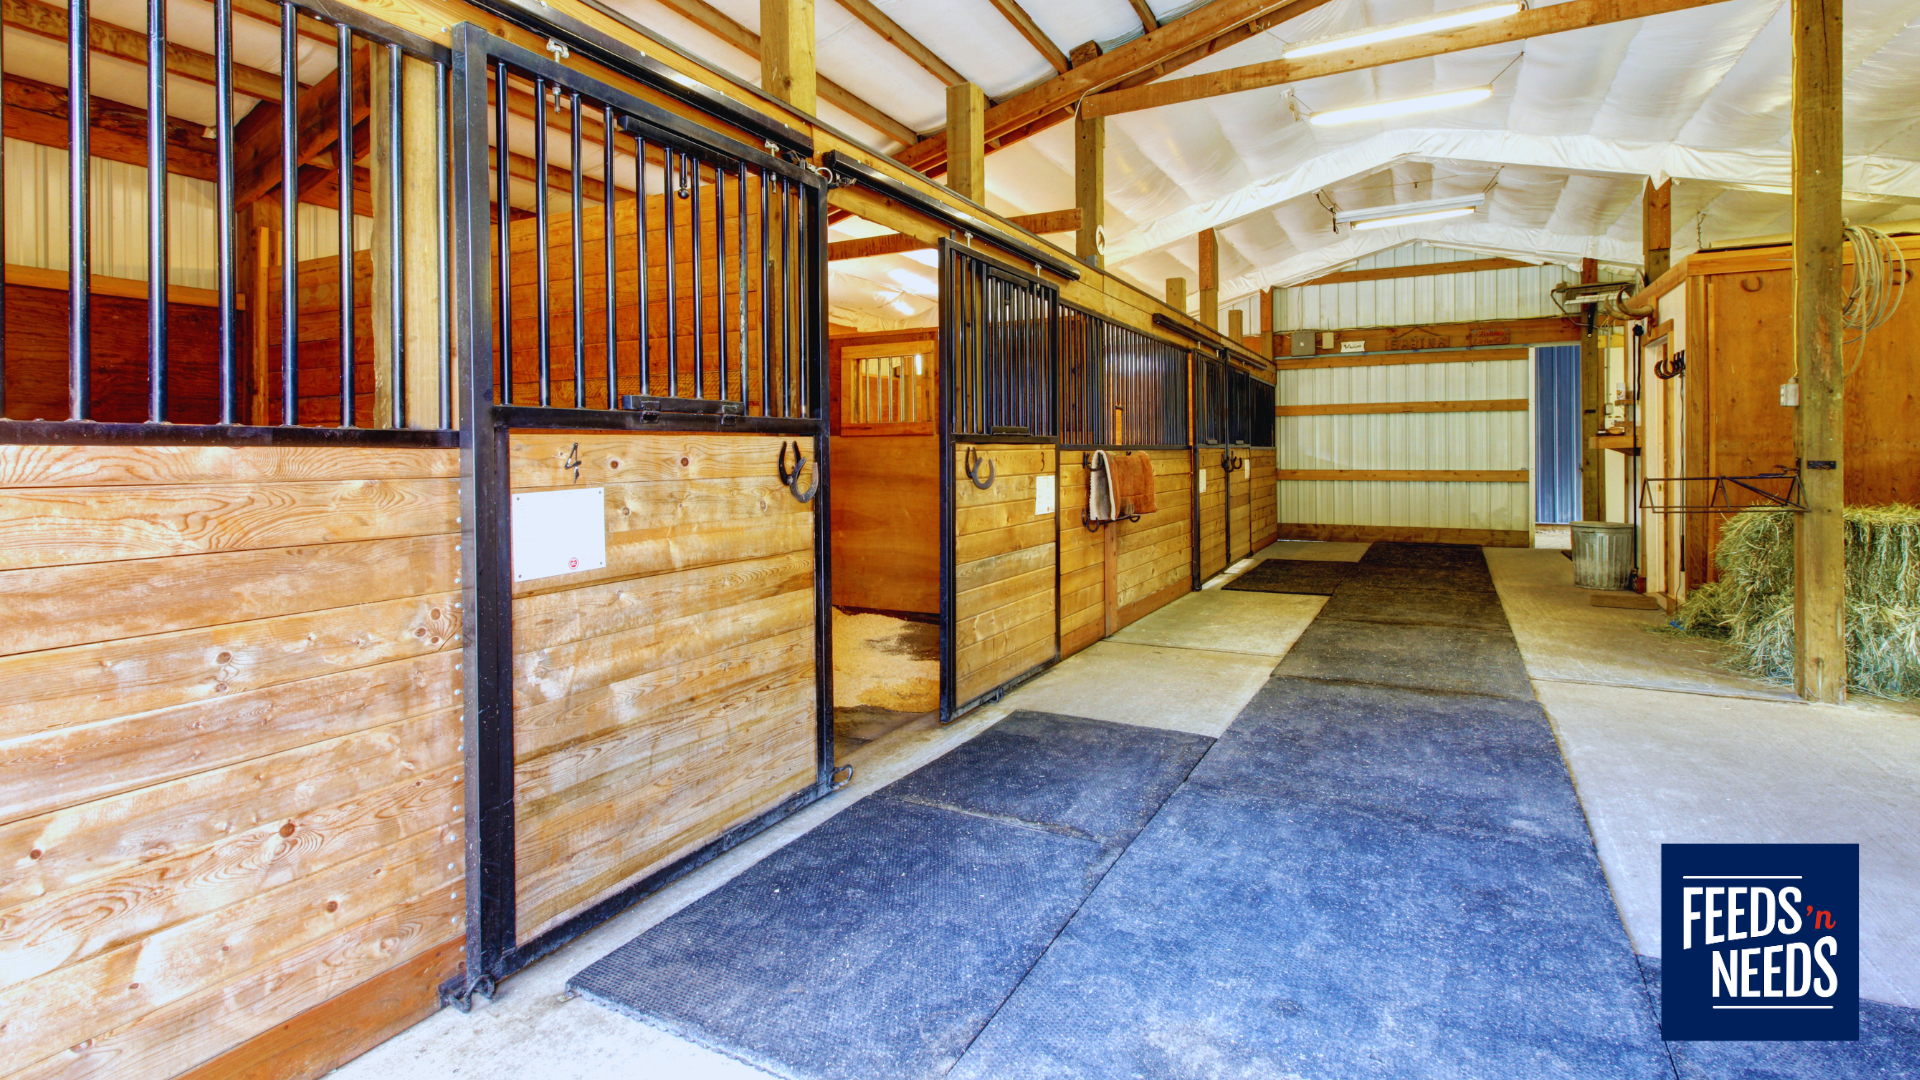
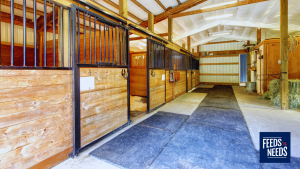
As temperatures drop across Atlantic Canada, mice and rats begin looking for reliable sources of food, water and shelter. Grain rooms, hay storage areas, livestock barns, poultry coops, workshops and equipment sheds can provide everything rodents need to settle in for winter.
A small rodent problem can quickly become a much larger one. Rodents contaminate feed, damage insulation, chew electrical wiring and create potential health risks for livestock, pets and people. Preparing before cold weather arrives is one of the most effective ways to protect your barn, feed and equipment.
Here are practical ways to prepare your farm for rodent season this fall.
Why Rodent Activity Increases in Fall
Rodents remain active throughout the year, but fall often brings them closer to barns and other farm buildings. As outdoor food becomes less available and temperatures fall, they begin searching for protected nesting areas near dependable food sources.
Barns are particularly attractive because they commonly contain:
- Livestock and poultry feed
- Spilled grain
- Hay and bedding
- Standing water
- Warm machinery
- Insulation and nesting material
- Quiet, undisturbed storage areas
Mice can enter through very small openings, while rats may squeeze through gaps that appear too narrow for them. Prevention begins by removing access to food and shelter before rodents establish themselves.
Know the Warning Signs
Rodents are often most active at night, so you may notice signs of their presence before seeing a mouse or rat.
Watch for:
- Droppings along walls, shelves or feed containers
- Torn feed bags
- Gnaw marks on wood, plastic, wiring or packaging
- Shredded paper, insulation or fabric
- Greasy rub marks along walls
- Tracks in dust or spilled feed
- Unusual scratching sounds
- Burrows around foundations or outdoor storage areas
- Musky odours
- Livestock feed disappearing faster than expected
- Pets showing unusual interest in a wall, corner or storage area
Regular inspections make it easier to respond while activity is still limited.
Start With the Grain Room
The grain room is one of the most important places to focus your rodent-prevention efforts. Even a small amount of spilled feed can support rodents and encourage them to remain in the building.
Store Feed in Secure Containers
Whenever possible, store grain, pellets, supplements, pet food and birdseed in durable containers with tight-fitting lids. Metal containers are often the most resistant to chewing.
Keep unopened feed bags:
- Off the floor
- On sturdy shelving or pallets
- Away from exterior walls
- Organized by type and date
- Rotated so older feed is used first
Avoid leaving partially opened bags unattended. Fold and secure bags immediately or transfer their contents into sealed containers.
Clean Spills Promptly
Sweep up spilled grain after filling feeders, mixing rations or receiving deliveries. Pay close attention to areas behind bins, beneath shelving and around doors.
Create a regular grain-room cleaning schedule rather than waiting until spills become noticeable. Removing this easy food source makes the area less attractive to rodents and allows fresh droppings or damage to be identified sooner.
Inspect Feed Before Use
Check bags and bins for holes, moisture, mould, droppings or unusual odours. Feed contaminated by rodents should not be given to livestock.
Do not simply scoop away the visibly affected portion. Rodents can contaminate a larger area through urine, droppings and contact with the feed. When in doubt, speak with your veterinarian or feed representative before using it.
Protect Your Hay and Bedding Storage
Hay and bedding provide excellent nesting material and shelter. Stacks can remain warm, dark and undisturbed—especially when stored for several months.
To make hay-storage areas less welcoming:
- Keep the area surrounding the stack clean and open.
- Remove loose hay and broken bales from the floor.
- Avoid creating piles of twine, empty bags or discarded wrap.
- Inspect beneath pallets and around outside edges regularly.
- Maintain space around stacks when the building layout permits.
- Rotate inventory so old bales do not remain untouched.
- Repair holes in walls, doors and foundations.
- Keep nearby grain and supplements in sealed containers.
Rodents may nest within hay without immediately causing visible damage. Look for tunnels, droppings, shredded material and concentrated areas of loose hay.
Hay should also be monitored for moisture and heating. Rodent prevention should never interfere with safe hay-storage practices, ventilation or fire prevention.
Seal Entry Points Around the Barn
Walk around the exterior and interior of each building before winter. Look closely at doors, windows, foundations, vents, utility openings and rooflines.
Potential entry points include:
- Gaps beneath doors
- Damaged door sweeps
- Cracks in foundations
- Openings around pipes or wiring
- Broken siding
- Damaged screens
- Uncovered vents
- Spaces where additions meet older structures
- Gaps around overhead doors
Use durable, rodent-resistant materials suited to the opening. Metal flashing, hardware cloth, concrete or other chew-resistant materials may be more effective than soft fillers used alone.
Do not block required ventilation or drainage. Openings that must remain functional can often be protected with appropriately sized metal screening.
Reduce Hiding Places
Clutter gives rodents protected travel routes and nesting areas. Fall cleanup should extend beyond the grain room.
Remove or reorganize:
- Empty feed bags
- Cardboard boxes
- Old twine and bale wrap
- Unused fabric or insulation
- Broken equipment
- Scrap lumber
- Tall weeds around buildings
- Brush piles near foundations
- Garbage and recycling
- Stacks of unused containers
Store equipment and supplies neatly so floors and walls remain visible. Leaving an open inspection zone around walls can make droppings, gnawing and travel paths easier to detect.
Manage Feed and Water Throughout the Barn
Rodent control becomes difficult when feed is continuously available outside secure storage.
At the end of daily chores:
- Clean spilled feed around troughs and feeders.
- Avoid overfilling feeders.
- Repair leaking water lines and drinkers.
- Remove standing water.
- Clean feed from corners and under equipment.
- Store pet food and treats securely.
- Collect broken eggs and spilled poultry feed.
- Keep garbage in containers with fitted lids.
Outdoor feeding areas should also be inspected. Grain dropped near bins, augers or livestock feeders can attract rodents toward nearby buildings.
Pay Special Attention to Poultry Coops
Poultry areas can be particularly attractive to rodents because feed is often available for long periods. Rodents may contaminate feeders, damage eggs and disturb birds.
Consider:
- Using feeders designed to reduce spilling
- Raising feeders to an appropriate height
- Cleaning beneath feeders regularly
- Storing extra feed in sealed containers
- Collecting eggs frequently
- Removing wet or heavily soiled bedding
- Sealing gaps around doors and vents
- Checking beneath nest boxes and along walls
Be especially cautious with traps and control products around birds, barn cats, dogs and children.
Use Traps Strategically
Traps can be an effective part of a rodent-control plan, especially when they are placed early and checked consistently.
Rodents often travel along walls and behind objects rather than crossing open spaces. Place traps where activity has been observed, following the manufacturer’s instructions.
Good practices include:
- Selecting traps appropriate for mice or rats
- Placing them along known travel routes
- Keeping them away from livestock, pets and children
- Using protective trap stations where needed
- Checking traps frequently
- Wearing gloves when handling traps or rodents
- Cleaning affected areas safely
- Recording where activity is occurring
One or two traps may not be enough for a large barn. Monitor results and adjust placement based on fresh evidence.
Barn cats may discourage some rodent activity, but they should not be the farm’s only control method. Prevention, sanitation, building maintenance and monitoring are still necessary.
Use Rodenticides With Care
Rodenticides are poisonous and can create serious risks for livestock, pets, wildlife and people if they are not handled properly.
Health Canada advises using rodenticides only as directed on the product label and securing them in appropriate bait stations. Products should be stored away from food and placed where children and animals cannot access them.
Before using a rodenticide:
- Read the complete label.
- Confirm that the product is approved for the intended location.
- Use a secure, tamper-resistant bait station when required.
- Keep bait away from feed, hay and water.
- Prevent access by livestock, pets, children and wildlife.
- Wear the recommended protective equipment.
- Follow placement, inspection and disposal directions.
- Store unused products in their original containers.
- Never scatter loose bait around a barn.
- Never use more than the label allows.
If the infestation is significant, recurring or difficult to control safely, contact a licensed pest-control professional.
Check Wiring and Equipment
Rodents may chew electrical wiring, increasing the risk of equipment failure and barn fires.
Inspect accessible wiring around:
- Feed rooms
- Water systems
- Fans
- Heaters
- Lighting
- Refrigeration equipment
- Electric fencing supplies
- Stored machinery
Look for tooth marks, exposed wire, damaged insulation or nesting material around warm equipment. Electrical repairs should be completed by a qualified professional.
Machinery stored for the winter should also be checked. Rodents can nest in engine compartments, air filters, seats and enclosed panels. Clean equipment before storage and inspect it periodically throughout the season.
Clean Rodent-Contaminated Areas Safely
Avoid stirring contaminated dust into the air. Wear gloves and follow appropriate public-health guidance when cleaning droppings, nesting material or dead rodents.
Keep livestock, pets and children away during cleanup. Heavily contaminated feed, bedding and other materials should be discarded safely. Wash hands thoroughly after removing gloves and handling traps or control products.
For extensive contamination, seek professional advice before beginning cleanup.
Keep Monitoring Throughout Winter
Rodent control is not a one-time fall chore. Continue checking grain rooms, hay storage, barns and sheds throughout the winter.
Create a simple monitoring routine:
Weekly
- Check traps and bait stations.
- Look for fresh droppings.
- Clean feed spills.
- Inspect opened feed bags.
- Check water lines for leaks.
Monthly
- Inspect doors and building exteriors.
- Look behind bins, shelving and equipment.
- Review feed use for unexplained losses.
- Check stored machinery and wiring.
- Remove unnecessary clutter.
Keep a record of where signs are found and what control steps were taken. Recurring activity in the same area may point to an overlooked entry point or food source.
Fall Rodent-Prevention Checklist
Before cold weather settles in:
- Seal gaps around doors, foundations and utility openings.
- Install or replace damaged door sweeps.
- Transfer feed into secure containers.
- Clean beneath bins, shelves and feeders.
- Organize hay and remove loose material.
- Cut back weeds and brush around buildings.
- Repair leaking water lines.
- Remove clutter and nesting materials.
- Inspect electrical wiring and stored equipment.
- Place traps or secured bait stations where appropriate.
- Keep all control products away from livestock, pets and children.
- Continue monitoring throughout winter.
Stay One Step Ahead of Rodent Season
The best time to address rodents is before they become established. A clean grain room, organized hay-storage area, sealed building and consistent monitoring routine can help protect livestock feed, equipment and farm buildings all winter.
Feeds’n Needs carries a variety of farm and barn supplies to help you prepare for the season, including feed-storage solutions, traps, bait stations, protective gloves and cleanup essentials. Product selection may vary by location, so visit your local store and speak with our knowledgeable team about options suited to your barn or farm.
Seal the gaps, secure the feed and stay ahead of unwanted winter visitors.
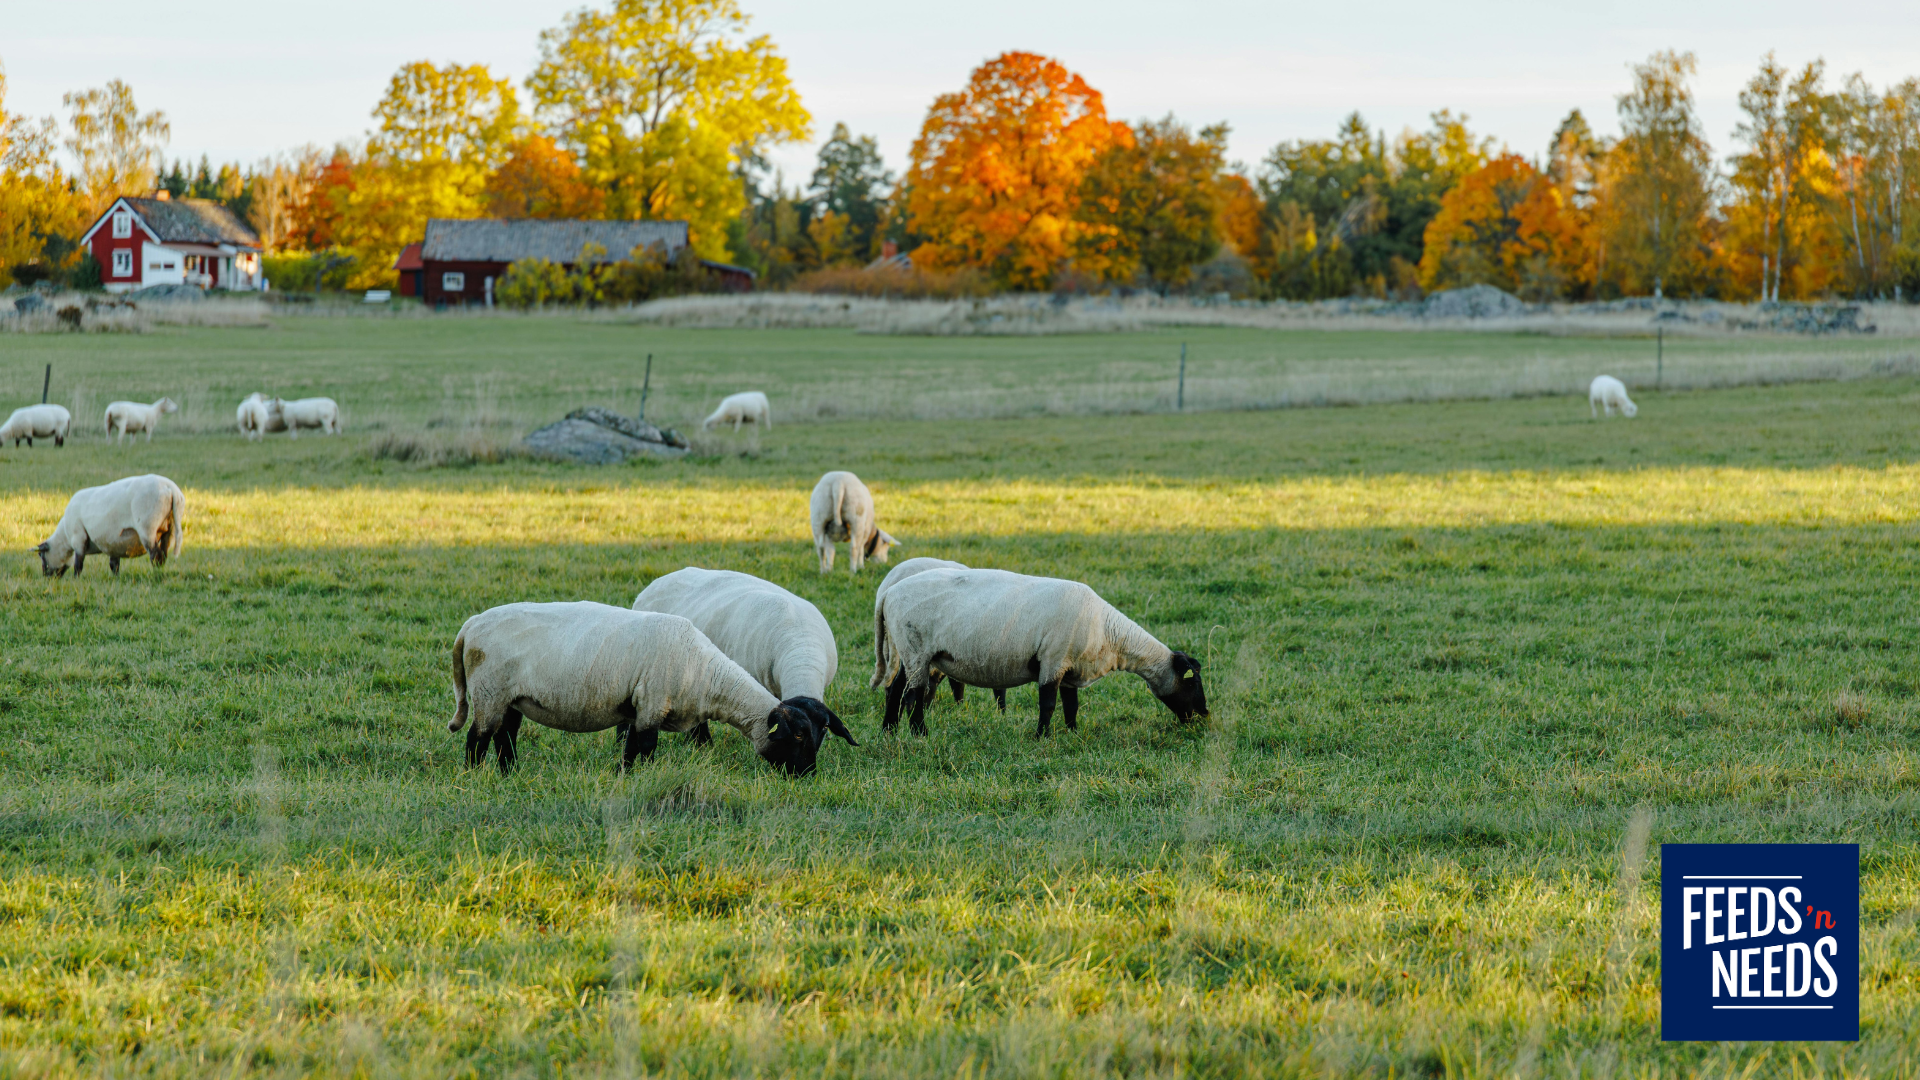
As Maritime farms move from pasture season toward winter housing, fall is an important time to evaluate parasite pressure in cattle, sheep, goats, pigs and other livestock.
Internal parasites can affect feed efficiency, weight gain, reproductive performance and overall animal health. However, effective control is not as simple as automatically treating every animal at the end of the grazing season. Parasite species, animal age, pasture conditions, previous treatments and product resistance can all influence the right approach.
A successful fall parasite-control program combines close observation, manure monitoring, pasture management, accurate dosing and species-appropriate treatment under veterinary guidance.
Why Parasite Pressure Can Increase During Pasture Season
Many internal parasites release eggs through manure. Under suitable conditions, the eggs develop into infective larvae that contaminate pasture, bedding, soil, feed or water.
Warm temperatures and moisture can support parasite development throughout the grazing season. Atlantic Canada’s damp conditions, heavy rainfall and periods of mild fall weather may allow animals to remain exposed later into the year.
Young livestock, newly weaned animals, animals under nutritional stress and those grazing heavily stocked fields may be especially vulnerable. By fall, animals may have accumulated a significant parasite burden even when obvious symptoms are not present.
Warning Signs of Parasites in Livestock
Parasite infections do not look the same in every species. Some animals continue eating and appear relatively normal while experiencing reduced growth or feed efficiency. Others may become noticeably unwell.
Possible warning signs include:
- Unexplained weight loss or poor weight gain
- Reduced appetite
- Dull, rough or unthrifty coats
- Diarrhea or persistently loose manure
- Pale gums or eyelids
- Swelling beneath the jaw, sometimes called “bottle jaw”
- Pot-bellied appearance
- Coughing or difficulty breathing
- Weakness, lethargy or reduced activity
- Poor feed conversion
- Reduced milk production
- Lower reproductive performance
- Increased susceptibility to other health problems
These signs are not exclusive to parasites. Nutritional deficiencies, respiratory disease, bacterial infections and other conditions may cause similar symptoms. A veterinarian can help identify the underlying problem before treatment begins.
Parasite Concerns by Species
Cattle
Pastured cattle may encounter gastrointestinal roundworms, lungworms, lice, grubs and other internal or external parasites. Calves and yearlings are often more vulnerable than mature cattle because they have had less time to develop immunity.
Poor weight gain, diarrhea, a rough hair coat and reduced body condition can indicate a problem. Lungworm infections may also cause coughing or respiratory distress.
A fall control plan may consider:
- The age and production stage of the cattle
- Length of the grazing season
- Stocking density
- Pasture history
- Previous deworming products
- Body condition and weight gain
- Manure-testing results
- Whether cattle will be housed for winter
Sheep and Goats
Small ruminants can be particularly vulnerable to gastrointestinal parasites, including barber pole worm. This blood-feeding parasite can cause severe anemia, weakness and bottle jaw, sometimes without diarrhea.
Checking eyelid colour can help trained producers identify anemia associated with barber pole worm. However, the FAMACHA system should be learned from a veterinarian or qualified instructor and used as one part of a broader monitoring program.
Other warning signs in sheep and goats include reduced growth, diarrhea, poor fleece or hair-coat quality, weight loss and declining body condition. Goats and sheep do not always respond to dewormers in the same way, and products labelled for one species should never automatically be assumed appropriate for the other.
Pigs
Pigs can be affected by roundworms, whipworms, strongyles and other parasites. Outdoor pigs may face greater exposure through contaminated soil, bedding and manure, although indoor herds can also experience parasite problems when sanitation and biosecurity practices are inconsistent.
Possible signs include:
- Reduced growth
- Poor feed efficiency
- Rough hair coats
- Coughing
- Diarrhea
- Loss of condition
- Uneven growth within a group
Pig parasite management should include cleaning pens, keeping feeders and waterers free from manure, rotating outdoor areas when practical and using a deworming product specifically labelled or prescribed for swine.
Other Livestock
Parasite-control needs also vary among poultry, llamas, alpacas and other farm animals. Coccidia, worms and external parasites require different monitoring and treatment strategies. A general livestock dewormer is not appropriate for every animal or every parasite.
Manure Monitoring: Look Beyond What You Can See
Regularly observing manure can provide valuable information. Watch for ongoing diarrhea, unusual consistency, blood, mucus or changes affecting multiple animals.
However, normal-looking manure does not confirm that an animal is parasite-free. Most parasite eggs and larvae are microscopic, and adult worms are not usually visible in manure.
A fecal egg count can help estimate the number and type of parasite eggs being shed. Results can support treatment decisions, identify higher-risk animals and help determine whether a deworming program is working.
Producers should remember that fecal egg counts have limitations. Egg shedding can vary, some parasites are not reliably detected through routine testing, and egg counts do not always directly reflect the number of adult parasites present. Results should be interpreted alongside clinical signs, body condition, production records and veterinary advice.
A fecal egg count reduction test compares samples collected before and after treatment. This can help assess whether the selected dewormer is still effective.
Pasture Management Is Part of Parasite Control
Deworming products are only one part of an effective parasite-management program. Reducing exposure can lower the number of infective larvae animals consume and may decrease reliance on repeated treatments.
Helpful pasture practices may include:
- Avoiding overgrazing
- Preventing excessive stocking density
- Rotating fields when sufficient land is available
- Resting heavily used paddocks
- Moving feeders and waterers away from manure-heavy areas
- Keeping feed off the ground
- Separating young, vulnerable animals from heavily contaminated pasture
- Maintaining clean, dry bedding
- Removing manure from pens and high-traffic areas
- Avoiding unnecessary grazing close to the soil surface
Rotational grazing can support parasite control, but short rotations alone do not guarantee clean pasture. Many parasite larvae remain viable after livestock move, especially during cool, damp conditions. Returning animals too quickly may expose them to larvae left during the previous rotation.
Pasture decisions should consider the parasite involved, weather, rest period, stocking rate and animal species.
Understanding Dewormer Resistance
Antiparasitic resistance occurs when parasites survive a treatment that once controlled them and pass those resistant traits to future generations. Over time, a dewormer may become less effective.
Resistance is a growing concern in cattle and small ruminants. Repeatedly treating every animal, underdosing and relying on the same drug class can increase selection pressure. The U.S. Food and Drug Administration recommends working with a veterinarian to develop parasite-control strategies that help preserve the effectiveness of available treatments. Learn more about antiparasitic resistance.
Ways to help slow resistance include:
- Treating based on risk, testing and veterinary recommendations
- Weighing animals or using an accurate weight estimate
- Calibrating drench guns and other dosing equipment
- Giving the full, correct dose
- Avoiding repeated use of one product simply out of habit
- Checking product effectiveness through follow-up testing
- Keeping accurate treatment records
- Using targeted treatment when appropriate
- Avoiding unnecessary deworming
Underdosing is not a safer option. It may fail to control parasites while allowing the more tolerant ones to survive. At the same time, giving more than the labelled dose can create animal-health and residue risks. Always follow the product label and veterinary directions.
Choose Species-Appropriate Products
Not every dewormer treats every parasite, and products cannot be freely interchanged among cattle, sheep, goats and pigs.
Before selecting a product, confirm:
- The animal species listed on the label
- The parasite species controlled
- The animal’s age and weight
- The correct dose and method of administration
- Meat and milk withdrawal periods
- Restrictions for pregnant or lactating animals
- Whether the product is approved for the intended production class
- Previous treatments and possible resistance
- Storage requirements and expiry date
Dewormers are available in several forms, including oral drenches, injectables, feed medications, pastes and pour-on products. The most convenient option is not always the most appropriate one.
Never assume that a cattle pour-on is suitable for sheep, goats or pigs. Goats may require veterinary direction because product approvals and dosing needs can differ. Some dewormers may also be unsuitable during particular stages of pregnancy.
Coccidia require additional consideration. They are protozoan parasites, not worms, and standard dewormers may not control them. Young animals with diarrhea, poor growth or dehydration should be assessed promptly so the cause can be identified and the correct treatment selected.
Don’t Forget Withdrawal Periods
Livestock intended for meat or producing milk for human consumption require careful attention to withdrawal periods. These periods vary by product, species, dose and route of administration.
Record:
- The animal or group treated
- Product name
- Lot number
- Date administered
- Dose
- Route of administration
- Person administering the treatment
- Meat or milk withdrawal date
Never send treated animals to market or use their milk for human consumption before the required withdrawal period has passed.
Build a Fall Parasite-Control Checklist
Before livestock move into winter housing:
- Review body condition, weight gain and overall appearance.
- Watch for diarrhea, coughing, anemia, bottle jaw or reduced performance.
- Examine manure patterns and collect fecal samples when recommended.
- Review pasture use and stocking density from the grazing season.
- Check treatment records from spring and summer.
- Discuss testing and product selection with your veterinarian.
- Weigh animals and calibrate dosing equipment.
- Use only a product appropriate for the species and parasite being targeted.
- Record the treatment and applicable withdrawal period.
- Arrange follow-up monitoring to confirm that the treatment worked.
Support Health Before Winter
Fall parasite control is about more than administering a dewormer. It is an opportunity to evaluate each herd or flock, reduce winter health challenges and protect the effectiveness of parasite-control products for the future.
Feeds’n Needs carries a selection of livestock health supplies, handling equipment, minerals, feeders and species-appropriate parasite-control products. Visit your local store and speak with our knowledgeable team about available options. For diagnosis, testing, dosing decisions and treatment planning, always work with your veterinarian.
A thoughtful fall plan can help livestock enter winter in stronger condition—ready to make better use of their feed and better prepared for the colder months ahead.
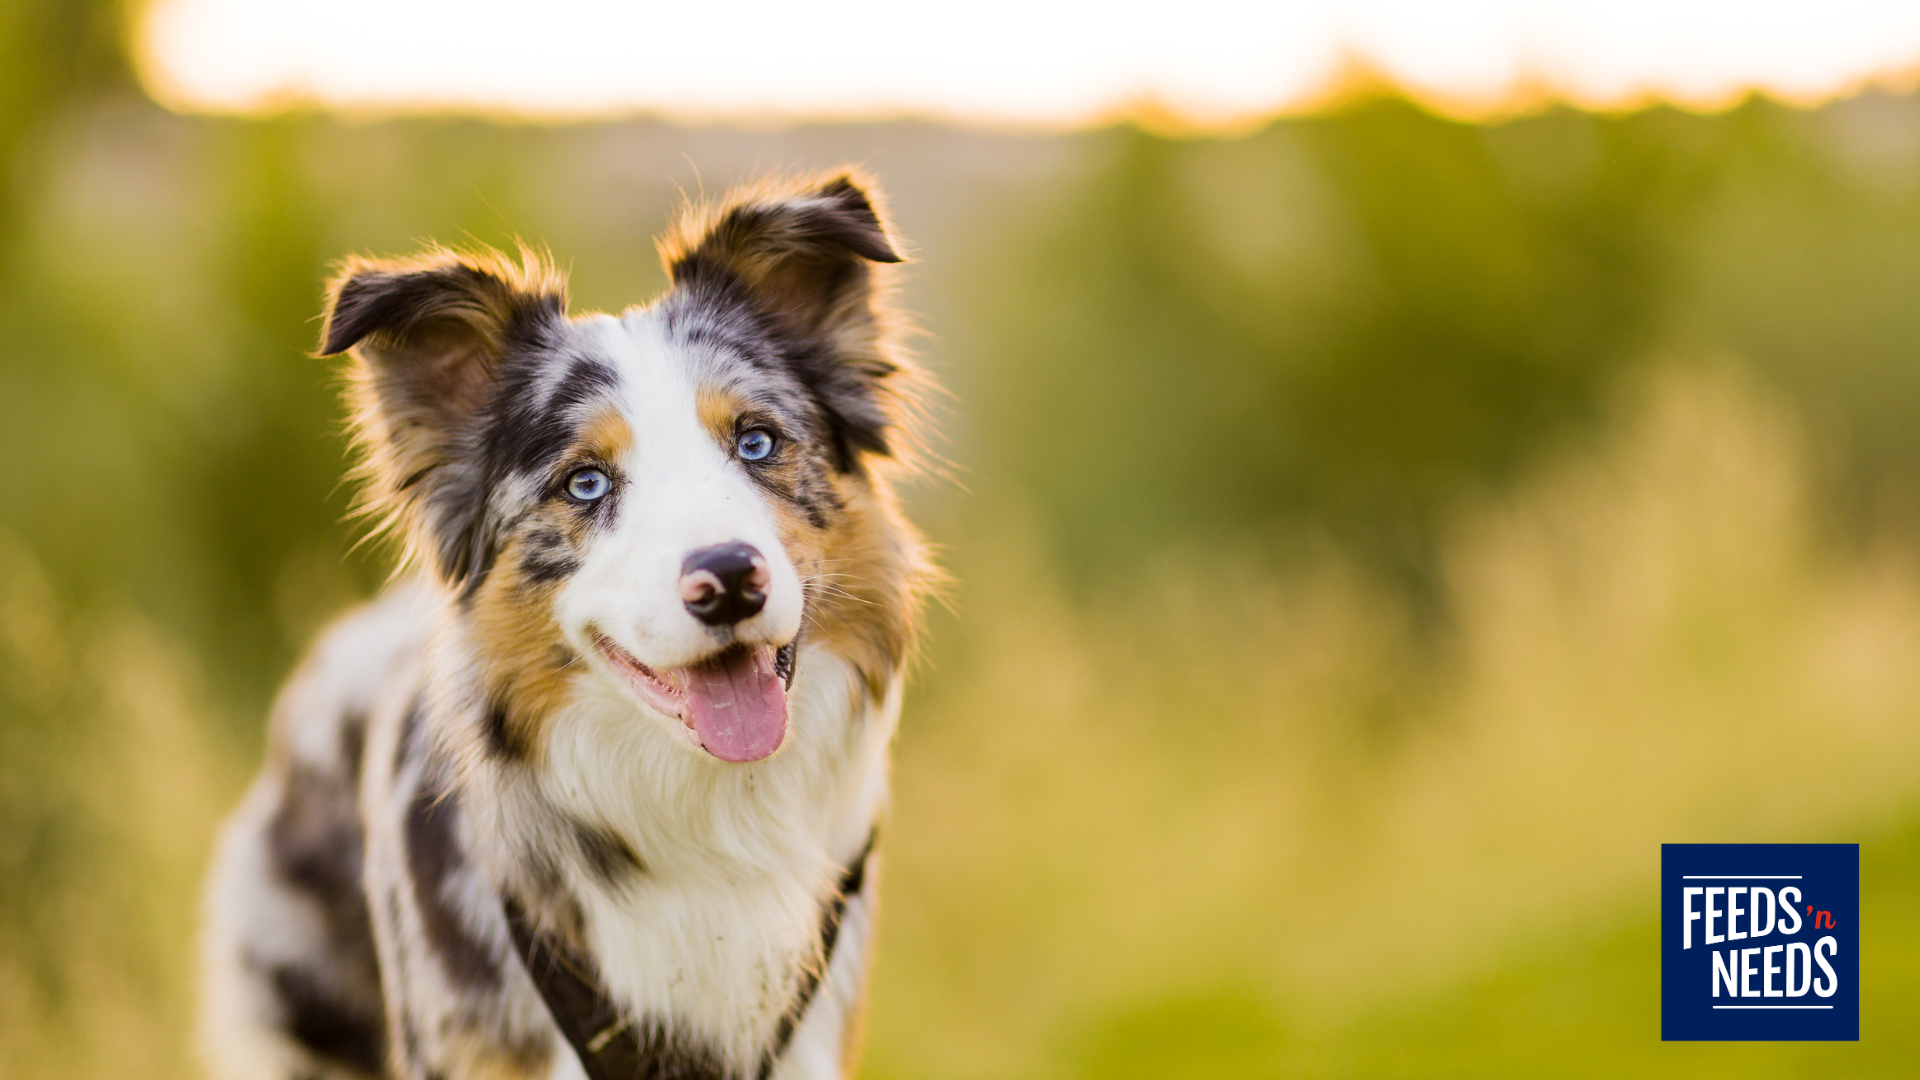

Why Fall Can Affect Your Pet’s Skin and Coat
Atlantic Canadian fall weather can shift quickly from warm afternoons to chilly, rainy days. Pets may move between damp outdoor conditions and heated indoor spaces, while dogs are often exposed to wet grass, mud, leaves and debris during daily walks.
Seasonal allergens may also contribute to itchy skin, paw chewing, facial rubbing, red skin, excessive tearing or recurring ear discomfort. Fleas and ticks can remain active during cool fall weather, so parasite prevention should not automatically end when summer does.
Pay attention to changes in your pet’s normal habits. Frequent scratching, licking or head shaking is often one of the first signs that something is irritating them.
1. Brush Regularly and Check the Skin
Many cats and dogs shed as their coats adjust for the cooler months. Regular brushing removes loose hair, helps prevent mats and gives you an opportunity to look closely at the skin.
While brushing, check for:
- Redness, flakes, scabs or irritated patches
- New lumps or tender areas
- Fleas, flea dirt or attached ticks
- Burrs, seeds, twigs and other debris
- Excessive oiliness, odour or hair loss
Choose a brush suited to your pet’s coat type. Long-haired pets may need more frequent grooming to prevent mats, especially behind the ears, under the legs and around the tail. Mats can trap moisture close to the skin and make irritation more difficult to spot.
2. Protect and Clean Paws After Outdoor Time
Wet grass, mud, gravel and plant debris can collect between paw pads. After walks or outdoor play, wipe or rinse your dog’s paws and dry them thoroughly, including the spaces between the toes. Outdoor cats may also benefit from a gentle paw check when they come inside.
Keep the fur between the paw pads neat if it tends to trap dirt or form mats, and inspect nails regularly. A pet-safe paw balm can help protect dry or rough pads; use only products made for pets and follow the label directions.
Watch for persistent paw licking, chewing, swelling, redness, odour, bleeding or limping. These signs may point to an allergy, injury, infection or foreign object and should be discussed with your veterinarian.
3. Manage Watery Eyes Gently
Wind, dust and seasonal allergens may irritate the area around a pet’s eyes. Some cats and dogs also naturally produce more visible tears than others.
For mild buildup around the eye, use a clean, soft, damp cloth or a pet-safe eye wipe to gently clean the surrounding fur. Use a separate clean area of the cloth for each eye, and never place shampoo, soap or unapproved drops in the eye.
Contact your veterinarian if you notice:
- Redness, swelling or squinting
- A cloudy or injured-looking eye
- Thick, yellow, green or bloody discharge
- Sudden or excessive tearing
- Pawing at the eye or signs of pain
Eye problems can worsen quickly, so prompt veterinary advice is important when symptoms are persistent, painful or unusual for your pet.
4. Keep Ears Clean, Dry and Comfortable
Floppy-eared dogs, pets with allergies and animals that spend time in wet conditions may be more prone to ear trouble. Check the outer ear regularly for redness, excess wax, discharge, swelling or a strong odour.
If your veterinarian has recommended routine ear cleaning, use a pet-specific ear cleaner and follow the directions carefully. Do not push cotton swabs or other objects into the ear canal. After rainy walks, bathing or swimming, gently dry the outer ear and surrounding fur.
Repeated head shaking, ear scratching, sensitivity, dark debris or a foul smell can signal mites, yeast, bacteria, allergies or another problem. An ear infection can be painful and usually needs a veterinary assessment rather than home treatment.
5. Bathe Without Drying Out the Skin
Fall adventures sometimes end with a muddy dog or dirty outdoor cat, but frequent bathing can strip natural oils from the coat. Bathe only as needed using a shampoo formulated for cats or dogs. Human shampoos may be too harsh for a pet’s skin.
Rinse thoroughly, because leftover shampoo can cause irritation, and dry the coat completely before your pet heads back outside. Pets with sensitive, itchy or flaky skin may benefit from a moisturizing or veterinarian-recommended formula.
Between baths, pet-safe grooming wipes can be useful for quick cleanups of paws, legs and coats.
6. Support Healthy Skin and Fur Through Nutrition
A complete and balanced diet provides the protein, fats, vitamins and minerals needed to support healthy skin and a strong coat. Some foods and supplements contain omega-3 and omega-6 fatty acids, which help support skin and coat condition.
Before adding oils or supplements, speak with your veterinarian—especially if your pet has a medical condition, follows a therapeutic diet or takes medication. Supplements are not a substitute for diagnosing ongoing itching, hair loss or inflammation.
Fresh water matters in every season. Indoor heating can create a drier environment, so make sure clean drinking water is always easy to access. Some cats may drink more readily from a pet fountain or when multiple water stations are available.
7. Continue Flea and Tick Protection
Cooler weather does not necessarily mean fleas and ticks have disappeared. Fleas can survive indoors, and ticks may remain active whenever conditions are suitable. Bites can cause skin irritation, and some pets are highly sensitive to flea saliva.
Continue the prevention plan recommended by your veterinarian, and check your pet after time in tall grass, brush, wooded areas or fallen leaves. Never use a dog-only flea or tick product on a cat; some canine ingredients can be dangerous to cats.
Build a Simple Fall Pet-Care Routine
A practical weekly routine can make seasonal care easier:
- Brush the coat and inspect the skin.
- Check paws, pads and nails after outdoor activity.
- Wipe away mild eye-area buildup gently.
- Look at the outer ears for redness, debris or odour.
- Check for fleas and ticks.
- Wash bedding and keep favourite resting areas clean and dry.
When to Call Your Veterinarian
Seasonal grooming can support your pet’s comfort, but it cannot replace veterinary care. Book an appointment if your cat or dog develops persistent itching, open sores, hot spots, hair loss, strong odour, swollen paws, painful ears, unusual eye discharge or a sudden change in behaviour.
Prepare Your Pet for a Comfortable Fall
Every pet experiences seasonal changes differently. By watching for small changes and keeping up with regular grooming, paw care, ear checks, eye-area cleaning, good nutrition and parasite prevention, you can help your cat or dog stay comfortable from the first cool morning through the wettest fall days.
Visit your local Feeds’n Needs for grooming brushes, pet-safe shampoos and wipes, paw-care products, flea and tick solutions, nutritious cat and dog food, supplements, treats and seasonal supplies. Our knowledgeable team is here to help you find practical products that suit your pet and their routine.
When a concern goes beyond everyday grooming, your veterinarian is always the best source of diagnosis and treatment advice.
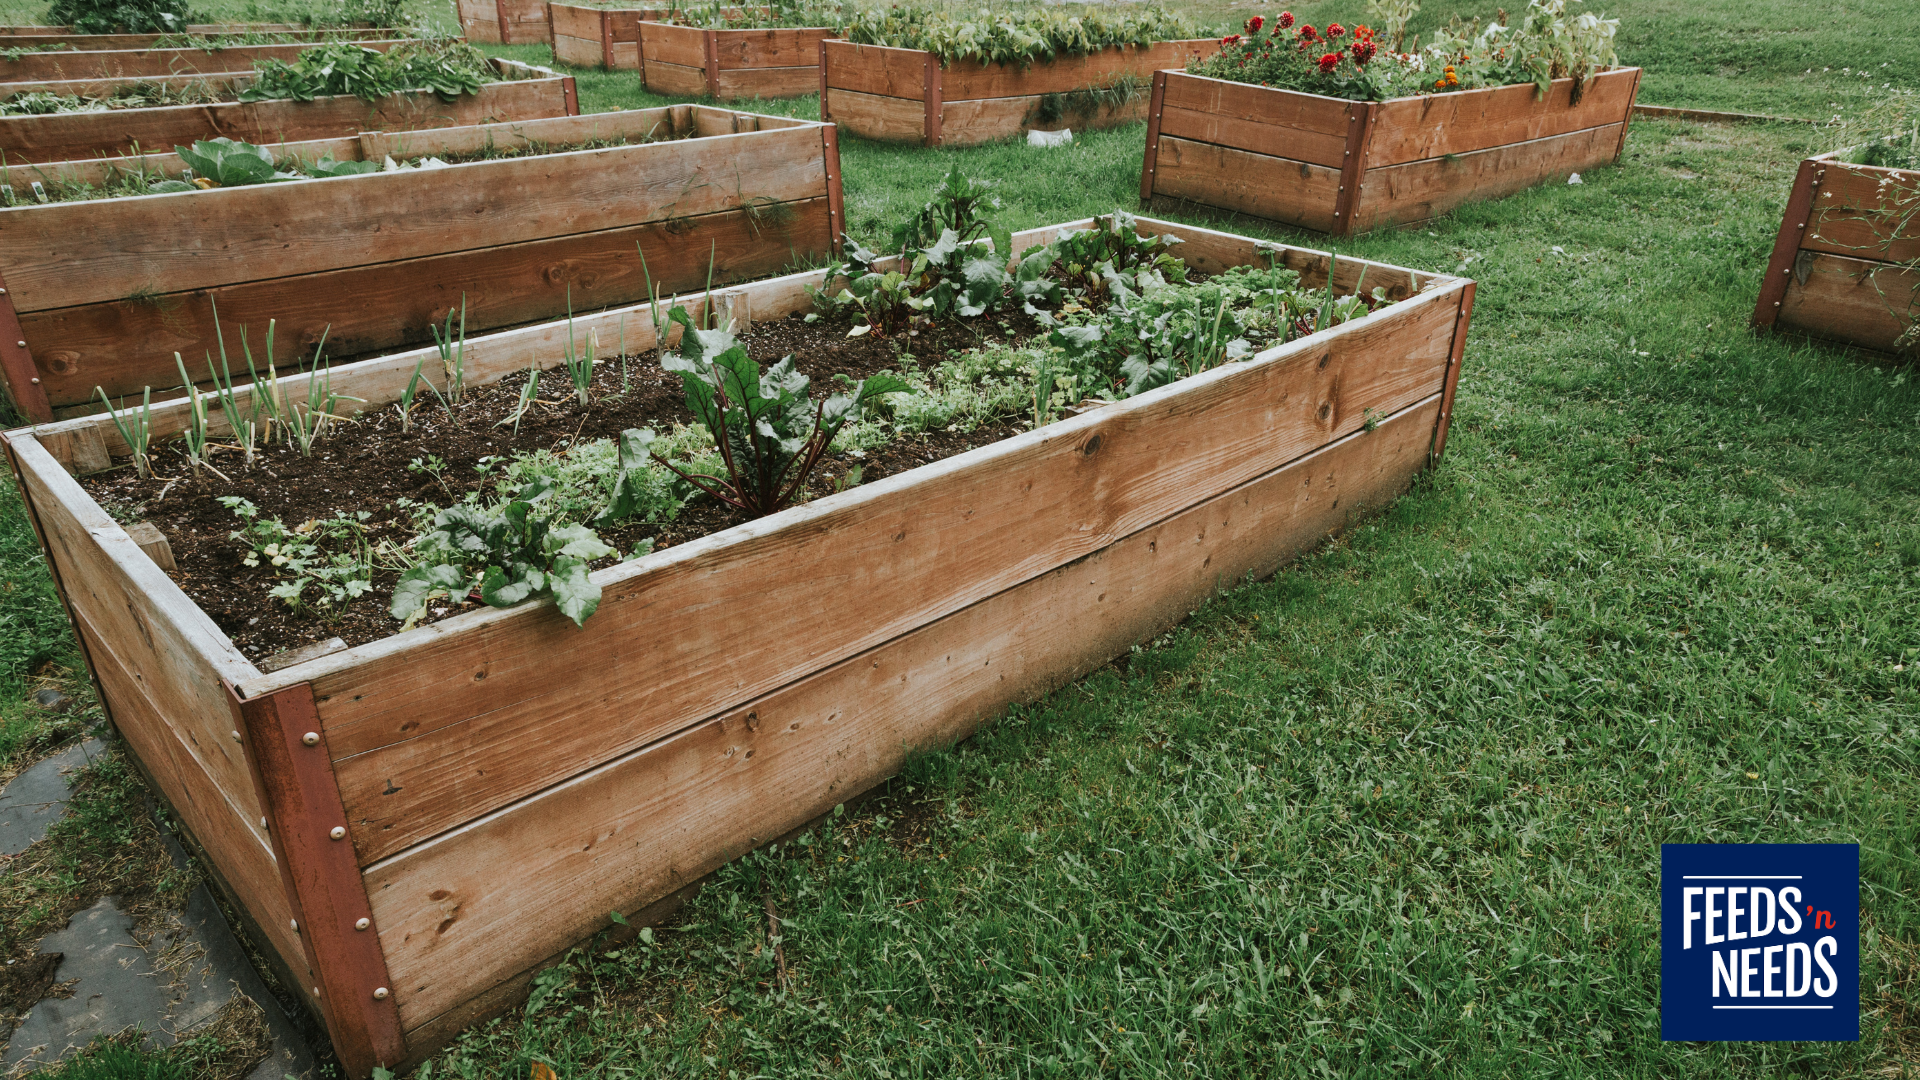
Fall Cleanup, Compost, Soil Protection and Garden Tool Storage
A productive spring garden starts with the work you do in the fall. Once the final vegetables are harvested and frost begins settling across Atlantic Canada, preparing your raised garden beds for winter can protect the soil, reduce pest and disease problems and make spring planting much easier.
Maritime winters bring repeated freezing and thawing, heavy rain, strong winds, snow and periods of saturated soil. Raised beds drain better than many in-ground gardens, but exposed soil can still erode, compact and lose nutrients if it is left unprotected.
From removing diseased plants to adding compost and draining garden hoses, this raised garden bed winter checklist will help you put your garden to rest properly.
Why Raised Garden Beds Need Fall Preparation
Raised beds are productive because they provide good drainage, warmer spring soil and greater control over soil quality. Their elevated design can also leave the soil more exposed to winter weather.
Without fall preparation, raised garden beds may experience:
- Soil erosion from rain and melting snow
- Nutrient loss
- Compaction
- Weed growth
- Overwintering pests
- Recurring plant diseases
- Damage to wooden boards or fasteners
- Frozen or cracked watering equipment
- A larger cleanup job in spring
Preparing raised garden beds before winter protects the investment you have made in your soil, plants and garden structure.
1. Finish Harvesting Before Winter
Begin by collecting the last usable vegetables and herbs. Some cold-tolerant crops can remain in the garden after light frost, while tender plants should be harvested before temperatures drop significantly.
Late-season crops may include:
- Carrots
- Beets
- Kale
- Swiss chard
- Leeks
- Spinach
- Brussels sprouts
- Parsnips
- Hardy herbs
Use your local forecast and the needs of each crop to determine when to harvest. Atlantic Canadian frost dates vary by province and even between inland and coastal communities.
Healthy root crops may be left in the soil temporarily under a protective layer of mulch, but harvest plans should account for frozen ground, wildlife and excessive moisture.
2. Remove Spent and Diseased Plants
Once harvesting is complete, remove annual vegetable plants, fallen fruit and other garden debris.
Pay particular attention to plants showing possible signs of disease, including:
- Spotted or discoloured leaves
- Powdery or fuzzy growth
- Blackened stems
- Unusual wilting
- Rotting roots or fruit
- Cankers or damaged plant tissue
- Significant insect infestations
Removing affected material can help reduce the chance of pests or plant diseases overwintering in the bed and returning next season.
Should Diseased Plants Go in the Compost?
Healthy plant material can generally be added to a properly managed compost pile. Diseased or heavily infested plants require more caution.
A typical backyard compost pile may not become hot enough throughout to destroy every plant pathogen, pest or weed seed. Keep questionable material out of your regular compost and dispose of it according to local municipal guidelines.
Do not leave diseased plants lying beside the raised bed or mix them back into the garden soil.
3. Remove Weeds Before They Produce Seed
Fall weeds compete for moisture and nutrients and may provide shelter for insects. Remove them before they mature and release seeds into the bed.
Pull weeds carefully, removing as much of the root system as possible. Pay special attention to perennial weeds that can survive winter and return from established roots in spring.
Do not place mature weeds containing seed heads into a cool backyard compost pile. The seeds may survive and spread when the compost is used later.
Feeds’n Needs carries garden gloves, hand cultivators, hoes, rakes and other tools to help with end-of-season garden cleanup. Product selection varies by location.
4. Inspect the Raised Bed Structure
With the plants removed, fall is a good time to examine the bed itself.
Check for:
- Loose boards
- Rotting wood
- Bowed or shifting sides
- Protruding screws or nails
- Rusted brackets
- Damaged corner joints
- Soil leaking from gaps
- Signs of rodents
- Poor drainage around the base
Tighten loose hardware and complete minor repairs before snow hides the damage. If a board is beginning to fail, replacing it in fall can prevent the bed from shifting under the weight of wet soil and snow.
Avoid using wood treatments that are not intended for use near edible gardens.
5. Add Compost to Raised Garden Beds in Fall
Fall is an excellent time to add finished compost to a raised bed. Compost adds organic matter, supports soil structure and helps replenish nutrients used during the growing season.
Spread a layer of finished compost over the bed’s surface. A modest top-dressing is usually enough; the appropriate amount will depend on the existing soil and the compost being used.
You may use:
- Fully finished compost
- Properly composted manure
- A suitable garden soil amendment
- A quality soil-and-compost blend
Only use well-composted manure around vegetable gardens. Fresh manure can contain excessive nutrients, weed seeds and potentially harmful microorganisms.
Feeds’n Needs offers seasonal soil, compost and manure-based garden amendments at select locations. Ask our team which option is appropriate for your raised garden beds and always follow package directions.
6. Test Before Adding Lime or Fertilizer
It can be tempting to add lime or fertilizer automatically during fall cleanup, but more is not always better.
A soil test can help determine:
- Soil pH
- Organic matter levels
- Nutrient availability
- Whether lime is required
- Which amendments may benefit the next crop
Applying lime without knowing the soil pH may make certain nutrients less available to plants. Similarly, unnecessary fertilizer can be lost through runoff or contribute to nutrient imbalances.
If testing recommends an amendment, follow the application rate carefully. Feeds’n Needs carries select lime, fertilizer and soil-improvement products, but product choice should be based on your soil conditions and intended crops.
7. Protect Bare Soil Through Winter
Do not leave raised garden bed soil completely bare if it can be avoided. Heavy rain, snowmelt and wind can move exposed soil and wash away nutrients.
A protective cover can also reduce compaction and limit winter weed growth.
Mulch
Apply an appropriate layer of:
- Clean straw
- Chopped leaves
- Leaf mulch
- Suitable untreated organic material
Mulch helps protect the soil surface from erosion and reduces damage caused by repeated freezing and thawing. Avoid thick, waterlogged layers that may mat down and restrict airflow.
Do not use plant material that is diseased, heavily infested or full of mature weed seeds.
Cover Crops
If there is enough growing time before hard frost, a suitable cover crop can help protect the soil and add organic matter.
The best cover crop will depend on:
- Planting date
- Local climate
- Bed size
- Winter hardiness
- Your spring planting schedule
Choose carefully and understand how the crop will be managed in spring. A cover crop should not become a weed or delay planting.
Garden Covers
A breathable garden cover can help keep leaves and debris from blowing into the bed. Secure it carefully so Atlantic Canadian wind does not carry it away.
Avoid sealing wet soil under non-breathable plastic for the entire winter. Trapped moisture can create poor conditions and plastic may tear under snow or ice.
8. Decide What Should Remain in the Bed
Not every plant needs to be removed.
Healthy perennial herbs and vegetables may remain, depending on their winter hardiness. These could include:
- Chives
- Thyme
- Oregano
- Asparagus
- Rhubarb
- Strawberries
Remove dead or diseased growth as appropriate and protect vulnerable roots with mulch. Some plants benefit from waiting until after frost before cutting back.
Do not assume every perennial will survive an Atlantic Canadian winter in a raised bed. Elevated soil can become colder than surrounding ground, especially when the bed is exposed to wind. Check the hardiness requirements for each plant.
9. Clean and Store Stakes, Cages and Supports
Tomato cages, trellises, plant stakes and garden ties can carry soil and plant debris from one season to the next.
Before storage:
- Remove vines, roots and old ties.
- Brush away soil and debris.
- Wash reusable supports.
- Allow everything to dry completely.
- Inspect for cracks, rust or sharp edges.
- Store items in a dry, sheltered area.
Discard damaged supports that cannot be used safely. Organize stakes and cages by size so they are easy to find during spring planting.
Cleaning reusable garden supports also reduces the amount of old plant material left available to harbour pests.
10. Clean and Store Garden Tools
Soil and moisture can cause rust, dull blades and damage wooden handles. A few minutes of fall maintenance can extend the life of your tools.
Garden Tool Storage Checklist
- Remove all soil and plant debris.
- Wash tools when necessary.
- Dry them thoroughly.
- Sharpen pruners, hoes and shovel edges if appropriate.
- Inspect handles for cracks or splinters.
- Tighten loose screws and fasteners.
- Store tools off the floor in a dry location.
- Keep sharp tools safely away from children and pets.
Clean cutting tools between diseased and healthy plants during the season and before winter storage. Use a cleaning or disinfecting method appropriate for the tool material and allow it to dry completely.
Feeds’n Needs carries work gloves, rakes, shovels, hand tools and seasonal garden accessories to help complete fall garden cleanup.
11. Drain and Store Hoses and Watering Equipment
Water left inside a hose, nozzle or watering wand can freeze, expand and cause cracking.
Before freezing temperatures arrive:
- Disconnect hoses from outdoor taps.
- Drain hoses completely.
- Remove nozzles and watering wands.
- Empty watering cans and portable containers.
- Drain irrigation lines according to manufacturer directions.
- Store hoses loosely coiled in a sheltered location.
- Shut off and drain outdoor plumbing where applicable.
- Inspect washers and fittings for wear.
Avoid hanging a hose tightly from one point, as this can create kinks or stress the material. A hose reel or broad wall hanger provides better support.
If you use timers, filters or pressure regulators, remove and store them before hard freezes unless the manufacturer states they are designed for winter exposure.
12. Record What Grew in Each Bed
Before snow covers the garden, make a simple map of what was planted in each raised bed.
Record:
- Crops grown
- Varieties that performed well
- Pest or disease problems
- Compost and amendments added
- Areas with poor drainage
- Crops that struggled
- Harvest timing
- Plans for crop rotation
Garden records can make spring planning easier and help prevent planting closely related vegetables in the same location year after year.
Raised Garden Bed Winter Checklist
Before winter arrives:
- Harvest remaining vegetables.
- Remove spent annual plants.
- Separate diseased material from healthy compostable debris.
- Pull weeds before they produce seed.
- Remove fallen or rotting produce.
- Inspect boards, corners and hardware.
- Add finished compost where appropriate.
- Test soil before applying lime or fertilizer.
- Cover bare soil with mulch or another suitable option.
- Protect overwintering perennials.
- Clean and store cages, stakes and trellises.
- Clean, dry and organize garden tools.
- Drain and store hoses and watering equipment.
- Record crops, problems and amendments.
- Secure all covers against wind.
Give Next Year’s Garden a Better Start
Preparing raised garden beds for winter does more than make the yard look tidy. It protects valuable soil, reduces potential pest and disease problems and creates better conditions for spring planting.
Atlantic Canadian weather can be hard on exposed gardens, but removing diseased plants, adding finished compost, protecting bare soil and properly storing garden equipment can help your raised beds handle the months ahead.
Visit your local Feeds’n Needs for seasonal compost, soil amendments, mulch options, gloves, garden tools, hose accessories and other supplies for your fall garden cleanup. Product availability varies by store location.
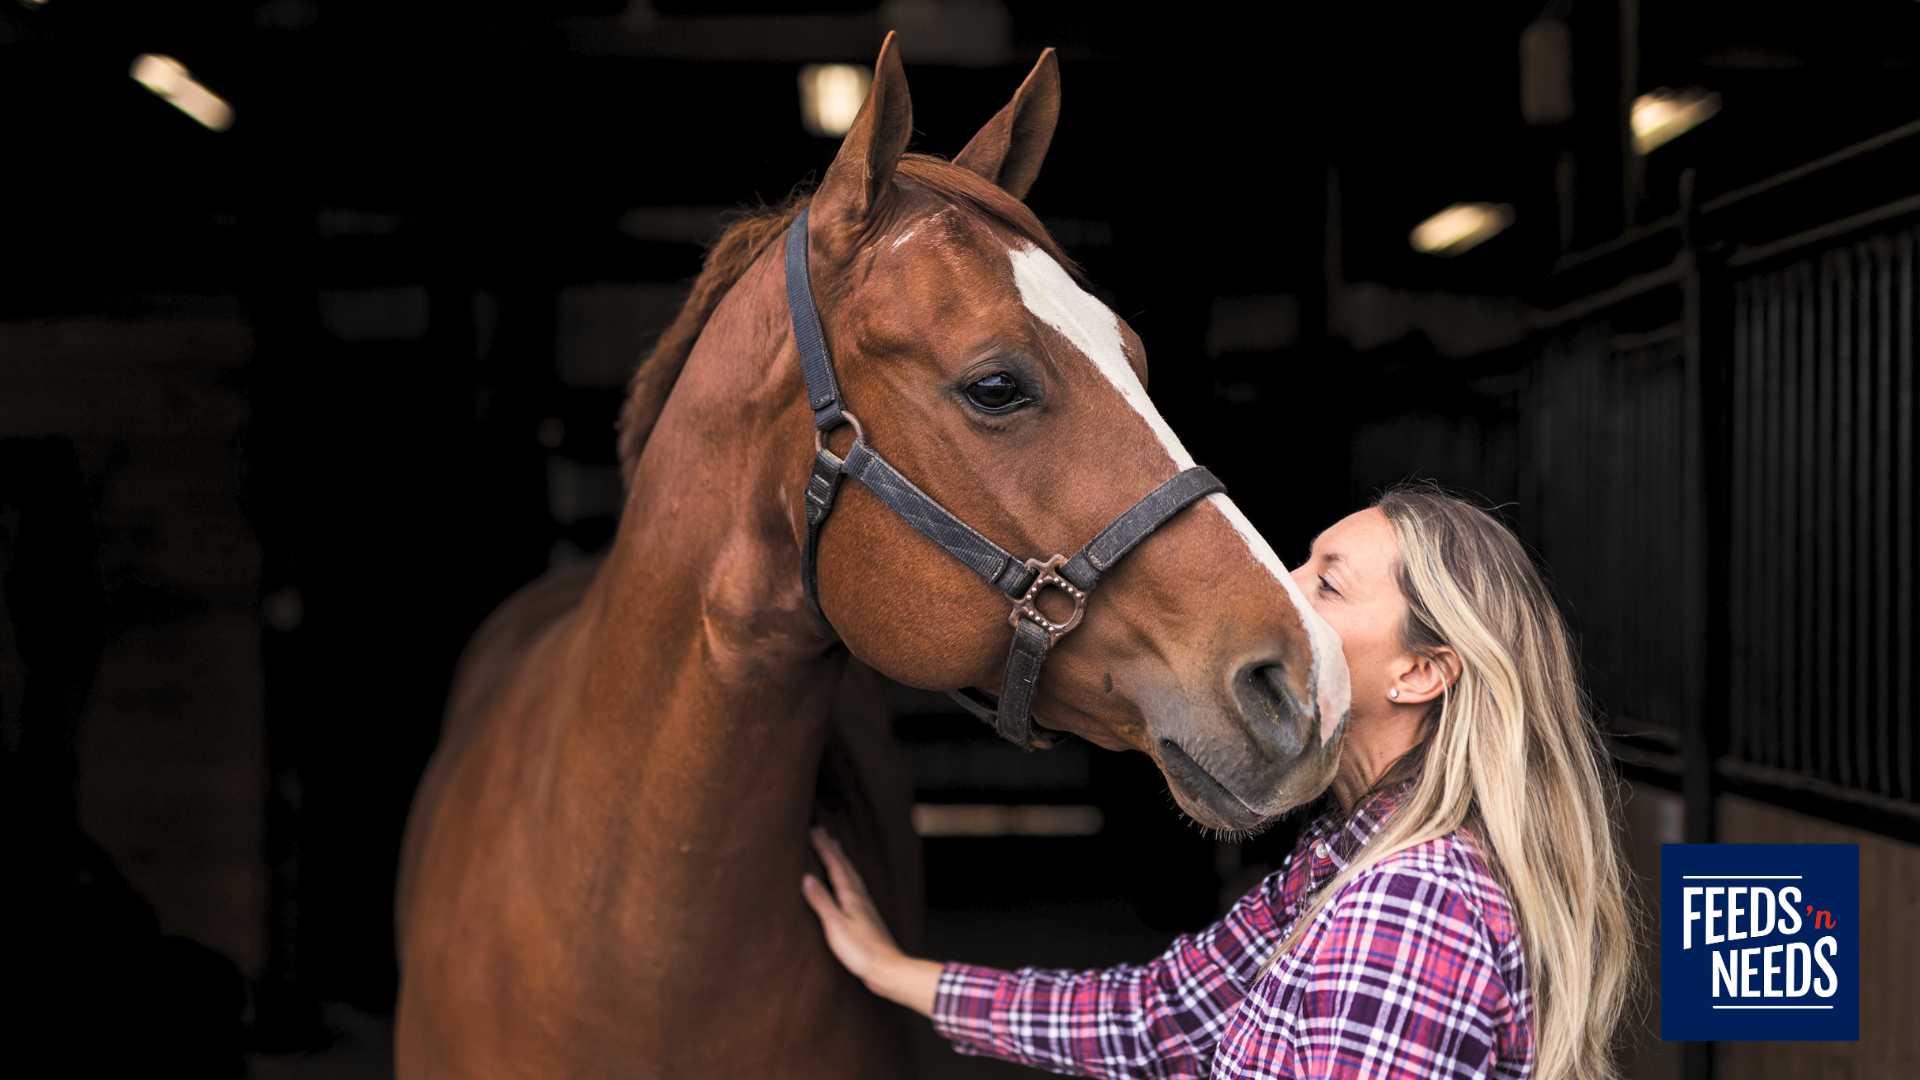
Strategic Deworming, Warning Signs and Pasture Management for a Healthier Herd
As summer show schedules slow down and horses transition from pasture to winter routines, fall is an important time to review your parasite-control program.
Warm days, cool nights, autumn rain and heavily grazed paddocks can create favourable conditions for parasite exposure across Atlantic Canada. However, effective fall parasite control is no longer as simple as giving every horse the same dewormer on the same calendar date.
A responsible program considers each horse’s age, health, environment, travel history and previous treatments. It also combines veterinarian-guided deworming with accurate dosing, proper recordkeeping and good pasture management.
Why Equine Parasite Control Matters
Internal parasites are a normal management concern for grazing horses. Parasite eggs are passed in manure, develop in the environment and may later be ingested while horses graze.
A significant parasite burden may contribute to:
- Unexplained weight loss
- Poor body condition
- A dull or rough hair coat
- Reduced appetite
- Diarrhea or changes in manure
- Poor growth in young horses
- Reduced energy or performance
- Recurring digestive discomfort
- Colic in some cases
These signs are not exclusive to parasites. Dental problems, poor nutrition, ulcers and other health conditions can cause similar symptoms. A horse showing weight loss, diarrhea, colic or a noticeable change in behaviour should be assessed by a veterinarian.
Why Fall Deserves Special Attention
Atlantic Canadian pastures can remain damp well into the fall. Moderate temperatures and moisture can allow certain parasite eggs and larvae to continue developing on pasture.
Colder weather may slow that development, but the first frost does not automatically eliminate every parasite risk.
Fall also brings several management changes:
- Horses may move from pasture into smaller paddocks.
- Grazing areas may become shorter or overused.
- Animals may gather around shared hay and water.
- Horses may return home after shows, clinics or summer boarding.
- New horses may be introduced to a barn.
- Manure may become concentrated around winter feeding areas.
- Changing weather may increase time spent in high-traffic turnout areas.
These conditions make fall a useful time to review your horse’s parasite-control plan with your veterinarian.
How to Know When Your Horse May Need Deworming
Parasites are not always easy to detect. Some horses can carry and shed parasites without showing obvious outward signs.
Possible signs that warrant a conversation with your veterinarian include:
- Unexplained weight loss
- Difficulty maintaining body condition
- A dull, rough or unusually long hair coat
- Reduced appetite
- Loose manure or recurring diarrhea
- Reduced energy or performance
- Poor growth in young horses
- A pot-bellied appearance in young horses
- Tail rubbing or irritation around the dock
- Recurrent digestive discomfort
- Pale gums, weakness or lethargy
- Visible worms or unusual material in manure
- Declining topline despite appropriate feeding
These symptoms do not confirm that a horse has parasites. Contact your veterinarian before administering a dewormer, particularly if the horse is losing weight, showing signs of colic or appears unwell.
Consider Your Horse’s Risk Factors
A horse can look healthy and still have parasite exposure. Certain management conditions may increase risk, including:
- Heavily used or overstocked pasture
- Sharing paddocks with several horses
- Grazing very short grass near manure-contaminated areas
- Irregular manure removal
- Frequent travel to shows, clinics or boarding facilities
- Recent arrival at a new barn
- Contact with horses that have an unknown treatment history
- A history of parasite problems
- An inconsistent deworming program
- Young or advanced age
- Poor body condition or existing health concerns
Foals, young horses, seniors and horses with health problems may require different parasite-control strategies. Their plans should always be developed with a veterinarian.
Why Appearance Alone Is Not Enough
A horse can appear healthy while still contributing parasite eggs to its environment. On the other hand, a thin horse does not automatically need deworming.
Giving a dewormer based only on appearance or a fixed calendar can lead to unnecessary treatment. It may also contribute to anthelmintic resistance—the ability of parasites to survive a product that was previously effective.
Your veterinarian can consider the horse’s age, health, living conditions, previous treatments and exposure risks before recommending whether treatment is appropriate.
Move Away from Automatic Calendar Deworming
For many years, it was common to deworm every horse at fixed intervals and rotate products throughout the year. Current veterinary recommendations advise against blindly treating every horse using the same repeating schedule.
A strategic parasite-control program may consider:
- The horse’s age and individual health
- Previous parasite-control history
- Pasture and housing conditions
- Travel and exposure to unfamiliar horses
- Parasites of concern
- Products previously administered
- Known resistance on the property
- The most appropriate seasonal timing
- Whether additional veterinary monitoring is needed
The American Association of Equine Practitioners advises against deworming all horses at fixed intervals year-round or blindly rotating dewormer classes.
Choosing the Right Horse Dewormer
There is no single dewormer that is automatically right for every horse, parasite or farm.
Different products contain different active ingredients and target different parasites or life stages. The product used last fall may not necessarily be the correct choice this year.
Before selecting a horse dewormer, speak with your veterinarian about:
- The horse’s age
- Current health and body condition
- Pregnancy or nursing status
- Recent symptoms or digestive concerns
- Previous products and treatment dates
- Other medications or health conditions
- Travel and show history
- New arrivals at the barn
- Parasites of concern
- Known or suspected resistance
- Appropriate timing for treatment
Never combine dewormers, change the recommended dose or give a horse a product intended for another livestock species unless specifically directed by a veterinarian.
Feeds’n Needs carries equine deworming products at select locations. Availability varies by store, and our team can help you locate the product recommended by your veterinarian.
Accurate Weight and Dosing Matter
Underdosing may result in ineffective treatment and contribute to resistance. Estimating a horse’s weight by sight can be difficult, especially when the horse has a thick winter coat or carries weight unevenly.
Use a livestock scale when available. An equine weight tape can provide a practical estimate when a scale is not accessible.
Once your veterinarian has recommended a product:
- Read the complete product label.
- Confirm the horse’s current weight.
- Set the dosing syringe carefully.
- Make sure the horse receives the full dose.
- Confirm that the medication has been swallowed.
- Record the product, active ingredient, dose and date.
- Monitor the horse as advised by your veterinarian.
Never administer more than the labelled or veterinarian-prescribed amount.
Keep Individual Deworming Records
Maintain a parasite-control record for every horse rather than relying on memory or a general barn calendar.
Record:
- Treatment date
- Product name
- Active ingredient
- Dose administered
- Estimated or measured weight
- Reason for treatment
- Previous veterinary recommendations
- Reactions or concerns after treatment
- Travel and new-horse introductions
- Pasture or housing changes
Good records help prevent accidental repeat treatments and allow your veterinarian to identify patterns over time.
Pasture Management Is Part of Parasite Control
Deworming alone is not a complete parasite-control program. Horses can be exposed again when grazing contaminated areas, making manure and pasture management essential.
Remove Manure Regularly
Pick manure from smaller paddocks, dry lots and high-traffic areas regularly. Pay particular attention to:
- Hay-feeding areas
- Gates and laneways
- Shelters
- Water sources
- Small sacrifice paddocks
- Winter turnout areas
Feeds’n Needs carries stable forks, manure-handling tools, wheelbarrows and other barn-cleaning supplies that make regular cleanup easier.
Avoid Overcrowding
More horses in a limited area generally means more manure and greater environmental contamination. Avoid overcrowding whenever possible and provide enough room around hay, water and shelter areas.
Prevent Overgrazing
Horses grazing very short pasture may feed closer to manure-contaminated areas. Rest overused paddocks and provide suitable forage when grass becomes limited.
Moving hay feeders periodically can also help reduce concentrated manure and damaged ground around winter feeding areas.
Rotate Pastures Carefully
Pasture rotation can help protect forage and reduce overgrazing, but simply moving horses does not eliminate parasites.
Rotation works best when combined with:
- Regular manure removal
- Appropriate stocking density
- Rest periods for pasture
- Proper composting
- Veterinarian-guided parasite control
- Careful management of new arrivals
Quarantine New Horses
New horses may introduce parasites—including resistant populations—to a property.
Before turning a new horse out with the resident herd:
- Keep the horse in a separate area.
- Use separate buckets and manure tools where practical.
- Review its health and deworming history.
- Contact your veterinarian for an appropriate arrival protocol.
- Avoid spreading manure from quarantine areas onto active pasture.
Compost Manure Properly
Avoid spreading fresh horse manure directly onto fields currently being grazed. Proper composting creates heat that helps reduce parasite survival and produces a more useful soil amendment.
Keep compost piles away from feed and water sources and manage runoff during wet Atlantic Canadian weather.
Support Overall Health Through Fall
Parasite control is only one part of preparing a horse for winter. A horse entering the colder months in good condition is better positioned to handle declining pasture quality and changing weather.
Review:
- Body condition
- Forage quality and quantity
- Access to clean water
- Salt and mineral availability
- Dental care
- Hoof care
- Vaccination status
- Shelter and blanketing needs
- Feed changes as pasture declines
Feeds’n Needs offers equine feed, forage products, salt, minerals, buckets, weight tapes, manure forks and stable supplies to support your horse’s complete fall-care routine.
Nutritional products and supplements do not replace veterinary-prescribed parasite treatment.
Signs That Require Veterinary Attention
Do not wait for a planned deworming date if your horse develops concerning symptoms.
Contact your veterinarian if you notice:
- Colic or repeated digestive discomfort
- Persistent diarrhea
- Rapid or unexplained weight loss
- Weakness or lethargy
- Loss of appetite
- Pale gums
- Poor growth in a young horse
- Significant abdominal distension
- Sudden decline in body condition
- Visible worms accompanied by illness
Attempting to treat a sick or heavily affected horse without veterinary direction may delay proper diagnosis and care.
Fall Horse Deworming Checklist
Before administering a dewormer:
- Review your horse’s health and treatment history.
- Consider recent travel and exposure to unfamiliar horses.
- Watch for changes in weight, appetite, manure and performance.
- Discuss risk factors with your veterinarian.
- Ask which parasites should be targeted.
- Use only the veterinarian-recommended product.
- Measure or accurately estimate body weight.
- Follow the product label and dosing instructions.
- Record the product, active ingredient, dose and date.
- Monitor your horse following treatment.
- Remove manure from high-use areas.
- Rest overgrazed paddocks where possible.
- Quarantine new arrivals.
- Maintain good forage, water and mineral support.
Build a Smarter Fall Parasite-Control Program
Fall parasite control is not about automatically reaching for the same dewormer used last year. It is about considering the horse in front of you, identifying its risk factors and making informed decisions with your veterinarian.
Strategic deworming, accurate dosing, recordkeeping and responsible pasture management can help protect horse health while preserving the effectiveness of available products.
Once your veterinarian recommends an appropriate product, visit your local Feeds’n Needs for select equine dewormers, weight tapes, manure forks, buckets, stable-cleaning tools and other supplies that support responsible fall horse care. Product selection varies by location.
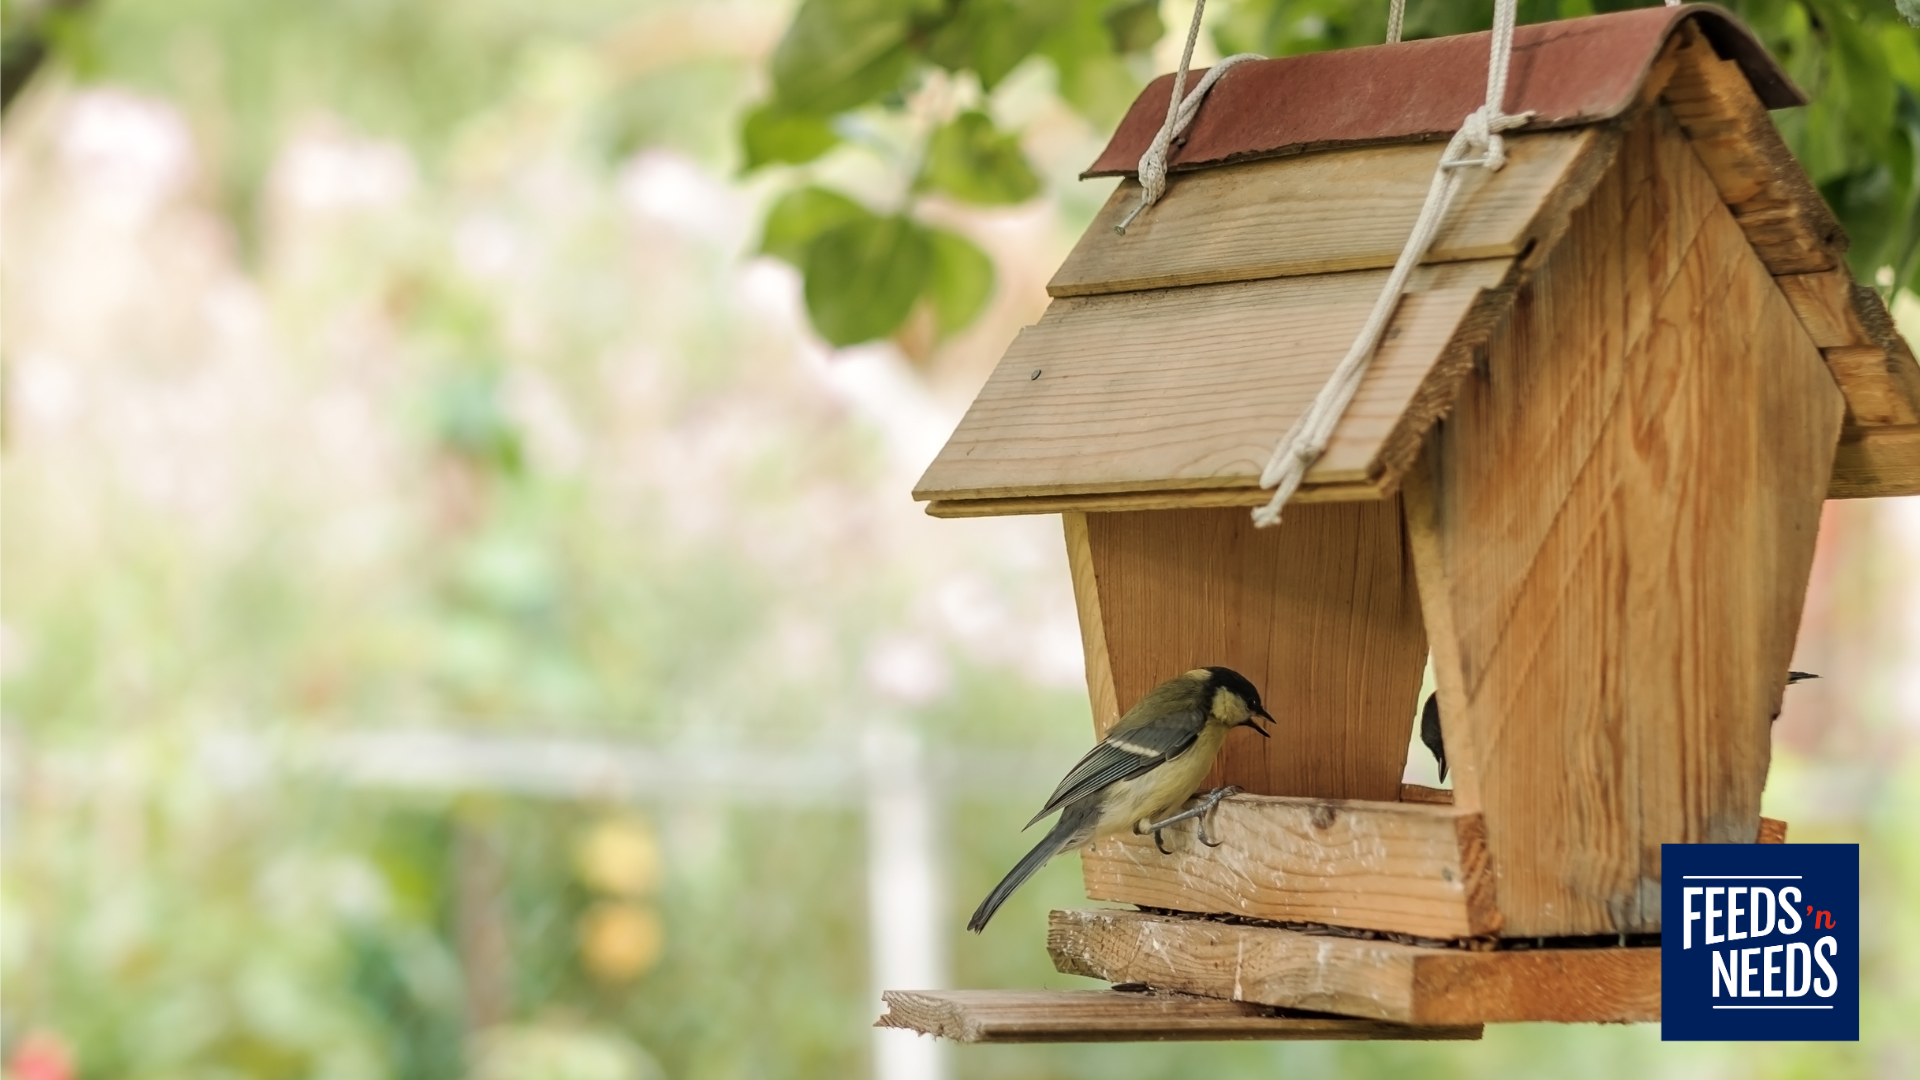
Preparing Backyard Birds for Fall Migration in Atlantic Canada
As summer fades across Nova Scotia, New Brunswick and Prince Edward Island, wild birds begin preparing for one of the most demanding stages of their annual cycle: fall migration.
Some species travel thousands of kilometres to reach their wintering grounds, while others remain in the Maritimes and prepare for colder temperatures and reduced natural food supplies. By providing nutritious wild bird seed, clean water, safe shelter and properly maintained feeders, you can turn your backyard into a valuable place for birds to rest and refuel.
When Does Fall Bird Migration Begin in Atlantic Canada?
Fall bird migration occurs in waves, with different species leaving at different times. In Atlantic Canada, migration generally begins in late summer and continues through October, with some species travelling into November.
Shorebirds and insect-eating birds may begin moving first, followed by Ruby-throated hummingbirds, warblers, swallows and other songbirds. Waterfowl and later-migrating species may remain well into the fall.
Migration timing is influenced by:
- Shorter daylight hours
- Changing temperatures
- Food availability
- Weather systems and wind direction
- Each species’ natural migration cycle
During this period, you may notice unfamiliar birds visiting your yard. Some may stop for only a few hours, while others remain for several days to replenish their energy reserves.
Offer High-Energy Wild Bird Food
Migration requires a tremendous amount of energy. Birds need calorie-dense, nutritious food to build and maintain the fat reserves required for long-distance flight.
Good fall bird-feeding options include:
Black Oil Sunflower Seed
Black oil sunflower seed is one of the best all-around options for feeding backyard birds in Atlantic Canada. Its thin shell is easy for smaller birds to open, while its high oil content provides valuable energy.
It commonly attracts chickadees, nuthatches, cardinals, finches, blue jays, grosbeaks and woodpeckers.
Peanuts
Plain, unsalted peanuts and peanut pieces provide protein and fat for active birds. They are especially popular with blue jays, woodpeckers, chickadees and nuthatches.
Use a dedicated peanut feeder to keep the food secure and reduce waste.
Nyjer Seed
Nyjer is an oil-rich seed suited to small-beaked birds such as goldfinches, pine siskins and redpolls. Because it is very small, Nyjer should be served in a specialized tube or mesh feeder.
Quality Wild Bird Seed Blends
A balanced wild bird blend can attract several species at once. Look for mixtures containing nutritious ingredients such as sunflower seed, millet, safflower and peanuts.
Feeds’n Needs carries black oil sunflower seed, Nyjer seed, peanuts, millet, mixed wild bird seed, cracked corn, bird pies and other seasonal options. Product selection may vary by store location.
Introduce Suet When Temperatures Cool
Suet is a concentrated source of fat that can help birds meet their increased energy needs during cool weather. It is especially popular with woodpeckers, chickadees, nuthatches and brown creepers.
Wait until temperatures are consistently cooler before offering traditional suet, as it can soften or spoil during warm weather. Place suet blocks in a properly designed cage feeder that gives clinging birds a secure surface while they eat.
Suet cakes and feeders are available at Feeds’n Needs to help you prepare your fall and winter bird-feeding station.
Match the Feeder to the Food
Using the correct feeder helps protect seed from Maritime rain and wind while making it easier for the right birds to access it.
- Tube feeders: Suitable for sunflower seed, mixed seed and peanuts.
- Hopper feeders: Provide shelter for seed and accommodate several bird species.
- Nyjer feeders: Designed with small openings for finches and other small-beaked birds.
- Suet cages: Securely hold suet blocks for clinging birds.
- Platform feeders: Attract a wide range of species but require frequent cleaning.
- Squirrel-resistant feeders: Help reduce seed loss during the busy fall foraging season.
Place feeders near trees or shrubs that provide quick escape cover, but not directly beside dense vegetation where outdoor cats or other predators can hide.
Covered feeders and weather guards can help keep seed dry during wet Maritime fall weather.
Clean Feeders Before Migration Peaks
Fall migration can bring many birds into close contact at backyard feeders. Damp seed, mould, droppings and spoiled food may contribute to the spread of disease.
Before feeder activity increases:
- Empty and discard old seed.
- Take the feeder apart where possible.
- Scrub away dirt, droppings and stuck seed.
- Disinfect it with an appropriate cleaning solution.
- Rinse thoroughly.
- Allow every part to dry before refilling.
Continue checking feeders throughout the fall. Remove wet, compacted or mouldy seed immediately and regularly rake up discarded hulls beneath the feeding area.
If you notice birds with swollen eyes, poor balance, unusual lethargy or difficulty flying, temporarily remove feeders and birdbaths. Clean them thoroughly and contact a local wildlife authority for guidance.
Provide Fresh Water
Birds need clean water for drinking and feather maintenance throughout the year. A shallow birdbath can provide an important hydration and resting point for migrating birds.
For a healthier water station:
- Replace the water every day or two.
- Remove leaves, seed hulls, algae and droppings.
- Scrub the basin regularly.
- Add clean stones if the surface is deep or slippery.
- Position the birdbath where birds can watch for predators.
- Switch to a heated birdbath or birdbath heater when temperatures begin to freeze.
Never add salt, antifreeze or other chemicals to prevent birdbath water from freezing.
Keep Hummingbird Feeders Available
Ruby-throated hummingbirds begin travelling south in late summer, but birds from farther north may continue passing through Atlantic Canada after your usual summer visitors have left.
Keeping a feeder available will not stop hummingbirds from migrating. Their journey is guided primarily by natural seasonal cues, including changes in daylight.
Keep hummingbird feeders up for approximately two weeks after your last sighting. Continue replacing the nectar and cleaning the feeder even if visits become less frequent.
Feeds’n Needs carries hummingbird feeders and nectar products to help support late-season travellers.
Leave Natural Food and Shelter
A bird-friendly fall yard does not need to be perfectly tidy. Seed heads, native berries, insects, leaf litter and dense vegetation provide natural food and shelter.
Consider leaving:
- Sunflower and coneflower seed heads
- Native grasses and berry-producing shrubs
- Fallen leaves beneath shrubs
- Dead plant stems until spring
- Undisturbed garden edges
- A small brush pile in a quiet corner
- Evergreen trees and shrubs for wind protection
Avoid unnecessary pesticide use during migration. Insects remain an important source of protein and energy for many travelling birds.
Reduce Common Backyard Hazards
Migrating birds may be unfamiliar with your property, making them especially vulnerable to reflective windows, artificial lighting and predators.
Help make your backyard safer by:
- Applying closely spaced bird-safe markings to the outside of windows
- Installing exterior screens or approved window film
- Closing curtains and blinds when rooms are not in use
- Turning off unnecessary indoor and outdoor lights at night
- Keeping cats indoors, in a secure enclosure or closely supervised
- Moving feeders away from low hiding places used by predators
Many songbirds migrate after dark. Reducing unnecessary nighttime lighting can help prevent confusion and disorientation, particularly during cloudy or foggy Maritime weather.
Prepare Feeders for Maritime Fall Weather
Atlantic Canadian fall weather can bring heavy rain, tropical storms, strong winds and sudden temperature changes. Inspect your feeding station regularly and prepare it before severe weather arrives.
- Secure feeder poles, hooks and hanging systems.
- Repair or replace cracked and damaged feeders.
- Bring lightweight feeders indoors during damaging winds.
- Store seed in a cool, dry place inside a sealed container.
- Discard seed that becomes wet or mouldy.
- Clear storm debris from feeders and birdbaths.
- Refill feeders once conditions are safe.
Support Fall Migration from Your Backyard
A clean feeder, high-energy wild bird seed, fresh water and safe shelter can make your backyard a valuable stopover for fall migratory birds. Continuing to feed after migration also supports chickadees, nuthatches, woodpeckers, cardinals, finches and other birds that remain in the Maritimes throughout winter.
Visit your local Feeds’n Needs for wild bird seed, black oil sunflower seed, Nyjer seed, peanuts, suet, nectar, feeders, birdbaths and other backyard bird-feeding supplies. Our team can help you choose the right food and feeder combination for the birds visiting your property this fall.
Maritime Fall Lawn Care: The Most Important Season for a Greener Lawn Next Year
Here’s something most Maritime homeowners don’t realize: what you do to your lawn in fall matters more than any other season.
Fall is when cool-season grasses — Kentucky Bluegrass, Fine Fescue, and Perennial Ryegrass — enter their most active growing period of the year. Soil is still warm from summer, air temperatures have cooled, and rainfall typically increases. These are ideal conditions for root development, recovery from summer stress, and preparation for winter. Every dollar and hour you invest in your lawn this fall will pay dividends next spring.
In Nova Scotia, New Brunswick, and PEI, the fall lawn care window runs roughly from late August through October, with timing varying by location and year. Acting within this window — before the ground freezes and growth stops — is what separates lawns that come back strong in spring from those that struggle year after year.
This guide covers everything Maritime homeowners need to know to make the most of fall lawn care season.
Key Takeaways
- Fall is the single best time of year to overseed, aerate, fertilize, and lime Maritime lawns
- Cool-season grasses grow actively in fall — take advantage of this window before the ground freezes
- 32-0-10 Fall/Winter Fertilizer prepares grass for winter by building carbohydrate reserves and strengthening roots without promoting soft top growth
- 21-7-7 Slow Release Fertilizer can be used in early fall when grass still needs green-up alongside root development
- Overseed thin or bare areas in early fall — aim for at least 6 weeks of growth before the first hard frost
- Aerate before overseeding and fertilizing for best results
- Lime in fall — rain and snowmelt move it into the soil over winter, improving spring conditions
- Keep mowing until grass stops growing, then make one final low cut before winter
- Leave your lawn clean of heavy debris going into winter to reduce snow mold risk
1. Why Fall Is the Best Season for Maritime Lawn Care
Understanding why fall is so valuable helps you prioritize your time and budget.
Cool-season grasses have two natural growth peaks each year: spring and fall. Summer heat and drought slow them down. Winter freezes them. But in fall, the combination of warm soil, cool air, and increasing moisture triggers a growth response that’s actually stronger than spring — particularly for root development.
What’s happening underground in fall:
- Grass plants are actively storing carbohydrates and energy reserves for winter survival
- Root systems are expanding and deepening in preparation for spring
- The soil remains biologically active long after air temperatures cool — often until late November in the Maritimes
This means that fall fertilizing, seeding, and liming have more time to work than most people realize. Lime applied in October continues moving into the soil through November rain and eventual snowmelt. Fertilizer applied in September feeds roots that are actively growing for weeks. Seed sown in late August can establish 6 to 8 weeks of growth before the first hard frost — enough to survive winter and emerge strong in spring.
Miss this window and you’re waiting another full year.
2. Assess Your Lawn After Summer
Before any fall work begins, walk your lawn and take inventory of what summer left behind.
Look for:
Summer stress and drought damage — Areas that went brown or thin during dry spells may bounce back on their own with fall moisture, or may need overseeding to fill in properly.
Grub damage — Late summer and early fall is when white grub (European Chafer and Japanese Beetle larvae) damage becomes most visible. Irregular brown patches that feel spongy underfoot, or areas where turf lifts like a loose carpet, are telltale signs. Crows, starlings, skunks, and raccoons digging at your lawn are also strong indicators. Address grub pressure before overseeding damaged areas, or your new seed investment may be undermined.
Pet damage and worn paths — High-traffic zones and pet urine spots that survived summer need attention in fall before they become larger problems next spring.
Compacted areas — Soil that feels hard underfoot, areas where water pools, or zones that repeatedly thin out despite regular care are candidates for aeration.
Thatch buildup — Run your fingers through the grass in several spots. A thatch layer thicker than half an inch will limit the effectiveness of everything else you do this fall — seed, fertilizer, and lime all struggle to reach the soil through a thick thatch mat.
Taking stock of these issues before you start work helps you prioritize and purchase the right products.
3. Dethatch and Rake — Set the Stage for Everything Else
Fall dethatching and raking does more than tidy up the lawn. It sets the stage for every other step that follows.
Dethatching removes the accumulated layer of dead stems, roots, and organic material between the soil surface and green grass blades. A thin layer is normal and beneficial. A thick layer — more than half an inch — physically blocks seed, fertilizer, lime, and water from making proper contact with the soil.
If your lawn has significant thatch, dethatch before overseeding and fertilizing. A dethatching rake works well for smaller areas; a power dethatcher covers ground faster on larger lawns. After dethatching, the lawn may look rough — this is normal. It will recover quickly with fall’s favourable growing conditions.
Fall raking removes leaves and debris that, if left in thick layers, will mat down over winter, block light and airflow from grass below, and create ideal conditions for snow mold. You don’t need a perfectly bare lawn — a thin, scattered layer of leaves will break down over winter — but heavy accumulations should be removed.
Tip: If you have a mulching mower, running it over a light leaf cover chops them into fine particles that decompose quickly and actually add organic matter to your soil. This is a legitimate alternative to raking light leaf fall.
4. Aerate — The Highest-Return Fall Investment
If there’s one fall task that delivers outsized returns for the investment, it’s core aeration.
Core aeration removes small plugs of soil across the lawn, creating channels that allow air, water, fertilizer, lime, and seed to penetrate directly into the root zone. On compacted Maritime soils — particularly those with clay content, as found in many parts of New Brunswick and Nova Scotia — aeration can transform how well your lawn responds to everything else you do.
Why fall aeration is better than spring:
- Soil is still warm and biologically active — cores break down faster
- Overseeded grass has warm soil to germinate into but cool air to establish in — ideal conditions
- Fertilizer and lime applied after aeration reach roots through open channels
- Weeds are less vigorous in fall, so newly opened soil is less vulnerable to weed establishment than in spring
Aerate if your lawn has:
- Pooling or runoff after rain
- Hard, compacted soil underfoot
- Thinning grass in high-traffic areas
- Clay-heavy soil
- Not been aerated in two or more years
Timing: Aerate while the grass is still actively growing and before the first hard frost. In most Maritime areas, September and early October are the ideal window. Aerate, then overseed and fertilize into the open channels for maximum effectiveness.
5. Overseed — Fall Is the Best Time to Fill in Your Lawn
If your lawn came out of summer thinner than you’d like — or if there are bare spots, worn paths, or areas recovering from grub or pet damage — fall overseeding is the most effective fix available.
Cool-season grass seed germinating in fall benefits from warm soil for root establishment, cool air temperatures that reduce competition from weeds, and natural fall moisture that reduces the watering burden on the homeowner. Seed sown in early September in the Maritimes can achieve 6 to 8 weeks of establishment before hard frosts arrive — enough to survive winter and emerge as a healthy, contributing part of the lawn next spring.
Overseeding timeline for the Maritimes:
- Best window: Mid-August to mid-September
- Acceptable with care: Mid-September to early October
- Risky: Late October — insufficient establishment time before freeze
Steps for successful fall overseeding:
- Mow the existing lawn slightly shorter than usual to improve seed-to-soil contact
- Dethatch and rake if thatch is present
- Aerate if soil is compacted — seed that falls into aeration channels has exceptional germination rates
- Rake bare areas lightly to loosen the surface
- Add a thin layer of quality lawn soil to bare spots if needed
- Apply seed at the recommended rate
- Lightly rake seed into the surface
- Apply 17-17-17 fertilizer to support both germination and root development
- Water lightly and frequently until seed is established — typically the first 2 to 3 weeks
- Keep foot traffic off newly seeded areas
Choosing the Right Fall Seed
| Seed | Best For |
|---|---|
| Triple Mix Lawn Seed | General overseeding, thin areas, everyday bare spot repair |
| Premium Lawn Mix | Front yards, high-visibility areas, finished residential lawns |
| Highway Mix | Slopes, ditches, driveway edges, rural and low-maintenance spaces |
6. Fertilize for Winter Survival, Not Just Green Colour
Fall fertilizing is fundamentally different from spring and summer fertilizing. The goal shifts from promoting visible top growth to building the underground reserves that help grass survive winter and emerge strong next spring.
32-0-10 Fall/Winter Fertilizer — The Right Tool for Late Fall
A fall/winter fertilizer with higher potassium and controlled nitrogen does something summer fertilizers don’t: it encourages grass to store carbohydrates, harden cell walls, and deepen roots without producing the soft, lush top growth that would be vulnerable to frost damage and disease.
What 32-0-10 does:
- High nitrogen feeds the plant efficiently in cooler conditions
- Zero phosphorus — roots are already established; phosphorus is less critical at this stage
- High potassium (10) strengthens cell walls, improves cold hardiness, and enhances disease resistance going into winter
Use 32-0-10 Fall/Winter Fertilizer when:
- Grass is still growing but temperatures are cooling — typically September through October in the Maritimes
- You want to prepare grass for winter without promoting excessive soft top growth
- Following up after early fall overseeding has established
21-7-7 Slow Release — For Early Fall Green-Up and Root Support
In early fall — late August through September — when grass is actively growing and still needs both colour and root support, 21-7-7 Slow Release remains a good option, particularly for established lawns that missed a summer feeding or came out of summer looking pale and stressed.
Fall fertilizer timing rule: Apply 21-7-7 in early fall while grass is actively growing and greening. Switch to 32-0-10 in mid-to-late fall to harden the lawn for winter. Never fertilize frozen or dormant grass.
7. Lime in Fall — Let Winter Do the Work for You
Fall is actually the ideal time to apply lime in the Maritimes, and here’s why: you don’t have to do any extra work. Rain in October and November, followed by snowmelt in spring, gradually moves lime down through the soil profile over the entire winter season. By the time you’re doing your spring cleanup, the lime has had months to begin adjusting pH — giving your spring fertilizer a much better environment to work in.
Maritime soils are naturally acidic. Consistent rainfall leaches pH over time. Many lawns across Nova Scotia, New Brunswick, and PEI are below the 6.0 to 7.0 pH range where cool-season grasses perform best — often without homeowners realizing it.
Apply lime in fall if:
- A soil test shows pH below 6.0
- Moss has been spreading across the lawn
- Fertilizer doesn’t seem to be producing visible results
- The lawn has not been limed in two or more years
Lime and fertilizer can be applied at the same time — they don’t interfere with each other. Apply lime after aeration for best soil penetration.
8. Keep Mowing — Then Make One Final Cut
Many Maritime homeowners stop mowing too early in fall, letting grass get long before winter arrives. Long grass going into winter creates several problems: it mats under snow, restricts airflow at the soil surface, and creates ideal conditions for snow mold development.
Fall mowing approach:
- Continue mowing at your normal 2.5 to 3 inch height through September and October as long as grass is actively growing
- Never let grass get significantly longer than 3 inches before a cut — long grass matted under early snow is a snow mold risk
- For your final cut of the season, drop the cutting height slightly to 2 to 2.5 inches — this reduces the amount of leaf tissue that will mat and compress under snow
- Make sure this final cut happens before the first hard, sustained frost — not after the grass has stopped growing
Keep your mower blade sharp through fall. A clean cut going into winter reduces entry points for disease.
9. Clean Up and Prepare for Winter
A few final steps in late fall make a meaningful difference in how your lawn emerges next spring.
Remove heavy leaf accumulation — Scattered leaves are fine. Thick, wet leaf mats that smother the grass through winter are not. Rake or mulch mow heavy leaf cover before the ground freezes.
Clean up pet waste — Pet waste left on the lawn over winter contributes to nitrogen burn and odour issues in spring. A final cleanup before freeze-up is worth the effort.
Avoid heavy traffic on frozen or frost-covered grass — Walking or driving on frozen grass damages the crowns of grass plants, which are brittle in frozen conditions. Avoid unnecessary foot traffic once hard frosts begin.
Put away irrigation equipment — Drain hoses and irrigation lines before the first hard frost to prevent freeze damage.
Note areas that need spring attention — Before snow covers everything, make a note of problem areas, bare spots, grub damage, or compaction zones. Having this list ready in spring means you can act quickly when the ground firms up.
Frequently Asked Questions
When should I start fall lawn care in the Maritimes?
Begin in late August to early September, particularly for overseeding. Most fall lawn care tasks — aerating, overseeding, fertilizing, and liming — should be completed by mid-October in most Maritime areas to allow enough time for grass to establish and products to work before the ground freezes.
Is fall really better than spring for overseeding?
For cool-season grasses, yes. Warm soil, cool air, and natural moisture in fall create near-ideal germination and establishment conditions. There’s also less competition from annual weeds in fall than in spring.
What fertilizer should I use in fall?
Use 21-7-7 Slow Release in early fall while grass is actively growing. Switch to 32-0-10 Fall/Winter Fertilizer in mid-to-late fall to harden grass for winter without promoting soft top growth.
How late can I overseed in the Maritimes?
Mid-September is the comfortable deadline for most Maritime locations. Seeding into early October is possible but risky — germinating grass needs at least 4 to 6 weeks to establish before hard frosts. Late October seeding has low success rates in most years.
Should I aerate in fall or spring?
Fall aeration is generally more beneficial for Maritime lawns. Soil is still biologically active, overseeded grass germinates into warm soil, and open aeration channels improve the effectiveness of fall fertilizer and lime applications.
How short should my final fall mow be?
Drop to 2 to 2.5 inches for your last cut of the season. This reduces the amount of leaf material that mats and compresses under snow, which is one of the main drivers of snow mold.
Can I apply lime and fertilizer at the same time in fall?
Yes. Lime and fertilizer do not interfere with each other and can be applied in the same session. Applying both after aeration improves penetration and effectiveness significantly.
What do I do about grub damage in fall?
Fall is when grub damage is most visible and when grub populations are most active near the surface. Consult your local Feeds’n Needs team about treatment options available in your province. Damaged areas should be raked out and overseeded once grub pressure is addressed.
Do I need to do anything special to protect my lawn from snow mold?
Yes. Avoid leaving long grass, heavy leaf accumulation, or thick debris on the lawn going into winter. Make a final mow at 2 to 2.5 inches, rake heavy leaves, and ensure good airflow across the lawn surface before the first sustained snowfall.
Recommended Products for Maritime Fall Lawn Care
- 32-0-10 Fall/Winter Fertilizer — Hardens grass for winter, builds cold hardiness and disease resistance
- 21-7-7 Slow Release Fertilizer — Early fall green-up and steady feeding for established lawns
- 17-17-17 Balanced Fertilizer — Balanced support for fall overseeding and bare spot repair
- Triple Mix Lawn Seed — Reliable all-purpose fall overseeding and patch repair
- Premium Lawn Mix — Thick, finished results for front yards and high-visibility areas
- Highway Mix — Durable ground cover for slopes, ditches, and low-maintenance areas
- Lime — Fall application works through winter to improve spring soil conditions
Have questions about your lawn? Visit your local Feeds’n Needs store for expert advice, soil amendments, fertilizer, grass seed, and lawn care products tailored to Maritime growing conditions.
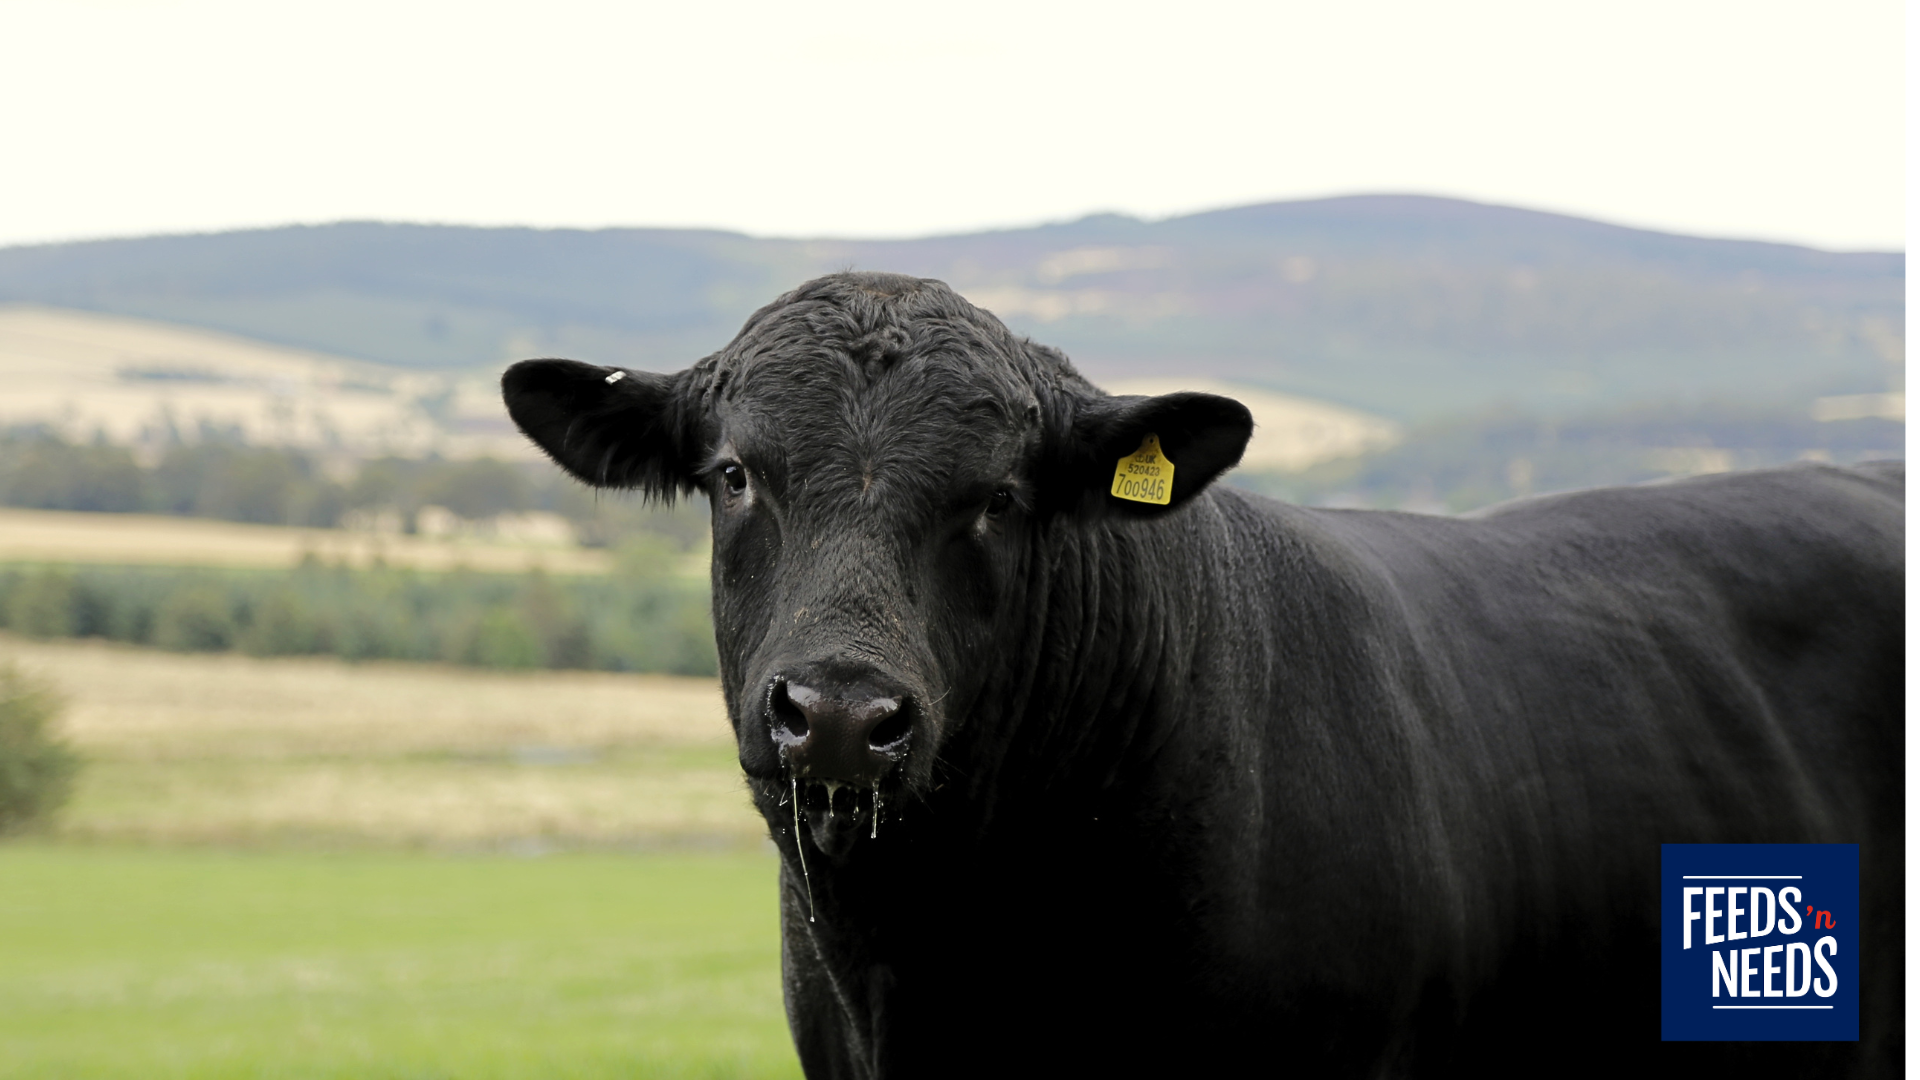
When to Remove Bulls, Restore Body Condition and Prepare for Fall
For many Atlantic Canadian spring-calving beef herds, late summer marks the end of the breeding season. Once the planned breeding window has closed, bulls should be removed from the cow herd and placed in a secure pasture where they can rest, regain condition and be evaluated before fall.
Removing bulls on schedule helps maintain a controlled calving season and gives producers a clearer picture of when next year’s calves should arrive. It also provides an opportunity to identify injuries, lameness or body-condition concerns while there is still time to respond before winter.
From fencing and pasture quality to mineral support and foot health, good post-breeding bull management protects one of the most important investments in a cow-calf operation.
Why Remove Bulls from the Cow Herd?
The right removal date depends on when bulls were turned out and how long the farm’s breeding season is intended to last. It should be based on the operation’s breeding plan—not simply a particular calendar date.
Leaving bulls with the cows longer than planned can result in:
- A longer and less predictable calving season
- More late-born calves
- Greater variation in calf age and weight
- Increased labour during calving
- More difficulty grouping cows for feeding and management
- Greater wear and weight loss for breeding bulls
- Unplanned breeding of young heifers
Record the date each bull entered and left the breeding herd. These dates will help estimate next year’s calving window and support future breeding decisions.
Move Bulls to a Secure Pasture
Once breeding is complete, move bulls to a separate pasture away from the cow herd. Bulls may test weak fencing when they can see, hear or smell cycling cows, so separation requires more than a convenient empty paddock.
The bull pasture should provide:
- Strong perimeter fencing
- Secure gates and latches
- Reliable access to clean water
- Adequate forage
- Shade or shelter
- Safe footing
- Enough room to move comfortably
- Easy access for regular observation
Whenever possible, use enough distance or a visual barrier to reduce contact with the cow herd.
Feeds’n Needs carries a range of farm-fencing supplies, including electric-fence components, posts, insulators, polywire, gate hardware and other repair essentials. Product availability varies by store.
Inspect the Fence Before Moving Bulls
Walk the entire pasture boundary before turnout and check for:
- Broken or leaning posts
- Loose wire
- Damaged insulators
- Weak corners
- Low electric-fence voltage
- Vegetation grounding the fence
- Gates that sag or fail to latch
- Washouts beneath fences
- Damage from fallen branches
- Areas weakened by wet soil
Atlantic Canada’s late-summer thunderstorms, heavy rain and tropical weather can quickly damage fence lines. Keep repair supplies on hand and recheck the perimeter after severe weather.
Take Care When Grouping Bulls
Bulls returning from separate breeding groups may re-establish their social order when placed together. Fighting can lead to leg, foot, shoulder or head injuries.
When grouping bulls:
- Use a large, open paddock with good footing.
- Avoid confined pens whenever possible.
- Remove unnecessary obstacles.
- Provide more than one feeding area.
- Avoid placing feed or water in tight corners.
- Observe the group closely after introduction.
- Have a safe plan for separating an injured animal.
Do not enter a pasture casually to break up fighting bulls. Cattle handling should be planned around appropriate facilities, escape routes and experienced help.
Evaluate Body Condition After Breeding
Breeding season can be physically demanding. Bulls may spend more time travelling, monitoring cows and breeding while spending less time grazing.
Assess each bull after removal rather than assuming the entire bull battery came through the season in the same condition.
Look for:
- Prominent ribs or spine
- Reduced muscle over the topline
- Loss of condition around the hips and tailhead
- A tucked-up appearance
- Reduced appetite
- Uneven movement
- Excessive fatigue
- Poor hair coat
- Noticeable weight loss
Use a consistent beef-cattle body-condition scoring system and keep records for comparison. Both underconditioned and overconditioned bulls may experience performance concerns, so the goal should be gradual recovery—not rapid fattening.
A livestock scale provides the most accurate weight. Weight tapes or other estimation methods may also help track changes when a scale is unavailable.
Support Gradual Weight and Condition Recovery
Bulls should have enough time after breeding to regain appropriate condition before cold weather increases their maintenance requirements.
Begin with forage. Evaluate:
- Pasture quantity
- Forage maturity
- Grazing pressure
- Available regrowth
- Weed content
- Mud or hoof damage around feeding areas
- Access to stored forage if pasture becomes limited
By late summer, pasture quality can decline quickly, particularly after dry weather, overgrazing or extended periods of heavy rain. A pasture that still looks green may not provide enough energy or protein for a bull that needs to regain condition.
If additional nutrition is required, work with a beef nutritionist, veterinarian or qualified feed adviser to develop a balanced program. Make feed changes gradually to protect rumen health.
Feeds’n Needs offers livestock feeds, forage products and feeding equipment for Atlantic Canadian beef operations. Our team can help you review available options, but significant weight loss or poor condition should also be discussed with your veterinarian.
Maintain a Complete Mineral Program
Bulls require balanced nutrition throughout the year—not only immediately before breeding.
Provide a cattle mineral appropriate for:
- The animal class
- The forage being fed
- The time of year
- Local deficiencies
- Farm management conditions
Mineral products are not interchangeable. A product intended for another livestock species may contain inappropriate nutrient levels for cattle.
Keep mineral feeders:
- Covered from rain
- Clean and dry
- Easy to access
- Located away from muddy areas
- Monitored for actual consumption
Atlantic Canadian humidity and heavy rain can cause exposed mineral to clump or spoil. Check feeders frequently and replace wet or contaminated material.
Feeds’n Needs carries cattle minerals, salt and mineral feeders at select locations. Ask our livestock team which option fits your feeding program and consult a qualified nutrition adviser when needed.
Provide Constant Access to Clean Water
Clean water remains essential as bulls recover from breeding season. Warm late-summer days can increase water needs, while poor water quality may reduce intake.
Inspect:
- Trough cleanliness
- Water flow
- Float systems
- Hoses and fittings
- Mud around the water source
- Algae buildup
- Electrical components on automatic systems
- Access for lower-ranking animals
If several bulls share a pasture, make sure dominant animals cannot easily block access to the only water source.
Feeds’n Needs offers livestock tubs, troughs, buckets and watering accessories to support pasture and barn setups.
Check Feet, Legs and Movement
A bull may have completed breeding while carrying an injury that was not obvious from a distance. Once bulls are separated, watch each animal walk on a firm, level surface.
Look for:
- Limping or shortened strides
- Stiffness
- Swelling around joints
- Reluctance to rise or travel
- Uneven hoof wear
- Cracks or overgrowth
- Sole damage
- Heat or swelling above the hoof
- Tenderness between the claws
- Signs of foot rot
- Injuries caused by fighting or rough ground
Sound feet and legs are essential for breeding performance.
Contact your veterinarian promptly if a bull is lame, swollen, feverish, losing weight or reluctant to move. Early attention may improve recovery and help determine whether the bull should remain in the breeding herd.
Complete a Hands-On Health Check
Post-breeding separation provides a valuable opportunity to examine each bull more closely.
Check:
- Eyes
- Teeth and mouth
- Hair coat and skin
- Feet and legs
- Joints
- Body condition
- Scrotum and testicles
- Sheath
- Signs of injury
- External parasites
- General attitude and appetite
Any swelling, asymmetry, wounds, abnormal discharge or suspected breeding injury should be evaluated by a veterinarian.
Review Herd Health with Your Veterinarian
Fall is a good time to review:
- Vaccination records
- Parasite-control plans
- Injuries or lameness
- Body-condition concerns
- Breeding performance
- Culling decisions
- Timing for a future breeding soundness examination
- Winter housing and nutrition
A breeding soundness examination is commonly completed before the next breeding season, allowing time to source a replacement if a bull does not pass. Your veterinarian can recommend the best timing for your operation.
Poor condition, lameness or reproductive abnormalities should be addressed when detected rather than left until spring.
Plan for Atlantic Canadian Fall Weather
Late summer can shift quickly into wet, windy and cool conditions across Nova Scotia, New Brunswick and Prince Edward Island.
Prepare the bull pasture for:
- Heavy rain
- Tropical storms
- Soft or muddy footing
- Falling branches
- Damaged electric fencing
- Declining pasture growth
- Early frost
- Reduced daylight
- Difficult vehicle access
Avoid placing hay, mineral or water in low areas where mud collects. Move feeding locations when practical to reduce hoof damage and soil disturbance.
Ensure bulls have access to shelter from wind and driving rain before colder weather arrives.
Begin Winter Feed Planning Early
Do not wait until pasture is finished to calculate winter feed requirements.
Review:
- Number and size of bulls
- Current body condition
- Hay quantity
- Forage quality
- Expected winter length
- Storage losses
- Feeding waste
- Mineral requirements
- Separate feeding needs
A forage test can help determine whether stored hay meets the bulls’ needs or if supplementation may be required. Rations should be balanced with help from a qualified livestock nutritionist or veterinarian.
If one bull is significantly thinner than the rest, he may require separate management to prevent competition and allow controlled recovery.
Make Records and Review Performance
Record information for every bull, including:
- Turn-in date
- Removal date
- Cow group
- Estimated number of cows exposed
- Body condition
- Weight when available
- Foot and leg observations
- Injuries or treatments
- Temperament
- Veterinary findings
- Planned winter group
- Future breeding status
When pregnancy-checking information becomes available, compare results with bull groups. Poor conception, a large number of late pregnancies or unexpected open cows may justify additional investigation.
Post-Breeding Bull Checklist
After removing bulls from the spring-calving herd:
- Move bulls to a secure pasture away from cows.
- Inspect fences, gates and electric-fence voltage.
- Monitor bulls carefully when regrouping.
- Record the breeding-season removal date.
- Assess body condition and weight.
- Watch each bull walk.
- Inspect feet, legs and joints.
- Check for breeding or fighting injuries.
- Provide clean water and adequate forage.
- Offer a suitable cattle mineral.
- Separate thin, injured or vulnerable bulls when needed.
- Review health concerns with your veterinarian.
- Evaluate winter hay and feed supplies.
- Plan future breeding soundness examinations.
- Keep individual bull records.
Give Your Bulls Time to Recover Before Winter
Removing bulls at the end of the planned breeding season is about more than controlling next year’s calving window. It creates an important management period for recovery, evaluation and winter preparation.
Secure separation, strong fencing, adequate forage, clean water, balanced minerals and close attention to feet, legs and body condition can help bulls enter fall in better shape.
Visit your local Feeds’n Needs for livestock feed, cattle minerals, feeders, water tubs, fencing supplies, posts, insulators, gate hardware and other essentials for post-breeding bull management. Product availability varies by store.
This article provides general educational information. Consult your veterinarian or qualified livestock nutrition adviser about health concerns, lameness, body-condition loss, feed changes, mineral selection and breeding soundness.


