
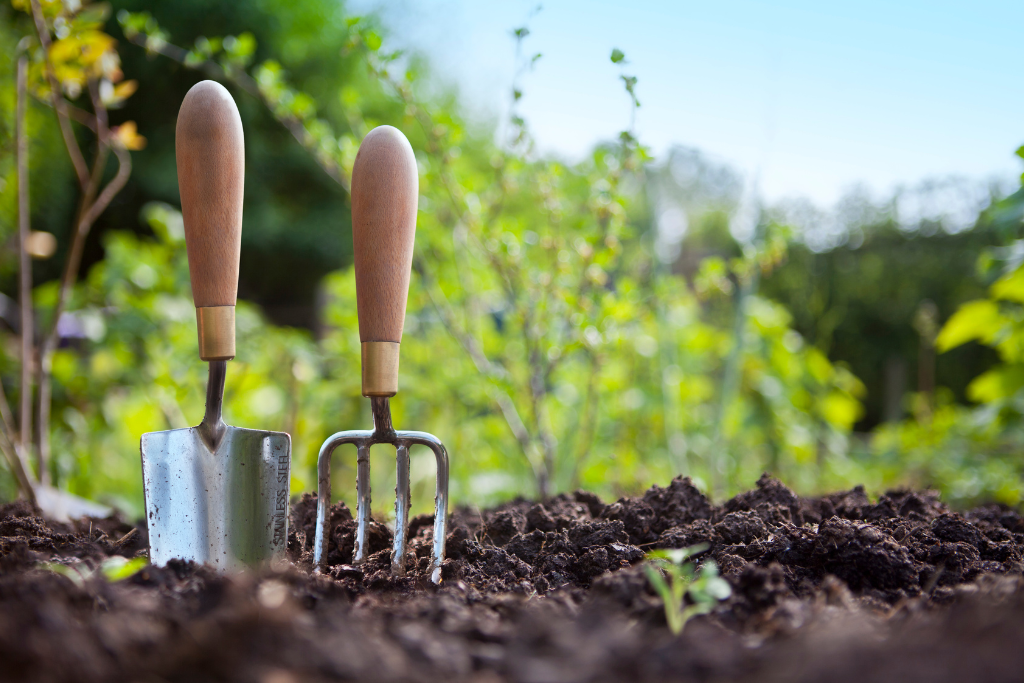
Is your lawn looking a little dull after a long winter? Don’t worry; the Feeds’n Needs Experts are here to share our top tips and products for bringing your lawn back to life this spring! From preparing your soil and overseeding to fertilizing and maintenance, this blog covers all the basics of springtime lawn care! Great lawns start with Feeds’n Needs!
Prepare Your Soil
Before you can seed your lawn, you need to prepare the soil.
- Mow the grass: Set your lawn mower to the lowest setting and cut your grass short. Bag the clippings or add them to your compost bin.
- Rake the lawn: Use a rake to scratch up the top layer of soil on your lawn and remove any dead grass or root buildup called thatch. Thatch buildup can prevent essential water and nutrients from reaching the soil beneath it and cause your grass to look dull and unhealthy.
- Aerate the soil: Aerate your soil during the spring and fall growing seasons. Aeration helps prevent thatch buildup while allowing water and nutrients to penetrate deeper into the soil and reach the roots of your grass.
Overseeding
Overseeding your lawn in the spring helps cover up any thin or bare spots in your grass and encourages new growth of thick, healthy grass. At Feeds’n Needs, we carry a variety of quality grass seed blends. Ask our Experts which one is best suited for your lawn!
- Choose a grass seed: When choosing grass seed for your lawn, consider the amount of sunlight or shade it receives and whether you’ll need cool-season or warm-season grass seed. Cool-season grasses are best for planting in spring and early fall when the soil temperature reaches 10 degrees Celsius.
- Spreading grass seed: To ensure the grass seed is spread evenly across your lawn, fill your spreader and adjust the density setting according to the recommendation on your seed bag.
- Let it grow: Once you’ve spread your grass seed, you’ll need to water your lawn frequently to keep the soil moist and allow the seeds to germinate.
Fertilizing
Once you’ve spread your grass seed and the new grass has begun growing, adding fertilizer will give your lawn the nutrients it needs to grow and remain healthy.
- Choose a fertilizer: When new grass begins growing in the spring, a high-nitrogen fertilizer will encourage new leaf growth. We recommend the Cavendish slow-release 21-7-7 fertilizer for springtime lawn maintenance.
- Spreading fertilizer: Fill your spreader and adjust the settings according to the recommendation on your fertilizer bag. Spread the fertilizer evenly across your lawn, ensuring each area gets covered.
- Water: Once you’ve spread your fertilizer, continue to water your lawn regularly to allow the fertilizer to sink into the soil and bring nutrients to your growing grass seedlings.
Maintenance
- Routine watering: Newly seeded and fertilized lawns need about an inch of water each week to promote root growth and vitality. Lightly water once or twice a day to keep the soil moist. Watering may not be necessary if it rains enough in your area.
- Mowing habits: When your lawn is freshly seeded, avoid mowing until the new grass reaches about 3 inches in height to prevent damage.
- Regularly Fertilize: Fertilize your lawn every eight weeks to support lush, healthy grass. Visit your local Feeds’n Needs to find fertilizer for every season!
When it comes to keeping a healthy lawn, Feeds’ n Needs is your one-stop shop for all the essentials! Check out our great selection of fertilizers, grass seeds, and more, and don’t forget to ask our Experts which products will work best for you!
For more expert advice on how to maintain a healthy lawn, check out our blog on How to Maintain a Healthy Lawn.

Garden Projects for Spring
The weather is getting warmer, and it’s finally time to start making your garden plans! It’s not quite time to plant yet, but you can begin many other projects in the spring to ensure your garden is ready to roll once the frost is gone!
Create a Garden Journal:
Keep track of what you’ve planted in the past, what grew well and what didn’t, where you planted things last year so you can rotate crops, tape seed package tags to pages, sketch out garden bed ideas—the list goes on! Keeping a detailed journal of your garden is a great way to help you remember what worked well for you in previous years or even new ideas you might like to try!
Start Seeds Indoors:
Many seed varieties, especially those that take longer to grow, such as tomatoes and peppers, can be started indoors. Plant your seeds in a shallow container about 2 to 3 ½ inches deep with drainage holes. Peat pots, pellets, paper cups, or shallow compartmented trays all work well.
Use a soilless seed starting mix, ideally made up of peat, perlite, vermiculite, and added nutrients. These mixes are light, improve drainage, and aid water retention, making them best for seedling germination.
Follow the planting directions on your seed packages to determine the depth in which to plant your seeds. Then, place your seed containers in a warm location (ideally 18 – 22 degrees Celsius) where they will have access to light for about 12 to 14 hours per day. Keep the soil moist and cover the seed pots or trays with plastic or damp paper towel to allow seeds to germinate.
Start a Compost Bin:
Commonly called “black gold,” compost does wonders for the soil and plants growing within it. Made up of recycled matter such as kitchen scraps and lawn clippings, compost adds vital nutrients to the soil, helping to maintain its structure, porosity, and density, maintain proper pH balance and moisture, and even prevent weeds! Composting is a great way to prevent unnecessary waste from ending up in landfills, helping your soil and plants thrive!
Test Your Soil:
Test your soil for deficiencies before you plant! Pick up a soil test kit at your local Feeds ‘n Needs to test your soil’s pH, nitrogen, phosphorus, and potash levels. The plants you grow need to be able to get their nutrients from the soil they grow in, so if your soil’s nutrient levels are too high or too low, it could cause problems down the road that are much easier to identify and fix before you plant!
Prepare Your Pots and Containers:
Make sure you have all the pots and containers you will need for all the planting you plan on doing. If you have containers that you used last year, get rid of any old soil and scrub them down with powdered laundry detergent and water. Once clean, disinfect the containers with a mixture of bleach and water. If you are new to planting or just need some new planting essentials, we carry a variety of plant pots, containers, and seed-starting kits!
Clean Your Tools:
Before you can start tending to your garden, make sure that all your tools are cleaned up and ready to go. Wash off any dirty tools and check their condition. If some of your tools have become rusty, try soaking them in a solid black tea bath or use sandpaper or a wire bristle brush to shine them up again. Take this time to tighten up any screws or bolts that may have come loose on any of your tools as well.
Our Experts know how exciting it is once the snow melts and gardening season is just within reach. But don’t forget to take advantage of springtime to make sure you have everything ready and planned out. We want to help you ensure that when it comes time to plant, you are more than prepared! Stop into your local Feeds ‘n Needs and check out our gardening section. We’ve got everything you need to prep, plant, and maintain your garden!
For more helpful gardening tips and tricks, check out our related posts!
Link 1 – Gardening Tips for Beginners
Link 2 – How to Sprout Your Own Seeds
Link 3 – Garden Planning for Spring and Summer
Sources:
https://www.almanac.com/content/3-simple-diy-soil-tests
https://www.farmandfleet.com/blog/early-spring-lawn-garden-projects/
https://www.housebeautiful.com/lifestyle/gardening/a31747273/easy-gardening-projects-spring/
https://www.countryliving.com/gardening/garden-ideas/a30753842/how-to-start-seeds/?psafe_param=1&utm_source=google&utm_medium=cpc&utm_campaign=arb_ga_clv_md_pmx_hybd_mix_ca_18700871953&gad_source=1&gclid=EAIaIQobChMI5svmw6P0hAMVdpJoCR1xhwOBEAAYAyAAEgKKOfD_BwE
https://www.veseys.com/ca/growing-from-seeds?gad_source=1&gclid=EAIaIQobChMI_bmPoqz0hAMV55KDBx11XwRdEAAYAiAAEgIhLvD_BwE
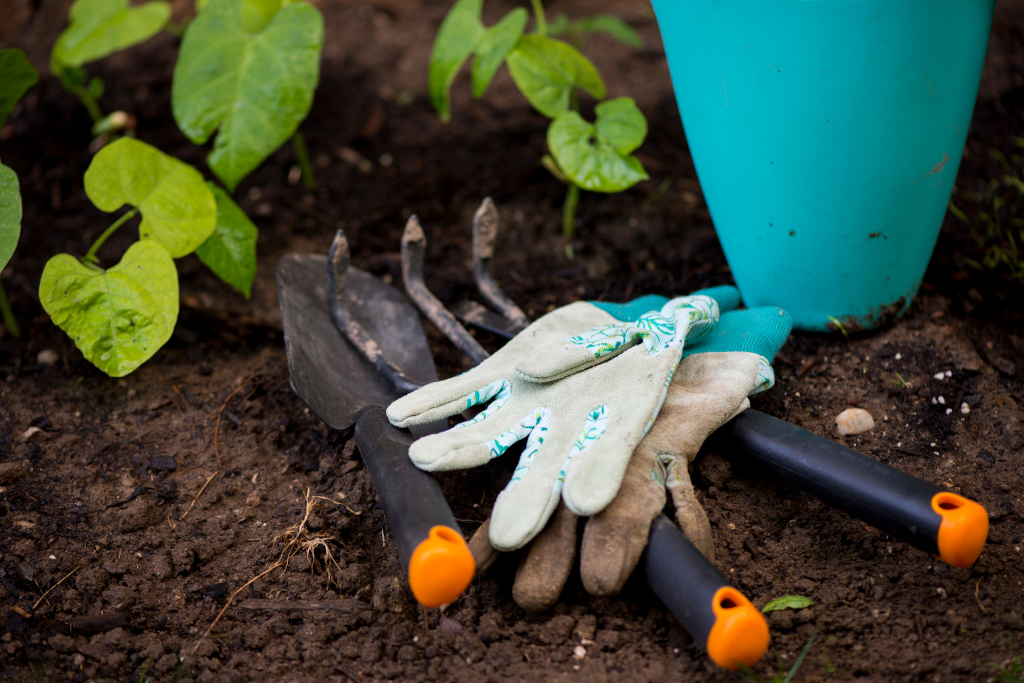
Essential Gardening Tools for Beginners
If you’re new to gardening, you may be wondering where to start. Before you can plant your garden, it’s helpful to have all the essentials you’ll need to ensure that your garden’s preparation, maintenance and harvesting are easy and hassle-free. Our list of the top 12 essential gardening tools is an excellent guide for first-time gardeners looking for a place to get started:
Gardening Gloves:
Keeping your hands clean, dry, and safe while you work. A good pair of breathable and waterproof gardening gloves is a must-have for every new gardener.
Garden Hoe:
A garden hoe is a useful tool for cultivating the garden, stirring up and mounding soil, and dislodging weeds. You can buy multiple types of garden hoes, each better suited to a specific task.
Garden Fork:
This tool comes in handy when getting your vegetable plots ready for planting. Garden forks come in different shapes and sizes but are generally used for breaking up stony soil, aerating sod and digging up root crops.
Shovel:
Shovels serve many purposes when gardening or working around the yard. A sturdy, long-handled shovel is perfect for digging large holes, moving and turning soil, digging out perennials to divide or transplant, and so much more. This is one tool you’ll definitely want to have on hand!
Garden Rake:
A long-handled tool with a wide head and teeth on the end, a garden rake works well to break down soil into a fine tilth that’s best for planting seeds. These rakes are also useful for getting rid of debris in your soil.
Spade:
Garden spades are essential tools for landscapers and come in handy in the garden, too. Used to break through ground and chop through tree roots and tough soil. Spades are helpful when excavating gardens, removing clumps of grass or roots, and cutting garden margins. These tools can also be used for soil aeration and turning soil.
Hand Trowel:
An invaluable tool in the garden, hand trowels are perfect for digging small holes for seeding and transplanting, turning small amounts of soil, and digging up weeds. Try finding a trowel with depth measurements to help you out when planting!
Hand Cultivator:
While these tools are available in various sizes, keeping a small handheld cultivator in your gardening tool kit will be helpful when you first start out. Great for reaching smaller areas where large tools won’t fit, hand cultivators have teeth that are perfect for pulling up pesky weeds between plants and digging or breaking up soil.
Pruners:
A good pair of hand pruners is perfect for trimming small branches, cutting through roots, and dividing root balls. There are various hand pruner options, with certain types better suited for specific tasks, and some even designed to minimize muscle strain and discomfort while using them.
Scissors:
A good, sharp pair of scissors serves many purposes while working in the garden. You can use them to deadhead flowers, harvest vegetables, snip herbs, cut twine or ties holding up plants and even cut open packages of seeds or fertilizers! The uses for this tool are endless!
Zip Ties or Twine:
Useful for securing plants to a support system like trellises, stakes, cages, fences, etc.
Hose & Watering Can:
Once you plant your garden, watering your crops as they grow is a daily task. A garden hose and nozzle with multiple watering settings are essential to ensure that your plants get the water they require to grow. A watering can is also beneficial to supply water to areas where your hose may not reach.
Having the proper tools on hand will make your time in the garden more efficient, precise, and safe while ensuring your plants’ health and maintenance. Stop by your local Feeds’ n Needs to view our selection of various garden tools, Vesey’s seeds, soils, and fertilizers. Let our Experts answer any questions about getting started in the garden!
For more expert advice on getting your garden started, check out our related blogs:
Garden Planning for Spring and Summer
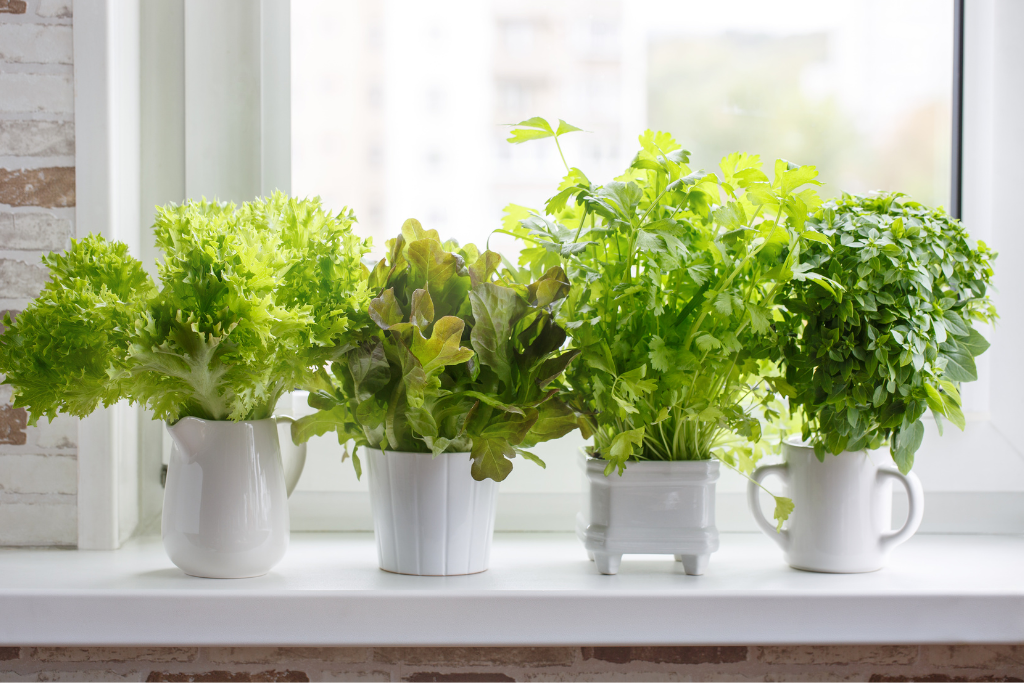
How to Grow Your Own Indoor Herb Garden
Not ready to give up gardening for the season? Start your own indoor herb garden! A herb garden will ensure you always have fresh herbs on hand. It’s as simple as understanding the plant’s requirements and making sure to give them what they need. Check out our step-by-step guide to learn how to grow your own indoor herb garden successfully!
Pick the Right Plants
Most herbs can be grown indoors, but ones that tend to thrive the most inside include basil, chives, mint, oregano, parsley, rosemary and thyme. First-time herb growers should select three to five herbs to keep the garden manageable. You can start herbs from seeds or cutting, but you may find it much easier and faster to start with seedlings. The best herbs for you will depend on the ones you plan to use while cooking.
Select a Container with Drainage
You can plant herbs in just about any container as long as it has some drainage. You should also have something underneath your pot, like a saucer or round plastic protector.
Choose a Sunny Spot
Most herbs prefer a lot of sunlight. You’ll want to give your indoor herb garden at least six hours of sun daily to thrive. It is best to place your herbs as close to your brightest windows as possible. Growth in the winter season can be slower as there isn’t as much natural light. You can invest in a grow light or LED light to help ensure your plants get enough light.
Herbs grown in strong, bright light will have the best flavour! A bright, sunny window or sunroom is the ideal location for growing herbs indoors.
Water – But Not Too Much
Keep the soil moist but not waterlogged to ensure your plants grow successfully. A small watering can, or a drizzle under the sink will do the job. If you notice the leaves of your plants turning yellow or wilting, scale back the water amount. Pour out any excess water that collects in the tray or saucer they’re sitting in.
Harvest a Little at a Time
Pinch off a few leaves with your fingers. Regular cutbacks encourage new growth. Be careful not to remove more than a quarter of the plant at a time, as this can cause distress to your herbs.
Transplant When Ready
If you see roots coming out of the drainage holes, growth seems to have stalled, or the plant starts to flop over, it’s time to transplant to give your plants more space to grow.
Visit your local Feeds’n Needs to stock up on your herb seeds and gardening necessities and get to planting! You’ll have fresh and delicious herbs at your fingertips in no time!
Sources:
10 Important Tips to Create your own Indoor Herb Garden (howtoculinaryherbgarden.com)
How to Plant an Indoor Herb Garden (eatingwell.com)
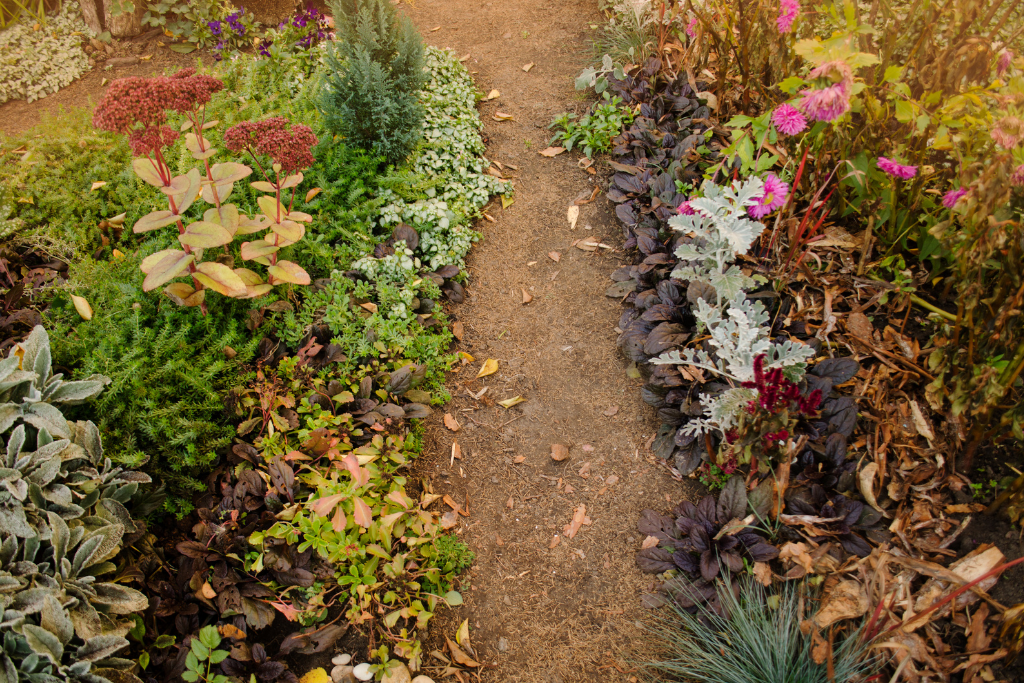
Fall Garden Checklist
It is never too early to think about your spring garden – that is why it needs some attention in the fall. When the weather cools down, it’s time to finish the gardening season by preparing your gardens for winter. Use this fall garden checklist that can make all the difference next spring!
Leave the Leaves
Leave plenty of healthy plant material in your garden to help feed garden wildlife over the winter months. Some insects will hibernate in the leaves or leave behind eggs to hatch in spring, giving birds something to munch on upon their return.
Plants naturally drop their leaves to feed the roots as they decompose. Leave some of the leaves on the soil until spring so the plants can get their nutrient boost!
Mulch
Mulching in the fall creates a warm blanket on the top of the soil that slowly breaks down into humus that will feed the soil.
If you have deciduous trees on your property, mulching is easy! Let the leaves fall on the garden and leave them there as mulch. In the spring, the mulched leaves can be left in place when you add a layer of compost or topsoil. They will continue to feed the soil as they break down.
Remove Diseased Material
Removing any diseased plant material or fallen fruit is good practice to stop the spread of pests and diseases the following year. It is important to remove anything that will cause you problems in the spring.
Plant Spring Bulbs
Many of your favourite spring flowers, such as tulips, daffodils, hyacinth, allium, and crocus, must be planted in the fall to get that cold bust.
Grow Fall & Winter Vegetables
Vegetable gardening doesn’t have to end in the fall. There are some super seedy and frost-hardy vegetables out there that can grow before the winter chill sets in.
Harvest
The most exciting garden task in the fall is harvesting. Celebrate your success, and then get to harvesting and preserving herbs, vegetables, and flowers.
Save the Seeds
As your plants go to seed, it’s time to collect them! Look at your favourite seasonal flowers and vegetables and see what you want to include in next year’s garden. Collect only seeds from the strongest plants, so next year’s garden is even better than this one.
Plant Your Shrubs
Fall means it is time to plant shrubs and evergreens. The best time of year for planting, the warm soil and cold air help to develop a strong enough root system to get through the winter.
Amend Soil
Give your garden some nutrition back by amending garden soil in the fall.
Make compost at home using a compost bin to turn leaves, food scraps, and more into a soil amendment. Spread the compost around the garden. From there, it will do the hard work for you.
Divide Perennials
Dividing perennials increases your plant stock and helps them fill in, improve blooming, and avoid overcrowding. For the healthiest perennials, dividing them in the fall is essential. Many perennials thrive by being divided, especially if they are crowded.
Clean Your Garden Tools
Fall is a great time to give your garden tools a good scrubbing. Wash hand tools like trowels and rakes with soapy water and a scouring sponge. Use a power washer to get large tools clean. You will also want to wrap up your garden hose and fully drain it of any water before curling it up.

Seeds for Fall Planting Season
It is a great time to stock up on seeds for the fall planting season – it is never too early to start thinking about spring. Many seeds enjoy the cold spell to nestle in the ground for winter and get a head start next spring.
For fall planting in Atlantic Canada, you want to wait until after a killing frost, meaning nothing is left growing from the summer season. If you plant your seeds too early, they may sprout. You want your seeds to hibernate for the winter and emerge in spring. If a fall seedling does sprout, mulch over them to prevent them from freezing.
To plant your seeds:
1. Prepare the bed as you normally would any time of the year
2. Clear all debris and add a layer of organic compost
3. Follow the seed packet for light and soil requirements
Seeds to Plant in the Fall:
This list covers both annuals and perennials to plant in the fall. These seeds require cold stratification to bloom the following spring, or they don’t mind the cold.
- Bells of Ireland Moluccella laevis
- Cornflower Centaurea cyanus
- Blanket Flower Gaillardia
- Poppy Papaveraceae
- Coneflower Echinacea
- Columbine Aquilegea
- Sweet Peas Lathyrus odoratus
- False Queen Anne’s Lace Ammi majus
- Foxglove Digitalis
- Sea Holly Eryngium
- Tickseed Coreopsis tinctoria
- Snapdragon Antirrhinum
- Hollyhock Alcea
- Black-Eyed Susan Rudbeckia
- Forget-Me-Not Myosotis
- Penstemon Penestemon
- Sweet William Dianthus
- Ashy Sunflower Helianthus mollis
- Pansy Viola
- Love-In-A-Mist Nigella damascene
- Delphinium
- Basket of Gold Alyssum Aurinia saxatilis
- Chinese Forget-Me-Not Cynoglossum amabile
- Common Woolly Sunflower Eriophyllum lanatum
- Lunaria Lunaria annua
- Biglead Lupin Lupinus polyphyllus
- Veronica Veronica spicata
- Purple Chinese Houses Collinsia heterophylla
- Globe Gilia Gilia capitata
- Baby’s Breath Gypsophila elegans
- Baby Blue Eyes Nemophila menziesii
Vegetables to Plant in the Fall:
Here is a list of some vegetables you can plant in the fall and enjoy next spring and summer!
- Onion, garlic, and shallots:
-
- These are best planted in the fall due to their long growing season. They need a cold period to grow well and are best planted early to mid-fall.
- Turnips, carrots, radishes, and beets
-
- These root vegetables don’t mind the cold, you may even see minimal growth. You will most likely notice a sweeter taste when planted in the fall.
- Lettuce and leafy greens
-
- You can have fresh greens year-round by using a cold frame or mini-greenhouse outside throughout the winter.
Here is a complete list of when to plant vegetables in Atlantic Canada!
New Brunswick: 2023 Planting Calendar: When to Start Vegetable Seeds | The Old Farmer’s Almanac
Nova Scotia: 2023 Planting Calendar: When to Start Vegetable Seeds | The Old Farmer’s Almanac
Prince Edward Island: 2023 Planting Calendar: When to Start Vegetable Seeds | The Old Farmer’s Almanac
Visit us today at any one of our 13 Feeds’n Needs locations. Stock up on your seeds before they’re gone! Now is the perfect time to plant for next year’s harvest. Happy planting!
Source: Seeds to Plant in the Fall for Next Season’s Blooms – Garden Therapy
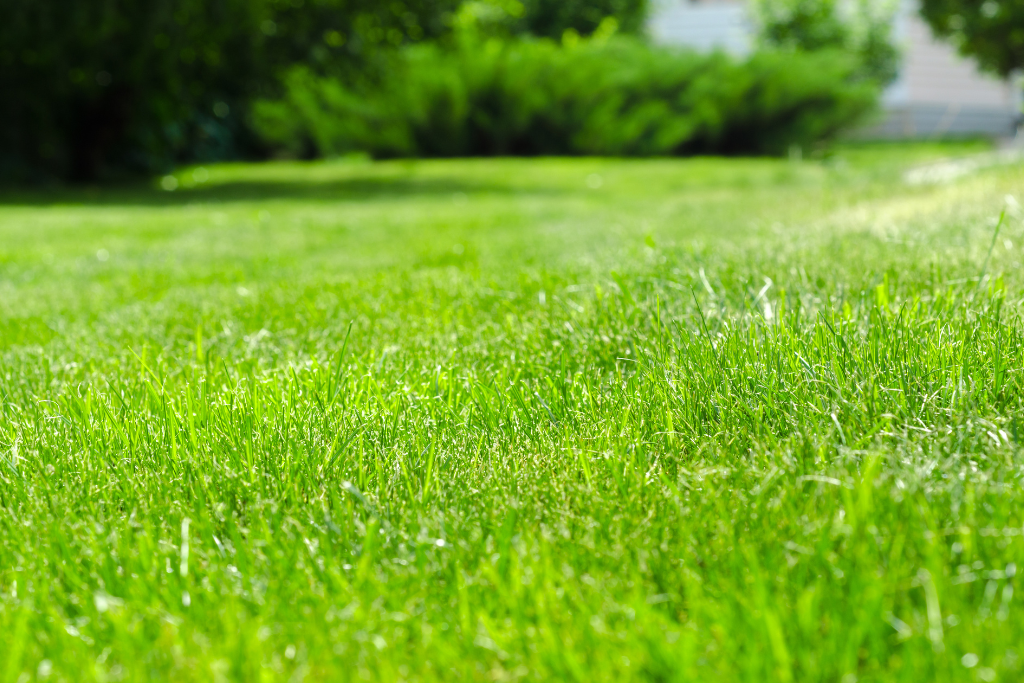
How to Maintain a Healthy Lawn
Are you looking to have the best yard in your neighbourhood this season?! Now is the time to start! While maintaining an attractive lawn, it is important to concentrate on the basic needs and conditions of the lawn and soil to fix any issues. Preventing lawn problems is usually easier than treating them with chemical pesticides after the issues start. Here are some simple tips on how to maintain a healthy lawn.
Rake Thatch
Rake any thatch – any dead grass from the previous year. Too much thatch reduces water and nutrients moving down to the roots and can shelter damaging insects and fungi.
Fertilize
Regularly fertilizing your lawn gives it the necessary nutrients to keep it strong and healthy. It will help out-compete any possible weed infestations and will make it tolerate a certain degree of insect infestation. Choose a fertilizer high in nitrogen with some iron for your first fertilizer application. Move to a fertilizer that has a longer-lasting effect for your second application. This type of fertilizer will release over the season rather than quickly. Fertilize in April/May or September when the lawn is actively growing.
Lime
Maritime soil is often very acidic. Sweeten the soil by adding lime. It is recommended to apply twice a year. Test your soil to determine whether your pH level suits your lawn. It should have a pH of 5.8-6.5.
Overseed
Overseeding is an easy and effective way to strengthen your lawn and protect against weed problems, especially in sparse areas after the winter cold or summer heat.
How to overseed:
1. Rake the bare or thin areas vigorously to loosen the soil.
2. For thickening-up purposes, apply at half the recommended rate.
3. For patching-up purposes, apply at the full recommended rate.
4. Apply a thin layer of topsoil on patched-up areas.
Aerate
Aerating the soil increases air and water circulation by opening up air spaces. Compacted soil is bad for grass development and often results in weed infestations such as plantain and clover.
Mowing Habits
Good mowing habits will help the overall health of your lawn. It is healthier to mow more frequently and keep the grass longer than removing too much at once. Maintaining your grass at a high of about 2-3 inches makes it more tolerant of drought and better to compete against weeds.
Grass Seed
Grow a lawn with more than one type of grass. Lawns with mixed grass are more tolerant of different growing conditions and insect- and disease-resistant.
Watering
Lawns usually receive enough water from rainfall, but in the driest summer periods, ensuring your lawn gets enough water is vital. Water just enough so that about 1 inch covers the entire surface of your yard. Watering in the morning or evening will reduce evaporation.
Weed Control
Weeds are prone to grow in lawns that are in poor condition. Weed seeds quickly germinate and grow in damaged areas where the soil is compacted or grass that is heavily damaged by insects and diseases. Re-seed any bare or damaged patches quickly. Walk in different places to avoid compacting the soil or waring bare spots in the grass.
Pest Control
Some lawn problems don’t seem to go away and might need a pesticide. Figure out what’s causing the problem, and visit your local Feeds’n Needs for advice on the best product to resolve your lawn issues. You can ask our Experts in-store any questions about your lawn care process. Great lawns start with Feeds’n Needs!
Early lawn care process:
April to May – Set a plan, rake, lime, create air movement, sunlight, and start with a clean slate.
May to June – Overseed and fertilize OR take care of weeds
July to August – Water (deep); mow (about 3″); fertilize, and weed
September to October – Lime, overseed and fertilize
Early November – Rake, dormant fertilize, dormant seed, put to bed
Sources:
Halifax Seed Company – Lawn Care: How to Maintain a Lush, Green & Healthy Lawn
Healthy.Lawns.pdf (novascotia.ca)
Gardening Tips for Beginners
Do you want to learn something new this spring and summer? Gardening is a fun and rewarding hobby! If you’re unsure where to start, no problem! Whether you’re trying to grow fruits and veggies or add some colour and curb appeal to your home, these seven simple gardening tips for beginners can help:
- Site it right – Gardening is all about location. When deciding where to put your garden plot, it’s essential to know if the area is “full sun,” “full shade,” or a combination of both. This information can help you determine which plants to place in which areas.
- Plan your garden – Sitting down and planning your garden is a great starting point. It is important to choose the right plants for your space and avoid overcrowding. Many plants, including fruits and vegetables, need six hours of sun daily to thrive, while others are better suited to areas with little light. If you are thinking of putting your garden in a spot that will get lots of sunlight, consider planting perennial plants (plants that return every year) like dahlias, roses, peonies, and lavender. Fruit trees and vegetables also thrive in sunny spots. If your garden will sit in a shaded area, consider plants like ferns, hydrangeas, sweet woodruff, hostas, and azaleas. Be sure to know how high your plants will grow. Shorter ones should be planted toward the front of your garden bed, with taller plants in the back to prevent blocking smaller ones.
- Test Your Soil – To thoroughly read your soil’s pH and nutrient levels, purchase an at-home testing kit available at your local Feeds’n Needs. The results will tell you how acidic or alkaline your soil is, which affects how plants absorb nutrients. Since different plants thrive in different pH levels, this test will help you decide what to plant or indicate how you should treat the soil.
- Invest in the Proper Gardening Tools – Visit your local Feeds’n Needs to pick up the essential gardening tools needed to start your garden.
- Learn Your Frost Dates – Planting too early (or late) in the season can set you up for disaster. Starting a garden before the season’s last frost is a mistake many new gardeners make. You need to know your area’s last average spring frost date so you don’t accidentally kill plants by putting them out prematurely, especially if you’re growing frost-sensitive plants. It’s also good to know your first average fall frost date to get your plants harvested or moved indoors before late-season cold damages them.
- Add Some Mulch – Consider adding 2-3 inches deep of mulch around the base of each plant. This will help reduce weeds and moisture loss through evaporation, so you have to weed and water less often. You can also put down straw, shredded leaves, pine straw, or other locally available material.
- Feed Plants Regularly – Watering and fertilizing your garden should become a regular part of your routine during the spring and summer. Knowing when and how to water plants seems easy, but it is often done incorrectly. Generally, water the root rather than the leaves, as the roots absorb the water. Depending on how much rain your area receives, you should head out to your garden at least once a week to water your plants. Once every two weeks, fertilize your garden, we recommend Seaboost to help grow healthy, vibrant plants. When diluted, this concentrated liquid can be applied by watering can or spray equipment.
These are just a few tips for starting your gardening journey. If you want more specific advice or plant recommendations, visit your local Feeds’n Needs and ask one of our Experts. Happy gardening!
Sources:

How to Successfully Grow a Vegetable Garden
Planting and maintaining your own vegetable garden takes time and care but is a fun, satisfying way to bring nutritious foods to your family’s table. If you are not sure where to start, below we share a step-by-step guide to growing a successful vegetable garden!
")
Step 1: Plan
Plan out your garden. Choose a spot that gets full sun, at least 6 hours a day (8 to 10 hours is even better). Start small if this is your first garden; anything over 1 m x 1 m may require more time than you are prepared to commit. After your first successful year of gardening, you can always add to your garden to make it larger.
")
Step 2: Remove Rocks and Debris from Soil
Remove any rocks, roots or debris from your soil and use a garden fork or spade to break up the soil to a depth of at least 15-20 cm. Using the fork, add a layer at least 5 cm deep of Grampie’s Super Soil and work it in to help stimulate root growth and ensure that you get the very best produce and herbs in your garden.
")
Step 3: Plant Your Seedlings
Plant your vegetable or herb seedlings. Keep in mind how big your plants will grow, and plant taller plants on the north side of the patch. Ask your Feeds’n Needs Experts for helpful tips on spacing your seedlings depending on what vegetable you are planting. Inspect your garden for weeds, pests and diseases at least twice each week. Pull weeds by hand, identify any pests and use an appropriate pest remedy before the problem becomes serious. Be sure to remove any diseased plant parts promptly to avoid affecting others.
")
Step 4: Feed Vegetables with Fertilizer Every 2 Months
Feed your garden every 2 months with 6-12-12 fertilizer or 10-10-10 fertilizer. Alternatively, apply water-soluble fertilizer approximately once every second week. During your next visit to your local Feeds’n Needs, ask our Experts what water-soluble fertilizer they recommend for your vegetable garden!
")
Step 5: Water as Needed
Water slowly with very little pressure so that the water has a chance to sink into the soil rather than running off. Water the soil rather than spraying the leaves of the plants, ideally in the very early morning before the sun becomes intense. Depending on the temperature, wind, soil type, spacing and type of plants, watering is usually required every second day unless it rains. If in doubt, stick your finger into the soil past the first joint and water if it feels dry.
Materials you will need:
- Plants, vegetable seeds or bulbs of your choice
- Grampie’s Super Soil
- 6-12-12 Fertilizer or 10-10-10 Fertilizer
Tools you will need:
- Shovel
- Garden hoses
- Fork or Spade
Sources: How to Grow an Organic Vegetable Garden | The Home Depot Canada
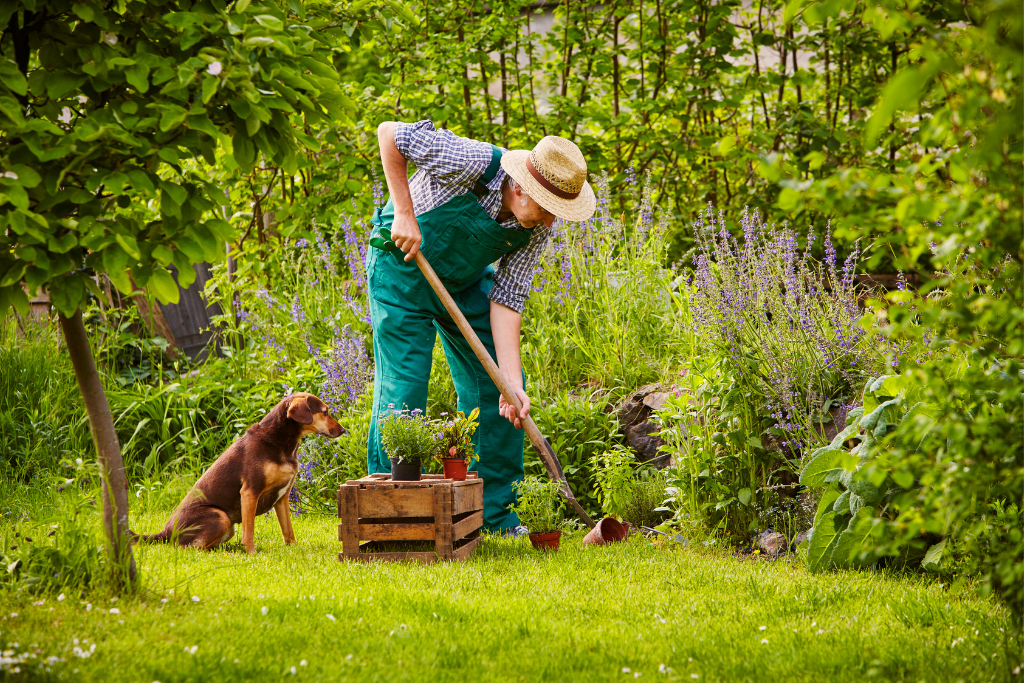
Springtime Garden Pet Safety
Gardening season is upon us, and for us pet owners, that means we need to be aware of how to keep our pets safe from hazardous spring plants! There are few effective treatments for toxic plant ingestion, so it’s important to know the potential dangers spring plants can have on our furry friends.
Most common toxic spring plants:
- Tulips, Daffodils, Narcissus, and Hyacinths – The skin at the bottom of bulb flowers is dangerous to both dogs and cats, but they are especially toxic to dogs. Make sure your dog isn’t digging up the bulbs in the garden! If ingested, it can cause vomiting, diarrhea, and drooling.
- Lilies – These are highly toxic to cats. The pollen, leaves, stems, and even the water in a vase can cause kidney failure, even small ingestions such as 2-3 petals or leaves.
- Irises – These are considered toxic to both dogs and cats. All parts of the iris contain harmful components, but the bulbs are the most dangerous part. If your pet ingests an iris, it can cause vomiting, diarrhea, and drooling.
- Begonias – The underground stem can cause severe mouth irritation for both dogs and cats.
- Buttercups – These flowers can cause your pets to have an upset stomach if ingested.
- Crocus – The spring Crocus may cause gastrointestinal upset like vomiting, diarrhea, and drooling if any part of the plant is ingested by dogs or cats.
- Lily of the Valley – This plant can cause symptoms such as vomiting, diarrhea, a drop in heart rate, severe cardiac arrhythmias, and possibly seizures.
It’s also important to be mindful of fertilizers as these often contain bone, blood or feather meal which ingesting in large quantities can cause vomiting and diarrhea. Next time you visit your local Feeds’n Needs store, be sure to ask our Experts for advice on safe fertilizers to use as a pet owner! You can also keep your curious furry friend away from the garden by fencing it off.
Educating yourself about these springtime hazards will help you, and your pet enjoy your backyard with no worry!
Sources:
Springtime Hazards: Protect your Pets From Toxic Plants | 24Petwatch
Spring Dangers To Pets | Pet Poison Helpline
