
Summer is when we want our lawns to look their best — green, thick, and ready for backyard barbecues, kids, and pets. But in Nova Scotia, New Brunswick, and PEI, summer also brings dry stretches, heat stress, weeds, insects, and heavy foot traffic.
Cool-season grasses like Kentucky Bluegrass, Fine Fescue, and Perennial Ryegrass thrive in cooler weather, so they naturally slow down during hot, dry periods. The goal in summer is to reduce stress on your lawn and support strong roots so it bounces back when cooler weather returns.
1. Water Deeply and Early
Light daily watering encourages shallow roots. Instead, water deeply and less frequently — this pushes roots deeper into the soil, making your lawn more drought-resilient.
Best practice: Water early in the morning so the grass absorbs moisture before peak heat. Avoid evening watering during humid weather, as wet overnight grass is more prone to fungal disease.
Tip: If your lawn looks blue-green or dull, or your footprints stay visible after walking across it, your grass is showing drought stress. Water before fertilizing.
Note on watering bylaws: Many Maritime municipalities have seasonal outdoor watering restrictions. Check your local municipality’s rules before setting up a regular watering schedule.
2. Mow High All Summer
Cutting too short exposes soil, dries out roots, and opens the door for weeds. Taller grass shades the soil and holds moisture better.
Summer mowing guidelines:
- Keep grass 2.5 to 3 inches high
- Never remove more than one-third of the blade at once
- Keep blades sharp — dull blades tear grass and stress it further
- Leave clippings on the lawn to return nutrients to the soil
- Avoid mowing dormant or very dry grass until it has moisture and is actively growing
3. Fertilize Carefully — Timing Is Everything
21-7-7 Slow Release Fertilizer is the right choice for established Maritime lawns that need steady feeding and a greener colour. But timing matters more than product.
Apply when:
- Grass is actively growing
- The lawn has adequate moisture
- Temperatures are moderate
Avoid fertilizing during:
- Drought or extreme heat
- Periods when the lawn is brown or dormant
Tip: A stressed, dry lawn cannot absorb nutrients properly. Fertilizing during drought can burn your grass. Water first, then wait for recovery before feeding.
4. Watch for Lawn Disease
Maritime summers — humid, warm, with occasional cool nights — create ideal conditions for common turf diseases:
- Red Thread: Pinkish-red threads visible on grass blades; thrives in cool, wet conditions. Common in PEI and coastal Nova Scotia.
- Dollar Spot: Small, silver-dollar-sized brown patches; caused by dry conditions and low nitrogen.
Prevention: Avoid evening watering, mow regularly, don’t over- or under-fertilize, and ensure good drainage. If disease spreads, consult your local Feeds’n Needs for treatment options.
5. Identify and Manage Grubs
White grubs (European Chafer and Japanese Beetle larvae) feed on grass roots through summer and are a growing problem in the Maritimes. Signs include:
- Irregular brown patches that don’t respond to watering
- Spongy turf that lifts easily like a carpet
- Increased crow, starling, or skunk activity digging at your lawn
If you suspect grubs, pull back a patch of turf and check the soil. More than five grubs per square foot generally warrants treatment. Ask your local Feeds’n Needs team for current product options available in your province.
6. Control Weeds with a Healthy Lawn
Weeds move into thin, stressed, or compacted lawns. Dandelions, clover, and crabgrass are common in Maritime summers, especially where grass is weak.
The best weed control is a thick, healthy lawn. Support it by:
- Mowing high
- Overseeding thin areas
- Watering during dry periods
- Feeding established lawns at the right time
- Repairing bare spots quickly
For more, read: Effective Weed Control: Essentials for Your Lawn
7. Protect Your Lawn from Pet Damage
Dogs are hard on summer lawns. Urine spots, worn paths, and compacted areas from repeated use are common complaints.
To reduce pet damage:
- Rinse urine spots with water as soon as possible
- Consider a designated pet area with mulch or gravel
- Reseed damaged spots when conditions allow
- Keep pets off newly seeded areas until grass is established
Read more: Tips to Safeguard Your Lawn from Pet Damage
8. Repair Bare Spots — Or Wait Until Fall
Summer seeding is possible but challenging. Heat and dry conditions make consistent moisture critical for germination.
For small summer repairs:
- Rake away dead grass and loosen the soil
- Add a thin layer of quality lawn soil if needed
- Apply Triple Mix Lawn Seed or Premium Lawn Mix
- Lightly rake seed into soil
- Water lightly and frequently until established
- Keep foot traffic off the area
If conditions are very hot and dry, late summer or early fall will give you significantly better results.
9. Choose the Right Seed for the Job
| Seed | Best For |
|---|---|
| Triple Mix Lawn Seed | General repair, overseeding, pet damage, everyday bare spots |
| Premium Lawn Mix | Front yards, play areas, high-visibility or finished lawn spaces |
| Highway Mix | Ditches, slopes, driveway edges, rural or low-maintenance areas |
10. Consider Lime If Your Soil Is Acidic
Maritime soils tend to be acidic, and summer is a good time to think about soil pH. Lime helps neutralize acidic soil so your lawn can actually absorb the nutrients you’re applying.
If your lawn looks pale despite regular feeding, or fertilizer doesn’t seem to be working, low soil pH may be the issue. A simple soil test can confirm this. Ask at your local Feeds’n Needs — our team can help you test and recommend the right lime application rate.
Plan Ahead: Fall Is the Best Time to Recover
If your lawn struggled this summer, don’t worry. Fall is the best season for overseeding, aeration, lime application, and fertilizing cool-season grasses. Late summer and early fall give your lawn a chance to repair before winter.
Read more: Fall Lawn Care Tips
Frequently Asked Questions
How often should I water my lawn in summer in the Maritimes?
Water deeply two to three times per week rather than lightly every day. Early morning is best to reduce evaporation and disease risk.
Should I fertilize my lawn in summer?
Yes, but only when your lawn is actively growing and not under heat or drought stress. Use 21-7-7 Slow Release Fertilizer for established lawns.
How do I tell if my lawn is dormant or dead?
Dormant grass is tan or straw-coloured but the crowns (just above soil level) remain firm and white-green. Dead grass has dry, brittle crowns. Pull a small plug — if the crown snaps rather than bends, the grass may be dead and need reseeding.
What height should I mow my lawn in summer?
Keep grass at 2.5 to 3 inches. Taller grass shades the soil, reduces moisture loss, and competes better against weeds.
Why is my lawn turning brown in summer?
Brown patches may result from drought dormancy, pet urine, grub damage, fungal disease, compacted soil, or mowing too short. Water first and assess whether the pattern suggests insects, disease, or drought stress.
What lawn seed is best for summer repairs in Atlantic Canada?
Triple Mix Lawn Seed is a reliable all-purpose option. Use Premium Lawn Mix for front yards or finished spaces where appearance matters most.
How do I know if I have grubs in my lawn?
Look for irregular brown patches that don’t green up after rain, spongy turf, or digging by birds and wildlife. Pull back a section of turf and check for white C-shaped larvae in the soil.
Does my lawn need lime?
Maritime soils are often acidic. If your lawn doesn’t respond well to fertilizer, a soil test may reveal low pH. Lime corrects this and improves nutrient uptake.
Recommended Products for Maritime Summer Lawn Care
- 21-7-7 Slow Release Fertilizer – Steady feeding and greener colour for established lawns
- Triple Mix Lawn Seed – All-purpose bare spot and general repair seed
- Premium Lawn Mix – Thick, attractive results for residential and high-visibility lawns
- Highway Mix – Durable ground cover for slopes, ditches, and low-maintenance areas
- Lime – Corrects acidic Maritime soil so nutrients are actually absorbed
Visit your local Feeds’n Needs in Nova Scotia, New Brunswick, or PEI for expert advice and the right products for your yard.

Maritime Spring Lawn Care: Repair, Seed, Fertilize, and Grow a Greener Lawn
After a long Maritime winter, it’s normal for your lawn to look rough. Snow mold, salt damage, ice, matted grass, bare spots, and compacted soil are all common sights across Nova Scotia, New Brunswick, and PEI come spring. The encouraging news is that cool-season grasses are remarkably resilient — with the right timing and approach, most lawns recover quickly and grow back stronger than before.
Maritime lawns are typically made up of cool-season grasses — Kentucky Bluegrass, Fine Fescue, and Perennial Ryegrass — which grow best during the cooler, moister parts of spring and fall. These grasses respond well to spring care when conditions are right, but getting the timing wrong — especially starting too early on wet soil — can do more harm than good.
This guide walks you through every step of Maritime spring lawn care, from the first cleanup after snowmelt to fertilizing, seeding, liming, and preparing for a healthy summer.
Key Takeaways
- Wait until the ground firms up before raking, aerating, or heavy foot traffic — wet soil compacts easily and damages emerging roots
- Identify snow mold and salt damage before starting any repair work
- Use 17-17-17 fertilizer for new lawns, overseeding, and bare spot repair
- Use 21-7-7 Slow Release Fertilizer for established lawns needing steady green-up
- Use Triple Mix Lawn Seed for general repair and overseeding
- Use Premium Lawn Mix for front yards and high-visibility finished lawn areas
- Use Highway Mix for slopes, ditches, and low-maintenance spaces
- Lime if your soil is acidic — this is very common across Maritime soils and often overlooked
- A sharp mower blade and a high first cut set the tone for the entire growing season
1. Don’t Start Too Early — Timing Is Everything in the Maritimes
The most common spring lawn care mistake in Atlantic Canada is starting too soon. After a long winter, the urge to get outside and work on the lawn is understandable — but working on wet, saturated soil causes compaction, damages the crowns of emerging grass plants, and can set your lawn back weeks.
The simple test: Walk across your lawn. If your footprints remain visible and the ground feels spongy underfoot, it’s too early. Wait until the surface firms up and drains before doing any raking, aerating, or seeding.
In most of the Maritimes, the right window to begin spring lawn care typically opens in late April to mid-May, depending on your location, elevation, and how severe the winter was. Lawns in sheltered inland areas may be ready earlier than those in coastal or low-lying spots that hold moisture longer.
Patience at this stage pays dividends throughout the entire season.
2. Assess Winter Damage Before Doing Anything Else
Once the ground firms up, do a thorough walk of your lawn before reaching for any product. Identifying what you’re dealing with helps you prioritize your work and choose the right approach.
Snow Mold
Snow mold is one of the most common spring lawn problems across PEI, coastal Nova Scotia, and areas of New Brunswick that experience deep, prolonged snow cover. It appears as circular, matted patches — typically grayish-white or pinkish — after the snow melts. The fungal growth develops under the snowpack over winter, where conditions are cold, dark, and moist.
What to do: Don’t panic — most lawns recover from snow mold on their own once air circulation is restored. Lightly rake affected patches to break up the matted grass and allow airflow. Avoid heavy raking that pulls out grass crowns. Monitor the area over the following two to three weeks. If patches remain bare and grass crowns feel dry and brittle rather than firm and slightly flexible, those areas will need reseeding.
Prevention going forward: Avoid leaving heavy leaf cover or debris on the lawn going into fall, as this creates ideal conditions for snow mold development under the snowpack.
Salt Damage
If your lawn borders a driveway, sidewalk, road, or parking area, there’s a good chance some edges show brown or dead strips in spring. Road salt and ice melt products draw moisture out of grass tissue and can raise soil sodium levels enough to prevent healthy growth.
What to do: Flush affected areas generously with water to dilute and push the salt through the soil profile. Do this a few times over the course of a week if damage is significant. Once you’ve flushed the area and the grass has had a chance to respond, rake out any dead material and reseed bare sections. For areas that repeatedly experience salt damage year after year, consider a more salt-tolerant ground cover along those edges, or a physical barrier like edging or mulch to protect the lawn from direct salt contact.
Matted and Compacted Areas
Heavy snow, ice sheets, and winter foot traffic press down on grass plants and compact the soil below. You’ll often notice this as areas where the grass looks flat, grey, or slow to green up compared to the rest of the lawn.
What to do: Gentle raking lifts matted grass and restores airflow to the soil surface. Severely compacted areas — particularly high-traffic zones like pathways across the lawn, areas near gates, or spots where vehicles have parked — may benefit from core aeration once the ground is firm enough to handle it.
Bare and Thin Patches
Bare spots from winter pet damage, heavy foot traffic, ice scraping, or simple winter kill will be visible early in spring. Note their location and size — this helps you plan how much seed and soil amendment you’ll need before your first trip to Feeds’n Needs.
3. Your First Mow of the Season Sets the Tone
Many homeowners underestimate how important the first mow of spring is. Cut too early, too short, or with a dull blade and you stress a lawn that’s already working hard to recover.
Wait until grass is actively growing and at least 3 inches tall before the first cut. Mowing too early removes leaf tissue the plant needs for photosynthesis and energy while it’s still establishing itself after winter.
First mow guidelines:
- Set your cutting height to 2.5 to 3 inches — this is your target height for the entire spring and summer
- Never remove more than one-third of the blade in a single mowing — removing too much at once stresses the plant significantly
- Check and sharpen your mower blades before the first cut of the season — dull blades tear and fray grass rather than cutting cleanly, leaving the lawn vulnerable to disease and moisture loss
- Leave clippings on the lawn when possible — they break down quickly and return nitrogen and organic matter to the soil
- Avoid mowing when the lawn is wet or the soil is still soft enough to show ruts from the mower wheels
Going into summer with a consistently high mowing habit — established right from that first spring cut — is one of the most effective things you can do for long-term lawn health.
4. New Lawn vs. Established Lawn: Two Different Approaches
Understanding which category your lawn falls into helps you choose the right products and sequence of steps.
Starting a New Lawn or Repairing Large Bare Areas
When you’re establishing grass from scratch or repairing areas larger than a few square feet, the focus is on creating the best possible environment for seed germination and early root development.
- Loosen the soil to a depth of 2 to 3 inches — compacted soil makes it very difficult for new roots to establish
- Add quality lawn soil or compost if the existing soil is poor, heavily compacted, or lacks organic matter — good seed-to-soil contact is essential for germination
- Choose the right seed for the area (see seed selection guide below)
- Apply seed at the recommended rate — more is not always better; overcrowded seedlings compete with each other and can lead to thin, weak grass
- Lightly rake seed into the top quarter-inch of soil — seed sitting on top of the surface is vulnerable to drying out, washing away, and being eaten by birds
- Apply 17-17-17 fertilizer according to label directions — the balanced NPK ratio supports both early top growth and the root development that new seedlings need most
- Water lightly and frequently to keep the seed bed consistently moist until germination — typically one to two times per day in dry conditions, less in cool or wet weather
- Stay off the area until new grass is at least 2 to 3 inches tall and has been mowed at least once — foot traffic on new seedlings causes significant damage
Maintaining an Established Lawn
For lawns that already have grass growing but need spring refreshing, repair, and strengthening:
- Rake lightly to remove winter debris and lift matted grass — check for thatch at the same time
- Address thatch if the layer is thicker than half an inch — thatch is a buildup of dead organic material between the soil surface and the green grass blades that can block water, air, and nutrients from reaching roots
- Patch bare spots with appropriate seed (see below)
- Test and lime if soil pH is a concern — very common in Maritime soils
- Aerate compacted areas once the ground is firm enough
- Apply 21-7-7 Slow Release Fertilizer once grass is clearly actively growing — not too early, and not when the ground is still cold
- Mow high from the very first cut and maintain that height through the season
5. Choose the Right Lawn Seed for Each Area
Not all lawn areas are the same, and choosing the right seed for each situation saves time, money, and frustration.
| Seed | Best For |
|---|---|
| Triple Mix Lawn Seed | General repair, overseeding, bare patches, everyday residential lawn touch-ups |
| Premium Lawn Mix | Front yards, family play areas, high-visibility and finished lawn spaces, mixed sun and shade |
| Highway Mix | Slopes, ditches, driveway edges, rural properties, utility and low-maintenance areas |
A closer look at Premium Lawn Mix: Quality premium blends for Maritime lawns typically combine Kentucky Bluegrass for dense, attractive turf; Perennial Ryegrass for fast germination and quick establishment; and Fine Fescue for shade tolerance and lower-maintenance performance. This combination makes Premium Lawn Mix well-suited to the range of conditions found in a typical Maritime residential yard — including areas with partial shade, some foot traffic, and variable soil moisture.
Overseeding tip for established lawns: When overseeding thin areas in an established lawn, mow the existing grass slightly shorter than usual before applying seed — this improves seed-to-soil contact and reduces competition from existing grass during the germination period. Return to your normal high mowing height once the new seed is established.
Tip: Use Premium Lawn Mix where appearance matters most, Triple Mix for everyday repair and overseeding, and Highway Mix for practical ground cover in tough or low-maintenance spots.
6. Choose the Right Fertilizer — and Understand Why It Matters
The three numbers on any fertilizer bag represent the percentage of nitrogen (N), phosphorus (P), and potassium (K) in the product. Understanding what each does helps you choose the right product for your situation.
- Nitrogen (N) drives green, leafy top growth — the lush colour people associate with a healthy lawn
- Phosphorus (P) supports root development, establishment, and energy transfer within the plant — particularly important for seedlings and recovering lawns
- Potassium (K) strengthens the plant’s ability to handle stress from drought, disease, temperature extremes, and heavy use
17-17-17 Balanced Fertilizer — For New Lawns and Repair
Equal amounts of all three nutrients make 17-17-17 the right choice when your lawn needs comprehensive support — not just green colour, but strong roots and stress resilience at the same time. This is the fertilizer to reach for whenever you’re establishing new grass or repairing areas that have been significantly damaged.
Use 17-17-17 when:
- Starting a new lawn from seed
- Overseeding bare or thin patches
- Repairing winter damage, snow mold patches, or salt-affected areas
- Giving a tired, pale established lawn a full nutritional reset in early spring
- You want to support both root development and top growth simultaneously
21-7-7 Slow Release Fertilizer — For Established Lawns
The higher nitrogen ratio combined with a slow-release format makes 21-7-7 the right choice for established lawns that are already growing and need sustained colour and vigour without the risk of nutrient spikes or burning. Slow release fertilizers feed gradually over an extended period, meaning fewer applications and more consistent results.
Use 21-7-7 Slow Release when:
- Your lawn is established and actively growing
- You want sustained green colour through the spring and into early summer
- You’re maintaining the lawn rather than starting or repairing it
- Conditions are not too cold, hot, or dry — fertilizer is most effective when grass is actively growing and soil has adequate moisture
Simple rule: Seeding or repairing? Use 17-17-17. Maintaining an established lawn? Use 21-7-7 Slow Release.
7. Lime: The Most Overlooked Step in Maritime Lawn Care
If there’s one aspect of spring lawn care that Maritime homeowners consistently overlook, it’s soil pH. Maritime soils are naturally acidic — a result of the region’s geology, rainfall patterns, and organic matter composition. When soil pH falls too low, grass cannot effectively absorb nutrients from the soil, even if you’re fertilizing regularly. This is why some lawns remain pale and thin despite consistent care.
Lime is not a fertilizer. It’s a soil amendment that raises pH and unlocks the nutrients already present in your soil so your grass can actually use them.
Signs your lawn may need lime:
- Moss spreading across the lawn — moss thrives in acidic, compacted, or shaded soil and often signals a pH problem
- Pale, yellowish, or persistently thin grass despite regular feeding
- Fertilizer doesn’t seem to be making a visible difference
- A soil test showing pH below 6.0 — cool-season grasses perform best between 6.0 and 7.0
About moss: Lime alone won’t permanently eliminate moss. Moss grows where the conditions favour it — acidic soil, shade, poor drainage, or compaction. To effectively address moss, you need to correct the underlying conditions: rake out existing moss, test and lime if pH is low, improve drainage or airflow if possible, aerate compacted areas, and overseed to encourage healthy grass to fill in. Dense, healthy grass is the most effective long-term defence against moss.
Spring and fall are both good times to apply lime. Fall applications are particularly effective in the Maritimes because rain and snowmelt gradually move lime down into the soil profile over the winter months.
Not sure about your soil pH? Ask at your local Feeds’n Needs — our team can point you in the right direction for soil testing in your area.
8. Aerate to Relieve Compaction and Improve Soil Health
Core aeration — removing small plugs of soil across the lawn — is one of the most effective things you can do for a compacted Maritime lawn. It opens up channels that allow air, water, lime, and fertilizer to penetrate deeper into the root zone rather than sitting on the surface or running off.
Spring aeration is particularly valuable after a winter with heavy snow loads, ice, or significant foot traffic on frozen ground.
Signs your lawn needs aeration:
- Water pools on the surface after rain or runs off without soaking in
- The soil feels hard and dense underfoot, even when moist
- Grass is thinning or dying in high-traffic areas despite regular watering and fertilizing
- The lawn has a dull, compacted appearance that doesn’t respond to care
- You have heavy clay soil — common in parts of New Brunswick and Nova Scotia
Important: Always wait until the ground is firm, not wet before aerating. Aerating saturated soil pulls up muddy plugs and can make compaction worse rather than better. If the ground is still soft from snowmelt, give it another week or two.
After aeration, apply lime and fertilizer — the open channels allow these products to reach the root zone much more effectively than applying to an unaerated surface.
9. Watch for Overwintered Grubs in Spring
White grubs — the larvae of European Chafer and Japanese Beetles — overwinter in the soil and become active again as it warms in spring. If you noticed irregular brown patches, spongy turf, or digging by crows, starlings, or skunks in your lawn last fall, inspect those areas closely in spring.
As soil temperatures rise, grubs move back up toward the surface to feed on grass roots before pupating. Damaged areas where roots were destroyed over winter and fall may not green up properly in spring, even with adequate moisture and fertilizer. These spots will typically need to be raked out and reseeded once the grubs have moved on.
If you’re seeing consistent grub pressure year over year in the same areas of your lawn, speak with your local Feeds’n Needs team about grub management options available in your province — regulations on certain products vary by region.
Frequently Asked Questions
When should I start spring lawn care in the Maritimes?
Wait until the ground has firmed up enough that walking across the lawn doesn’t leave visible footprints. In most Maritime locations this is late April to mid-May. Starting too early on wet, soft soil causes compaction and can damage the crowns of emerging grass plants.
What is the difference between 17-17-17 and 21-7-7 fertilizer?
17-17-17 provides equal amounts of nitrogen, phosphorus, and potassium, making it ideal for new lawns, overseeding, and spring repair where you need both root development and top growth. 21-7-7 has a higher nitrogen content with a slow release formula, designed for established lawns that need sustained green colour and vigour without repeated applications.
What is snow mold and how do I fix it?
Snow mold is a fungal disease that develops under prolonged snow cover, leaving circular matted or discoloured patches after the snow melts. Lightly rake affected areas to restore airflow. Most lawns recover naturally within a few weeks; persistently bare patches may need light reseeding.
How do I repair salt damage on my lawn?
Flush affected areas with generous amounts of water to dilute and disperse the salt through the soil. Repeat a few times over a week for significant damage. Once the area shows signs of recovery or confirms it won’t recover, rake out dead grass, improve the soil if needed, and reseed.
Why is moss taking over my lawn?
Moss is a symptom, not the root problem. It thrives in acidic, shaded, poorly drained, or compacted soil. Address the underlying cause — test pH and lime if acidic, improve drainage, aerate if compacted, reduce shade where possible — and overseed with appropriate grass seed. Dense, healthy grass is your best long-term defence.
Should I lime my lawn every spring?
Not necessarily every year — lime should be applied based on soil test results. However, because Maritime soils are naturally acidic and rainfall leaches pH over time, many lawns in Nova Scotia, New Brunswick, and PEI benefit from lime every one to three years. A soil test gives you a clear answer.
What lawn seed is best for repairing bare patches?
Triple Mix Lawn Seed is a reliable all-purpose choice for patching and overseeding. For areas where you want a thicker, more polished result — front yards, visible lawn areas — use Premium Lawn Mix.
How often should I water newly seeded areas?
Keep the seedbed consistently moist until germination and early establishment — this typically means light watering once or twice a day in dry or windy conditions. Never let the seed bed dry out completely during the germination window, but avoid flooding. Once grass is a couple of inches tall, you can begin transitioning to deeper, less frequent watering.
Does my lawn need aeration every spring?
Not every lawn needs annual aeration, but most Maritime lawns benefit from it every one to two years, particularly those with clay soil, heavy foot traffic, or persistent compaction. If water is pooling or the soil feels hard underfoot, aeration should be part of your spring plan.
What causes thatch and how do I deal with it?
Thatch is a layer of dead grass stems, roots, and organic material that accumulates between the soil surface and the green grass blades. A thin layer (under half an inch) is normal and even beneficial. A thicker layer blocks water, air, and nutrients from reaching roots. Dethatch in spring once the ground is firm, using a dethatching rake for small areas or a power dethatcher for larger lawns. Follow up with overseeding and fertilizing to help the lawn fill back in.
Recommended Products for Maritime Spring Lawn Care
- 17-17-17 Balanced Fertilizer — Complete nutrition for new lawns, overseeding, and spring repairs
- 21-7-7 Slow Release Fertilizer — Sustained green-up and steady feeding for established lawns
- Triple Mix Lawn Seed — Reliable all-purpose patching and overseeding
- Premium Lawn Mix — Thick, attractive, finished results for residential and high-visibility lawns
- Highway Mix — Durable, practical ground cover for slopes, ditches, and low-maintenance areas
- Lime — Essential for correcting the acidic Maritime soils that prevent nutrients from being absorbed
Visit your local Feeds’n Needs in Nova Scotia, New Brunswick, or PEI for lawn seed, fertilizer, lime, and expert seasonal advice tailored to your yard and your region.

Your Garden’s Spring Kick‑Start Guide
As the ground thaws and the days get longer, spring becomes the season gardeners wait for all year. Whether you’re a seasoned grower or just starting out, a bit of planning can make all the difference in how your garden thrives. Spring gardening isn’t just about planting—it’s about preparing your soil, choosing the right seeds, understanding your climate, and setting your space up for success.
A good place to start is with your soil. After a long winter, soil often needs a refresh. Loosening it up, checking drainage, and adding organic matter like compost gives your plants the nutrients they need right from the start. Spring is also when many gardeners reach for a balanced fertilizer—10‑10‑10 is a classic choice—to give lawns, beds, and vegetables a helpful boost.
Next comes the fun part: choosing what to grow. Spring is prime time for hardy vegetables, cold‑tolerant flowers, and seed starting. If you want a head start, using a seed starting mix can make a world of difference by creating the ideal environment for germination. Just be sure to match your choices with your region’s frost dates—some plants love early cool weather, while others will need to wait.
Spring is also the perfect time to think about pollinators and biodiversity. Incorporating native plants, adding a pollinator water source, or planting early blooms can help bees, birds, and butterflies shake off the winter along with you. If you’re a wild bird enthusiast, consider refreshing feeders, cleaning birdbaths, and adding bird‑safe window decals to keep visiting species protected.
Another key consideration is garden cleanup—but with intention. While it’s tempting to tidy everything immediately, waiting until temperatures consistently reach 10°C (50°F) gives overwintering pollinators a safe chance to emerge. When you do clean, removing debris, trimming perennials, and preparing beds helps reduce pests and opens space for new growth.
Finally, spring is a chance to rethink your garden layout. Maybe you’re adding raised beds, expanding your veggie patch, or switching to pollinator‑friendly landscaping. Dream big—spring is all about fresh starts.
With the right preparations and a little seasonal knowledge, your garden will reward you all spring and summer long. So grab your gloves, dust off your tools, and dig into the season—it’s time to grow!
Kick‑start your spring garden with confidence—stop by Feeds’n Needs for everything you need to grow healthy, thriving plants from day one.
More great resources on getting your garden started:
How to Start Seeds, by Halifax Seed Co.: https://www.halifaxseed.ca/tips/seed-starting-101
Canada Hardiness Zones, by Veseys: https://www.veseys.com/ca/canada-hardiness-zones-frost-dates
Garden Planning, by Feeds’n Needs: https://feedsnneeds.ca/advices/garden-layout-garden-starting/
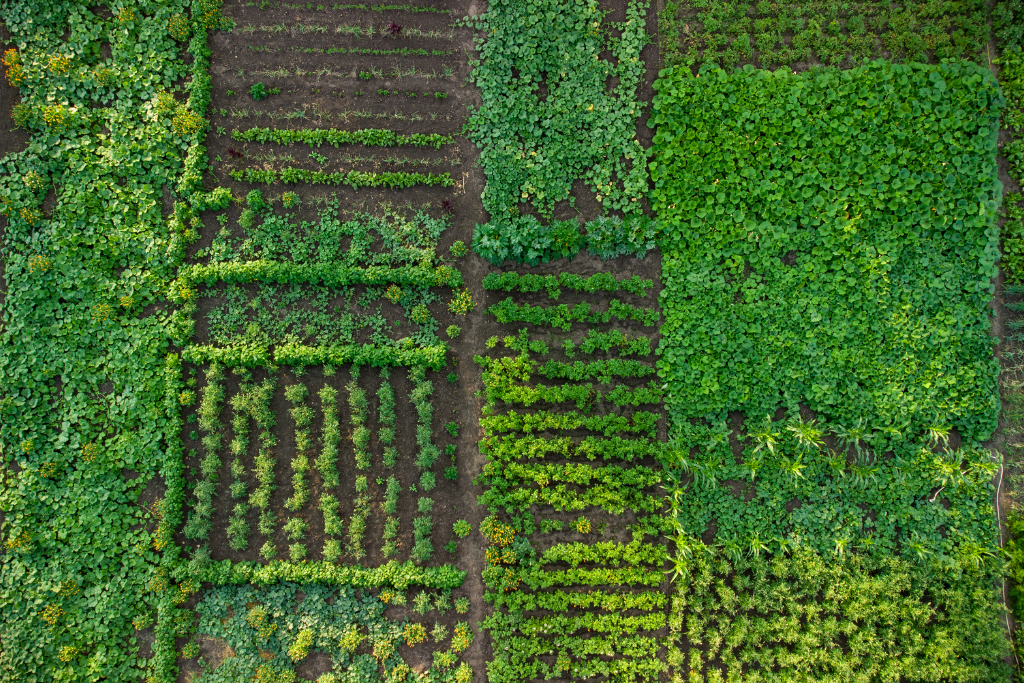
Garden Layout: What to Consider When Starting Your Garden
Planning your garden layout is one of the most exciting steps in kicking off a new growing season. Whether you’re a first‑time gardener or expanding an existing space, a thoughtful layout helps you grow healthier plants, save time, and enjoy a more productive garden all season long. Here’s what to consider as you map out your perfect garden.
- Sunlight: The Most Important Factor
Most vegetables and flowers need 6–8 hours of sunlight each day. Spend a day observing your yard to see where the sun falls in the morning, afternoon, and evening.
- Place sun‑loving plants (tomatoes, peppers, squash, herbs) in the brightest spots.
- Save shadier areas for greens and cool‑season crops like lettuce, spinach, kale, and peas.
- Soil Quality & Preparation
Healthy soil is the foundation of a thriving garden.
- Test your soil or simply observe texture: is it sandy, clay-heavy, or rich and dark?
- Add compost or organic matter to improve drainage and boost nutrients.
- Consider raised beds if your soil is difficult to work with—they warm faster in spring and offer great control.
- Water Access
Make watering simple.
- Choose a location close to a hose or rain barrel.
- Avoid layouts that require dragging hoses around obstacles.
- Plan for even watering—group plants with similar moisture needs together.
- Pathways & Access
Think ahead to weeding, harvesting, and daily care.
- Leave comfortable walking paths between rows or beds.
- Avoid planting too tightly—good airflow prevents disease.
- Make sure tools and wheelbarrows can easily reach your garden space.
- Plant Spacing & Growth Habits
Different plants have very different sizes and shapes once mature.
- Place tall crops like corn, sunflowers, or trellised peas on the north side so they don’t cast shade over smaller plants.
- Give sprawling plants (squash, pumpkins, cucumbers) plenty of room—or grow them vertically on trellises to save space.
- Follow spacing recommendations on seed packets for best results.
- Garden Layout Style
Choose a layout that fits your space, goals, and lifestyle:
Rows
Traditional, easy to maintain, and great for larger gardens.
Raised Beds
Excellent organization, improved drainage, and reduced bending.
Square‑Foot Gardening
Maximizes yield in small spaces with neat, efficient planting grids.
Container Gardens
Perfect for decks, patios, and renters—grow herbs, greens, tomatoes, and more.
- Companion Planting
Pairing compatible plants can boost growth and deter pests.
- Basil with tomatoes
- Marigolds near almost anything to help reduce pests
- Carrots with onions to discourage carrot flies
- Wildlife & Pest Considerations
Consider fencing or natural deterrents if you share your space with deer, rabbits, or raccoons.
- Raised beds, row covers, or simple fencing can protect young seedlings.
- Native plants nearby attract beneficial insects like bees and ladybugs.
- Plan for the Future
A good garden layout grows with you.
- Leave room for new crops you may want to try next year.
- Consider where perennials (strawberries, rhubarb, herbs) will live long-term.
- Think about adding compost bins, rain barrels, or a tool area.
Ready to Start Planting?
A thoughtful layout sets the stage for a more productive, enjoyable gardening season. By taking time to consider sunlight, soil, spacing, and long‑term goals, you’ll create a garden that’s easy to maintain and rewarding to grow.
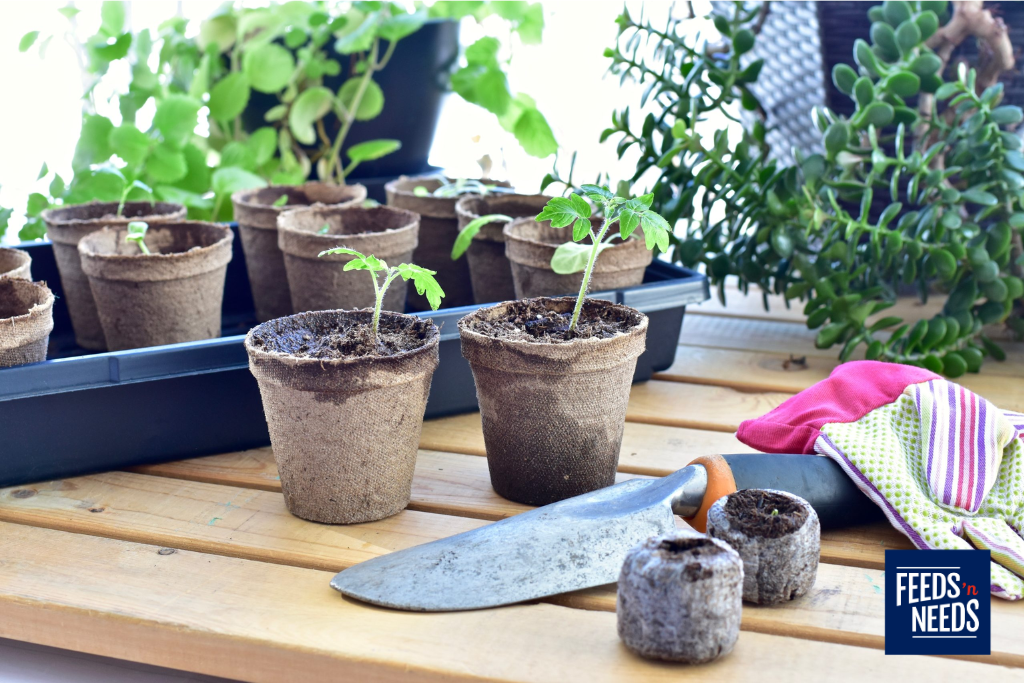
Seed Starting in Spring: What to Start & When
Seed Starting Guide for Atlantic Canada: What to Plant and When
Spring is the perfect time to get a jump on your garden by starting seeds indoors—especially in Atlantic Canada, where our last frost typically lands in early to mid‑May.
What to Start Indoors (and When)
Here’s a simple timeline based on regional planting calendars:
Early March
Start longer-season veggies like onions and leeks, which benefit from early indoor sowing. Both can be started in early March and transplanted outdoors in May.
Mid-March
This is when many popular garden plants can be started indoors, including:
- Basil (germinates in 5–21 days; transplant early June)
- Cabbage
- Celery (for experienced growers—germinates slowly)
These plants appreciate a few extra weeks of indoor warmth before heading outside.
Late March to Early April
As days brighten, start quicker growers like broccoli, bok choy, zinnias, marigolds, and other annual flowers to enjoy a colourful early-summer display. Many flowers—like zinnias and marigolds—are commonly started this time of year in cold climates.
Direct Sowing Outdoors
Once frost danger has passed—around mid-May in much of Atlantic Canada—you can directly sow hardy crops like:
- Carrots
- Beets
- Arugula
These can be seeded outdoors shortly after soil becomes workable.
Final Tips
- Always check your seed packets—they’re your best source for timing guidance.
- It’s better to plant a little later than too early, especially in cooler regions.
- If in doubt, base your schedule around your local last frost date to keep seedlings healthy and on track.
Stop into Feeds’n Needs to ask our experts for all your gardening needs.
More information about local frost dates: Canada Hardiness Zones Frost Dates | Veseys
Growing from Seeds | Veseys

Types of seeds: Heirloom, Hybrid, Open Pollenated
When planning your garden, the type of seeds you choose influences everything – from flavour and appearance to how well your plants grow and whether you can save seeds for next year. Here’s a simple guide to help you understand the main seed types and how they connect to seed saving.
Heirloom Seeds
Heirloom seeds come from plant varieties that have been passed down through generations, often 50 years or more. Their genetics remain stable because they come from open‑pollinated plants that naturally reproduce true to type.
Why gardeners love them:
- Amazing flavours and unique colours
- Rich history and biodiversity
- You can save seeds, and they’ll grow true year after year
Best for:
Gardeners who love tradition, character, and seed-saving.
Hybrid Seeds
Hybrid seeds are created by intentionally crossing two parent plants to produce offspring with specific traits like disease resistance or higher yields.
Benefits:
- Strong, uniform plants
- Improved productivity
- Better resistance to pests and disease
Important to know:
Hybrid seeds won’t grow true if you save their seeds. The next generation will be unpredictable, often reverting to characteristics of the parent plants.
Best for:
Gardeners who want reliability and consistent results.
Open‑Pollinated Seeds
Open‑pollinated seeds come from plants pollinated naturally by wind, insects, or animals. Their genetics are stable, meaning they will produce plants similar to the parent.
Why they’re great:
- Seeds can be saved and replanted
- Wide variety of shapes, sizes, and flavours
- Great for gardeners who want dependable results
All heirloom seeds are open-pollinated, but not all open-pollinated seeds are heirloom.
Saving Seeds: What You Need to Know
Seed saving is a rewarding way to maintain your favourite varieties and reduce gardening costs. But success depends on starting with the right types of seeds.
Best seeds for saving:
- Heirloom
- Open‑pollinated
These seeds will reproduce true to type, giving you plants that match the parent.
Seeds not recommended for saving:
- Hybrid: Hybrids won’t produce consistent offspring, so saved seeds usually lead to surprises not always good ones!
Tips for saving seeds:
- Choose healthy, vigorous plants as parents.
- Allow fruits or flowers to fully mature before collecting seeds.
- Dry seeds thoroughly before storing.
- Store seeds in a cool, dark, dry place.
Understanding seed types helps you make confident choices in your garden. Whether you love the charm of heirlooms, the strength of hybrids, or the dependability of open‑pollinated seeds, there’s a place for each in a thriving garden. And if you enjoy the idea of growing your own “garden legacy,” seed saving is the perfect next step.
References:
3 Main Types of Vegetable Seeds Explained – Food Gardening Network
Veseys Facebook Page
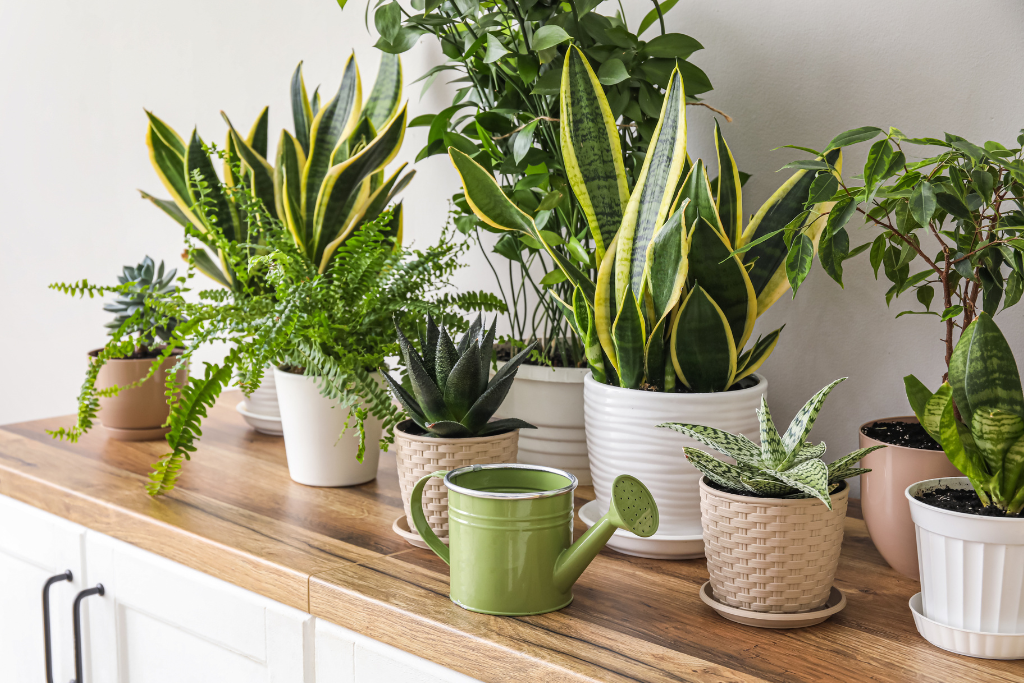
Keep Indoor Plants Thriving In Winter
Winter Challenges in Maritime Homes
Dry indoor air from baseboard or wood heat, short daylight, and drafts from coastal winds can stress plants. These simple habits keep your indoor green friends thriving.
1) Light: Make Every Ray Count
- Move plants to south or east-facing windows for maximum winter light.
- Rotate weekly for even growth.
- Use LED grow lights for low-light species or rooms with limited sun.
2) Humidity: Combat Dry Air
- Group plants together to create a microclimate.
- Place pots on pebble trays with water (not touching the pot base).
- Avoid misting near windows during freeze-thaw, it can lead to fungal spots.
- Consider a small humidifier for tropical plants like monstera or ferns.
3) Watering: Less Is More
- Test soil with your finger. Water only when the top inch is dry.
- Water thoroughly, then empty saucers to prevent root rot.
- Reduce watering frequency for succulents and cacti.
4) Temperature & Drafts
- Keep plants away from cold windows and heater vents.
- Ideal indoor temps: 18–24°C for most houseplants.
5) Feeding & Repotting
- Hold off on fertilizer until late February/March when growth resumes.
- Repot only if severely root-bound; otherwise wait for spring.
Maritime-Friendly Plants
- Snake Plant, ZZ Plant, Pothos (tolerate lower light).
- Spider Plant, Peace Lily (handle variable humidity).
- Herbs like rosemary and mint with supplemental light.
Find LED grow lights, humidity trays, potting mix, and plant care tools at Feeds’n Needs to keep your winter plant corner flourishing.
Conclusion
With proper care—dry bedding, good ventilation, and a few preventive measures—you can keep your flock safe and healthy all winter long. Here’s to happy hens and a frostbite-free season!

Seed Lifespan
If you’re a gardener who saves seeds or buys in bulk, proper storage is key to keeping them viable for future planting seasons. Seeds are living organisms, and how you store them determines how long they’ll last.
Why Storage Matters:
Humidity and heat are the biggest enemies of seed longevity. Moisture causes seeds to deteriorate quickly, and high temperatures speed up aging. Ideally, seeds should have a moisture content of no more than 10–12% and be stored in a cool, dry environment.
Pro Tip: The sum of temperature (°F) plus relative humidity (%) should never exceed 100. For example, if your storage area is 50°F, humidity should stay below 50%.
Best Practices for Seed Storage
- Keep seeds dry: They should feel brittle before storing.
- Use paper envelopes: Label with seed type and year, then place in an airtight container.
- Store in a cool, dark place: A refrigerator or freezer is ideal. Freezing can extend seed life for 10 years or more—just make sure seeds are thoroughly dried first.
- Avoid warm, humid spots: Never leave seeds in a greenhouse or sunny windowsill, even for a few hours.
How Long do Seeds Last?
Most vegetable seeds remain viable for 2–3 years, but some last much longer. For example, lettuce can sprout after five years, while onion seeds typically last only one year.
Here’s a quick reference guide for average storage life under proper conditions:
Testing Seed Viability
Not sure if your old seeds are still good? Try a simple germination test:
- Moisten a paper towel (damp, not dripping).
- Place 10 seeds in a row and fold the towel over them.
- Seal in a plastic bag, label with date and seed type.
- Keep in a warm spot (around 70°F).
- Check daily for moisture and sprouting.
- After 7–10 days, count how many seeds germinated.
Interpreting Results:
- 70–90% germination: Seeds are usable; sow a little thicker.
- 100% germination: Excellent! Ready to plant.
- Less than 70%: Consider replacing with fresh seed.
(You can plant the sprouted seeds from your test—just cut the towel around each seed and plant it paper and all.)
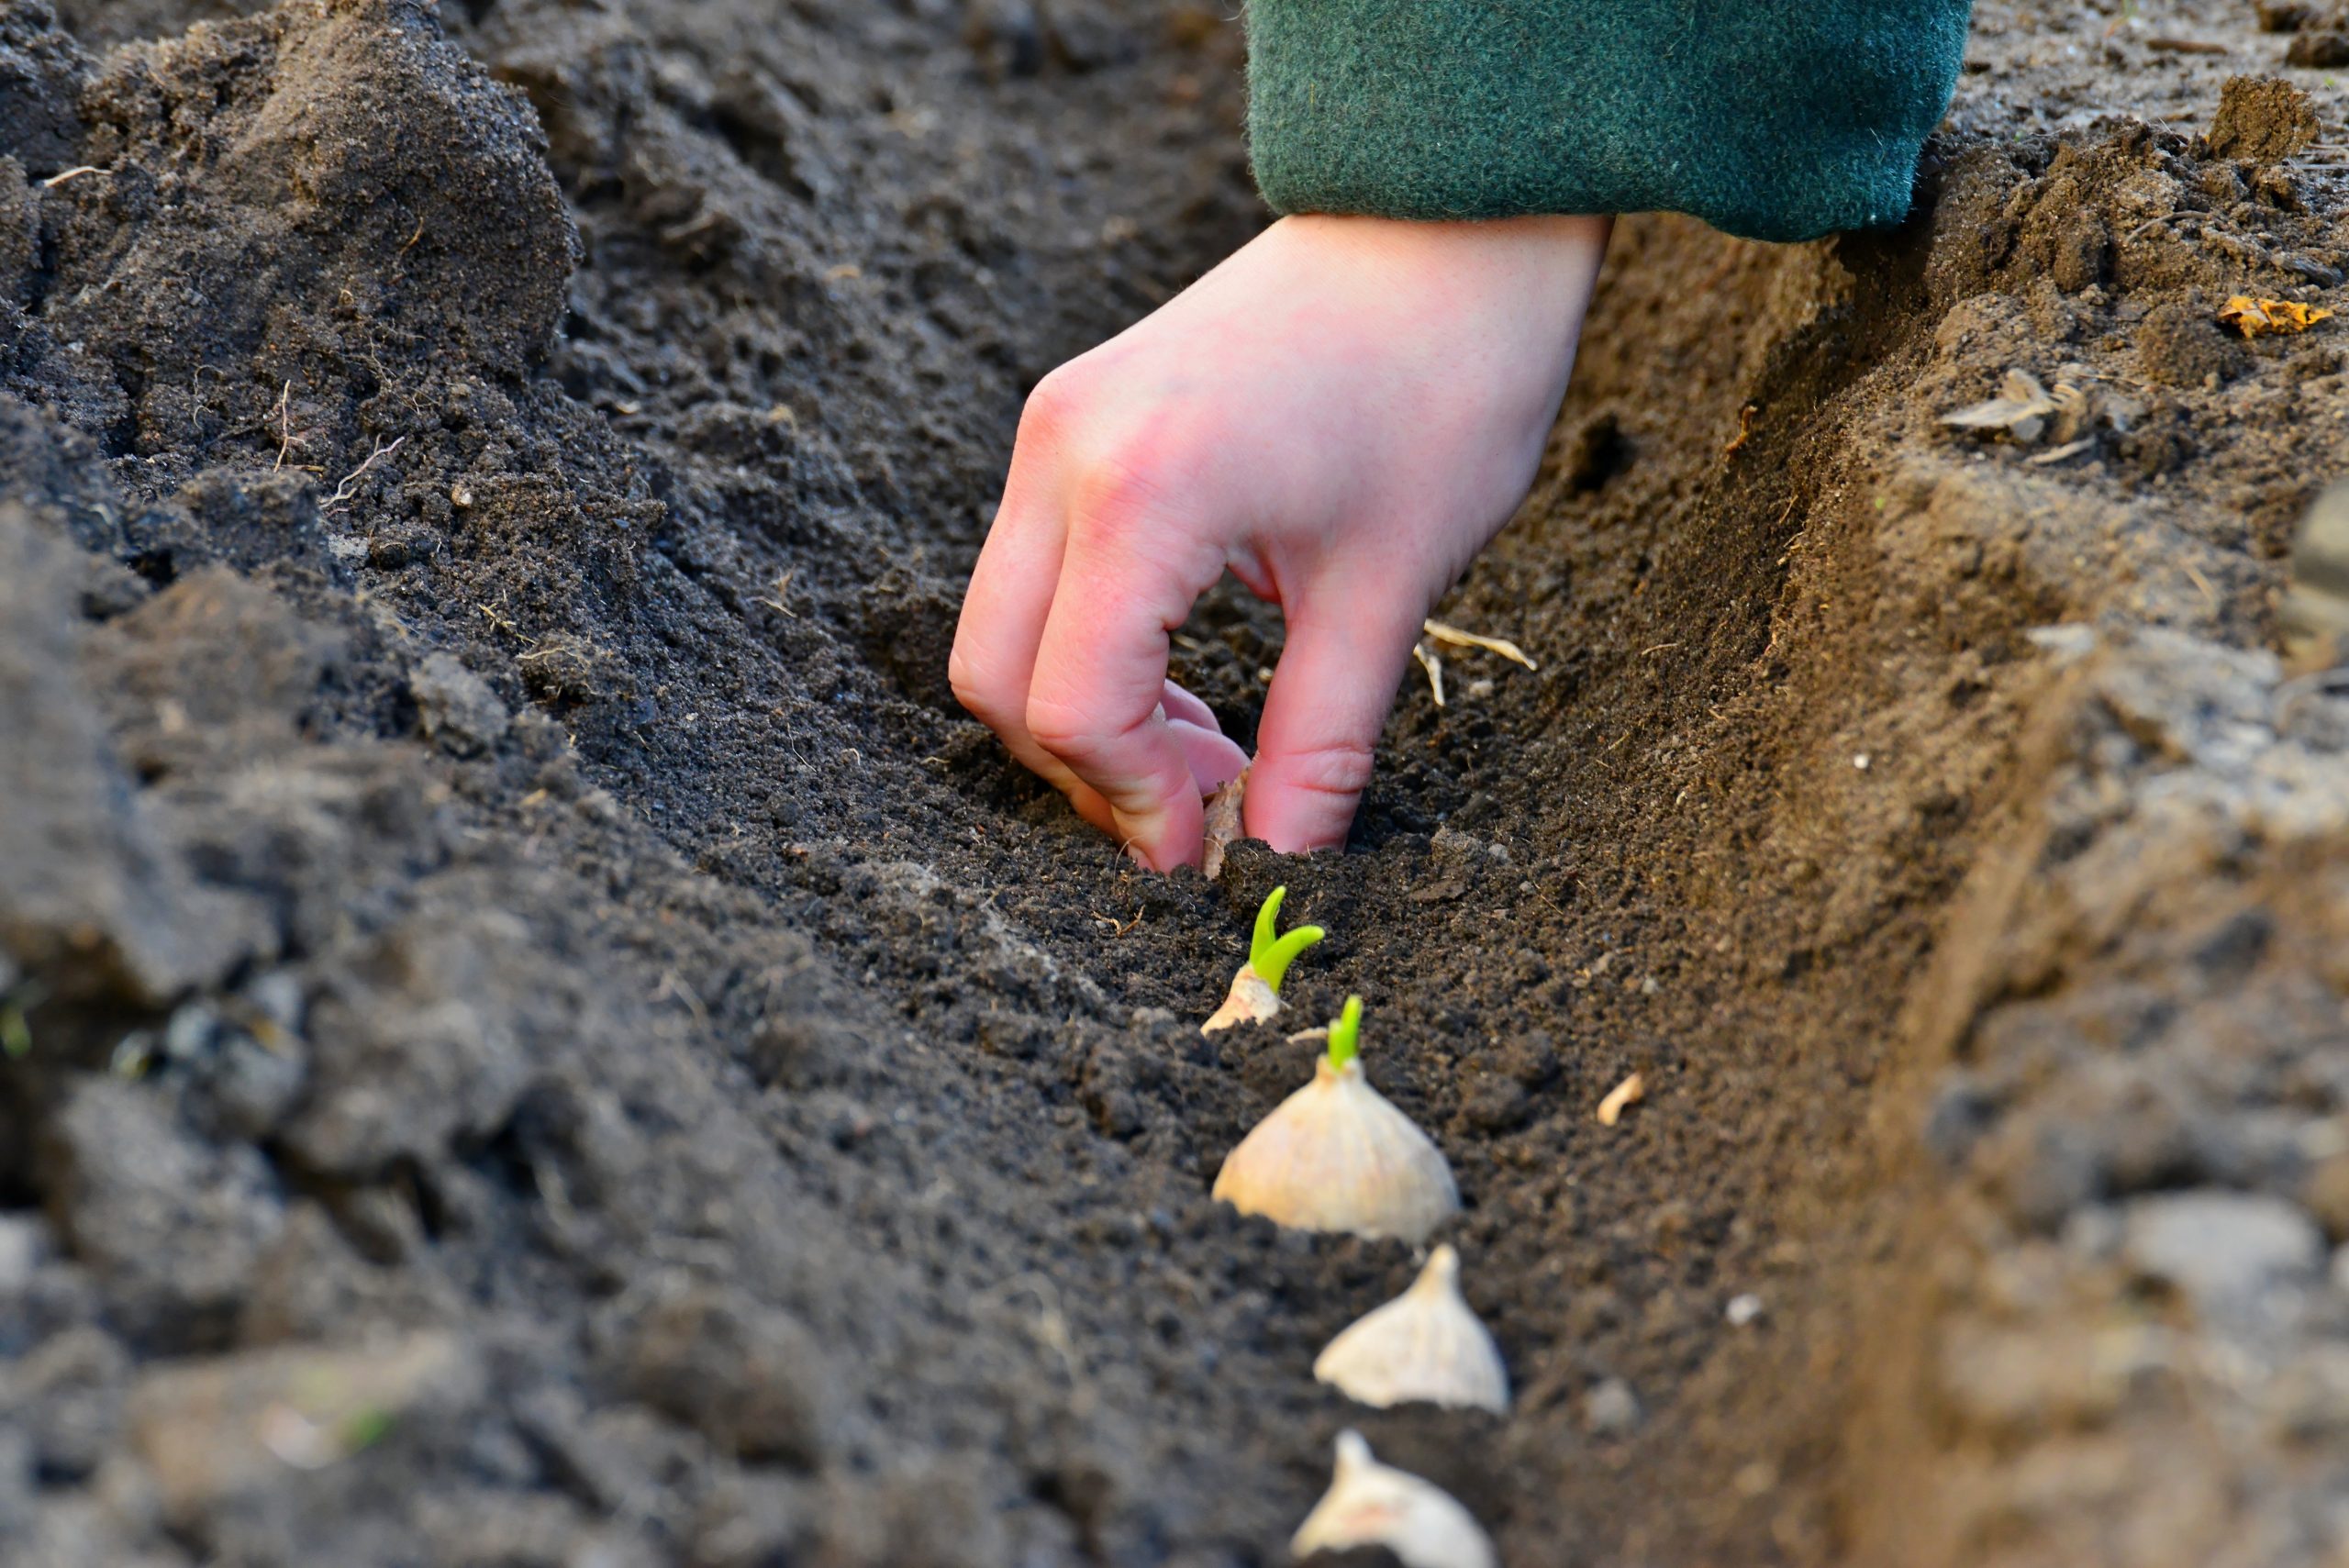
Planting Garlic Bulbs
Garlic is one of the easiest and most rewarding crops to grow in your garden. Whether you’re a seasoned gardener or just starting out, planting garlic in the fall sets you up for a flavourful harvest next summer. Here’s everything you need to know to get started.
Choosing Your Garlic Type
Before planting, decide which type of garlic suits your climate and needs:
- Softneck Garlic: Ideal for warmer regions, this variety has a flexible stem perfect for braiding and tends to store longer.
- Hardneck Garlic: Best for colder climates, it produces edible flower stalks called scapes in spring. Removing the scapes helps the plant focus on growing larger bulbs.
When to Plant Garlic
Garlic is typically planted in the fall, from mid-October until the ground freezes. This gives the cloves time to establish roots before winter sets in.
How to Plant Garlic
- Pick the Right Spot
Choose a sunny location with well-drained soil. Garlic needs at least 6 hours of direct sunlight daily and doesn’t like soggy conditions. - Prepare the Soil
Loosen the soil and dig holes about 2–6 inches deep. Go deeper in colder climates and shallower in warmer ones. - Separate the Cloves
Break apart the garlic bulb just before planting. Keep the papery skin on each clove intact, even if some flakes off. - Plant the Cloves
Place each clove in the hole with the pointy end facing up and the flat root end down. Space them 4–8 inches apart. - Cover and Water
Fill the holes with soil, gently tamp it down, and add a light layer of mulch. Water thoroughly to help the roots settle in.
Spring Garlic Care
- Fertilize: When green shoots appear in spring, apply a balanced fertilizer.
- Water: Keep the soil moist during dry spells.
- Weed: Remove weeds regularly to prevent competition for nutrients.
Harvesting Garlic
Garlic is ready to harvest in late spring to early summer. Here’s how to know when it’s time:
- Hardneck Garlic: Watch for curly scapes in late spring. Snip them off to encourage bulb growth. Bonus: scapes are delicious sautéed!
- All Varieties: When about half the leaves turn yellow and flop over, it’s harvest time. Use a garden fork to gently lift the bulbs from the soil.
Let the bulbs cure in a dry, shaded spot for a couple of weeks. Once dry, trim the stems or braid softneck varieties for storage.
Storing Garlic
Store garlic in a cool, dark place with good air circulation. Mesh bags, baskets, or hanging braids work well. Properly cured garlic can last 4–6 months. Use any damaged bulbs first, as they won’t store as long.
Ready to grow your own garlic? With just a little effort this fall, you’ll be rewarded with a flavorful harvest next year. Happy planting!

Winterizing Your Lawn
As the days grow shorter and temperatures begin to drop, it’s time to give your lawn a little extra care before winter sets in. Winterizing your lawn helps protect it from harsh conditions and sets the stage for lush, green growth when spring arrives. Here’s a step-by-step guide to help you get started:
- Aerate the Lawn
Aeration is one of the most beneficial things you can do for your lawn before winter. By creating small holes in the soil, aeration allows water, oxygen, and nutrients to reach the roots more effectively. This strengthens the root system and improves overall lawn health.
- Mow the Grass Shorter
Before the snow flies, give your lawn a final trim. Mow to a height of about 2–3 inches—short enough to prevent matting under snow, but not so short that the grass becomes stressed. This helps reduce the risk of disease and keeps your lawn tidy through the colder months.
- Fertilize with a Winterizer
Applying a winter fertilizer gives your lawn the nutrients it needs to survive the cold and thrive in the spring. Look for a blend high in nitrogen and potassium, which promotes strong root growth and helps store energy for next season. Available at your local Feeds’n Needs. A well-fed lawn now means a greener lawn later!
- Mulch the Leaves
Instead of raking and bagging fallen leaves, mulch them directly into the lawn using your mower. This adds valuable organic matter, helps retain soil moisture, and provides insulation for the roots. It’s a simple way to recycle nutrients and improve soil health.
- Seed Bare Spots
Fall is a great time to overseed any thin or bare patches in your lawn. The cooler temperatures and increased moisture create ideal conditions for seed germination. By spring, you’ll enjoy a thicker, more resilient lawn.
Conclusion
Winterizing your lawn doesn’t take long, but the benefits last well into the next growing season. With a little effort now, you’ll be rewarded with a vibrant, healthy lawn when the snow melts and the sun returns.
