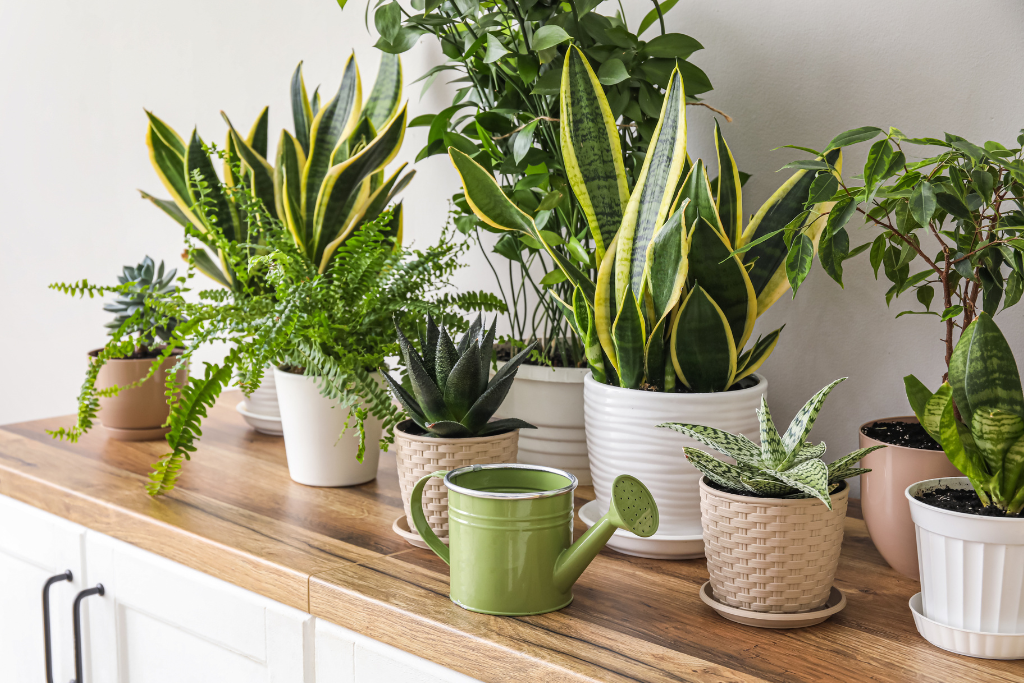
Winter Challenges in Maritime Homes
Dry indoor air from baseboard or wood heat, short daylight, and drafts from coastal winds can stress plants. These simple habits keep your indoor green friends thriving.
1) Light: Make Every Ray Count
- Move plants to south or east-facing windows for maximum winter light.
- Rotate weekly for even growth.
- Use LED grow lights for low-light species or rooms with limited sun.
2) Humidity: Combat Dry Air
- Group plants together to create a microclimate.
- Place pots on pebble trays with water (not touching the pot base).
- Avoid misting near windows during freeze-thaw, it can lead to fungal spots.
- Consider a small humidifier for tropical plants like monstera or ferns.
3) Watering: Less Is More
- Test soil with your finger. Water only when the top inch is dry.
- Water thoroughly, then empty saucers to prevent root rot.
- Reduce watering frequency for succulents and cacti.
4) Temperature & Drafts
- Keep plants away from cold windows and heater vents.
- Ideal indoor temps: 18–24°C for most houseplants.
5) Feeding & Repotting
- Hold off on fertilizer until late February/March when growth resumes.
- Repot only if severely root-bound; otherwise wait for spring.
Maritime-Friendly Plants
- Snake Plant, ZZ Plant, Pothos (tolerate lower light).
- Spider Plant, Peace Lily (handle variable humidity).
- Herbs like rosemary and mint with supplemental light.
Find LED grow lights, humidity trays, potting mix, and plant care tools at Feeds’n Needs to keep your winter plant corner flourishing.
Conclusion
With proper care—dry bedding, good ventilation, and a few preventive measures—you can keep your flock safe and healthy all winter long. Here’s to happy hens and a frostbite-free season!

Seed Lifespan
If you’re a gardener who saves seeds or buys in bulk, proper storage is key to keeping them viable for future planting seasons. Seeds are living organisms, and how you store them determines how long they’ll last.
Why Storage Matters:
Humidity and heat are the biggest enemies of seed longevity. Moisture causes seeds to deteriorate quickly, and high temperatures speed up aging. Ideally, seeds should have a moisture content of no more than 10–12% and be stored in a cool, dry environment.
Pro Tip: The sum of temperature (°F) plus relative humidity (%) should never exceed 100. For example, if your storage area is 50°F, humidity should stay below 50%.
Best Practices for Seed Storage
- Keep seeds dry: They should feel brittle before storing.
- Use paper envelopes: Label with seed type and year, then place in an airtight container.
- Store in a cool, dark place: A refrigerator or freezer is ideal. Freezing can extend seed life for 10 years or more—just make sure seeds are thoroughly dried first.
- Avoid warm, humid spots: Never leave seeds in a greenhouse or sunny windowsill, even for a few hours.
How Long do Seeds Last?
Most vegetable seeds remain viable for 2–3 years, but some last much longer. For example, lettuce can sprout after five years, while onion seeds typically last only one year.
Here’s a quick reference guide for average storage life under proper conditions:
Testing Seed Viability
Not sure if your old seeds are still good? Try a simple germination test:
- Moisten a paper towel (damp, not dripping).
- Place 10 seeds in a row and fold the towel over them.
- Seal in a plastic bag, label with date and seed type.
- Keep in a warm spot (around 70°F).
- Check daily for moisture and sprouting.
- After 7–10 days, count how many seeds germinated.
Interpreting Results:
- 70–90% germination: Seeds are usable; sow a little thicker.
- 100% germination: Excellent! Ready to plant.
- Less than 70%: Consider replacing with fresh seed.
(You can plant the sprouted seeds from your test—just cut the towel around each seed and plant it paper and all.)
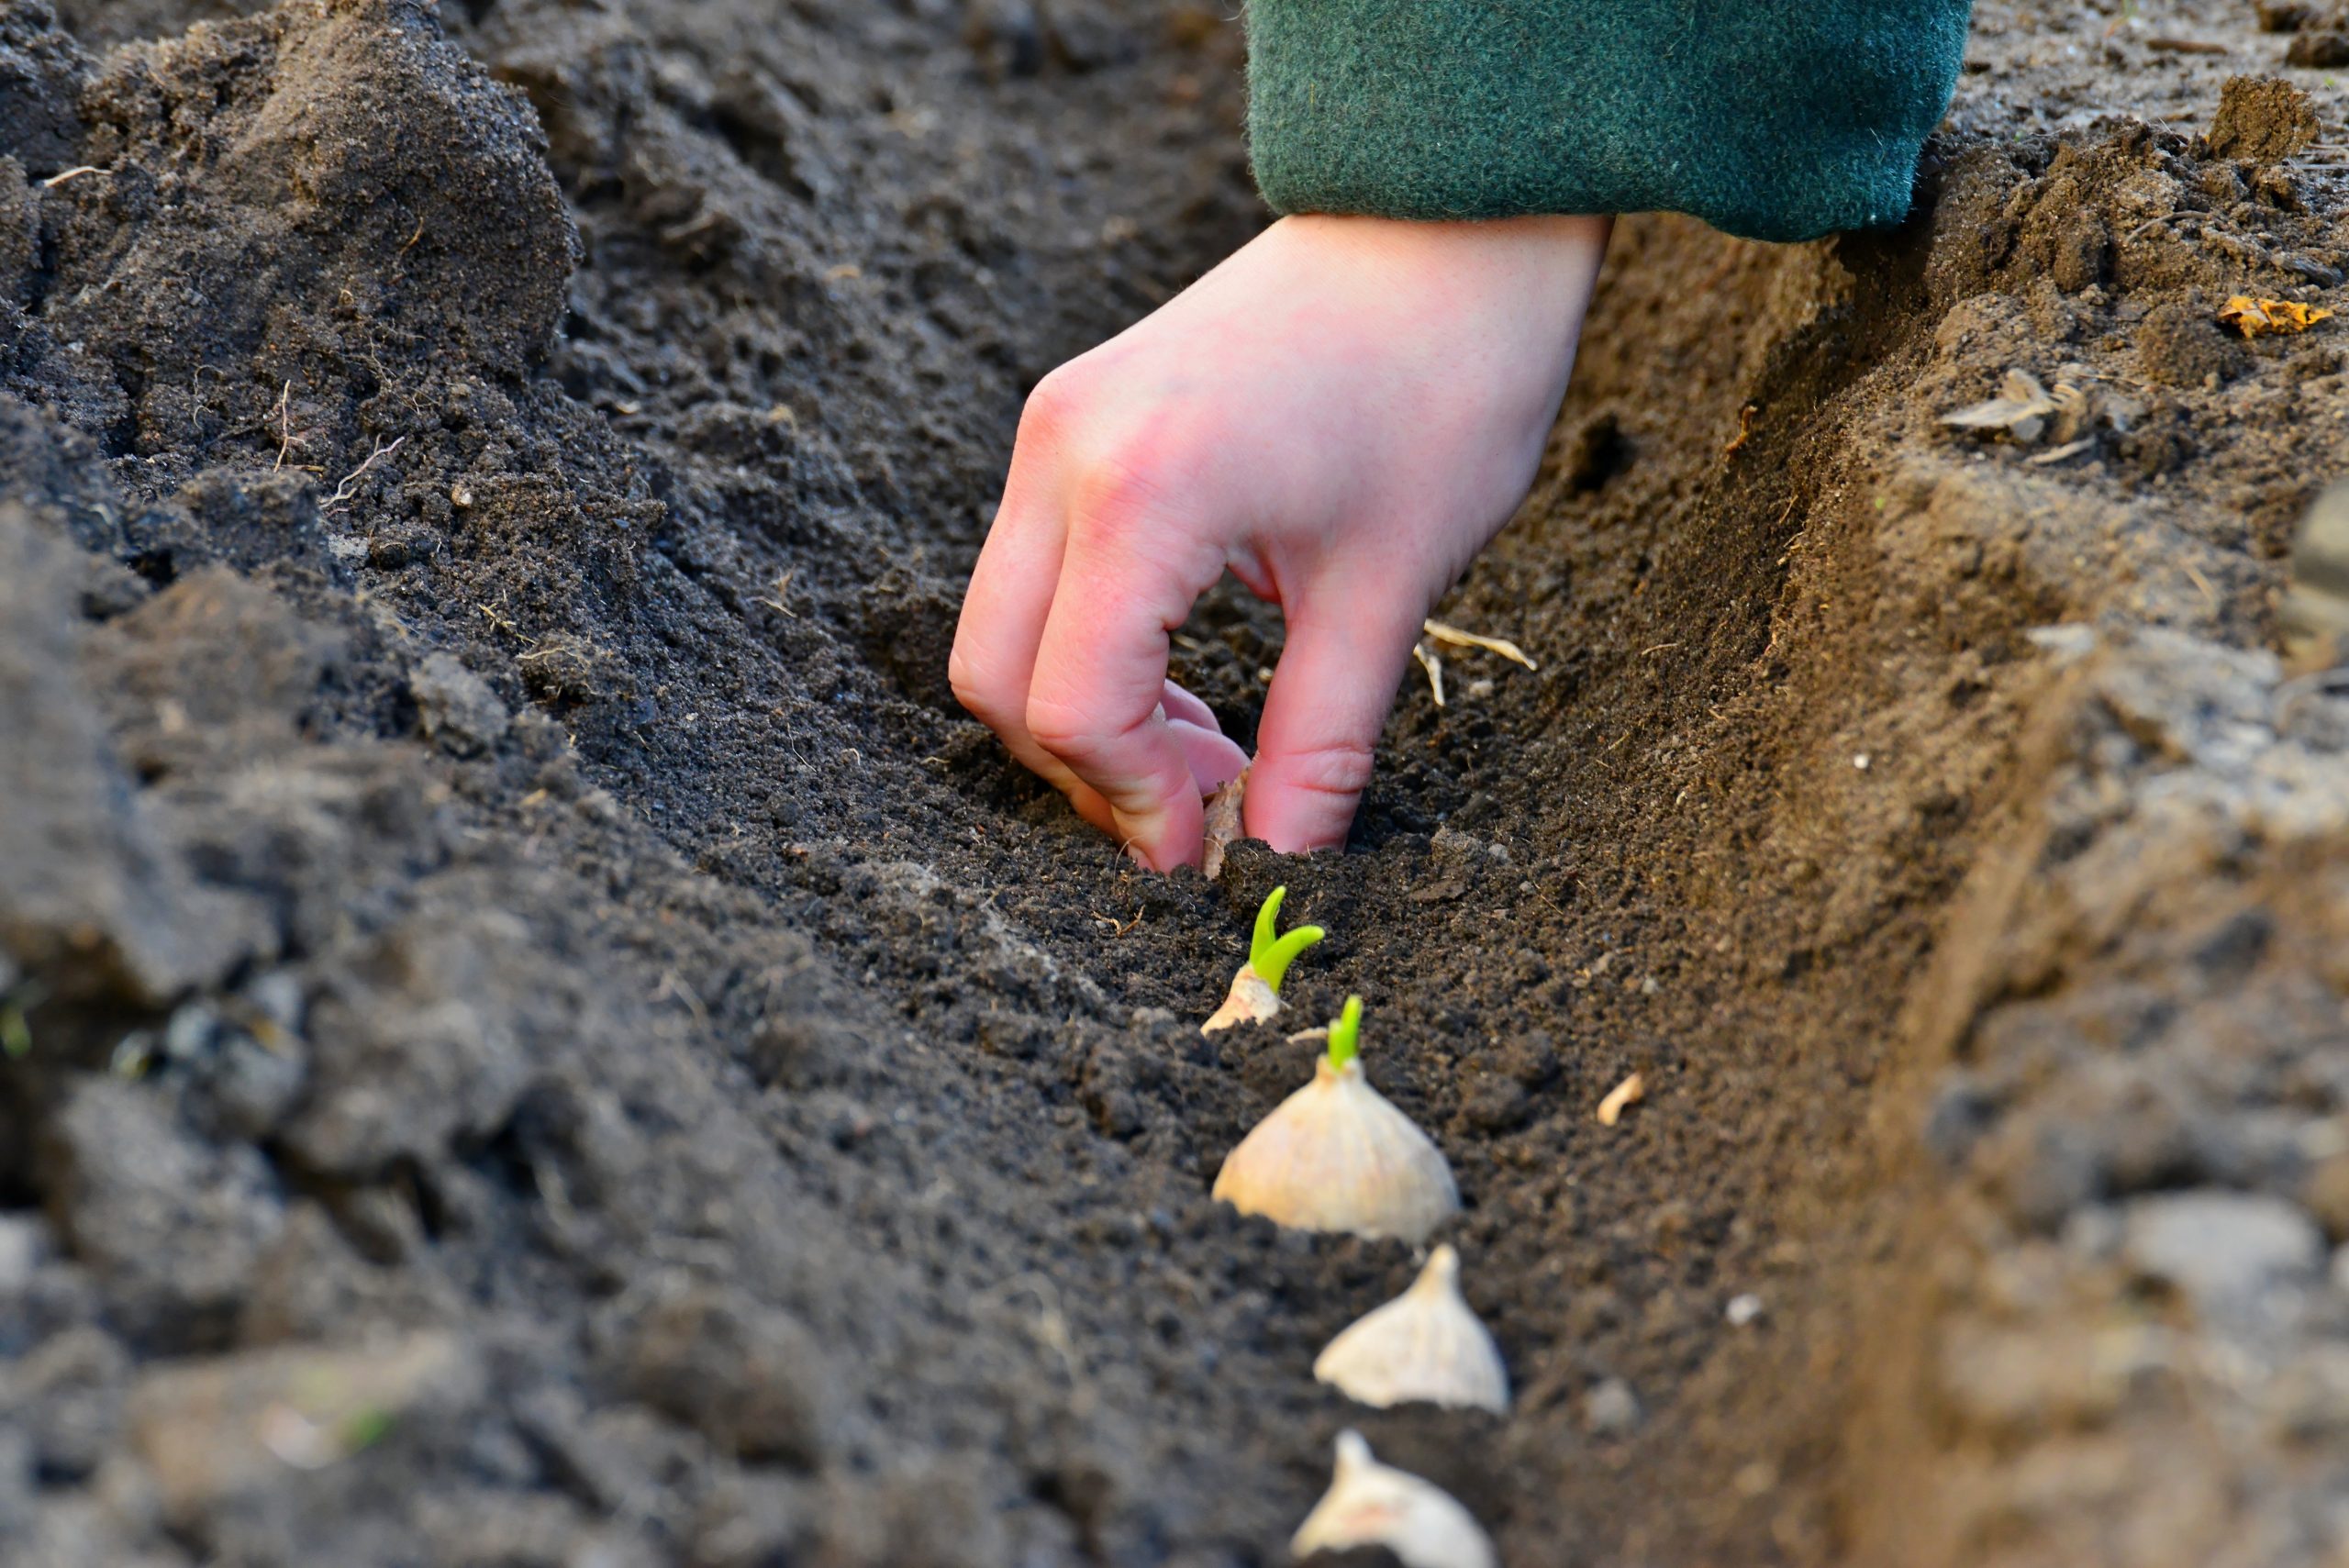
Planting Garlic Bulbs
Garlic is one of the easiest and most rewarding crops to grow in your garden. Whether you’re a seasoned gardener or just starting out, planting garlic in the fall sets you up for a flavourful harvest next summer. Here’s everything you need to know to get started.
Choosing Your Garlic Type
Before planting, decide which type of garlic suits your climate and needs:
- Softneck Garlic: Ideal for warmer regions, this variety has a flexible stem perfect for braiding and tends to store longer.
- Hardneck Garlic: Best for colder climates, it produces edible flower stalks called scapes in spring. Removing the scapes helps the plant focus on growing larger bulbs.
When to Plant Garlic
Garlic is typically planted in the fall, from mid-October until the ground freezes. This gives the cloves time to establish roots before winter sets in.
How to Plant Garlic
- Pick the Right Spot
Choose a sunny location with well-drained soil. Garlic needs at least 6 hours of direct sunlight daily and doesn’t like soggy conditions. - Prepare the Soil
Loosen the soil and dig holes about 2–6 inches deep. Go deeper in colder climates and shallower in warmer ones. - Separate the Cloves
Break apart the garlic bulb just before planting. Keep the papery skin on each clove intact, even if some flakes off. - Plant the Cloves
Place each clove in the hole with the pointy end facing up and the flat root end down. Space them 4–8 inches apart. - Cover and Water
Fill the holes with soil, gently tamp it down, and add a light layer of mulch. Water thoroughly to help the roots settle in.
Spring Garlic Care
- Fertilize: When green shoots appear in spring, apply a balanced fertilizer.
- Water: Keep the soil moist during dry spells.
- Weed: Remove weeds regularly to prevent competition for nutrients.
Harvesting Garlic
Garlic is ready to harvest in late spring to early summer. Here’s how to know when it’s time:
- Hardneck Garlic: Watch for curly scapes in late spring. Snip them off to encourage bulb growth. Bonus: scapes are delicious sautéed!
- All Varieties: When about half the leaves turn yellow and flop over, it’s harvest time. Use a garden fork to gently lift the bulbs from the soil.
Let the bulbs cure in a dry, shaded spot for a couple of weeks. Once dry, trim the stems or braid softneck varieties for storage.
Storing Garlic
Store garlic in a cool, dark place with good air circulation. Mesh bags, baskets, or hanging braids work well. Properly cured garlic can last 4–6 months. Use any damaged bulbs first, as they won’t store as long.
Ready to grow your own garlic? With just a little effort this fall, you’ll be rewarded with a flavorful harvest next year. Happy planting!

Winterizing Your Lawn
As the days grow shorter and temperatures begin to drop, it’s time to give your lawn a little extra care before winter sets in. Winterizing your lawn helps protect it from harsh conditions and sets the stage for lush, green growth when spring arrives. Here’s a step-by-step guide to help you get started:
- Aerate the Lawn
Aeration is one of the most beneficial things you can do for your lawn before winter. By creating small holes in the soil, aeration allows water, oxygen, and nutrients to reach the roots more effectively. This strengthens the root system and improves overall lawn health.
- Mow the Grass Shorter
Before the snow flies, give your lawn a final trim. Mow to a height of about 2–3 inches—short enough to prevent matting under snow, but not so short that the grass becomes stressed. This helps reduce the risk of disease and keeps your lawn tidy through the colder months.
- Fertilize with a Winterizer
Applying a winter fertilizer gives your lawn the nutrients it needs to survive the cold and thrive in the spring. Look for a blend high in nitrogen and potassium, which promotes strong root growth and helps store energy for next season. Available at your local Feeds’n Needs. A well-fed lawn now means a greener lawn later!
- Mulch the Leaves
Instead of raking and bagging fallen leaves, mulch them directly into the lawn using your mower. This adds valuable organic matter, helps retain soil moisture, and provides insulation for the roots. It’s a simple way to recycle nutrients and improve soil health.
- Seed Bare Spots
Fall is a great time to overseed any thin or bare patches in your lawn. The cooler temperatures and increased moisture create ideal conditions for seed germination. By spring, you’ll enjoy a thicker, more resilient lawn.
Conclusion
Winterizing your lawn doesn’t take long, but the benefits last well into the next growing season. With a little effort now, you’ll be rewarded with a vibrant, healthy lawn when the snow melts and the sun returns.

Digging Up and Storing Bulbs for Winter
As the growing season winds down and frost begins to settle in, it’s time to think about lifting and storing your tender bulbs to protect them through the winter. Proper care can ensure vibrant blooms next year!
- Know When to Dig
Timing is everything when it comes to digging up bulbs.
- Wait for dieback: Let the foliage die back naturally after the first frost. This signals the bulb has stored enough energy for next season.
- Avoid frost damage: Digging too soon can harm the bulb, while waiting too long may expose it to freezing temperatures underground.
- Dig Up and Clean the Bulbs
- Use the right tool: A garden fork is ideal to gently lift bulbs without damaging them.
- Lift carefully: Dig around and under the bulb to avoid cutting roots or bruising the bulb.
- Clean gently: Shake or brush off excess soil—no need to wash them.
- Dry the Bulbs
- Air-dry: Place bulbs in a well-ventilated, dry area for about a week.
- Trim foliage: Once dry, remove any remaining leaves or stems.
- Prepare for Storage
- Choose ventilated containers: Cardboard boxes, mesh bags, or crates work well.
- Add insulation: Layer bulbs with peat moss, sawdust, or vermiculite to prevent them from touching and to retain just enough moisture.
- Label everything: Include bulb type and color for easy spring planting.
- Store the Bulbs
- Find the right spot: Store bulbs in a cool 7–13°C, dark, and dry location that won’t freeze.
- Ideal places: Unheated garages, basements, or root cellars are perfect.
- Monitor regularly: Check for signs of rot or mold and remove affected bulbs.
Spring & Summer Bulb Tips
Spring Bulbs (e.g., Daffodils, Crocus)
- Dormancy begins: Once foliage turns brown and papery in late spring or early summer, bulbs are dormant and ready to be lifted if needed.
- Divide every 5 years: Overcrowding leads to smaller blooms and uneven growth. Dig, divide, and replant to refresh your beds.
Summer Bulbs (e.g., Dahlias, Begonias)
- Lift after frost: Wait until frost blackens the foliage, then gently dig up the bulbs.
- Dry before storing: Allow leaves to dry naturally before trimming. Dust bulbs with fungicide to prevent rot.
- Store smart: Use paper bags or nylon stockings with dry peat moss. Keep in a frost-free, well-ventilated area between 16–18°C.
Conclusion
While many bulbs can stay in the ground for years, lifting and storing tender varieties ensures they survive harsh winters and thrive come spring. With a little care and attention, your garden will reward you with a stunning display year after year.

Fall Garden Prep
As the days grow shorter and the air turns crisp, it’s the perfect time to give your garden a little TLC before winter sets in. Prepping your garden in the fall not only keeps things tidy but also sets the stage for a healthy, vibrant growing season next year. Here’s how to wrap up the season with care:
Clean Up and Sanitize Your Garden
A tidy garden is a healthy garden. Start by removing any spent annuals and vegetable plants that have finished producing. This helps prevent pests and diseases from lingering through the winter.
- Toss diseased plants in the trash—not the compost pile—to avoid spreading pathogens.
- Leave healthy roots from nitrogen-fixing plants like beans and peas in the soil. They’ll break down naturally and enrich your garden.
- Weed thoroughly, especially those that have gone to seed, to reduce next spring’s weed load.
Enrich Your Soil
Fall is a great time to give your soil a boost so it’s ready to support new growth come spring.
- Test your soil every few years to check pH and nutrient levels. Fall is ideal for applying amendments like lime, which need time to take effect.
- Add compost—a 2–3 inch layer will feed your soil over the winter as it breaks down.
- Mulch generously with shredded leaves, straw, or wood chips to protect the soil and retain moisture.
Care for Perennials and Bulbs
Your perennials and bulbs need a little attention before the frost hits.
- Divide and transplant overcrowded perennials to give them room to thrive.
- Water deeply before the ground freezes to help roots stay hydrated through winter.
- Plant spring-blooming bulbs like tulips and daffodils now for a colorful show next year.
- Dig up tender bulbs such as dahlias and gladiolus and store them indoors.
Prep Your Tools and Equipment
Don’t forget to take care of your gardening gear!
- Clean and sharpen tools to keep them in good shape and ready for spring.
- Drain hoses and irrigation systems to prevent freezing and cracking.
- Store pots and containers in a dry place to avoid damage from freeze-thaw cycles.
Fall Planting and Final Harvest
There’s still time to enjoy a few more crops before winter.
- Plant garlic between September and the end of November.
- Harvest remaining produce before the first hard frost. Green tomatoes? Let them ripen on a sunny windowsill indoors.
With a little effort now, your garden will be healthier, your tools will last longer, and you’ll be one step ahead when spring rolls around. Happy fall gardening!

How to Care for Potted Mums
As summer fades and autumn rolls in, it’s time to welcome one of the season’s most iconic flowers — the chrysanthemum, or as most of us call them, mums. These vibrant blooms are a staple in fall décor, adding bursts of color to porches, patios, and gardens. Whether you’re a seasoned green thumb or just starting out, caring for potted mums is simple with a few key tips.
Here’s how to keep your mums healthy, happy, and blooming beautifully all season long.
Choosing the Right Pot & Placement
Start with a container that drains well — think terra cotta, ceramic, or even the plastic nursery pot your mum came in. Good drainage is essential to prevent root rot.
If you’re repotting, use a high-quality potting mix from Feeds’n Needs that holds moisture but still drains well. Mums love sunlight, so place them where they’ll get at least 6 hours of direct sun daily. Want to extend their bloom time? Try a spot with partial shade to slow down bud opening.
Watering Wisely
Mums like consistent moisture, but soggy soil is a no-go. Water when the top inch of soil feels dry, and always aim for the base of the plant — not the leaves — to avoid fungal issues. A regular watering schedule will help your mums stay vibrant longer.
Deadheading for More Blooms
To keep your mums looking fresh and encourage new flowers, remove faded blooms as they appear. This redirects the plant’s energy into producing more blossoms instead of seed.
Fertilizing for Fall Success
If you’re growing mums from spring, start feeding them with a balanced fertilizer like 10-10-10. As buds begin to form, switch to one with higher phosphorus and potassium (like 5-10-5) to boost blooms and root strength.
- Start feeding after the last frost in spring
- Continue until late July
- Feed every 7–14 days
- Water deeply after fertilizing to avoid root burn
If you’re treating your mums as seasonal décor and plan to compost them after fall, you can skip the fertilizer.
Winterizing Your Mums
Want your mums to come back next year? Here’s how to give them a fighting chance:
- Wait until after the first hard frost
- Add 4 inches of mulch (straw or shredded hardwood) around the base
- Leave stems intact — prune in spring, not fall
- In early spring, remove mulch and trim away dead growth
Keep in mind: mums are hardy, but poor drainage or extreme cold can reduce their chances of surviving winter.
Conclusion
Caring for potted mums is a great way to celebrate the season and add a splash of color to your outdoor space. With the right pot, proper watering, and a little TLC, your mums will thrive well into autumn — and maybe even return next year.
Looking for supplies? Visit your local Feeds’n Needs for potting mix, fertilizers, and everything you need to keep your fall garden blooming.

Best Vegetables to Can for Beginners
Canning is a fantastic way to preserve your garden harvest and enjoy fresh-tasting vegetables all year long. If you’re new to the process, starting with easy, reliable options can make your first season a success. Here are ten of the best vegetables to can for beginners that taste just as good months later as the day you packed them.
- Asparagus – Tender asparagus is a spring favorite that cans surprisingly well. Start with fresh, firm stalks, trim them to fit your jars, and blanch before packing. Whether you add them to salads, stir-fries, or snack straight from the jar, you’ll be glad you preserved them when winter rolls around.
- Beets – With their rich color and earthy flavor, beets are as beautiful as they are delicious. Leave a bit of stem and root when boiling to keep juices in, then slip off the skins before canning. They can be preserved whole, halved, or quartered, making them perfect for salads, side dishes, or snacking.
- Carrots – Crisp, sweet carrots hold their texture wonderfully after canning. Simply wash, peel, and cut them into slices or chunks. They’re great for soups, stews, or quick side dishes—and pulling a jar off the shelf is much easier than peeling fresh ones on a busy night.
- Corn – Fresh corn is hard to beat, and canning lets you keep that summer flavour on hand. Cut the kernels from the cob without scraping too close (to avoid tough bits) and pack them for year-round use in chowders, casseroles, and side dishes.
- Cucumbers – Cucumbers are a classic canning choice—especially for pickles. Small ones stay crisp, while larger cucumbers can be sliced into spears or rounds. With the right brine, you’ll have tangy, crunchy pickles that brighten any meal.
- Green Beans – Whether you prefer them whole or cut into bite-sized pieces, green beans are a canning staple. Just snap off the ends, rinse, and pack them in jars. They stay tender yet firm, making them a reliable side dish straight from the pantry.
- Peas – Peas might not be the first vegetable you think of for canning, but they’re a hidden gem. Shell and blanch them to lock in their bright green color, then preserve them on their own or as part of a mixed vegetable blend. Their sweet pop adds flavour to soups, stews, and salads.
- Peppers – From sweet bells to spicy varieties, peppers are versatile and full of flavor. Blister or boil them to remove skins before canning. Small peppers can be left whole, while larger ones work well halved or sliced for quick fajitas, pasta, or stir-fries.
- Tomatoes – Tomatoes are practically made for canning. Use them for sauces, soups, stews, or salsa. Blanch to slip off the skins, then choose your style—whole, diced, or puréed. Season with herbs like basil or garlic for ready-to-use flavor boosters.
- Radishes – Not just for salads, radishes shine when pickled. Their peppery bite mellows into a tangy, slightly sweet crunch that’s perfect for tacos, sandwiches, or charcuterie boards. They’re quick to grow, easy to prepare, and add something unique to your pantry lineup.
Start small and build your skills each season. With just a few jars of each of these vegetables, you’ll be stocking your pantry with homemade goodness—and you might find yourself looking forward to canning season as much as the harvest itself.

How to Get Started Growing Strawberries
There’s something truly satisfying about harvesting fresh, juicy strawberries from your own garden. Whether you’re a seasoned green thumb or just starting out, strawberries are a rewarding and relatively easy crop to grow—especially with our Maritime climate. Here’s everything you need to know to get started on the path to a bountiful strawberry harvest.
Step 1: Choose the Right Location and Prepare the Soil
Strawberries love the sun and thrive in fertile, well-drained soil. Here’s how to set the stage for success:
- Sunlight: Choose a spot that receives at least 6 hours of direct sunlight per day.
- Drainage: Avoid areas with heavy clay or soggy soil. Strawberries hate “wet feet,” so good drainage is key.
- Soil Amendment: Enrich the soil with compost or well-rotted manure to boost nutrients and improve texture.
- Soil pH: Aim for a pH between 6.0 and 6.5. You can test your soil using a simple home testing ki available at your local Feeds’n Needs.
Step 2: Plant the Strawberry Crowns
Once your soil is prepped, it’s time to plant:
- When to Plant: Spring is ideal, though fall planting can work in milder regions.
- Planting Depth: Dig holes large enough for the roots. Position the crown (where the roots meet the stems) level with the soil surface.
- Spacing: Space each plant about 20 inches apart. This helps with airflow and reduces disease risk.
Step 3: First-Year Plant Care
Your plants need a little TLC in their first season to set the stage for future harvests:
- Watering: Water thoroughly after planting and regularly throughout the season, especially during dry spells.
- Weeding: Keep the area weed-free so your strawberries don’t have to compete for water and nutrients.
- Blossom Removal: If you’re growing June-bearing varieties, pinch off the flowers during the first year. This encourages stronger root development and better yields next season.
- Fertilizing: Apply a nitrogen-rich fertilizer about 4–6 weeks after planting to promote healthy growth.
Step 4: Prepare for Winter
Strawberries are hardy, but they still need protection when the temperatures drop:
- Mulch: Apply a thick layer of straw or similar mulch around the plants in late fall. This insulates the crowns and helps prevent winter damage.
- Snow Cover: In areas like the Maritimes, snow can offer additional insulation—but mulch is still essential to guard against freeze-thaw cycles.
Step 5: Ongoing Strawberry Plant Care
Keep your plants healthy and productive with consistent care:
- Watering: Continue regular watering, especially while fruit is developing.
- Fertilizing: Feed your strawberries in early spring and again after harvesting. Follow the product’s instructions for best results.
- Weed and Pest Control: Stay vigilant for weeds, pests, and diseases. Remove weeds promptly and use organic or chemical treatments as needed.
- Plant Renewal: Strawberry plants tend to decline after 3–4 years. Plan to replace older plants to maintain high yields.
Best Strawberry Varieties for Atlantic Canada
Not all strawberries are created equal, especially when it comes to colder climates. These varieties are known to do well in Nova Scotia:
- ‘Northeaster’ – Cold-hardy and early ripening.
- ‘Sable’ – Excellent flavor and disease resistance.
- ‘Primetime’ – A reliable producer for home gardens.
Growing your own strawberries takes a little planning, but the payoff is sweet—literally. With the right care and a bit of patience, you’ll be enjoying homegrown berries straight from the garden in no time.
Conclusion
Integrating a new pet into your household isn’t always easy, but it’s definitely rewarding. With time, patience, and plenty of positive reinforcement, your furry family members can learn to live together peacefully—and maybe even become best pals.
For more information on introducing a new cat to your home, check out our blog Preparing for Your New Kitten!


Effective Weed Control: Essentials for Your Lawn
Maintaining a pristine lawn in the Maritimes can be challenging, especially when weeds start to invade your green space. However, with the right strategies and products, you can keep your lawn looking its best. Here are some essential tips and products for effective weed control.
Understanding Common Weeds in the Maritimes
The first step in effective weed control is identifying the common weeds that plague lawns in the Maritimes. Some of the most prevalent include dandelions, crabgrass, and clover. Knowing what you’re up against will help you choose the right control methods.
Specific Weeds in the Maritimes
- Dandelion (Taraxacum officinale): A widely recognized weed with yellow flowers and rosette-shaped leaves.
- Chickweed (Stellaria media): A low-growing weed with small, white flowers and fleshy leaves.
- Canada Thistle (Cirsium arvense): A perennial weed with spiny leaves and purple flower heads.
- Crabgrass (Digitaria spp.): A common grassy weed that grows in lawns and other disturbed areas.
- Bindweed (Convolvulus arvensis): A vining weed with trumpet-shaped flowers and heart-shaped leaves.
- Velvetleaf (Abutilon theophrasti): An annual weed with large, velvety leaves and pale yellow flowers.
- Yellow Rocket (Barbarea vulgaris): A biennial weed with yellow flowers and dissected leaves.
- Yellow Nut Sedge (Cyperus esculentus): A grassy weed with rhizomes (underground stems) that can be difficult to control.
- Tansy Ragwort (Senecio jacobaea): A biennial weed with yellow flowers and pinnate leaves.
- White Cockle (Lychnis alba): A biennial weed with white flowers and lance-shaped leaves.
- Common Milkweed (Asclepias syriaca): A native perennial weed with pinkish-white flowers and lance-shaped leaves, also important for monarch butterflies.
- Partridge Berry (Mitchella repens): A low-growing ground cover with oval, green leaves and red berries.
- Common Blue Wood-Aster (Symphyotrichum cordifolium): A perennial plant with blue or purple flowers and heart-shaped leaves.
Factors Influencing Weed Growth
- Soil conditions: Weeds thrive in disturbed or nutrient-poor soils.
- Disturbed areas: Roadsides, pastures, and harvested tree lots are prone to weed invasion.
- Climate: Environmental conditions like temperature and moisture can influence weed distribution and growth.
Weeds can tell you a lot about your soil because all plant species prefer specific environmental conditions to thrive. Does the soil have too little nitrogen or is it eroded or too compacted? Here is a more detailed review of each type of weed and the specific factors that influence their growth on lawns:

Dandelions are quite resilient and can thrive in various conditions. Here are some key factors that influence their growth on lawns:
- Soil Compaction: Dandelions can grow well in compacted soil where grass roots struggle to penetrate
- Thin Turf: Sparse grass provides less competition, allowing dandelion seeds to germinate more easily.
- Excess Soil Moisture: Dandelions thrive in moist-to-wet soil conditions, especially when the grass is weakened by waterlogged soil
- Soil Acidity: Dandelions prefer slightly acidic soil, which might indicate your lawn’s pH is not optimal for grass
- Calcium Deficiency: Soil lacking calcium can favor dandelion growth, as these plants can pull nutrients from deeper layers to the surface
- Mowing Practices: Cutting grass too short can reduce its ability to compete with dandelions
To manage dandelions, maintaining a healthy, dense lawn is crucial. Regular aeration, proper mowing, and balanced fertilization can help keep these weeds at bay.

Chickweed (Stellaria media) is a common lawn weed that thrives under various conditions. Here are some key factors influencing its growth:
- Soil Type: Chickweed prefers moist, fertile, and well-drained soils. It can tolerate a wide range of soil pH levels
- Moisture Levels: It thrives in moist conditions but can also tolerate some drought
- Climate Conditions: Chickweed is cold-hardy and often flourishes in cooler seasons, even under snow cover
- Disturbed Soil: Areas with disturbed soil, such as those with frequent foot traffic or lawn maintenance activities, are ideal for chickweed growth
- Shade: Chickweed can grow in both sunny and shaded areas, but it often forms dense patches in shaded lawns
- High Nitrogen Levels: Chickweed tends to do well in soils with high nitrogen content
To manage chickweed, maintaining a healthy lawn through proper fertilization, regular mowing, and using turfgrasses well-adapted to your site conditions is essential. Postemergence herbicides containing dicamba, MCPP, and fluroxypyr can also be effective.

Canada Thistle (Cirsium arvense) is a persistent and invasive weed that can be challenging to manage on lawns. Here are some key factors that influence its growth:
- Soil Disturbance: Canada Thistle thrives in disturbed soils, such as those found in areas with frequent foot traffic or lawn maintenance activities
- Moisture Levels: It prefers moist soil conditions but can also tolerate dry periods
- Soil Fertility: This weed can grow in a variety of soil types but tends to do well in fertile soils
- Sunlight: Canada Thistle grows best in full sun but can also tolerate partial shade
- Root System: It has an extensive root system that can penetrate deep into the soil (up to 6 feet) and spread horizontally (up to 15 feet), allowing it to form dense patches
- Seed Dispersal: The seeds are equipped with a pappus (a tuft of hairs) that aids in wind dispersal, allowing them to spread over long distances
To manage Canada Thistle, it’s important to maintain a healthy, dense lawn to outcompete the weed. Regular mowing, proper fertilization, and possibly the use of herbicides can help control its spread.

Crabgrass (Digitaria spp.) is a common and troublesome weed in lawns. Here are some key factors that influence its growth:
- Soil Temperature: Crabgrass seeds germinate when soil temperatures consistently reach between 55°F and 60°F (13°C to 16°C) in the spring
- Sunlight: It thrives in sunny areas and can outcompete turfgrass in these conditions
- Soil Compaction: Compacted soil provides an ideal environment for crabgrass, as it struggles to compete with healthy, dense turf
- Moisture Levels: Crabgrass prefers moist conditions but can also tolerate drought, making it adaptable to various watering regimes
- Mowing Practices: Mowing the lawn too short can stress the grass and create opportunities for crabgrass to establish
- Bare Spots: Areas of the lawn that are thin or bare are prime spots for crabgrass to take hold
To manage crabgrass, maintaining a healthy, dense lawn is crucial. This includes proper mowing, watering, and fertilization practices. Pre-emergent herbicides can be applied in early spring to prevent crabgrass seeds from germinating, and post-emergent herbicides can be used to control any that do appear.

Bindweed (Convolvulus arvensis) is a persistent weed that can be challenging to control. Here are some key factors that influence its growth on lawns:
- Soil Type: Bindweed thrives in moist, deep, fertile soils but can also tolerate poor, dry, gravelly soils
- Climate: It grows well in temperate, Mediterranean, and tropical climates
- oil Moisture: While it prefers moist conditions, bindweed seldom grows in wet soils
- Shade: Bindweed growth can be partially reduced by shade from other plants
- Root System: Bindweed has an extensive root system that can reach depths of up to 20 feet, making it difficult to eradicate
- Nitrogen Levels: Adequate nitrogen fertilization can help manage bindweed by promoting healthy grass growth
To control bindweed, maintaining a healthy lawn through proper fertilization, irrigation, and mowing practices is essential.
 in the Mallow family, growing in Ontario Canada. -Captured by MIROFOSS")
Velvetleaf (Abutilon theophrasti) is a resilient weed that can thrive under various conditions. Here are some key factors that influence its growth:
- Soil Moisture: Velvetleaf prefers moist soil conditions but can tolerate moderate water stress. It grows best when soil moisture is maintained at 75% to 100% field capacity
- Soil Fertility: It thrives in fertile soils and can grow quickly during the hot summer months
- Sunlight: Velvetleaf can grow under both full sun and partially shaded conditions, making it adaptable to different light environments
- Temperature: It grows well in warm temperatures but is not frost-tolerant and dies with the first hard frost
- Seed Dormancy: Velvetleaf seeds exhibit considerable dormancy, allowing them to survive in the soil for over 50 years. Scarification of the seed coat by microbial action, soil action, or tillage permits water entry and germination
- Disturbed Soil: Areas with disturbed soil, such as those with frequent foot traffic or lawn maintenance activities, are ideal for velvetleaf growth
To manage velvetleaf, maintaining a healthy, dense lawn through proper fertilization, regular mowing, and minimizing soil disturbance is essential. Herbicides can also be effective in controlling this weed.

Yellow Rocket (Barbarea vulgaris) is a resilient weed that can thrive in various conditions. Here are some key factors that influence its growth:
- Soil Moisture: Yellow Rocket prefers moist, well-drained soils but can tolerate a range of moisture conditions
- Soil Fertility: It thrives in fertile soils and can grow quickly, especially in nutrient-rich environments
- Sunlight: This weed can grow in both full sun and partial shade, making it adaptable to different light conditions
- Temperature: Yellow Rocket is a cool-season plant that can germinate in both spring and fall. It is frost-tolerant and can survive through winter
- Disturbed Soil: Areas with disturbed soil, such as those with frequent foot traffic or lawn maintenance activities, are ideal for Yellow Rocket growth
- Seed Dispersal: The seeds of Yellow Rocket can remain viable in the soil for several years, allowing it to re-establish even after removal
To manage Yellow Rocket, maintaining a healthy, dense lawn through proper fertilization, regular mowing, and minimizing soil disturbance is essential. Post-emergent herbicides containing 2,4-D, MCPP, and dicamba can also be effective.

Tansy Ragwort (Senecio jacobaea) is a resilient weed that can thrive under various conditions. Here are some key factors that influence its growth:
- Soil Type: Tansy Ragwort grows well in medium to light-textured soils, including calcareous soils, organic-rich alluvium, light loam, and clay-with-flints
- Moisture Levels: It prefers areas with sufficient rainfall (around 34 inches or 860 millimeters per year) but is absent where the water table is high
- Sunlight: This weed can grow in both full sun and partial shade, making it adaptable to different light conditions
- Temperature: Tansy Ragwort is a winter annual, biennial, or short-lived perennial that can grow between 8-36 inches tall but can attain heights greater than 6 feet under optimal conditions
- Disturbed Soil: Areas with disturbed soil, such as those with frequent foot traffic or lawn maintenance activities, are ideal for Tansy Ragwort growth
- Seed Dispersal: The seeds are equipped with a pappus that aids in wind dispersal, allowing them to spread over long distances
To manage Tansy Ragwort, maintaining a healthy, dense lawn through proper fertilization, regular mowing, and minimizing soil disturbance is essential. Herbicides containing 2,4-D and picloram can be effective when applied to actively growing immature plants.

White Cockle (Lychnis alba), also known as White Campion, is a resilient weed that can thrive in various conditions. Here are some key factors that influence its growth:
- Soil Type: White Cockle prefers well-drained soils and is commonly found in pastures, along right-of-ways, and in hay fields
- Moisture Levels: It thrives in moist conditions but is seldom seen in very dry climates
- Sunlight: This weed is a “sun-lover” and grows best in full sun, although it can tolerate partial shade
- Temperature: White Cockle seedlings do not tolerate high temperatures well, making it more prevalent in cooler climates
- Seed Dispersal: Each female plant can produce over 24,000 seeds, which can remain viable in the soil for up to three years. The seeds are similar in size and shape to clover and alfalfa seeds, often leading to contamination
- Disturbed Soil: Areas with disturbed soil, such as those with frequent foot traffic or lawn maintenance activities, are ideal for White Cockle growth
To manage White Cockle, maintaining a healthy, dense lawn through proper fertilization, regular mowing, and minimizing soil disturbance is essential. Herbicides can also be effective in controlling this weed.
 feeding on common milkweed in summer meadow")
Common Milkweed (Asclepias syriaca) is a resilient plant that can thrive in various conditions. Here are some key factors that influence its growth:
- Soil Type: Common Milkweed prefers well-drained soils but can grow in a variety of soil types, including sandy and loamy soils
- Moisture Levels: It thrives in moist conditions but can tolerate periods of drought. Consistent moisture helps in optimal growth
- Sunlight: This plant grows best in full sun but can also tolerate partial shade
- Temperature: Common Milkweed grows well in warm temperatures. Elevated temperatures can increase its growth, while water stress can decrease it
- Seed Dormancy: The seeds require a period of cold stratification to break dormancy. This means they need to be exposed to cold, moist conditions for a few weeks before they can germinate
- Disturbed Soil: Areas with disturbed soil, such as those with frequent foot traffic or lawn maintenance activities, are ideal for Common Milkweed growth
To manage Common Milkweed, maintaining a healthy, dense lawn through proper fertilization, regular mowing, and minimizing soil disturbance is essential.

Partridge Berry (Mitchella repens) is a low-growing, evergreen plant that can thrive in various conditions. Here are some key factors that influence its growth:
- Soil Type: Partridge Berry prefers well-drained, slightly acidic soils. It is commonly found in mature forests with rich, organic soil
- Moisture Levels: It thrives in moist, well-drained conditions but can tolerate some drought once established
- Sunlight: This plant grows best in partial to full shade, making it ideal for shaded areas of the lawn
- Temperature: Partridge Berry is hardy and can survive in a range of temperatures, but it prefers cooler, temperate climates
- Growth Habit: It spreads vegetatively through creeping stems that root at the nodes, forming dense mats over time
- Seed Dormancy: The seeds require a period of cold stratification to break dormancy and germinate
To encourage the growth of Partridge Berry, maintaining a shaded, moist environment with well-drained, slightly acidic soil is essential.

Common Blue Wood-Aster (Symphyotrichum cordifolium) is a hardy perennial that can thrive in various conditions. Here are some key factors that influence its growth:
- Soil Type: It prefers average, dry to moist, well-drained soils. Poorly drained locations can lead to issues like aster wilt
- Moisture Levels: While it can tolerate dry conditions, it grows best in moist soils
- Sunlight: This plant can grow in both full sun and partial shade, making it adaptable to different light environments
- Temperature: Common Blue Wood-Aster blooms late summer into fall and can continue blooming through the first few frosts
- Growth Habit: It spreads by short rhizomes, leading to a clumping growth habit. Taller plants may require staking or support
- Disturbed Soil: Areas with disturbed soil, such as those with frequent foot traffic or lawn maintenance activities, are ideal for its growth
To manage Common Blue Wood-Aster, maintaining a healthy, dense lawn through proper fertilization, regular mowing, and minimizing soil disturbance is essential.
Note: While some plants are commonly considered weeds, some native species, like common milkweed, can also be beneficial to the ecosystem.
Some ‘weeds’ such as Goldenrod (Solidago species) and Joe Pye Weed (Eutrochium purpureum) are native species which support pollinating insects and birds and contribute to the ecosystem. Milkweed (Asclepias species), for example, provides a nursery for the offspring of Monarch butterflies. Also, Queen Anne’s Lace (Daucus carota) is also considered a weed but can be beneficial in that it attracts predatory wasps, flies and lady beetles which prey on garden pests such as aphids.
Pre-Emergent Herbicides
Pre-emergent herbicides are a great way to prevent weeds from taking root in your lawn. These products work by inhibiting the germination of weed seeds. Apply them early in the season before weeds start to grow. There are many popular options available, speak with your local Feeds’n Needs experts to find the right solution for your green space.
Remember to always read the label for application specifications.
Post-Emergent Herbicides
For weeds that have already established themselves, post-emergent herbicides are necessary. These products target and kill weeds that are actively growing. There are many popular options available, speak with your local Feeds’n Needs experts to find the right solution for your green space. Remember to always read the label for application specifications.
Organic Weed Control Options
If you prefer an eco-friendlier approach, there are organic weed control options available. These products are safe for pets and children and are effective in managing weeds. There are many popular options available, speak with your local Feeds’n Needs experts to find the right solution for your green space.
Manual Weed Removal
Sometimes, the best solution is good old-fashioned manual removal. Tools like weed pullers and hoes can help you remove weeds by the root, preventing them from growing back.
Lawn Maintenance Practices
Maintaining a healthy lawn is one of the best defenses against weeds. Regular mowing, watering, and fertilizing can keep your grass strong and resilient. Here are some tips:
- Mow Regularly: Keep your grass at a height of 2.5-3 inches (or use the one-third rule) to prevent weed growth. Mowing is a crucial maintenance practice for turf, significantly influencing the type and amount of weeds present. Following the one-third rule (never mow off more than one-third of the plant) is beneficial, but there’s more to consider. As turf grows taller and denser, it shades the soil, preventing weed seeds from germinating due to lack of sunlight. Increased mowing height alone can reduce weed pressure significantly.
During summer, raising mowing heights to three inches or more helps turf grow thicker and reduces weed pressure. Taller turf also promotes deeper root growth, enhancing the turf’s ability to withstand heat, drought, disease, and insect pressure. Additionally, keeping mower blades sharp and returning clippings to the turf (using a mulching mower blade helps with this) contributing up to two pounds of nitrogen per year.
- Water Deeply: Water your lawn deeply but infrequently to encourage deep root growth.
- Fertilize: Use a balanced fertilizer to keep your lawn healthy and vigorous. Remember to always read the label for application specifications.
To get your green space looking it’s best, talk with one of our Feeds’n Needs experts in store. They will help you find the best solution to control and prevent weed growth.
Conclusion
Weed control in the Maritimes requires a combination of prevention, treatment, and maintenance. By using the right products and practices, you can keep your lawn looking lush and weed-free. Visit your local Feeds’n Needs to find all the essentials you need for effective weed control.
