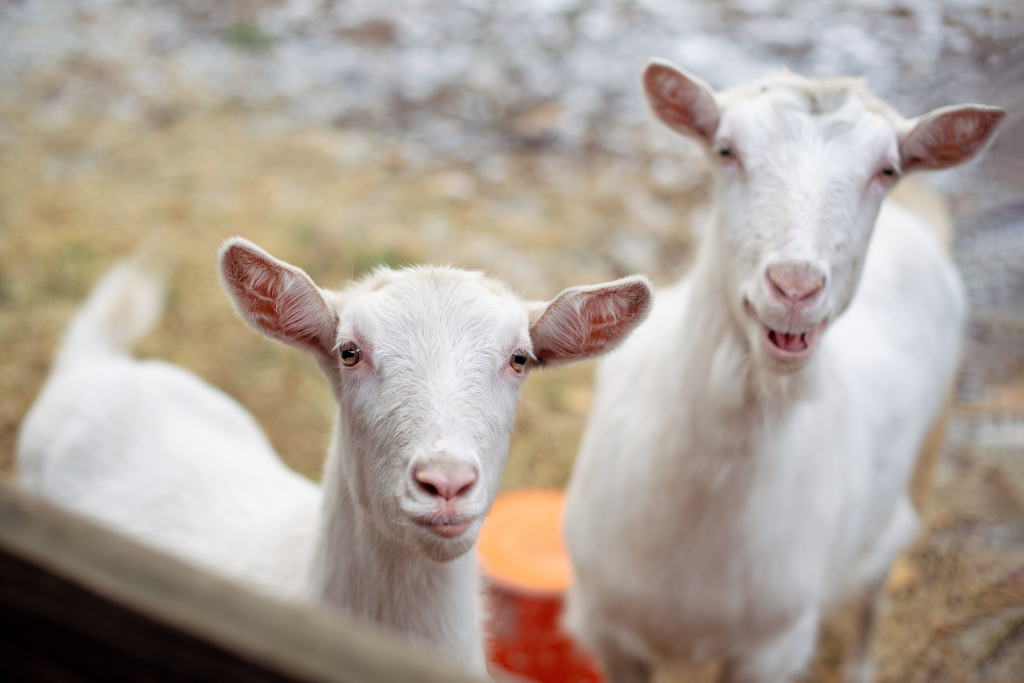
Ensuring the well-being of your goats is a top priority as winter weather approaches. Cold temperatures and harsh conditions bring unique challenges that can impact your goats’ health and comfort. By covering the basics—shelter, water, and nutrition—you can help your herd thrive all season long.
Shelter: Protection from the Elements
Goats don’t need elaborate housing, but they do require protection from wind, snow, and rain. At a minimum, provide a three-sided shelter that blocks cold north winds while still allowing ventilation. In barns, consider using a door flap to keep wind and snow out while letting goats move freely. To maintain comfort and insulation, keep plenty of clean, dry straw or shavings available for bedding.
Ventilation Matters:
Avoid sealing the barn too tightly. While drafts should be minimized, airflow is essential to prevent moisture buildup, which can lead to pneumonia and other respiratory issues. Proper ventilation reduces humidity and keeps your goats healthy.
Keep It Dry
Moisture is the enemy in winter.
- Location: Avoid low-lying areas where water collects.
- Maintenance: Regularly refresh bedding and keep loafing areas dry to prevent hoof problems like rot or scald, and udder issues such as mastitis.
Do Goats Need Heat?
Surprisingly, goats do not need supplemental heat in most cases. Heat lamps and jackets can interfere with their natural ability to acclimate. As temperatures drop, goats grow a thick winter coat for insulation.
Tip: If snow sits on their coat without melting, their insulation is working!
Typically only newborn kids or a sick goat require extra warmth—use heat lamps with extreme caution due to fire risk and cord chewing.
Water: Fresh and Unfrozen
Goats need constant access to fresh water, even more so in winter when hay replaces moisture-rich pasture. Without water, goats eat less and lose body condition. To prevent freezing, use heated water bowls or change water frequently.
Nutrition: Fuel for Warmth
Winter feeding isn’t just about calories—it’s about heat production.
- Hay is Key: Offer free-choice hay 24/7. Goats are ruminants, and the fermentation process in their rumen generates internal heat.
- Extra Energy: Consider adding alfalfa for protein and energy, but use caution with bucks and wethers to avoid urinary calculi.
- Minerals: Provide salt and mineral supplements year-round.
Helping Goats Adjust
Gradual acclimation is important. Keep goats outdoors as long as possible in fall so they develop thick coats before moving to winter housing. Goats generally handle snow well if they have dry shelter and clear paths to water and feeders. Plowed snow can even serve as a windbreak.

Why Keep Cows Inside in Winter
Keeping your cattle outside in the Maritimes during winter is viable but requires careful thought and good management. For many producers, indoor wintering is preferable. Many dairy breeds do not do well in the cold as their bodies don’t grow the coat and have the extra pounds like beef breeds. Keeping your cows inside in the winter helps keep them out of the elements and ensures they always have water. It also prevents any falling ice or calves from being born outside. Our blog will guide you with some important practices on why to keep cows inside throughout the winter season.
Slower Winter Growth Rates:
Slower growth rates in winter mean less plant coverage on the soil to protect it. The same cattle hooves that benefited the soil through trampling of pasture in summer now become damaging as they expose bare patches of soil that are vulnerable to erosion. Waterlogged soils quickly turn to mud with cattle roaming above. This makes it very difficult for plant species to grow, and the pasture will take a very long time to recover.
On top of this, there isn’t enough forage to sustain the cattle through the whole winter. During the autumn season, hay is often taken to the cows on the pasture so they can stay outside despite being unable to forage the field. However, moving cows inside in late autumn is a good idea to give the pasture time to recover through the winter and prevent overgrazing.
Overwintering Inside:
Cattle need a constant supply of fresh air to minimize disease, predominantly pneumonia. Stale air increases the spread of the infection and the number of vulnerable animals. The age of the cattle, stage of production, and health and body condition of the cattle all need to be considered and will have challenges coping with severe weather.
Shelter:
Keeping your cows inside during the winter ensures they will be warm and will not require you to provide extra bedding to help dry them out if they get muddy or extra outdoor shelter to protect them from harsh weather conditions.
Feeding:
If you decide to overwinter your cattle, you will likely have to invest in more feed and better quality forage to help provide them with additional energy. Housing them inside will help keep your costs down in the winter.
For more information on keeping cows inside in winter, visit your local Feeds’n Needs and chat with one of our Experts!
Disclaimer: This is general information, it is important to do what works best for you and your cattle.

Natural Goat Treat Recipes
Goats make an excellent addition to your farm. A great way to bond with your goats and thank them for their contribution is by giving them treats! Try out these easy DIY natural goat treat recipes – Your goats will thank you later!
Goat “Jerky” Treats
The first treat recipe is from The Giving Goat Blog, a healthy treat full of natural supplements that your goats will love! These treats can be made using a dehydrator or baked in the oven.
INGREDIENTS:
- 1 ¼ cup of flaxseed meal
- 2-3 cloves of crushed garlic
- 2 tablespoons of raw organic honey
- 4 tablespoons of water
- A few sprigs of thyme
DIRECTIONS:
- Mix ingredients together in a large bowl.
- Line a dehydrator rack (if dehydrating) or baking sheet (if baking in oven) with parchment paper.
- Spread the dough onto the parchment paper no more than ¼” thick and place in the dehydrator or oven.
- IF DEHYDRATING – Dehydrate treats at 135 degrees Fahrenheit for 10-12 hours or until the desired texture is reached.
- IF BAKING – Bake in the oven at the lowest temperature setting until the desired texture is reached.
“Goatmeal” Cookies
This next recipe was created by Sarita Harbour from the blog An Off Grid Life. It makes oatmeal cookies that your goats, chickens, and other farm animals will love!
INGREDIENTS:
- ¾ cups of granulated sugar
- ½ cup of flaxseed
- 2 cups of quick-cooking oats
- 2 cups of sifted flour
- 1/ cup of vegetable shortening coconut oil or olive oil
- 1 ½ teaspoons of baking soda
- 1 egg
- ½ cup of molasses
DIRECTIONS:
- Preheat oven to 375 degrees Fahrenheit.
- Line a baking sheet with parchment paper.
- Mix ingredients together thoroughly in a large bowl using a rubber spatula.
- Scoop small portions of the dough and roll them into balls.
- Place your dough balls on the baking sheet and press them down gently with your fingers or a fork.
- Bake in the oven for 10-12 minutes or until the edges turn golden brown.
- Once cooked, take the cookies out of the oven and let them cool completely before putting them in an airtight container.
Peanut Butter Goat Cookies
Our last recipe for you is created by Karissima Walker from the Gifts From Goats blog. These peanut butter cookies combine delicious ingredients your goats are sure to love!
INGREDIENTS:
- 1 cup of quick-cooking oats
- 1 cup of flour (whole wheat or rye)
- 1 cup of sunflower hearts or other seeds
- ½ cup of peanut butter
- ¼ cup of molasses
- ¼ cup of water (adjust to get desired consistency)
DIRECTIONS:
- Preheat oven to 350 degrees Fahrenheit.
- Line a baking sheet with parchment paper.
- Mix your dry ingredients together in a large bowl.
- Now add your peanut butter and molasses.
- Add water to the mixture until the batter is a crumbly paste-like consistency.
- Portion small amounts of dough and roll into balls.
- Place dough balls onto the baking sheet and gently flatten them with a fork or your fingers.
- Bake in the oven for about 20 minutes.
- Once cooked, allow the cookies to cool completely before storing them in an airtight container.
At Feeds‘n Needs, we know that your animals deserve the best, and we’re sure they will love these homemade treats!
Visit our blog section and explore more posts about animal health, advice, DIY’s and more: feedsnneeds.ca/experts-advice/

A Guide to Watering Pigs in the Summer
Ensuring your pigs have access to fresh drinking water at all times can feel like a never-ending challenge. These mud-loving animals are notorious for being able to tip over water troughs and buckets with their brute strength. How can you avoid this and be sure your pigs have clean water to drink 24/7? Our guide to watering pigs in the summer offers tips, tricks and products to keep your pigs cool and hydrated all summer!
Why Do Pigs Need Access to Water at All Times?
Did you know that pigs don’t have functional sweat glands? This means that instead of sweating, pigs must find other ways to keep cool to avoid heat stress and maintain healthy bodily functions. In the summer months, when the temperature may exceed 25 degrees Celsius, pigs can consume two times more water than they would on a cooler day. This is because the cool water helps them regulate their body temperature. Pigs love to roll around in mud and water because when they get wet, a process called “evaporative cooling” takes place, which helps the pig maintain a normal body temperature.
How Much Water Do Pigs Need Each Day?
How much water a pig needs to drink daily can vary based on several factors. Age, size, weather, and what the pig is eating are all things that need to be taken into consideration when it comes to swine water requirements. The chart below is a basic guide to pigs’ daily water requirements; however, our experts still recommend talking to your farm vet to help you determine your pigs’ water requirements.
")
Watering Systems for Pigs
Depending on how many pigs you have and how your farm is set up, there are several different ways to deliver constant fresh drinking water to your pigs. Let’s go over the best manual and automatic watering systems for swine:
Manual Watering Systems for Pigs – A manual watering system is something like a trough, bucket or tub that requires you to clean and refill daily. Whatever you use as a manual waterer must be durable and heavy so your pigs can’t damage or knock it over. The sides need to be low enough for the smaller pigs to be able to drink from but high enough to prevent mud or bedding from contaminating the water. Try placing a couple of cinder blocks at the bottom of your trough or tub to weigh them down and provide footing for any pigs who may accidentally fall in.
Automatic Watering Systems for Pigs – Automatic watering systems provide a continuous flow of drinking water for your pigs without the hassle of having to clean and refill a tub or trough. Pig water nipples and drinking cups are examples of popular and effective automatic watering systems that have animal-activated stem valves to ensure that your pigs are getting water when they need it without spilling everywhere and making a mess. These valves can be screwed into a garden hose and attached to the wall of your pig pen at a height of roughly two inches above where the shoulder of your smallest pig would reach. If your barn doesn’t have the option of running water through a hose, you can hook up your pig water nipples or cups to the side of a large plastic water barrel. You can even hook up your barrel to a rain barrel outside the barn to keep it filling automatically. Additionally, these auto waterers can be hooked up to large livestock tanks to provide water to pigs who may be on pasture.
Sometimes, all it takes are the right tools and a bit of creativity when it comes to pig watering solutions, so stop by your local Feeds’n Needs and chat with one of our Experts about which watering system may work best for your pigs. We’re here to help!
Be sure to check out our other blogs, where you’ll find helpful information on a wide range of topics!
feedsnneeds.ca/experts-advice/
Sources:
Keeping Pigs Cool in the Summer Heat (psu.edu)
How To Water Pigs: Equipment Tips, Winter Care & More – Hobby Farms
Water – Small Scale Pig Farming
The Easy Guide To Watering Your Pigs (qcsupply.com)

Calving Supplies Checklist
When it comes to the birth of new calves, things sometimes go differently than planned. From difficult labor and delivery to dealing with sick, cold newborns, when you’re expecting a pregnant cow to give birth, you need to be prepared for any scenario. Make sure your calving kit is fully stocked and ready to go prior to the due date of the first calf so that even if it’s born early, you’ll be prepared. Our calving supply checklist is a great guide to help you make sure you have everything you need this calving season!
Veterinarian Contact Information
If you plan to own and breed cattle, you’ll want to make sure you know who your local farm veterinarian is and keep their contact information on file in case of an emergency. It’s not uncommon for a cow to require assistance to deliver her calf; however, sometimes, if the farmer cannot get the calf out, a veterinarian must be called to the farm to perform emergency measures.
Notebook & Pencil
Keep a detailed record of important information, including breeding and due dates, so you have a rough idea of when to expect calves. Record newborn calves’ birth date, sex, birth weight, and any additional information such as the ID numbers of each cow and calf pair, whether or not a bull calf has been castrated, and any health issues noticed.
Calving Pen
Calving areas should be sheltered from cold weather, have clean straw or shavings for bedding, and ideally have a functional chute in case of emergencies requiring medical intervention. Make sure your calving pen has adequate lighting and keep a flashlight close by in case you need to inspect a cow or calf. Stock up on dust-free chopped straw or wood shavings at your local Feeds ‘n Needs.
Heating & Drying Sources
Since they are born covered in amniotic fluid, calves must be quickly dried and warmed up after birth to prevent them from developing hypothermia. A cow should be allowed to lick her calf clean after delivery; however, in cases of cold weather or if the mother does not clean her baby, have towels and blankets ready to dry the calf off and stimulate blood circulation. If a newborn gets chilled, have a warming box or other heat source like hair dryers and heat lamps ready to use to get the calf warm. Use a thermometer to keep track of calves’ temperatures, especially if they are sick or hypothermic. Always sterilize thermometers after use.
Gloves & OB Lubricant
Keep boxes of long and short disposable gloves to protect you and your animals from bacteria entering the body, and always change gloves between working with different animals. If a cow requires assistance delivering her calf, have lots of regular obstetrical lubricant on hand to lubricate the birth canal and your gloved arms to reduce friction and swelling. If your cow may require a C-section, avoid using J-lube to try and get the calf out, as it is toxic to the peritoneal cavity and will be fatal to the cow.
Halter, Rope & OB Chains
Ensure you have clean OB chains and handles ready in case you have to intervene and assist a cow during delivery. Additionally, have a halter and long rope prepared for laying down a cow to make delivery easier.
Disinfectant
A 7% iodine solution or chlorhexidine should be used to dip the calf’s navel after birth to keep it clean and disinfected. Additionally, you can add these disinfectants to a bucket or squeeze bottle of water to create wash water for cleaning the cow after delivery. Roll cotton soaked in this disinfectant water also works well to wash the cow.
Colostrum & Milk Replacer
The colostrum, or “first milk” a pregnant cow produces, is rich with antibodies and nutrients, which are vital for her calf to receive in the first 4 to 6 hours after birth. Calves should be standing and nursing on their own within 1 hour. Otherwise, you may need to intervene. If you are worried that a calf is not getting colostrum, or if you have a calf too weak to nurse on their own, frozen colostrum or dried colostrum mixed with warm water should be readily available to administer to the calf. Colostrum replacer products should contain a minimum of 100g of lgG per dose. Keep powdered milk replacer on hand for calves that will be bottle fed. Trust Feeds ‘n Needs to provide you with the best quality powdered colostrum and milk replacers to help your calves grow and thrive.
Feeding Supplies
A flexible stomach feeding tube and large syringe may need to be used to administer colostrum to weak or sick calves that are unable to suckle. Be sure to sterilize supplies between calves or keep a second stomach tube on hand to feed sick calves only. Additionally, keep bottle feeding supplies like calf bottles and extra nipples on hand to bottle feed calves that are stronger and able to suckle.
Needles & Syringes
Keep an assortment of sterile needles and syringes in your calving kit for administering supplements, vaccines, antibiotics, or other medications as per your veterinarian’s recommendation.
Use a bulb syringe to suction amniotic fluid out of newborn’s noses so they can breathe.
Injectables & Supplements
Administering supplements of the vitamins A, D, E, and selenium, as well as a mix of electrolytes for calves, is recommended for newborns. Our experts recommend the AVL Vitaferst-Care oral neonatal supplement for ruminants to give your calves the best start at life. Medications and vaccinations can be administered as per your veterinarian’s recommendation. Additionally, it’s always beneficial to keep scour pills or a prevention solution on hand in the event a calf develops scours and requires immediate treatment. If you do not have access to scour pills from your vet, we recommend administering Calf Renova at the first signs of diarrhea or Calf Perk to get a cold, weak calf to its feet after birth. Ask your local Feeds’ n Needs experts about product availability.
ID Equipment
Each head of cattle in Canada is required to have a registered CCIA tag before being transported from their farm of origin. These can be bought from an authorized dealer like your local Feeds ‘n Needs store. In addition to CCIA tags, you may want to tag your cattle with an on-farm ID tag, which should be done within the first few days of a calf’s life as cows sometimes swap calves, making future genetic selections inaccurate if calves were not tagged at birth. If you plan to give your calves tattooed ID numbers, ensure all your equipment is clean and in good working order.
Elastrator Rings & Tool
If you plan on castrating bull calves, you will need to make sure you have elastrator rings and the proper elastrator tool. Castration of bull calves is typically done between 1 week and 5 months of age. Be sure to record which calves are being castrated and which are not.
When it comes to calving, expect the unexpected and always be prepared. Stop by your local Feeds ‘n Needs to pick up some essential calving kit items so that you’ll be ready when the first calf arrives!
Disclaimer: Feeds ‘n Needs is not qualified to give medical advice or recommendations; please consult your veterinarian for any concerns, vaccine recommendations, etc.

Lambing Supplies Checklist
The arrival of new lambs can be exciting and busy, so the best way to guarantee a smooth lambing season is to ensure you are well-prepared in advance. In this blog, we will review the essential supplies that every shepherd should have on hand before the arrival of any lambs.
Notebook & Pencil
Have a notebook to record all contact between ewes and rams, and use a gestation table to calculate approximate due dates. Knowing roughly when to expect lambs to be born allows you to ensure you have all supplies on hand at least a week before due dates.
Use this notebook to keep track of other things, such as ewe and lamb ID numbers or colors, any health issues you have noticed, etc.
Lambing Pen
Ewes and their newborns should have an isolated pen away from the rest of the flock for the first several days after birth to allow a safe place for them to bond. The pen should be at least 5’ x 5’, and bedding should be kept clean and dry to prevent infection, especially after lambs are born.
Lighting
Keep bright flashlights or headlamps nearby if your barn does not have great lighting. If a lamb arrives at night, you’ll need a good light source to assist the ewe and her newborn.
Heat Sources
Newborn lambs are susceptible to hypothermia, so several methods to warm a chilled lamb can be vital to survival. Hair dryers, warming boxes, and heat lamps are all great ways to get a lamb warm after birth when used with caution. You can also place a lamb’s body in a plastic bag with its head sticking out and sit it in a warm water bath to quickly raise its body temperature without affecting its smell.
Digital Thermometer
Monitor lamb’s temperature to ensure it isn’t too cold or sick. A normal temperature for a lamb is 38.8°C to 39.4°C, if the temperature drops below 37.7°C, the lamb is hypothermic.
Towels and Paper Towel
Lambs are born covered in amniotic fluid which the mother ewe should clean off. While this is important for their bonding, you may need to assist the ewe and help get the baby dry using towels or paper towels to prevent the lamb from getting cold.
Bulb Syringe
The use of a bulb syringe may be required to suck any amniotic fluid out of a newborn lamb’s nostrils after birth to allow it to breathe.
Iodine Spray or Dip
Whether or not you decide to cut a newborn lamb’s umbilical cord using sterile scissors, the navel can serve as a pathogen pathway to a lamb, and it is vital that the area be kept clean. Use a 10% iodine spray or dip solution to keep the area disinfected, and make sure that the lambing pen has clean bedding.
Lubricant
Keep some OB lubricant on hand in case it’s needed. This can be helpful to lube up a thermometer, getting a lamb’s head unstuck during birth, or lubricating your arm and any needed birthing tools if the ewe requires help while giving birth.
Gloves
Keep boxes of long and short gloves to use when handling lambs and ewes to prevent bacteria from entering your body. Be sure to use different gloves when handling different sheep to avoid the potential spread of infection.
Colostrum & Milk Replacer
Lambs need to nurse during the first 24 hours of their life to receive the nutrients and antibodies from the ewe’s first milk, called colostrum. Before a lamb can nurse, you must strip the wax plug from the ewe’s teats and ensure her milk flows. If a lamb is rejected by its mother, or if you have a lamb that is too weak to nurse, have powdered or frozen colostrum that you can warm and feed to them as they must receive this vital colostrum within their first 8 hours of life. It is also a good idea to keep a lamb milk replacer on hand in case of a rejected lamb that may need to be bottle-reared.
Feeding Supplies
A flexible stomach feeding tube and large syringe can feed weak or cold lambs that can’t suckle on their own. Additionally, keep bottle-feeding supplies on hand, including lamb bottles and nipples, to feed stronger and able-to-suckle lambs, such as a triplet or rejected lamb.
Needles & Syringes
Have a variety of sterile needles and syringes to be used to administer any injectables or vaccines as recommended by your veterinarian.
Injectables & Supplements
Injectable vitamins A, D, and E with Selenium may be given after birth, as well as injectable antibiotics or vaccines per your veterinarian’s recommendation. Additionally, it can be beneficial to keep a propylene glycol solution on hand to help an exhausted ewe regain her energy after birth. This is especially helpful for ewes who have given birth to twins or triplets.
Elastrator Rings and Tool
If you plan on castrating ram lambs not intended for breeding, you will want to make sure you have elastrator rings and the appropriate elastrator tool to castrate within the first week of the ram’s life. The same rings and tool can be used to dock a lamb’s tail. Unless you plan on leaving your lambs with their natural long tails, they will need to be docked within the first few days of their lives.
ID Tags & Applicator
Animals intended to be sold and shipped must have registered CCIA tags which can be purchased from an authorized dealer. You may also want to tag your lambs using a different tag to use as an on-farm ID. Use your notebook to keep track of animal ID’s!
Marker Crayons or Spray
Identify your animals more easily by marking your ewes and lambs with colored ID-marking crayons or sprays. Use this method to keep track of twin lambs, mother and lamb pairs, banded ram lambs, etc. Keep notes of your ewes and their lambs in your notebook.
Get prepared for lambing season with a trip to your local Feeds ‘n Needs! Our stores carry a variety of essential supplies to ensure that you can be well-prepared for the arrival of new lambs! Our Experts will be happy to help you find what you need!
Disclaimer: Feeds ‘n Needs is not qualified to give medical advice or recommendations; please consult your veterinarian for any concerns, vaccine recommendations, etc.
Livestock Bedding Options
When it comes to providing your livestock with bedding, making sure it’s clean, absorbent and comfortable is a must. There are several options for materials that you can use to place under your animals in their enclosure to ensure overall well-being. Organic materials are usually best, as they contain lower levels of bacteria counts, resulting in better air quality and less discomfort (and will consequently result in less sores and other harmful ailments). While the type of flooring, animal breed and population density of animals in the enclosure matter when choosing the right bedding, here are a few good organic options to consider when making an informed decision for your furry friends.
Vegetable Litter for bedding
Plant litter is arguable the least harmful option for the environment, as it’s ecological and biodegradable and can be a great solution for your poultry flock! It’s mainly composed of natural elements, like wood chips, hay or pellets and is mainly used for animal enclosures.
Ripe wood
If you opt for a wood-based litter, it’s recommended to use soft wood that’s specially treated for composting purposes if you want better absorption quality. Like wood shavings, which are both absorbent and comfortable for farm animals. An interesting aspect of plant litter is that it doesn’t produce much dust, which benefits the respiratory health of the animals.
Hay and straw
Hay or straw are also materials used to create bedding for farm animals. Hay is cut and dried legumes and or grasses and is commonly used for feed, but lower qualities of hay are great for bedding purposes. Ensuring the quality of the hay is not palatable so animals don’t consume it.
If you’re considering using hay or straw, it’s important to know that there’s a bit more upkeep required due to the lower levels of absorbency than some other litter options. Another thing to consider is to ensure the quality of the hay or straw is older and dry when you are spreading it, as old hay may give off dust, resulting in potential respiratory damage in animals. When they have a high level of humidity, the risk of mold increases which rapidly grows bacteria that can be harmful to your animals.
Peat moss
Within the vegetable little category, you can also find peat moss as an option. This type of litter is becoming increasingly popular, as it tends to be more absorbent than wood or hay and it helps eliminate the amount of flies in facilities. Peat moss has a controlled PH, which helps to reduce odors and the amount of ammonia in the litter. This bedding has even been known to help improve areas of animal health, including udders, legs and airways.
Sources:
https://monvet.com/fr/fiche-informative/85/differentes-sortes-de-litieres
https://www.zoomalia.com/blog/article/quelle-litiere-choisir-pour-mon-chat.html
https://fr.wikipedia.org/wiki/Liti%C3%A8re
https://ag.umass.edu/sites/ag.umass.edu/files/fact-sheets/pdf/Bedding%2008-05.pdf
https://www.meunerievicto.com/fr/
https://www.meunerieacadienne.com/quoi-mettre-dans-les-enclos/
