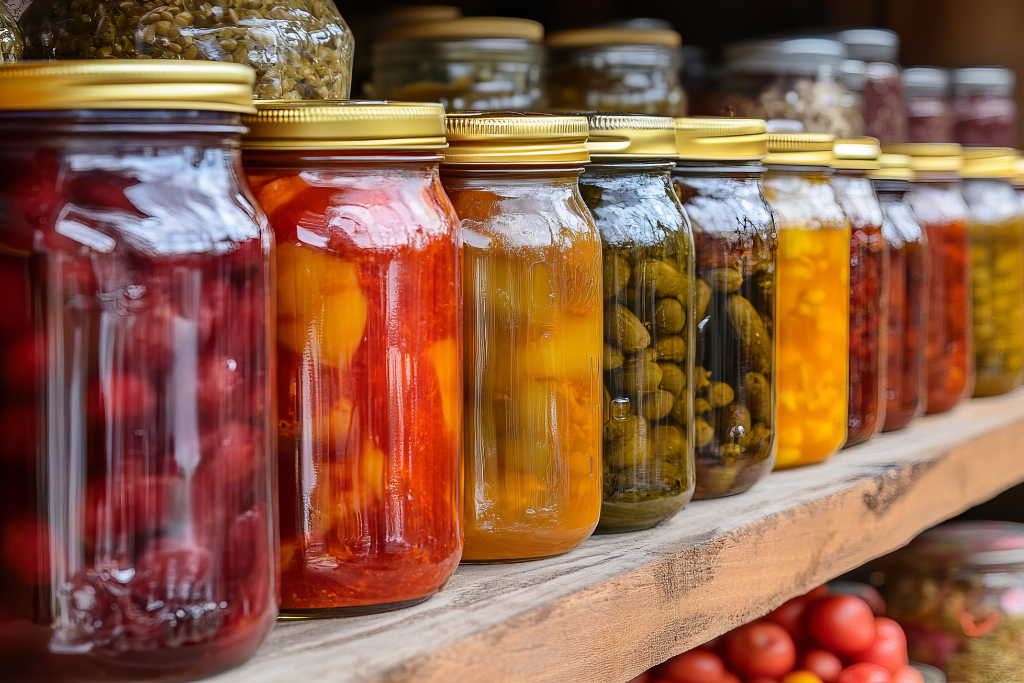
Canning is a fantastic way to preserve your garden harvest and enjoy fresh-tasting vegetables all year long. If you’re new to the process, starting with easy, reliable options can make your first season a success. Here are ten of the best vegetables to can for beginners that taste just as good months later as the day you packed them.
- Asparagus – Tender asparagus is a spring favorite that cans surprisingly well. Start with fresh, firm stalks, trim them to fit your jars, and blanch before packing. Whether you add them to salads, stir-fries, or snack straight from the jar, you’ll be glad you preserved them when winter rolls around.
- Beets – With their rich color and earthy flavor, beets are as beautiful as they are delicious. Leave a bit of stem and root when boiling to keep juices in, then slip off the skins before canning. They can be preserved whole, halved, or quartered, making them perfect for salads, side dishes, or snacking.
- Carrots – Crisp, sweet carrots hold their texture wonderfully after canning. Simply wash, peel, and cut them into slices or chunks. They’re great for soups, stews, or quick side dishes—and pulling a jar off the shelf is much easier than peeling fresh ones on a busy night.
- Corn – Fresh corn is hard to beat, and canning lets you keep that summer flavour on hand. Cut the kernels from the cob without scraping too close (to avoid tough bits) and pack them for year-round use in chowders, casseroles, and side dishes.
- Cucumbers – Cucumbers are a classic canning choice—especially for pickles. Small ones stay crisp, while larger cucumbers can be sliced into spears or rounds. With the right brine, you’ll have tangy, crunchy pickles that brighten any meal.
- Green Beans – Whether you prefer them whole or cut into bite-sized pieces, green beans are a canning staple. Just snap off the ends, rinse, and pack them in jars. They stay tender yet firm, making them a reliable side dish straight from the pantry.
- Peas – Peas might not be the first vegetable you think of for canning, but they’re a hidden gem. Shell and blanch them to lock in their bright green color, then preserve them on their own or as part of a mixed vegetable blend. Their sweet pop adds flavour to soups, stews, and salads.
- Peppers – From sweet bells to spicy varieties, peppers are versatile and full of flavor. Blister or boil them to remove skins before canning. Small peppers can be left whole, while larger ones work well halved or sliced for quick fajitas, pasta, or stir-fries.
- Tomatoes – Tomatoes are practically made for canning. Use them for sauces, soups, stews, or salsa. Blanch to slip off the skins, then choose your style—whole, diced, or puréed. Season with herbs like basil or garlic for ready-to-use flavor boosters.
- Radishes – Not just for salads, radishes shine when pickled. Their peppery bite mellows into a tangy, slightly sweet crunch that’s perfect for tacos, sandwiches, or charcuterie boards. They’re quick to grow, easy to prepare, and add something unique to your pantry lineup.
Start small and build your skills each season. With just a few jars of each of these vegetables, you’ll be stocking your pantry with homemade goodness—and you might find yourself looking forward to canning season as much as the harvest itself.

New Year’s Resolutions for Pets
We’re officially into 2025, and many of us are working hard to stick to our New Year’s resolutions. Changing out habits for self-improvement can be for more than just humans. Pets benefit just as much from setting goals for their health, happiness, and well-being.
Why Are Setting Resolutions for Pets Beneficial?
Like us, our pets need focus and attention on their health and wellness. Creating resolutions for them is a great way to monitor and improve their overall well-being, from diet to dental care and physical activity. These resolutions help keep your pets physically healthy and strengthen the emotional connection between you and your furry friend.
Dental Hygiene: Keep Those Teeth Sparkling!
Dental hygiene is a critical part of your pet’s overall health. Just like humans, dogs (and cats!) can develop plaque and tartar on their teeth. Left untreated, it can lead to painful gum disease and even tooth loss. Thankfully, there are plenty of ways to help prevent dental issues in pets. Not all pets enjoy getting their teeth brushed, but there are alternatives, such as dental treats, oral care food, and water gels, that help maintain your pet’s oral health.
A dental exam at the vet is the first step in creating a healthy oral care plan. If your pet needs a professional cleaning, your vet will help set that up, and from there, you can establish a home care routine to maintain their pearly whites. Remember, healthy teeth lead to a healthier pet overall!
Exercise: Keep Them Active and Fit
Just like humans, pets can experience joint issues, reduced mobility, and a shorter lifespan due to being overweight. Exercise should be a priority in your pet’s New Year’s resolutions.
Regular walks, playtime, and outdoor adventures are not only fun but essential for your pet’s overall health. Whether it’s chasing a ball in the backyard or going for a daily stroll around the block, exercise helps maintain a healthy weight and supports joint health. Start slowly and gradually increase their activity level, especially if they’ve been less active during winter.
Diet: Nourish Their Bodies the Right Way
It’s easy to spoil our pets with extra snacks and table scraps, but this can lead to unwanted weight gain and long-term health issues. Overweight pets are at a higher risk of heart disease, diabetes, and even certain cancers. One of the best ways to combat this is by providing a balanced diet.
Stick to a high-quality pet food, if you are unsure where to start, the Expert at Feeds’n Needs can help you find the right food for your pet.
Nutrition: Boost Their Health with Supplements
Ensuring your pet’s diet is nutritionally balanced is key, but you can take their health a step further by adding supplements to their daily routine. Products like Thrive supplements can support various aspects of your pet’s health, from digestive health to joint support, skin and coat issues, and more.
By incorporating the right supplements, you can enhance their diet and make sure they’re getting the nutrients. If you’re unsure where to start, stop by Feeds’n Needs and chat with one of our Experts who can recommend the best supplements for your pet’s specific needs.
When making changes to your pet’s routine, it’s important to start slow. Abrupt changes can be stressful for your pet, so allow them time to adjust. Whether introducing a new food, adding supplements, or starting a new exercise routine, gradual changes will ensure a smooth transition and greater success in maintaining these new habits.
Make 2025 a year of health and wellness for your furry friends, and enjoy the journey together. After all, a healthy pet means a happier, more active life for both of you!
Let’s make this year the best one yet—for you and your pets!

Gift Guide for Homesteaders
Looking for the perfect Christmas Gifts? Feeds’n Needs has a great selection of gifts for everyone on your list! Here are some of our top ideas:
Books – Farmer’s Almanac, gardening books, recipe books, and how-to books, you’ll be sure to find the perfect option!
Canning & Preserving Supplies – Mason jars, lids, and fermentation kits so that someone on your list you’re shopping for can preserve the foods they grow!
Seed-Starting Supplies – Help them prepare for the upcoming growing season by gifting them seed-starting supplies! Plant pots, trays, starter soil, peat pellets, plant markers, etc.
Sprout Growing Kit – For greens all year long, you can’t go wrong with sprouts. Healthy and packed full of nutrients, sprouts are both easy and fun to grow, so get them started with a sprout starter kit!
Vesey’s Seeds – The gift that keeps on giving! Gift them high-quality Vesey’s seeds this Christmas.
Gardening Supplies – Gardening gloves, tools, a soil test kit, a rain gauge, etc. Useful gifts they’ll surely appreciate!
Beekeeping Starter Kit – Bees play a vital role in fertilizing the plants we grow, and their by-products can be used for all sorts of things! If someone on your list is interested in beekeeping, a starter kit could be the perfect gift for them!
Farm Décor – Chicken coop signs, farm style décor, garden flags, door mats, and so much more will make perfect gifts for the homesteader in your life!
Walton Wood Farm Products – Consciously crafted, natural beauty and personal care products make the perfect gift for any hard-working homesteader to relax and pamper themselves!
Rescue Coffee – Premium, fair trade, organic coffee for a good cause! With each bag purchased, 10% of the profits go towards helping local shelter animals. Available in multiple delicious flavours.
Coffee Mug – Pair a new mug with a bag of rescue coffee, and you’ve got a perfect gift for the coffee lover on your list!
Apron – A great gift for the homesteader who loves to cook and bake!
Egg Basket – An excellent tool for the chicken farmer in your life. Egg baskets make egg collection easy with less risk of breaking eggs!
Feeds’n Needs Gift Card – Not sure what they would like? Why not give them a gift card to Feeds’ n Needs?!
Visit your local Feeds’n Needs to find the perfect gift for everyone on your list!

Homemade Cranberry Sauce Recipe
Here’s a quick and easy recipe for delicious homemade cranberry sauce! Whether hosting a holiday dinner or just bringing a side dish, this sauce made with fresh whole cranberries will surely impress. Check out the recipe below!
Ingredients:
⅔ cup sugar
⅓ cup light brown sugar, tightly packed
⅓ cup water
⅔ cup orange juice
12 oz cranberries rinsed and picked through — bad/bruised cranberries removed
Instructions
Combine sugars, water, and orange juice in a medium-sized saucepan over medium heat. Stir occasionally until sugars are dissolved, and bring to a boil.
Add cranberries and return to a boil.
Reduce heat to a simmer and continue to cook cranberries, stirring occasionally, 10-15 minutes or until all or most berries have burst (careful, there is some splatter) and the mixture is slightly reduced. The longer you cook your cranberries, the thicker your mixture will be, but it will also thicken up after standing.
Transfer the mixture to a bowl and allow it to cool for at least 20 minutes at room temperature.
Cover and refrigerate at least 2 hours before serving.
How Do You Make Cranberry Sauce Thicker?
When cooking your cranberry sauce, you can simmer it as long as needed after your berries burst until the desired thickness is reached. Remember that your sauce will seem runnier while it’s hot and thickens as it cools and sets.
Can Cranberry Sauce Be Made in Advance?
Yes! Cranberry sauce requires a minimum of 2 hours in the refrigerator to thicken and set properly. However, you can make this holiday side dish up to a week in advance. Just be sure to store it in an airtight container.
And that’s all there is to making homemade cranberry sauce. Enjoy!

Basics of Home Canning for Beginners
Canning is a great way to preserve the fruits and vegetables you worked so hard to grow all summer long from your Vesey’s seeds you bought at Feeds’n Needs! It offers a great way to stock your pantry for the fall and winter or to give delicious homemade gifts. Learn all about canning with our guide to basics of home canning for beginners!
What is Canning?
Home canning is a simple procedure of applying heat to food in a closed jar to prevent decay. By putting prepared food into home canning jars and sealing them with two-piece vacuum caps, you can eliminate exposure to air, which is one part of the decay process.
By heating the filled jars to the proper temperature, you eliminate another part: the spoilage microorganisms and inactive enzymes that break down food over time.
You’ll remove the rest of the air from the food and set the final seal by properly cooling the jars and allowing the lids to vent.
Ingredients
Use only the best, top-quality ingredients. Preserve fruits and vegetables at their peak ripeness. Ensure they are thoroughly cleaned and scrubbed to remove any excess dirt or chemicals.
When canning jams, canning jellies, and other high-acid foods like fruits, fruit juices, tomatoes with added acid, pickles, relishes, chutneys, sauces, vinegar, and other condiments, process them at 212°F. This means you can use a water bath canner for them. Water bath canning is a basic method that involves putting your jam or pickles in a sterilized canning jar. Put the jars into the pot and cover them with at least one to two inches of water. Bring them to a boil, up to 212°F (100°C) and keep the jars at the boil for a specified amount of time, depending on your recipe.
You can pickle all sorts of vegetables with the water bath method, but you need to use an approved recipe. Ensure that the acid you use (like vinegar, citric acid, or lemon juice) reduces the pH to a safe level for whatever food you pickle.
Recipes and Instructions
Follow only current and tested home canning recipes that include the appropriate processing method for the canned food type. Also, follow the canning jar manufacturer’s directions for preparing home canning jars and two-piece vacuum caps.
How to Can
After following the processing directions in the recipe, fill the hot jar with the processed food, leaving the recommended headspace.
Remove air bubbles by sliding a non-metallic spatula between the jar and the food. Then, press gently on the food to release the trapped air. Repeat around the circumference of the jar.
Wipe the rim and threads of the canning jars with a clean, damp cloth. Center the heated lid on the jar. Screw the band down evenly and firmly until you meet resistance (fingertip tight).
After processing, remove the jars from the canner with a jar lifter and set them upright on a towel to cool. Never re-tighten the bands or check the lids for a seal while the jars are still hot.
After 24 hours, check the lids for a seal. Sealed lids curve downward. Press the center of the lid to ensure it does not flex up or down. Reprocess or refrigerate any unsealed jars.
Remove the bands from the sealed jars. Wipe the jars with a clean, damp cloth and dry them off. Wash the bands in soapy water, dry them, and store them away.
Storage
Label and store your jars in a cool, dry, dark place.
Now that you have home canning basics down start with a small project! It will be as fresh and delicious as the day you canned it. For the best quality, use home canned foods within one year.

Strawberry Rhubarb Jam Recipe
A perfect recipe for beginners!
You’ll be spoiled for life once you try this fabulous Strawberry Rhubarb Jam! You can enjoy it on toast, biscuits, scones, ice cream, yogurt… It will be a hit with all your friends and family.
If you’ve never made jam before, this Strawberry Rhubarb Jam is the best place to start. It’s super easy and doesn’t require any canning knowledge. Check out our recipe below:
Ingredients:
5 – 7 cups Rhubarb
1 – 2 cups Strawberries
½ cup Honey
1 ½ cups Granulated Sugar
2 packages of Strawberry Jello
1 cup Water (optional)
Finely chop fruit. Add honey and sugar. Leave in the fridge overnight. Boil on the stove with packages of Jello and water for 20 minutes, until thick.
Place in jars. Cool. Freeze. When using, keep refrigerated for up to 6 weeks.
Tips:
Adjust the sugar amount to taste if you like your jam to be sweet or if you like it to be more tart. Optionally, use 1 cup of water for a smoother spreading jam.

How Long Are Farm Fresh Eggs Good For?
Nothing is better than fresh eggs straight from the coop, but how long are farm fresh eggs good for? Several factors influence the freshness of eggs and their shelf life, so whether you’re just starting out raising chickens or an experienced homesteader, we’re here to fill you in on the knowledge and techniques you’ll need to determine whether or not the eggs you’ve collected are fresh and safe to eat.
How to Properly Clean Eggs:
Did you know that eggs have a natural protective coating over them called a bloom? This coating seals the pores of the egg, preserving its freshness and preventing harmful bacteria like salmonella from getting inside. This is why it’s important to be careful when cleaning your eggs. If the egg is relatively clean when collected, you can brush off dirt or debris with a dry cloth or brush, and if the eggs are quite dirty, gently rinse them under cool water with your hands. When eggs are cleaned excessively, it gets rid of dirt and bacteria, but also strips away the protective coating. Once the protective coating is gone, the eggs become more susceptible to contamination, and their shelf life is shortened.
How Long Can You Store Eggs?
Refrigerated Eggs Shelf Life – Because they are so sensitive to temperature and humidity fluctuations, eggs should be stored in a cool spot in your refrigerator where the temperature is below 7 degrees Celsius. If stored correctly in the fridge, farm fresh eggs can be stored for up to 6 weeks.
Unrefrigerated Eggs Shelf Life – Since warm temperatures will make eggs go bad faster, store your eggs in a cool area with no direct sunlight. Unrefrigerated eggs that are stored properly can stay fresh for up to 2 weeks.
Always label eggs with the date they were collected, that way you have a rough idea of how fresh they are and when they should be discarded.
How to Test if an Egg is Fresh
There are a few simple ways to test the freshness of an egg, you can do these tests right after collecting eggs or before you use them:
Float Test:
- Place your egg in a bowl of cold water.
- If the egg sinks to the bottom and lies horizontally, it’s very fresh and safe to eat.
- If the egg floats a bit or stands vertically, it’s past its peak freshness but is still edible.
- If the egg floats to the surface, the egg is old and should be thrown out.
Visual Inspection:
- Check for any cracks or powdery mold on the shell – Discard the egg if it’s cracked or moldy.
- Crack the egg open – Fresh eggs have thick, firm egg whites, plump, round yolks, and very little spreading. Old eggs will have flat yolks and watery egg whites and may not be safe to consume.
- If the shell is thin or brittle, it means that egg didn’t get enough calcium while being formed. Since these shells are weak, they are easily contaminated and shouldn’t be eaten.
Smell Test: Fresh eggs should have little to no smell when cracked open. Old eggs may have a strong, sulfurous odor. If your egg smells rotten, throw it out.
It’s essential to understand the importance of taking the proper precautions when handling and storing eggs to prevent foodborne sickness. A good rule of thumb when testing an egg to determine freshness is “When in doubt, throw it out.”
Visit our experts in store if you have any questions and be sure to check out our selection of poultry supplies and feed while you’re there!
For more expert advice on all things poultry and homesteading, check out our blog:
How to Introduce New Chickens to Your Flock
Hens Health Throughout the Seasons
Predator Proofing Your Chicken Coop

Easy Easter DIYs Using Eggs
Springtime is all about bright colors, new beginnings, and creativity. What better way to welcome the season and have some Easter-themed fun than decorating eggs? This blog provides a step-by-step guide to making three easy Easter crafts that the whole family will love!
Blowing Eggs
Before starting any of our Easter egg DIYs, you’ll need to remove the yolks from all the eggs you’ll be working with.
What You’ll Need:
- Eggs
- Pin (you can also use a needle or sharp metal skewer)
- Cocktail stick or wooden skewer
- Paper clip (optional)
- Bowl
Step 1: Using your pin or needle, carefully poke a hole in the top and bottom of your egg. Gently insert your cocktail stick or skewer into the hole to gradually increase its size. The hole in the bottom of the egg needs to be big enough for the yolk to pass through, but be careful not to crack the egg in the process.
Step 2 (Optional): Use a straightened paper clip to “stir” the yolk inside the egg, making it easier to blow through the hole you made.
Step 3: Hold your egg over a bowl and blow as hard as you can into one of the holes in your egg. The yolk should start coming out the other end. You won’t need the yolk for these projects, but you can set them aside to use for cooking later!
Step 4: Now that the yolks are out of the eggs, rinse them under hot tap water to remove any residue. Once rinsed, leave the shells out to dry.
DIY #1 – Painting Eggs
Test your painting skills by getting creative with eggs! Paint stripes, patterns, splatters, and more! The design options for this DIY are endless!
What You’ll Need:
- Eggs with yolks blown out
- Acrylic paint
- Cocktail stick or skewer
- Paint brushes
- Sponge (optional)
Step 1: Insert a cocktail stick or skewer into the bottom hole of your egg to keep it away from your fingers while you paint.
Step 2: Use paintbrushes or a sponge to apply paint to your egg. Get creative with this part!
Step 3: Let the paint dry while your egg is still on the skewer by holding the skewer in a glass.
Step 4: Once your paint is dry, add a second coat to brighten the colors or add more designs! Leave your egg on the skewer until you are done painting and the egg is dry.
DIY #2 – Dyeing Eggs
Use food coloring or natural dyes with ingredients from around your home to create beautiful, dyed eggs that are the perfect Easter decorations! We will teach you how to dye eggs using food coloring for this DIY.
What You’ll Need:
- Eggs with yolks blown out
- Vinegar
- Food coloring (your choice of colors)
- Measuring spoons
- Kitchen tongs
- Paper towels
- Heat-proof bowls (one bowl for each color of food coloring)
- Crayons (optional)
Step 1: Prep your work area by laying down paper towels to prevent food coloring stains.
Step 2: To make your dyes, bring some water to a boil, then add 1 teaspoon of vinegar and about 20 drops of food coloring. The more food coloring you add, the more vibrant your dye color will be. Pour your mixture into a heat-proof bowl deep enough to dip your eggs in.
Step 3 (Optional): You can use crayons to create fun patterns and designs by drawing directly on the egg before you dye it. The dye pigment will not stick to the wax, so whatever you draw will stand out after you dip your egg!
Step 4: When you’re ready to dye your egg, use a pair of kitchen tongs to submerge the egg into your bowl of coloring. Make multicolor eggs, striped eggs, patterned eggs – You can be as creative as you want with this part!
Step 5: Remove your eggs from the dye using your kitchen tongs and set them out to air dry when finished.
DIY #3 – Jello Filled Eggs
This DIY project is a fun way to make a tasty treat that can also be a great April fool’s prank! You can paint or dye your eggs before you add the Jello to add to the fun and make this a 2-part project or leave them plain and give someone a surprise when their egg turns out to be Jello!
What You’ll Need:
- Eggs with yolks blown out
- Packets of Jello (Your choice of flavor)
- A fine pastry tip
- Egg carton
- Duct tape
Step 1: Use a small piece of duct tape over the hole in the bottom of your eggs to seal it closed, then place your eggs tape-side down back into the carton.
Step 2: Follow the instructions on the package to prepare your Jello mixture. Try making different flavors to add variety to your eggs!
Step 3: Once your Jello mix is ready, insert a fine pastry tip into the top hole of your egg and carefully pour the liquid Jello into the egg. Be careful not to overfill the egg, as the liquid will be hot.
Step 4: Once you’ve filled all your eggs, place the carton in the fridge to allow the Jello to set. This should take 2-3 hours.
Step 5: Once the Jello has set completely inside your eggs, open the shells and enjoy this tasty Easter treat!
Have fun and get creative this spring using everyday kitchen items and eggs from your own backyard! From all of us at Feeds ‘n Needs, we hope you try these Easter DIYs and have a great time making them!
Sources:
https://www.marthastewart.com/275626/egg-dyeing-101
https://www.marthastewart.com/266591/blowing-out-an-egg
Tapping Maple Trees for Sap
There comes a time of year when the days begin to get warmer, and hope for spring is in the air. After a long, cold winter, these are the days we look forward to. The snow begins to melt, and the sap starts to flow within the trees. For many families in Canada, tapping trees in the springtime is an eagerly awaited annual tradition and an easy and fun way to collect sap to make homemade maple goodies.
Getting Started
Generally, sap begins to flow when the daytime temperatures rise above freezing (0 Celsius / 32 Fahrenheit) and nighttime temperatures fall below freezing. Typically, the season runs for 4-6 weeks, from around mid-February to mid-March. Sap only flows on warm days, so you may not get any on colder days.
Tapping trees is a relatively straightforward process and only requires a few supplies to get started:
- Power drill & drill bit
- Spiles
- Sap buckets & lids
- Hammer
Some of our local Feeds’n Needs stores carry a great selection of quality sap supplies; be sure to check them out!
Before tapping trees each season, it is important to ensure your supplies are clean. A solution of 1 part unscented household bleach to 20 parts clean water can be used to clean your spiles, buckets, and lids.
Selecting Trees to Tap
When selecting which trees to tap, a maple tree with a high sugar content will produce the best sap for making syrup. Popular maple trees for tapping are sugar, black, red, and silver maples. Select healthy and mature trees with a diameter of at least 12″. Depending on the size, some trees can support more than one tap.
A general guide to follow when tapping trees:
- 12 – 20” = 1 tap
- 21 – 27” = 2 taps
- 27” = 3 taps
How to Tap Trees
Spile Placement: When tapping a tree, place your spile at least 3 feet from the ground and at least 6 inches away from any former tap holes. Tap above a large root or below a branch on the south side of the tree if possible, and if placing multiple taps on one tree, distribute the spiles around the tree’s circumference.
Drill a Hole: Most spiles require a 7/16 or 5/16 drill bit, but double-check to ensure that you use a drill bit that matches the size of your spile. Drill a hole about 2 to 2 ½ inches deep so that you hit the sapwood of the tree. Drill slightly upward to allow the sap to flow downward through your spile and into your bucket.
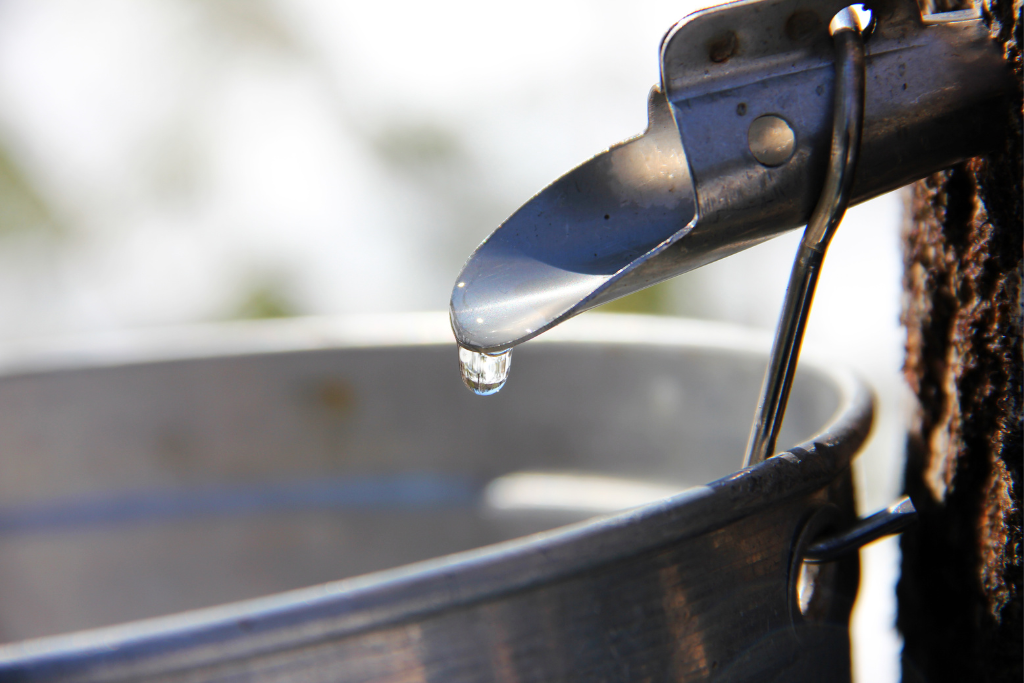
Insert Your Spile: Insert your spile into the tap hole you drilled. Then, gently tap the spile into place using a hammer so that it fits snugly within the hole. Once the spile is placed, you should begin to see sap start to drip or flow. Maple sap is clear and resembles water.
Hang Your Bucket: Hang your sap bucket by inserting the hook on the spile into the hole in the bucket’s rim. Attach a lid to prevent unwanted snow or debris from collecting in the bucket with your sap.
Sap can be collected until the temperature consistently stays above freezing or when buds begin to form on trees. Remove spiles and wash them to be stored for next season.
Once you collect your sap, keep it cold at 38 degrees Fahrenheit or 3.3 degrees Celsius until you boil it. Sap can be stored for up to 7 days at this temperature.
Now that you’ve learned how to tap trees to collect maple sap, you are well on your way to becoming an expert and enjoying this beloved Canadian tradition. Feel free to ask your local Feeds’ n Needs experts any questions you may have about tree tapping and sap collection. Be sure to check out our great selection of supplies to get you started!


