
How to protect animals, barns, feed and farm supplies before high winds, heavy rain and flash flooding arrive
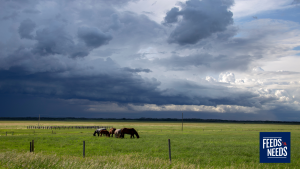
Hurricane season can bring powerful winds, storm surge, prolonged power outages and sudden flooding to farms across Nova Scotia, New Brunswick and Prince Edward Island. For livestock owners, equestrians and small-scale farmers, waiting until a storm is approaching can leave too little time to safely move animals, secure buildings or gather essential supplies.
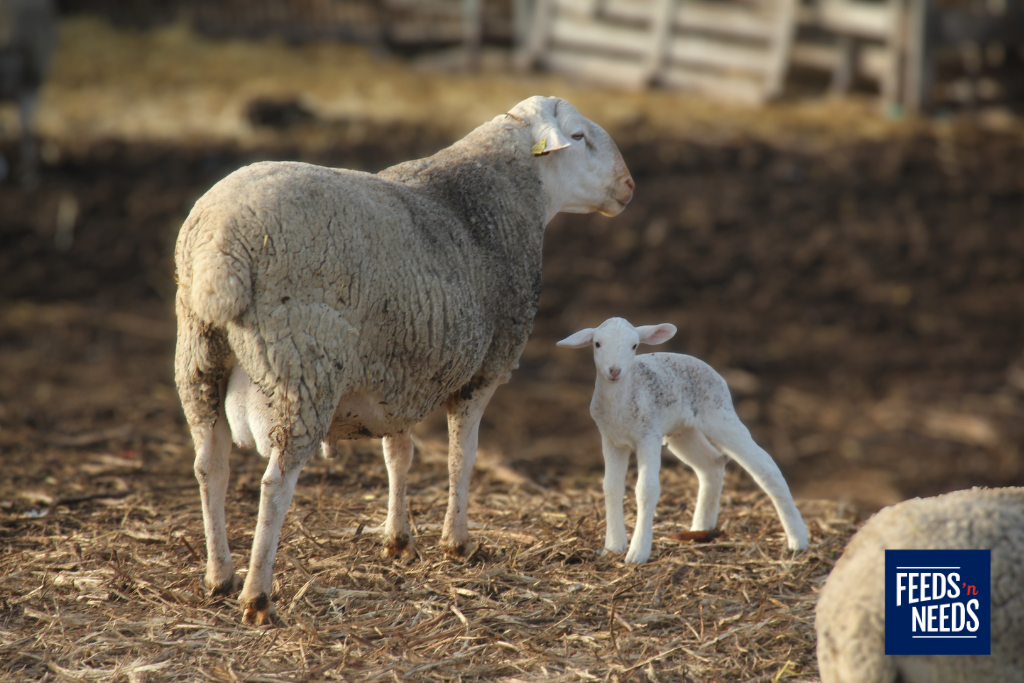
A practical farm hurricane preparedness plan can reduce confusion, protect livestock and help your operation recover faster. Whether you care for horses, cattle, sheep, goats, pigs, poultry or a mixed backyard flock, preparation should begin well before the first warning is issued.
Why Atlantic Canadian farms need a hurricane plan.
Maritime weather can change quickly.
A hurricane or post-tropical storm may produce several hazards at once:
- High winds that damage barns, fencing and shelters
- Falling trees and airborne debris
- Heavy rainfall and flash flooding
- Storm surge in low-lying coastal areas
- Washed-out lanes, culverts and access roads
- Extended power, pump and communication outages
- Contaminated wells, pasture and feed
- Frightened animals that may escape through damaged fencing
Every property has different risks. Begin by identifying low-lying fields, waterways, weak structures, aging trees, flood-prone roads, and areas where animals could become trapped.
Agriculture and Agri-Food Canada recommend maintaining a written emergency plan, farm map, livestock inventory, animal identification information and records of feed, equipment, hazardous materials and vaccinations. Review its emergency-planning guidance for producers here: Emergency planning is for producers too – agriculture.canada.ca
Create a livestock evacuation plan before the storm.
Decide in advance whether your animals will shelter on the farm or evacuate. This decision may depend on the storm’s projected path, local flood risk, road conditions, available transportation, and the strength of your buildings.
Your plan should answer the following questions:
- Where will each group of animals go?
- Is the destination on higher ground and outside the expected flood area?
- Are trailers and hauling vehicles ready?
- How many trips will be required?
- Who is available to help catch, load, and transport animals?
- Which evacuation routes and alternate routes can accommodate a trailer?
- Where will animals be housed if they cannot return immediately?
- Who will make the final decision to evacuate?
Never wait until water is rising or winds are severe to begin moving livestock. Trailers can become unsafe in strong crosswinds, and flooded roads may conceal washouts, debris, or damaged culverts. Follow instructions from local emergency officials and never drive through floodwater.
Practice loading animals before hurricane season; An emergency is not the time to introduce a horse, cow, sheep or goat to a trailer for the first time.
Prepare halters, leads and handling equipment
Reliable handling equipment can make evacuation faster and safer. Keep emergency supplies together in a clearly marked, easily accessible location—not buried at the back of a tack room or locked inside a building that could become unsafe.
For horses and suitable livestock, prepare:
- Properly fitted halters
- Strong lead ropes
- Spare halters in multiple sizes
- Livestock ties or trailer ties appropriate for the animal
- Quick-release hardware where appropriate
- Stable hooks and safe hanging hardware
- Livestock panels or portable gates
- Flashlights and headlamps
- Work gloves and sturdy footwear
Inspect every halter before storm season. Look for frayed webbing, stretched holes, rusted hardware, loose stitching and damaged snaps. Buckles should fasten securely, and the halter should fit closely enough that it cannot easily slip off without restricting breathing or movement.
Label halters and lead ropes with the owner’s name, phone number and the animal’s identification. Waterproof luggage tags, livestock markers or securely attached identification tags can help reunite an animal with its owner if fences fail or animals are displaced.
Do not leave an ordinary halter on an unattended animal unless your emergency plan specifically requires it and it can be done safely. Halters may catch on fencing, branches or barn hardware. Stage fitted halters where they can be reached quickly and consider breakaway options when appropriate. Ask your veterinarian or an experienced livestock professional for your species and setup.
Feeds’n Needs carries practical farm and stable essentials such as halters, lead ropes, ties, buckets, stable hooks and livestock-handling supplies to help owners prepare before severe weather arrives. Product availability may vary by store.
Identifying every animal
Visible identification is especially important when high winds or flooding can damage fences.
Depending on the species and provincial requirements, identification may include:
- Ear tags
- Tattoos
- Microchips
- Leg bands
- Halter tags
- Livestock-safe temporary marking
- Waterproof contact information attached securely to a suitable collar or halter
Keep current photos of horses and livestock, including distinguishing markings. Store digital and printed copies of ownership records, registration papers, health information, medications and vaccination records.
Maintain an updated list of animal numbers by species, pasture, and building. Ensure that another trusted person knows where the records are kept.
Reduce the risk from flash flooding
Flash flooding can rise quickly and cut off access to barns, pastures, and roads. Move animals away from flood-prone fields, riverbanks, drainage channels, and low-lying buildings before heavy rain begins.
Avoid locking animals inside a structure that is likely to flood. At the same time, do not release animals onto roads or unfamiliar land. The safest choice depends on the property, predicted conditions and available shelter, which is why planning with your veterinarian, municipality and local emergency officials is essential.
Before the storm:
- Clear safe drainage routes without entering unstable ditches
- Move portable equipment and supplies to higher ground
- Raise bagged feed, bedding and medications off the floor
- Relocate fuel, chemicals and pesticides away from flood risk
- Secure manure storage and waste areas
- Check culverts, lanes and alternate access points
- Move tractors and generators to secure, elevated locations
After flooding, treat standing water, submerged feed and wet bedding as potentially contaminated. Do not allow livestock to drink from floodwater. Inspect wells and water systems and follow provincial guidance before resuming use if contamination is suspected. The Government of Canada advises residents to understand their local flood risk and follow directions from emergency responders and officials. Read Canada’s flood-preparedness guidance.
Secure barns, coops and farm property
High winds can turn loose equipment into dangerous debris. Walk the property before the weather deteriorates and secure or move:
- Feeders and water tubs
- Wheelbarrows and tools
- Garbage cans and empty barrels
- Portable shelters
- Gates and livestock panels
- Patio furniture and signs
- Tarps and temporary fencing
- Trailers and small equipment
Inspect roofs, doors, windows and siding. Repair loose metal, damaged latches, and weak hinges. Store chemicals, medications and fuels in secure locations, following their handling and ventilation requirements.
Remove dead branches where it is safe to do so but leave major tree work to qualified professionals. Identify large trees that could fall across barns, fences, power lines, or evacuation routes.
Protect feed, hay, bedding and clean water
A hurricane can disrupt deliveries and electricity for several days. Maintain an emergency supply of feed, forage, bedding, and water based on the needs of your animals and the realistic length of a local outage.
Store feed in waterproof, animal-resistant containers. Keep bagged products on pallets or shelving and away from walls where moisture may enter. Inspect the hay-storage area for roof leaks, blocked drainage, and wind exposure.
Discard feed or hay that has been contaminated by floodwater, fuel, chemicals, mould or sewage. When in doubt, consult your veterinarian, feed specialist or provincial agriculture authority before feeding it.
Water planning is equally important. Calculate how much your animals require each day, including extra water for cleaning and heat. Fill approved water containers before the storm and keep buckets and tubs clean and ready.
If your farm relies on an electric well pump, establish a backup water plan. Generators must be operated outdoors and well away from doors, windows, barns and occupied spaces to prevent deadly carbon monoxide exposure. Never connect a generator to a building electrical system without approved transfer of equipment installed by a qualified electrician.
Assemble a farm emergency kit
Keep supplies in waterproof, clearly marked containers that can be loaded quickly.
A livestock and small-farm emergency kit may include:
- Halters, leads and suitable livestock ties
- Feed and water buckets
- Stable hooks and hanging hardware
- Portable fencing supplies
- Livestock identification supplies
- First-aid supplies recommended by your veterinarian
- Several days of essential medications
- Flashlights, headlamps and batteries
- Battery-powered radio
- Charged power banks
- Work gloves and rain gear
- Basic hand tools
- Fire extinguishers
- Paper farm maps and evacuation routes
- Animal records and emergency contacts
- Feed, forage, bedding and potable water
Check the kit at the beginning of hurricane season and replace expired medications, damaged equipment and dead batteries.
Build an emergency contact list
Keep printed and digital copies of contact information for:
- Your veterinarian
- Local emergency management office
- Provincial emergency alerts
- Fire department and police
- Trailer owners and livestock transporters
- Nearby farmers and trusted neighbours
- Feed and farm-supply store
- Temporary boarding locations
- Insurance provider
- Electric utility
- Fuel supplier
Assign responsibilities to family members, employees, and neighbours. Everyone should know who monitors alerts, who handles each group of animals, who prepares the trailer, and who shuts down utilities if authorities advise doing so.
Inspect animals and property after the storm
Wait for officials to confirm that it is safe before returning to an evacuated property. Watch for downed power lines, unstable buildings, sharp debris, washed-out ground and displaced wildlife.
Check animals for:
- Cuts, punctures or swelling
- Lameness
- Breathing difficulty
- Signs of stress or shock
- Dehydration
- Reduced appetite
- Diarrhea or digestive upset
- Exposure to contaminated water or feed
Contact your veterinarian if an animal is injured, behaving abnormally or may have consumed contaminated material.
Before returning livestock to a field, walk the entire fence line and inspect gates, posts, wire, water sources and footing. Photograph damage before beginning cleanup when it is safe, particularly for insurance records.
Prepare now, not when the wind begins
Atlantic Canadian farmers are accustomed to changing weather, but hurricanes and post-tropical storms can test even experienced operations. A written plan, safe evacuation route, reliable animal identification and well-maintained handling equipment can make a critical difference.
Visit your local Feeds’n Needs before severe weather arrives to prepare your farm emergency kit and stock up on available stable accessories, halters, lead ropes, buckets, hooks, livestock-handling supplies, feed and bedding.
Preparation protects more than property, it protects the animals and people who depend on your farm.
 Hay Storage & Hay Quality Guide for Fall: How to Inspect, Store & Protect Your Hay for Winter in Atlantic Canada
As summer winds down, many livestock and horse owners shift their focus toward one of the most important jobs of the season—preparing hay for fall and winter.
Whether you’re feeding a few backyard sheep, a small family horse barn, or a commercial cattle operation, the quality of the hay you store this fall will directly impact the health of your animals throughout the winter months.
Atlantic Canada’s unpredictable weather brings unique challenges. Late summer humidity, hurricane season, and early fall rain can quickly turn quality hay into wasted feed if it isn’t stored correctly.
Here’s how to evaluate your hay, improve storage conditions, and ensure your livestock have a safe, nutritious feed supply all winter long.
Why Hay Quality Matters
Hay isn’t just filler—it’s often the primary source of fiber and nutrition for livestock throughout the winter.
Poor-quality hay can result in:
- Weight loss
- Reduced milk production
- Lower body condition
- Increased feed waste
- Respiratory issues from mold or dust
- Digestive problems
Taking the time to inspect your hay now can prevent costly problems later in the season.
Step 1: Evaluate Your Current Hay Supply
Before purchasing additional hay, take inventory of what you already have.
Ask yourself:
- How many bales remain?
- Are they dry and well stored?
- Has any hay become moldy or weather damaged?
- Will your current inventory last until spring?
Many producers underestimate winter feed requirements.
As a general guideline, horses and livestock consume approximately 2–3% of their body weight daily in forage, depending on species, age, workload, and production stage.
If your numbers look tight, now is the time to secure additional hay before supplies become limited.
Step 2: Check Every Bale
Not all hay is created equal.
When evaluating square or round bales, inspect for:
- Color: Good hay should remain green to light green. Excessively brown or faded hay may have lost valuable nutrients.
- Smell: Quality hay has a fresh, sweet smell.
Avoid hay that smells: Musty, Sour, Damp, Mold; These are signs moisture has entered the bale.
- Texture: Hay should feel dry and springy—not wet or slimy. Overly dusty hay can contribute to respiratory irritation, especially in horses.
- Watch for Mold: Never feed moldy hay. Mold spores may not always be visible but can seriously affect horses, cattle, goats, sheep, and other livestock.
Look for:
- White or grey fuzzy patches
- Black discoloration
- Excessive heating
- Damp pockets within round bales
When in doubt, don’t feed questionable hay.
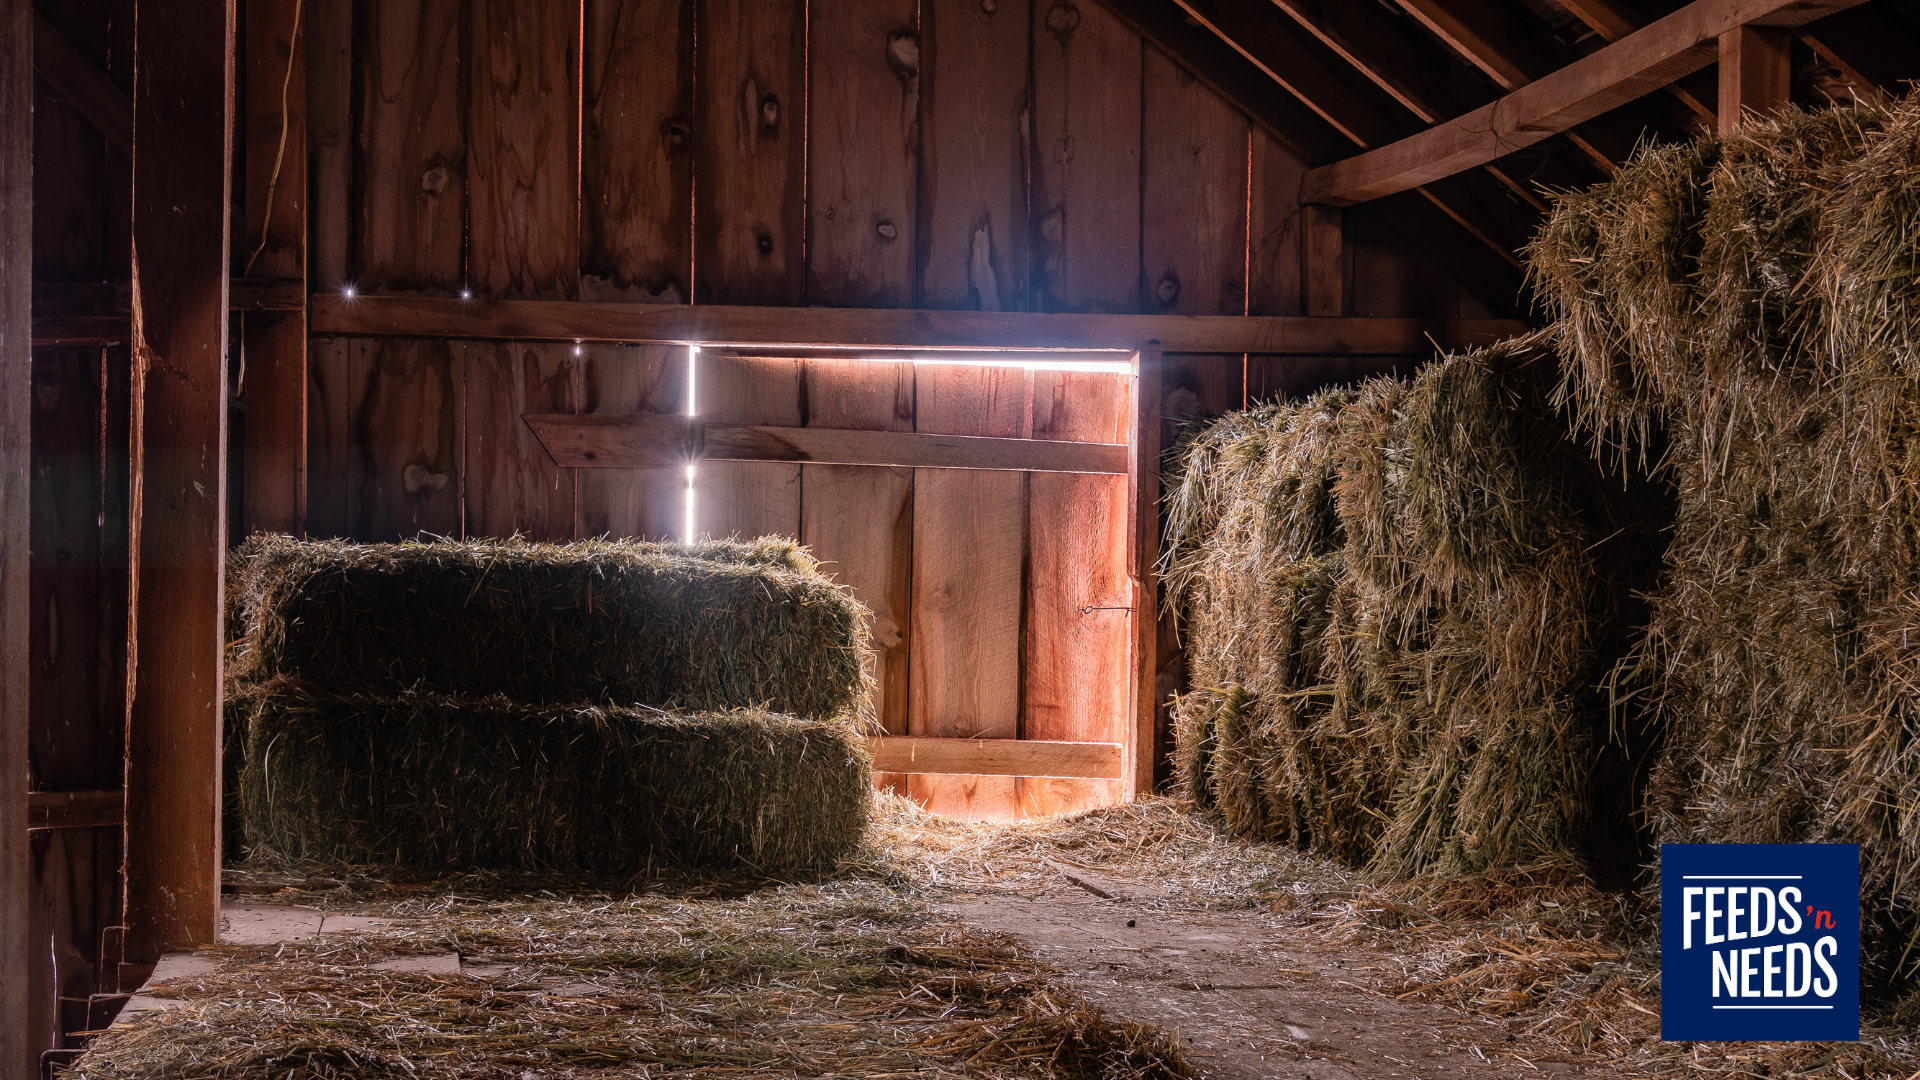
Step 3: Inspect Your Hay Storage Area
Your barn protects more than your equipment—it protects your winter feed investment.
Late summer is the perfect time to inspect your storage before fall weather arrives.
Walk through your hay storage and check for:
- Roof leaks
- Missing shingles
- Loose metal roofing
- Soft spots in the ceiling
- Wet walls
- Broken siding
- Cracked foundations allowing water inside
Atlantic Canada often experiences tropical storms and hurricanes well into the fall.
One unnoticed roof leak can ruin dozens of bales during a single heavy rain event.
Repair these issues before your barn is full for winter.
Step 4: Make Airflow a Priority
Even perfectly dry hay needs ventilation.
Without proper airflow, moisture becomes trapped, increasing the risk of:
- Mold
- Heating
- Spoilage
- Fire hazards
For best results:
- Leave space between stacks and walls.
- Keep aisles open for air movement.
- Avoid packing bales too tightly.
- Open barn doors on dry days to improve ventilation.
- Use fans where natural airflow is limited.
- Round bales stored outside should never sit directly on the ground.
Use pallets, crushed stone, or a well-drained pad to reduce moisture absorption from below.
Step 5: Store Hay Off the Floor
Ground moisture slowly moves upward into stored hay. Even concrete floors can transfer moisture over time.
Use:
- Wooden pallets
- Landscape timbers
- Railroad ties
- Hay racks
- Keeping hay elevated improves airflow underneath while reducing spoilage.
Step 6: Rotate Older Hay First
Practice “first in, first out.”
Use older hay before newly harvested bales. This helps maintain feed quality while reducing unnecessary waste.
Mark different hay lots or harvest dates if possible, to make rotation easier throughout winter.
Step 7: Plan Before Supplies Tighten
Many Atlantic Canadian producers begin purchasing winter hay in late summer and early fall.
Waiting until the first snowfall—or after a poor second cut—can mean:
- Higher prices
- Limited selection
- Longer delivery times
- Lower-quality hay
If your inventory appears short, don’t wait until October or November to start looking. Planning ahead gives you more options and helps avoid emergency purchases later in the season.
A Few Minutes Today Can Save You All Winter
Hay is one of the biggest investments many farms make each year.
Spending an afternoon inspecting your hay, repairing storage areas, and calculating your winter feed requirements can prevent unnecessary waste and help keep your animals healthy throughout the colder months.
Whether you’re feeding two backyard goats or managing a barn full of horses, proper hay storage is one of the simplest ways to protect both your animals and your investment.
At Feeds’n Needs, we’re here to help you prepare for the season ahead with quality livestock feeds, horse nutrition, minerals, bedding, feeders, and the supplies you need for a successful fall and winter.
Visit your local Feeds’n Needs store and let our team help you get ready before winter arrives.

Barnyard Bite Prevention
Flea & Tick Control for Livestock in Atlantic Canada
Protecting Cattle, Sheep, Goats & Pigs from Seasonal Parasites
When warmer weather arrives in Atlantic Canada, livestock owners know that pest season is never far behind. While flies often get most of the attention on the farm, fleas and ticks can also create problems for cattle, sheep, goats, and pigs — especially on farms with wooded pasture, tall grass, brush lines, damp bedding, or mixed animal housing.
Flea and tick prevention for livestock is an important part of seasonal animal health. These small pests can cause skin irritation, scratching, hair loss, discomfort, reduced weight gain, and stress on your animals. Ticks may also carry disease, making regular prevention and inspection an important habit for farms across Nova Scotia, New Brunswick, Prince Edward Island, and Newfoundland.
At Feeds’n Needs, we carry livestock pest control products, barn insect sprays, fly traps, bedding, dust bath supplies, and animal health essentials to help keep your herd, flock, and barn protected through flea, tick, and fly season.
Which Animals Are Most at Risk?
Every farm is different, but these animals commonly encounter ticks in Atlantic Canada:
- Cattle grazing wooded fence lines or rough pasture
- Goats that browse brush and shrubs
- Sheep in long pasture or bushy paddocks
- Outdoor pigs rooting in wooded or grassy areas
Peak tick activity typically occurs through spring and early summer, with another increase during the fall, although ticks can remain active whenever temperatures stay mild.
Signs Your Livestock May Have Fleas or Ticks
Keep an eye out for:
- Excessive scratching or rubbing
- Hair loss or damaged coats
- Scabs or irritated skin
- Visible ticks attached around the ears, neck, brisket, udder, tail, or under the legs.
- Restlessness while grazing
- Poor weight gain or reduced productivity in heavy infestations
Checking animals during routine handling is one of the easiest ways to catch problems before they become severe.
Prevention Starts in the Pasture
The best flea and tick control is best combined with good management and the right animal health products.
Rotate Pastures: Rotational grazing helps reduce the time livestock spend in heavily infested areas while improving pasture health.
Mow High-Traffic Areas: Keeping grass shorter around gates, waterers, laneways, and handling facilities reduces places where ticks like to wait for passing animals.
Trim Brush Along Fence Lines: Ticks thrive in damp, shaded vegetation. Clearing back brush and overgrown edges reduces ideal habitat.
Inspect New Animals: Before introducing new livestock into the herd or flock, give them a thorough health check to help prevent bringing unwanted parasites onto the farm.
Integrated pest management—combining pasture management, monitoring, and appropriate treatments—is considered the most effective long-term approach for controlling livestock pests while reducing reliance on pesticides alone.
Barn Tips That Make a Difference
Many parasites spend part of their life cycle away from the animal, making barn hygiene just as important as treating livestock.
A few simple habits can help:
- Replace wet or heavily soiled bedding regularly.
- Remove manure frequently to discourage insect breeding.
- Improve ventilation to reduce damp conditions.
- Keep feed storage areas clean to discourage rodents and wildlife.
- Seal cracks and repair damaged walls where pests can hide.
- Clean pens thoroughly between groups of animals.
A clean barn is one of the easiest ways to reduce parasite pressure throughout the season.
Products Available at Feeds’n Needs
Every farm has different needs, so choosing the right product depends on the species, age, and management system.
Visit your local Feeds’n Needs for products such as:
- Livestock fly and tick control products
- Pour-on insecticide treatments*
- Premise and barn insect sprays
- Fly traps and sticky traps
- Livestock dust bags and applicators
- Mineral supplements to support overall health
- Bedding products that help keep housing clean and dry
Our knowledgeable staff can help you choose products that are labelled for your specific livestock species and explain proper application and withdrawal requirements.
*Always read and follow the product label before use. Use only products approved for the species you are treating and observe all meat and milk withdrawal periods where applicable.
Don’t Forget Daily Herd Checks
During tick season, a quick visual inspection while feeding or moving livestock can save time and money later.
Pay special attention to:
- Around the ears
- Under the jaw
- Between the legs
- Tail head
- Udder or sheath
- Neck and shoulders
Removing attached ticks early and treating infestations promptly helps reduce stress on your animals and limits further spread.
We’re Here to Help
Whether you raise a few backyard goats or manage a commercial beef herd, preventing fleas and ticks is far easier than dealing with a heavy infestation later in the season.
Stop by your nearest Feeds’n Needs location for advice on livestock parasite control, barn management products, and seasonal animal health supplies. Our team is here to help keep your animals healthy, comfortable, and productive all summer long.
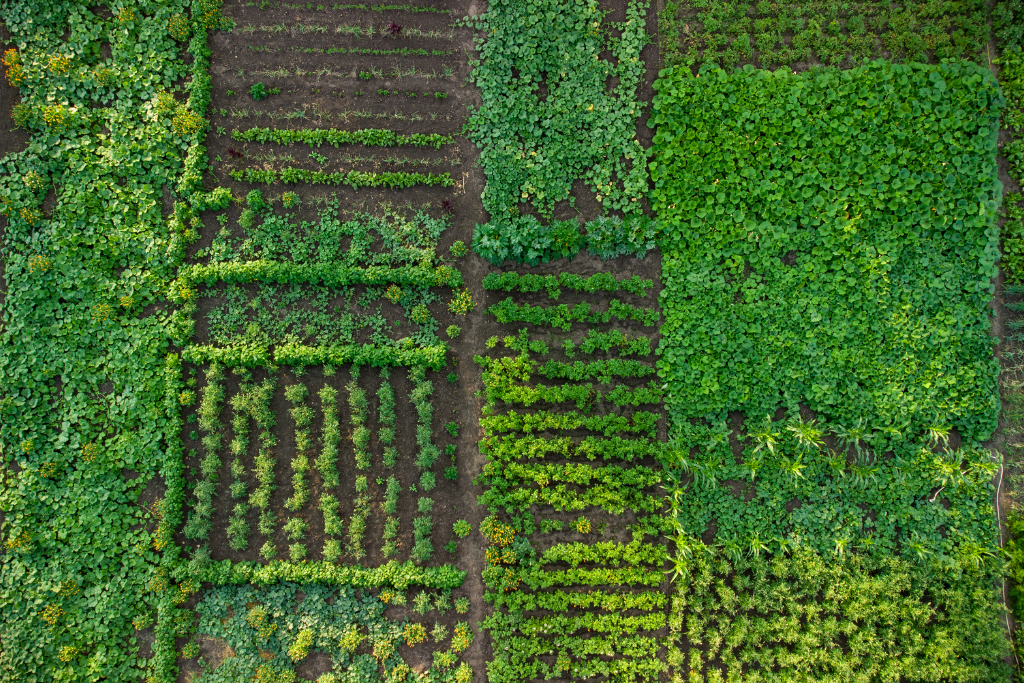
Planning your garden layout is one of the most exciting steps in kicking off a new growing season. Whether you’re a first‑time gardener or expanding an existing space, a thoughtful layout helps you grow healthier plants, save time, and enjoy a more productive garden all season long. Here’s what to consider as you map out your perfect garden.
- Sunlight: The Most Important Factor
Most vegetables and flowers need 6–8 hours of sunlight each day. Spend a day observing your yard to see where the sun falls in the morning, afternoon, and evening.
- Place sun‑loving plants (tomatoes, peppers, squash, herbs) in the brightest spots.
- Save shadier areas for greens and cool‑season crops like lettuce, spinach, kale, and peas.
- Soil Quality & Preparation
Healthy soil is the foundation of a thriving garden.
- Test your soil or simply observe texture: is it sandy, clay-heavy, or rich and dark?
- Add compost or organic matter to improve drainage and boost nutrients.
- Consider raised beds if your soil is difficult to work with—they warm faster in spring and offer great control.
- Water Access
Make watering simple.
- Choose a location close to a hose or rain barrel.
- Avoid layouts that require dragging hoses around obstacles.
- Plan for even watering—group plants with similar moisture needs together.
- Pathways & Access
Think ahead to weeding, harvesting, and daily care.
- Leave comfortable walking paths between rows or beds.
- Avoid planting too tightly—good airflow prevents disease.
- Make sure tools and wheelbarrows can easily reach your garden space.
- Plant Spacing & Growth Habits
Different plants have very different sizes and shapes once mature.
- Place tall crops like corn, sunflowers, or trellised peas on the north side so they don’t cast shade over smaller plants.
- Give sprawling plants (squash, pumpkins, cucumbers) plenty of room—or grow them vertically on trellises to save space.
- Follow spacing recommendations on seed packets for best results.
- Garden Layout Style
Choose a layout that fits your space, goals, and lifestyle:
Rows
Traditional, easy to maintain, and great for larger gardens.
Raised Beds
Excellent organization, improved drainage, and reduced bending.
Square‑Foot Gardening
Maximizes yield in small spaces with neat, efficient planting grids.
Container Gardens
Perfect for decks, patios, and renters—grow herbs, greens, tomatoes, and more.
- Companion Planting
Pairing compatible plants can boost growth and deter pests.
- Basil with tomatoes
- Marigolds near almost anything to help reduce pests
- Carrots with onions to discourage carrot flies
- Wildlife & Pest Considerations
Consider fencing or natural deterrents if you share your space with deer, rabbits, or raccoons.
- Raised beds, row covers, or simple fencing can protect young seedlings.
- Native plants nearby attract beneficial insects like bees and ladybugs.
- Plan for the Future
A good garden layout grows with you.
- Leave room for new crops you may want to try next year.
- Consider where perennials (strawberries, rhubarb, herbs) will live long-term.
- Think about adding compost bins, rain barrels, or a tool area.
Ready to Start Planting?
A thoughtful layout sets the stage for a more productive, enjoyable gardening season. By taking time to consider sunlight, soil, spacing, and long‑term goals, you’ll create a garden that’s easy to maintain and rewarding to grow.
Seed Starting in Spring: What to Start & When
Seed Starting Guide for Atlantic Canada: What to Plant and When
Spring is the perfect time to get a jump on your garden by starting seeds indoors—especially in Atlantic Canada, where our last frost typically lands in early to mid‑May.
What to Start Indoors (and When)
Here’s a simple timeline based on regional planting calendars:
Early March
Start longer-season veggies like onions and leeks, which benefit from early indoor sowing. Both can be started in early March and transplanted outdoors in May.
Mid-March
This is when many popular garden plants can be started indoors, including:
- Basil (germinates in 5–21 days; transplant early June)
- Cabbage
- Celery (for experienced growers—germinates slowly)
These plants appreciate a few extra weeks of indoor warmth before heading outside.
Late March to Early April
As days brighten, start quicker growers like broccoli, bok choy, zinnias, marigolds, and other annual flowers to enjoy a colourful early-summer display. Many flowers—like zinnias and marigolds—are commonly started this time of year in cold climates.
Direct Sowing Outdoors
Once frost danger has passed—around mid-May in much of Atlantic Canada—you can directly sow hardy crops like:
- Carrots
- Beets
- Arugula
These can be seeded outdoors shortly after soil becomes workable.
Final Tips
- Always check your seed packets—they’re your best source for timing guidance.
- It’s better to plant a little later than too early, especially in cooler regions.
- If in doubt, base your schedule around your local last frost date to keep seedlings healthy and on track.
Stop into Feeds’n Needs to ask our experts for all your gardening needs.
More information about local frost dates: Canada Hardiness Zones Frost Dates | Veseys
Growing from Seeds | Veseys

Types of seeds: Heirloom, Hybrid, Open Pollenated
When planning your garden, the type of seeds you choose influences everything – from flavour and appearance to how well your plants grow and whether you can save seeds for next year. Here’s a simple guide to help you understand the main seed types and how they connect to seed saving.
Heirloom Seeds
Heirloom seeds come from plant varieties that have been passed down through generations, often 50 years or more. Their genetics remain stable because they come from open‑pollinated plants that naturally reproduce true to type.
Why gardeners love them:
- Amazing flavours and unique colours
- Rich history and biodiversity
- You can save seeds, and they’ll grow true year after year
Best for:
Gardeners who love tradition, character, and seed-saving.
Hybrid Seeds
Hybrid seeds are created by intentionally crossing two parent plants to produce offspring with specific traits like disease resistance or higher yields.
Benefits:
- Strong, uniform plants
- Improved productivity
- Better resistance to pests and disease
Important to know:
Hybrid seeds won’t grow true if you save their seeds. The next generation will be unpredictable, often reverting to characteristics of the parent plants.
Best for:
Gardeners who want reliability and consistent results.
Open‑Pollinated Seeds
Open‑pollinated seeds come from plants pollinated naturally by wind, insects, or animals. Their genetics are stable, meaning they will produce plants similar to the parent.
Why they’re great:
- Seeds can be saved and replanted
- Wide variety of shapes, sizes, and flavours
- Great for gardeners who want dependable results
All heirloom seeds are open-pollinated, but not all open-pollinated seeds are heirloom.
Saving Seeds: What You Need to Know
Seed saving is a rewarding way to maintain your favourite varieties and reduce gardening costs. But success depends on starting with the right types of seeds.
Best seeds for saving:
- Heirloom
- Open‑pollinated
These seeds will reproduce true to type, giving you plants that match the parent.
Seeds not recommended for saving:
- Hybrid: Hybrids won’t produce consistent offspring, so saved seeds usually lead to surprises not always good ones!
Tips for saving seeds:
- Choose healthy, vigorous plants as parents.
- Allow fruits or flowers to fully mature before collecting seeds.
- Dry seeds thoroughly before storing.
- Store seeds in a cool, dark, dry place.
Understanding seed types helps you make confident choices in your garden. Whether you love the charm of heirlooms, the strength of hybrids, or the dependability of open‑pollinated seeds, there’s a place for each in a thriving garden. And if you enjoy the idea of growing your own “garden legacy,” seed saving is the perfect next step.
References:
3 Main Types of Vegetable Seeds Explained – Food Gardening Network
Veseys Facebook Page

Best Vegetables to Can for Beginners
Canning is a fantastic way to preserve your garden harvest and enjoy fresh-tasting vegetables all year long. If you’re new to the process, starting with easy, reliable options can make your first season a success. Here are ten of the best vegetables to can for beginners that taste just as good months later as the day you packed them.
- Asparagus – Tender asparagus is a spring favorite that cans surprisingly well. Start with fresh, firm stalks, trim them to fit your jars, and blanch before packing. Whether you add them to salads, stir-fries, or snack straight from the jar, you’ll be glad you preserved them when winter rolls around.
- Beets – With their rich color and earthy flavor, beets are as beautiful as they are delicious. Leave a bit of stem and root when boiling to keep juices in, then slip off the skins before canning. They can be preserved whole, halved, or quartered, making them perfect for salads, side dishes, or snacking.
- Carrots – Crisp, sweet carrots hold their texture wonderfully after canning. Simply wash, peel, and cut them into slices or chunks. They’re great for soups, stews, or quick side dishes—and pulling a jar off the shelf is much easier than peeling fresh ones on a busy night.
- Corn – Fresh corn is hard to beat, and canning lets you keep that summer flavour on hand. Cut the kernels from the cob without scraping too close (to avoid tough bits) and pack them for year-round use in chowders, casseroles, and side dishes.
- Cucumbers – Cucumbers are a classic canning choice—especially for pickles. Small ones stay crisp, while larger cucumbers can be sliced into spears or rounds. With the right brine, you’ll have tangy, crunchy pickles that brighten any meal.
- Green Beans – Whether you prefer them whole or cut into bite-sized pieces, green beans are a canning staple. Just snap off the ends, rinse, and pack them in jars. They stay tender yet firm, making them a reliable side dish straight from the pantry.
- Peas – Peas might not be the first vegetable you think of for canning, but they’re a hidden gem. Shell and blanch them to lock in their bright green color, then preserve them on their own or as part of a mixed vegetable blend. Their sweet pop adds flavour to soups, stews, and salads.
- Peppers – From sweet bells to spicy varieties, peppers are versatile and full of flavor. Blister or boil them to remove skins before canning. Small peppers can be left whole, while larger ones work well halved or sliced for quick fajitas, pasta, or stir-fries.
- Tomatoes – Tomatoes are practically made for canning. Use them for sauces, soups, stews, or salsa. Blanch to slip off the skins, then choose your style—whole, diced, or puréed. Season with herbs like basil or garlic for ready-to-use flavor boosters.
- Radishes – Not just for salads, radishes shine when pickled. Their peppery bite mellows into a tangy, slightly sweet crunch that’s perfect for tacos, sandwiches, or charcuterie boards. They’re quick to grow, easy to prepare, and add something unique to your pantry lineup.
Start small and build your skills each season. With just a few jars of each of these vegetables, you’ll be stocking your pantry with homemade goodness—and you might find yourself looking forward to canning season as much as the harvest itself.

New Year’s Resolutions for Pets
We’re officially into 2025, and many of us are working hard to stick to our New Year’s resolutions. Changing out habits for self-improvement can be for more than just humans. Pets benefit just as much from setting goals for their health, happiness, and well-being.
Why Are Setting Resolutions for Pets Beneficial?
Like us, our pets need focus and attention on their health and wellness. Creating resolutions for them is a great way to monitor and improve their overall well-being, from diet to dental care and physical activity. These resolutions help keep your pets physically healthy and strengthen the emotional connection between you and your furry friend.
Dental Hygiene: Keep Those Teeth Sparkling!
Dental hygiene is a critical part of your pet’s overall health. Just like humans, dogs (and cats!) can develop plaque and tartar on their teeth. Left untreated, it can lead to painful gum disease and even tooth loss. Thankfully, there are plenty of ways to help prevent dental issues in pets. Not all pets enjoy getting their teeth brushed, but there are alternatives, such as dental treats, oral care food, and water gels, that help maintain your pet’s oral health.
A dental exam at the vet is the first step in creating a healthy oral care plan. If your pet needs a professional cleaning, your vet will help set that up, and from there, you can establish a home care routine to maintain their pearly whites. Remember, healthy teeth lead to a healthier pet overall!
Exercise: Keep Them Active and Fit
Just like humans, pets can experience joint issues, reduced mobility, and a shorter lifespan due to being overweight. Exercise should be a priority in your pet’s New Year’s resolutions.
Regular walks, playtime, and outdoor adventures are not only fun but essential for your pet’s overall health. Whether it’s chasing a ball in the backyard or going for a daily stroll around the block, exercise helps maintain a healthy weight and supports joint health. Start slowly and gradually increase their activity level, especially if they’ve been less active during winter.
Diet: Nourish Their Bodies the Right Way
It’s easy to spoil our pets with extra snacks and table scraps, but this can lead to unwanted weight gain and long-term health issues. Overweight pets are at a higher risk of heart disease, diabetes, and even certain cancers. One of the best ways to combat this is by providing a balanced diet.
Stick to a high-quality pet food, if you are unsure where to start, the Expert at Feeds’n Needs can help you find the right food for your pet.
Nutrition: Boost Their Health with Supplements
Ensuring your pet’s diet is nutritionally balanced is key, but you can take their health a step further by adding supplements to their daily routine. Products like Thrive supplements can support various aspects of your pet’s health, from digestive health to joint support, skin and coat issues, and more.
By incorporating the right supplements, you can enhance their diet and make sure they’re getting the nutrients. If you’re unsure where to start, stop by Feeds’n Needs and chat with one of our Experts who can recommend the best supplements for your pet’s specific needs.
When making changes to your pet’s routine, it’s important to start slow. Abrupt changes can be stressful for your pet, so allow them time to adjust. Whether introducing a new food, adding supplements, or starting a new exercise routine, gradual changes will ensure a smooth transition and greater success in maintaining these new habits.
Make 2025 a year of health and wellness for your furry friends, and enjoy the journey together. After all, a healthy pet means a happier, more active life for both of you!
Let’s make this year the best one yet—for you and your pets!

Gift Guide for Homesteaders
Looking for the perfect Christmas Gifts? Feeds’n Needs has a great selection of gifts for everyone on your list! Here are some of our top ideas:
Books – Farmer’s Almanac, gardening books, recipe books, and how-to books, you’ll be sure to find the perfect option!
Canning & Preserving Supplies – Mason jars, lids, and fermentation kits so that someone on your list you’re shopping for can preserve the foods they grow!
Seed-Starting Supplies – Help them prepare for the upcoming growing season by gifting them seed-starting supplies! Plant pots, trays, starter soil, peat pellets, plant markers, etc.
Sprout Growing Kit – For greens all year long, you can’t go wrong with sprouts. Healthy and packed full of nutrients, sprouts are both easy and fun to grow, so get them started with a sprout starter kit!
Vesey’s Seeds – The gift that keeps on giving! Gift them high-quality Vesey’s seeds this Christmas.
Gardening Supplies – Gardening gloves, tools, a soil test kit, a rain gauge, etc. Useful gifts they’ll surely appreciate!
Beekeeping Starter Kit – Bees play a vital role in fertilizing the plants we grow, and their by-products can be used for all sorts of things! If someone on your list is interested in beekeeping, a starter kit could be the perfect gift for them!
Farm Décor – Chicken coop signs, farm style décor, garden flags, door mats, and so much more will make perfect gifts for the homesteader in your life!
Walton Wood Farm Products – Consciously crafted, natural beauty and personal care products make the perfect gift for any hard-working homesteader to relax and pamper themselves!
Rescue Coffee – Premium, fair trade, organic coffee for a good cause! With each bag purchased, 10% of the profits go towards helping local shelter animals. Available in multiple delicious flavours.
Coffee Mug – Pair a new mug with a bag of rescue coffee, and you’ve got a perfect gift for the coffee lover on your list!
Apron – A great gift for the homesteader who loves to cook and bake!
Egg Basket – An excellent tool for the chicken farmer in your life. Egg baskets make egg collection easy with less risk of breaking eggs!
Feeds’n Needs Gift Card – Not sure what they would like? Why not give them a gift card to Feeds’ n Needs?!
Visit your local Feeds’n Needs to find the perfect gift for everyone on your list!

Homemade Cranberry Sauce Recipe
Here’s a quick and easy recipe for delicious homemade cranberry sauce! Whether hosting a holiday dinner or just bringing a side dish, this sauce made with fresh whole cranberries will surely impress. Check out the recipe below!
Ingredients:
⅔ cup sugar
⅓ cup light brown sugar, tightly packed
⅓ cup water
⅔ cup orange juice
12 oz cranberries rinsed and picked through — bad/bruised cranberries removed
Instructions
Combine sugars, water, and orange juice in a medium-sized saucepan over medium heat. Stir occasionally until sugars are dissolved, and bring to a boil.
Add cranberries and return to a boil.
Reduce heat to a simmer and continue to cook cranberries, stirring occasionally, 10-15 minutes or until all or most berries have burst (careful, there is some splatter) and the mixture is slightly reduced. The longer you cook your cranberries, the thicker your mixture will be, but it will also thicken up after standing.
Transfer the mixture to a bowl and allow it to cool for at least 20 minutes at room temperature.
Cover and refrigerate at least 2 hours before serving.
How Do You Make Cranberry Sauce Thicker?
When cooking your cranberry sauce, you can simmer it as long as needed after your berries burst until the desired thickness is reached. Remember that your sauce will seem runnier while it’s hot and thickens as it cools and sets.
Can Cranberry Sauce Be Made in Advance?
Yes! Cranberry sauce requires a minimum of 2 hours in the refrigerator to thicken and set properly. However, you can make this holiday side dish up to a week in advance. Just be sure to store it in an airtight container.
And that’s all there is to making homemade cranberry sauce. Enjoy!
